
BLOG ARCHIVE

On Location Photographing Bruges
In July 2018, I spent a day and a bit in the beautiful city of Bruges, Belgium. With only around 36 hours in the city, I wanted to soak up as much of this city as possible and photograph some of its stunning views, cityscapes and interesting architecture.
In July 2018, I spent a day and a bit in the beautiful city of Bruges, the largest city in the Flemish region of Belgium. With only around 36 hours in the city, I wanted to soak up as much of this city as possible and photograph some of its stunning views and interesting architecture.
As I had done with my trip to Venice, I want this post to be a good mix of photography and travel related content. This isn’t an all inclusive review of the city as there is so much more to explore and given how close I am in the UK to Bruges, you can bet your bottom dollar I will be heading back in the not so distant future.
See here for my post PHOTOGRAPHING VENICE - PART ONE
Rather than post the photos I took in the order they were taken, I decided to structure this post into the different locations I photographed, some I visited multiple times allowing me to photograph these places at different times of the day.
This post won’t be too gear orientated but below is a quick list of the camera/lenses I had with me:
Fujifilm XT2 and X-T10 cameras
XF10-24mm lens
XF18-55mm lens
XF35mm F2 lens
XF55-200mm lens
Manfrotto travel tripod which I didn’t use too much
Plenty of batteries and memory cards.
As you can see, I am a Fujifilm shooter and during this trip, i tended to carry the smaller XT-10 and a single lens while walking about during the day whereas the XT2 was used, alongside the tripod and other gear while shooting during the best light during the more focused morning and evening shoots. For some more details about the gear I use, pop over to my About page.
Burg Square
I’ve decided to start with Burg Square. Just a short walk from the larger, Market Square, the architecture in Burg square is quite stunning ranging from Gothic to Renaissance and includes some important buildings such as the 14th Century Town Hall, from which the city was governed for over 600 years.
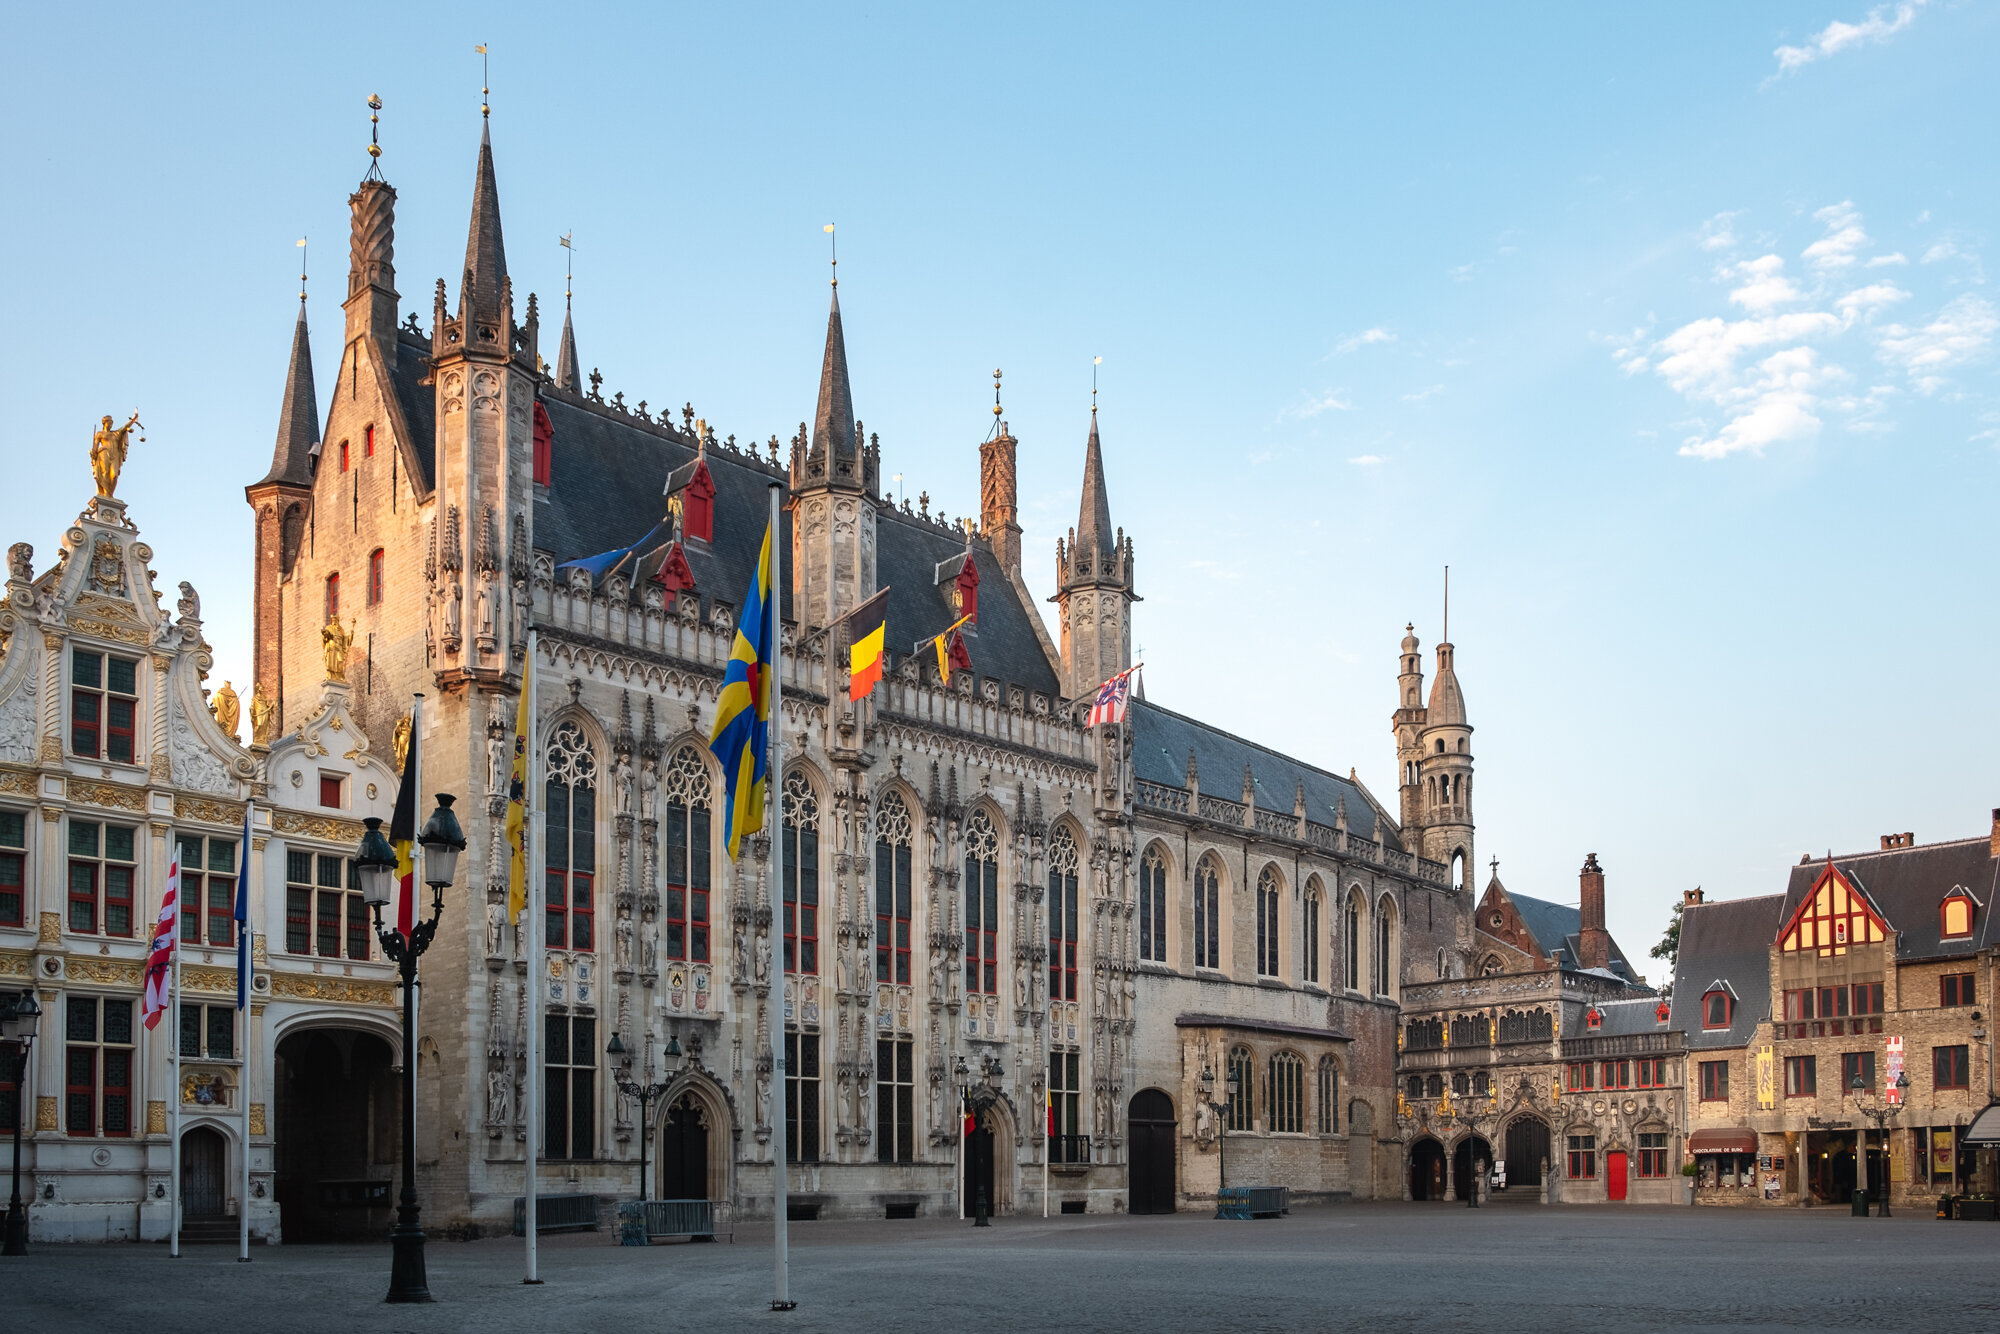
Fujifilm XT2 | XF18-55mm | 18mm | 1/140th Sec | f/7.1 | ISO200
Fujifilm XT2 | XF18-55mm | 25mm | 1/110th Sec | f/7.1 | ISO200
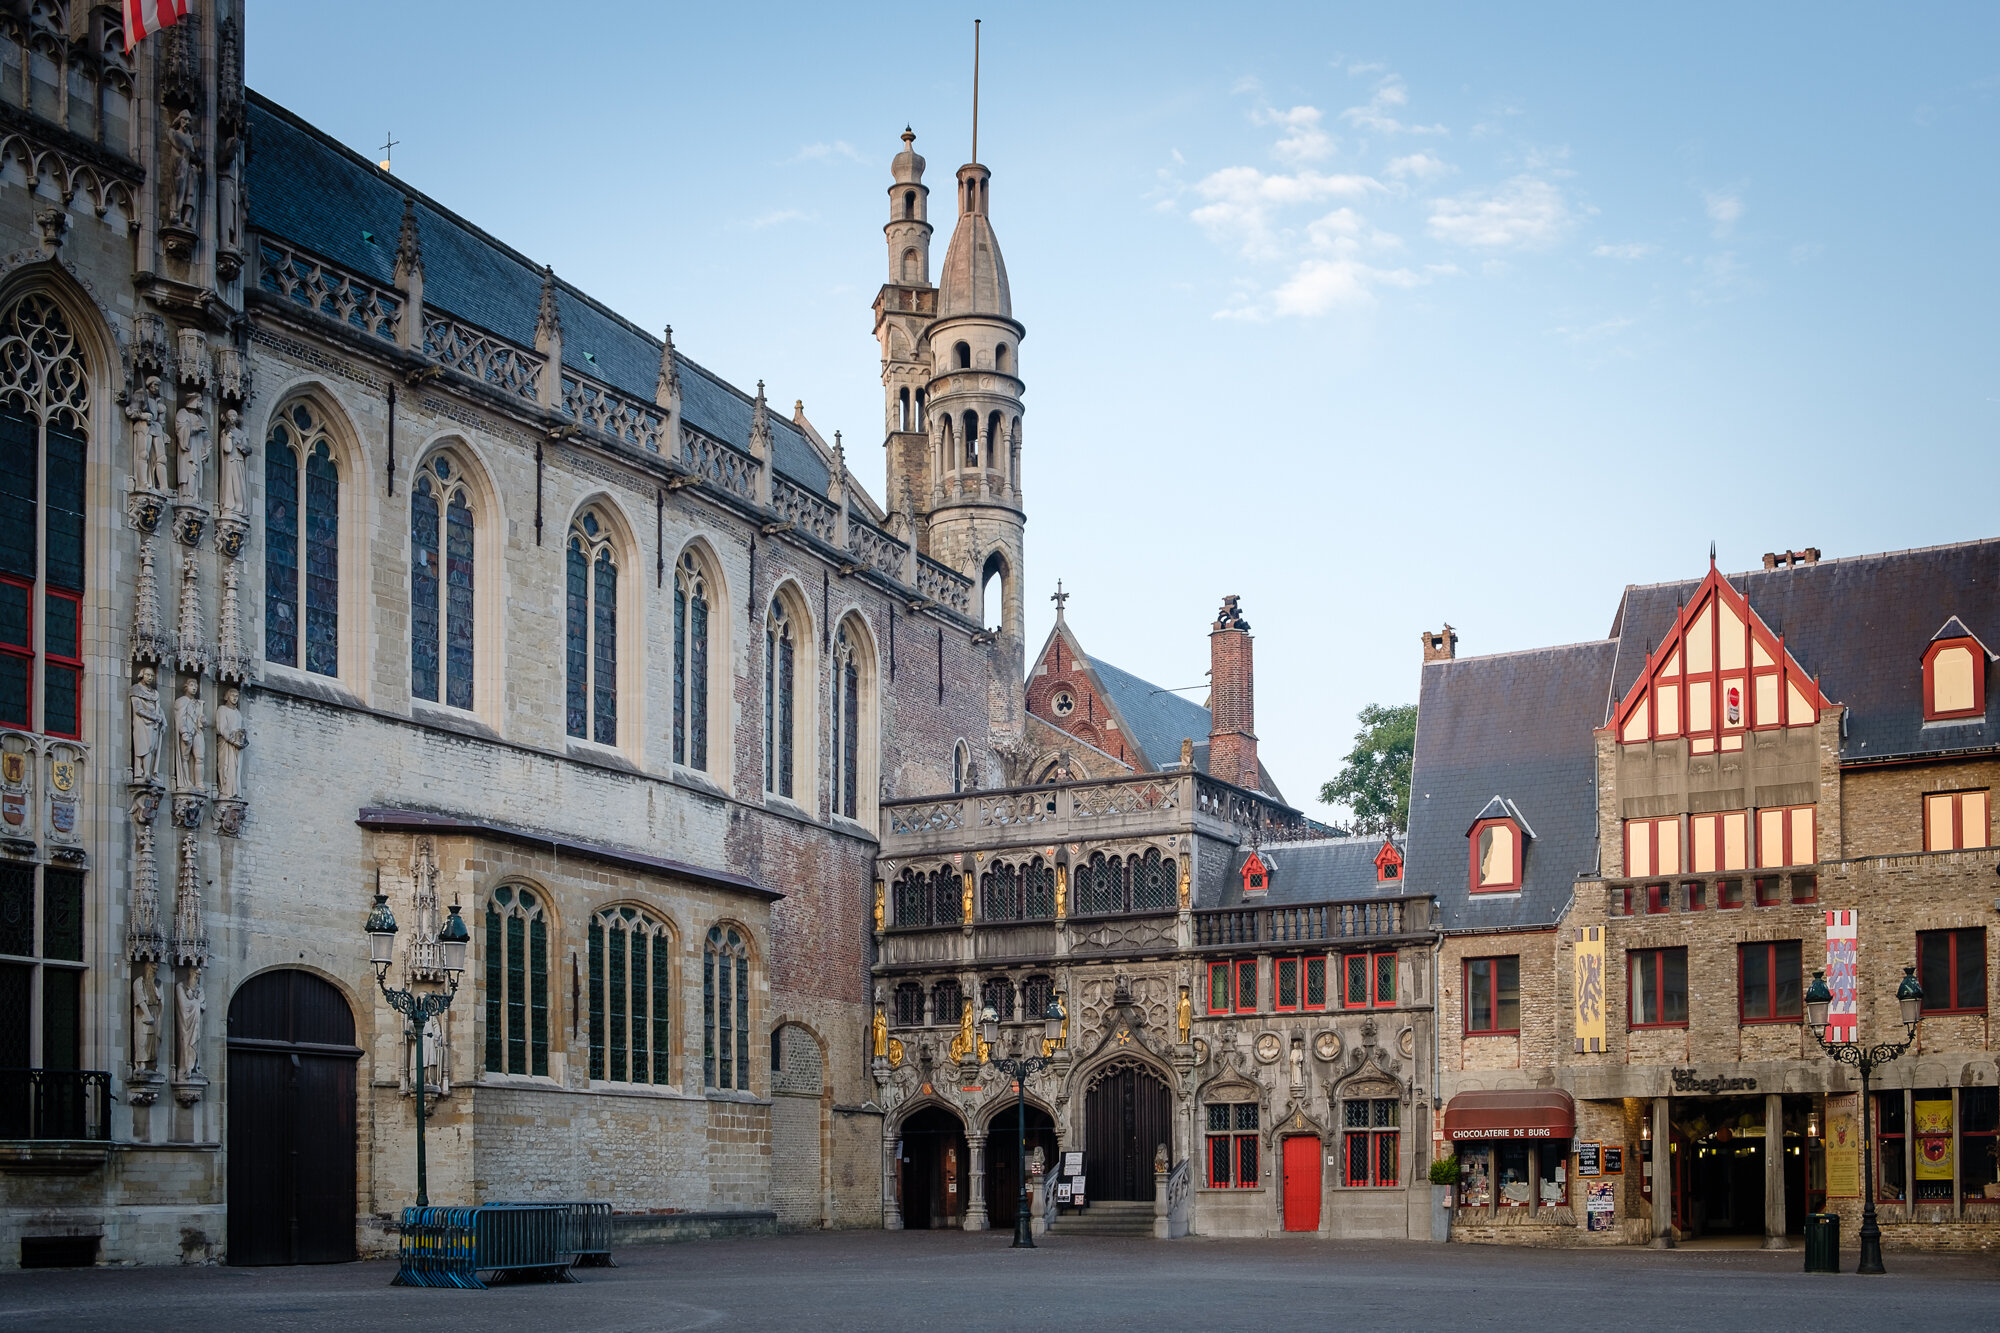
Tucked in the corner of Burg Square is The Basilica of the Holy Blood. This ornate, tiny church has a Romanesque lower chapel and a Gothic upper. Visually, the upper Gothic chapel has it all going on with lots of colour and detail with the lower being a lot more subdue.
In the photo above, next to the Holy Blood, you can see the red door shown in this picture here. I often find myself capturing interesting doors and windows and this one caught my eye with the bright reds and the decorative statues.
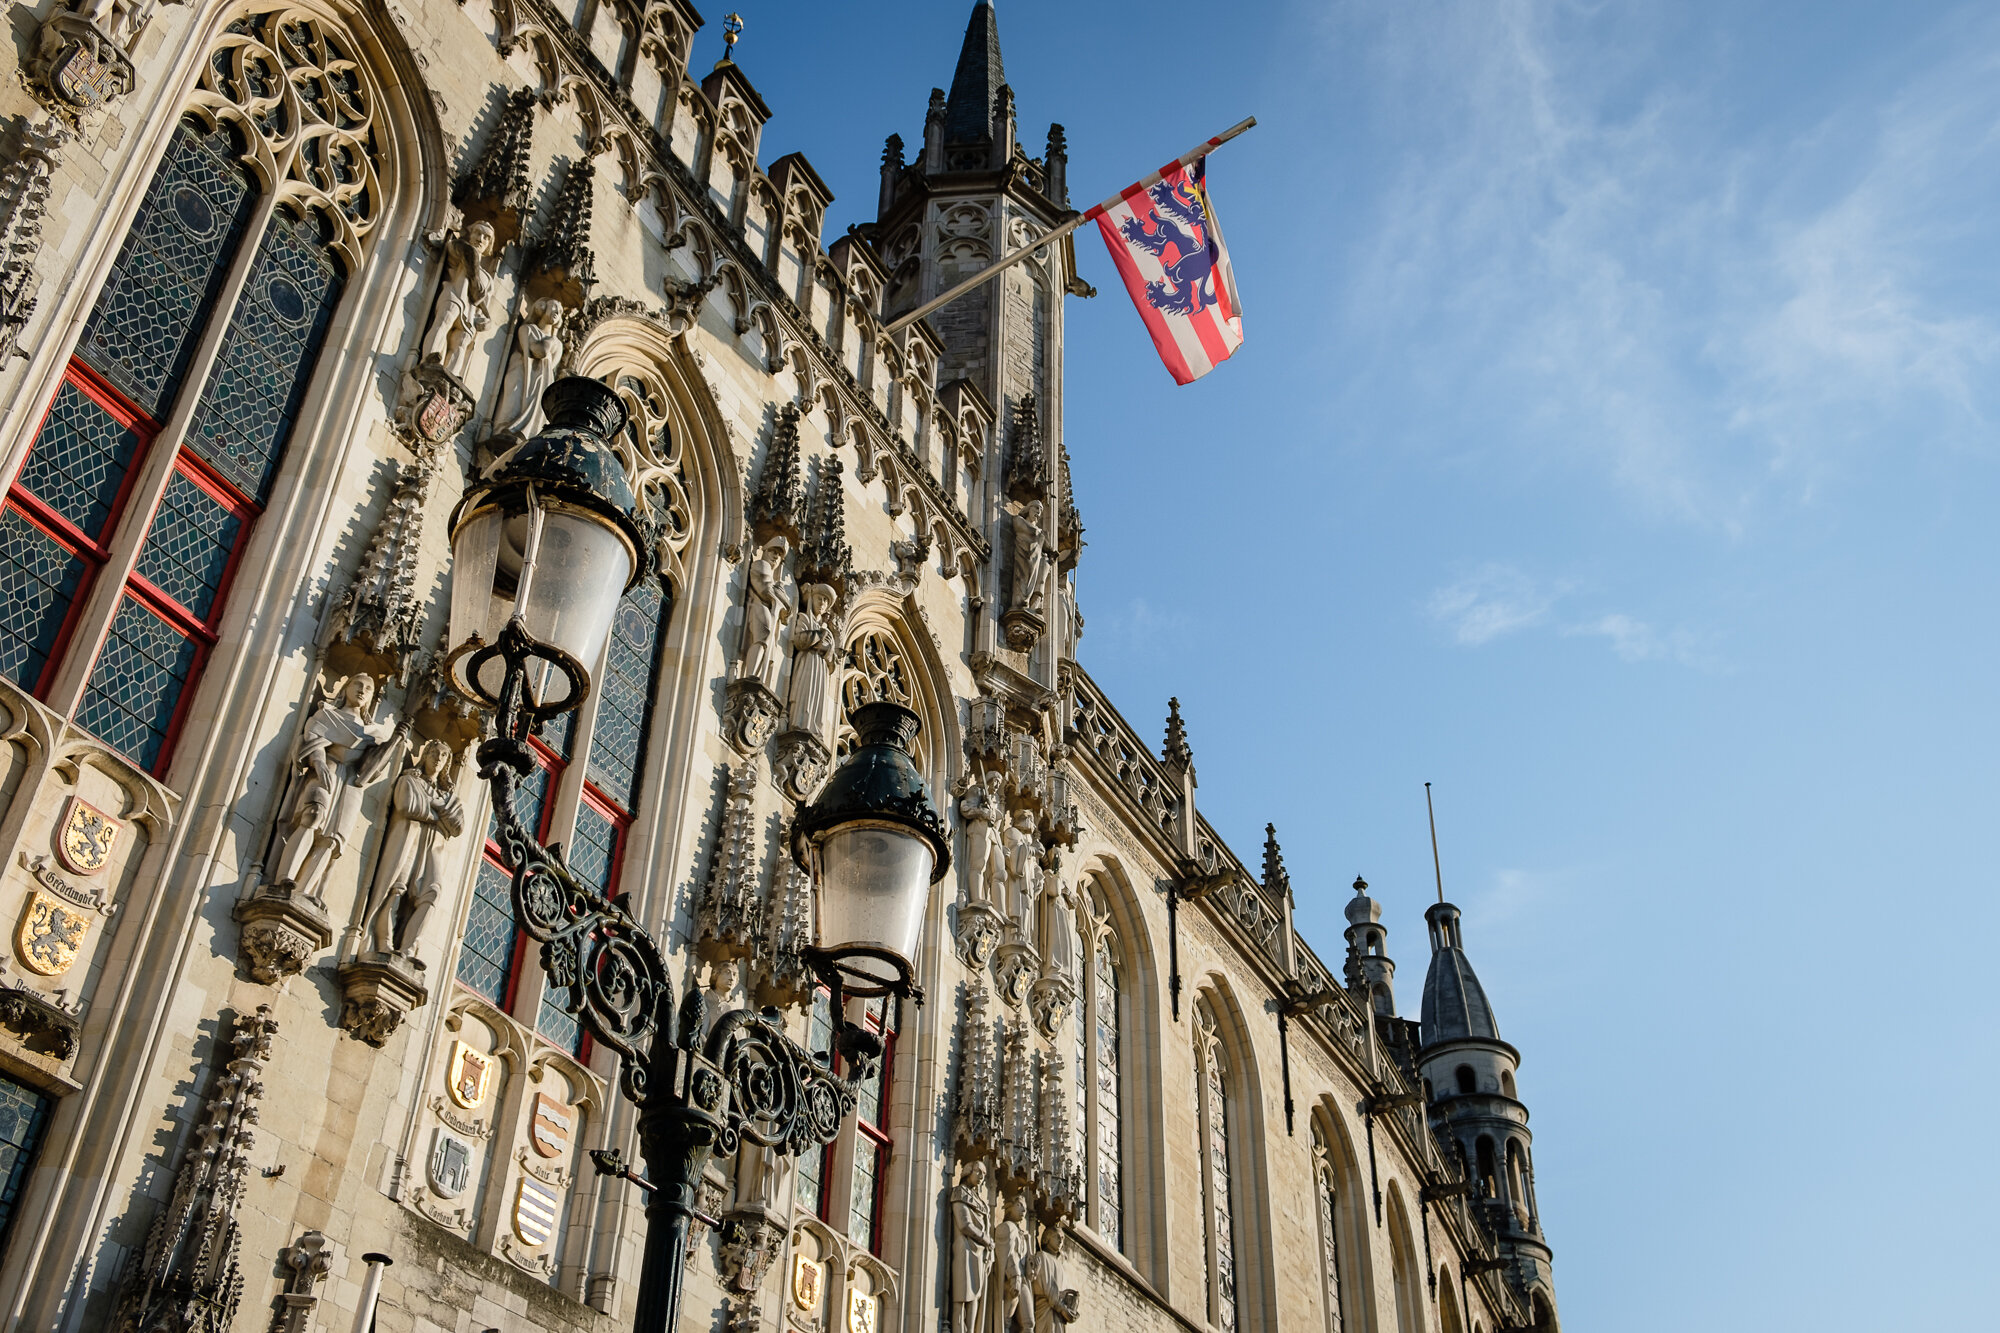
Still in Burg Square, the photo below is a closeup shot of the Town Hall. I tried to capture some of the architectural details behind one of the ornate lamp posts in the square.
The red and white flag that flies above the Town Hall is the Flag of Bruges, Province of West Flanders, Belgium.

Fujifilm XT2 | XF18-55mm | 55mm | 1/420th Sec | f/4.5 | ISO200
Fujifilm XT2 | XF18-55mm | 22mm | 1/5,800th Sec | f/4.5 | ISO200
This is Berg Square with the Belfry of Bruges Tower in the background and a hot air balloon up above the city. The horse and carts you can see are a real feature of Bruges and taking a ride in one is a great way to see the city. The one time I needed the wider 10-24mm lens and it was at the hotel. I only just managed to get everything in the shot!

Fujifilm XT2 | XF18-55mm | 18mm | 1/350th Sec | f/5 | ISO200
If you ever visit Bruges and want to photograph the city, try and get out and about at sunrise. As you can see in the photos below, the streets will be deserted. I took these at around 7am on Sunday morning and had the entire place to myself. Bliss!

Fujifilm XT2 | XF18-55mm | 18mm | 1/75th Sec | f/7.1 | ISO200

Fujifilm XT2 | XF18-55mm | 29mm | 1/80th Sec | f/7.1 | ISO200
Palace of the Liberty of Bruges
Located in a corner of Burg Square and smaller in comparison to its neighbouring buildings, the Palace of the Liberty stands out on the square with its decorative, golden trimmed architecture. Built between 1722-1727, this building has been used as a court house and now houses the city archives.
The photo here (below left) is what appears to be the entrance to the Palace but entry is in fact gained via the City Hall mentioned earlier in the post. Although the building looks impressive from the front, I particularly enjoyed photographing it from the back. If you wander down the side of the building, underneath the archway and along Blinde-Ezelstraat you will get a great view of the golden, decorative statues and trim framed by the buildings flanking the street. For this reason it’s a popular photographic composition captured in Bruges.

Fujifilm XT2 | XF18-55mm | 55mm | 1/50th Sec | f/7.1 | ISO200

Fujifilm X-T10 | XF55-200mm | 61mm | 1/900th Sec | f/5 | ISO200
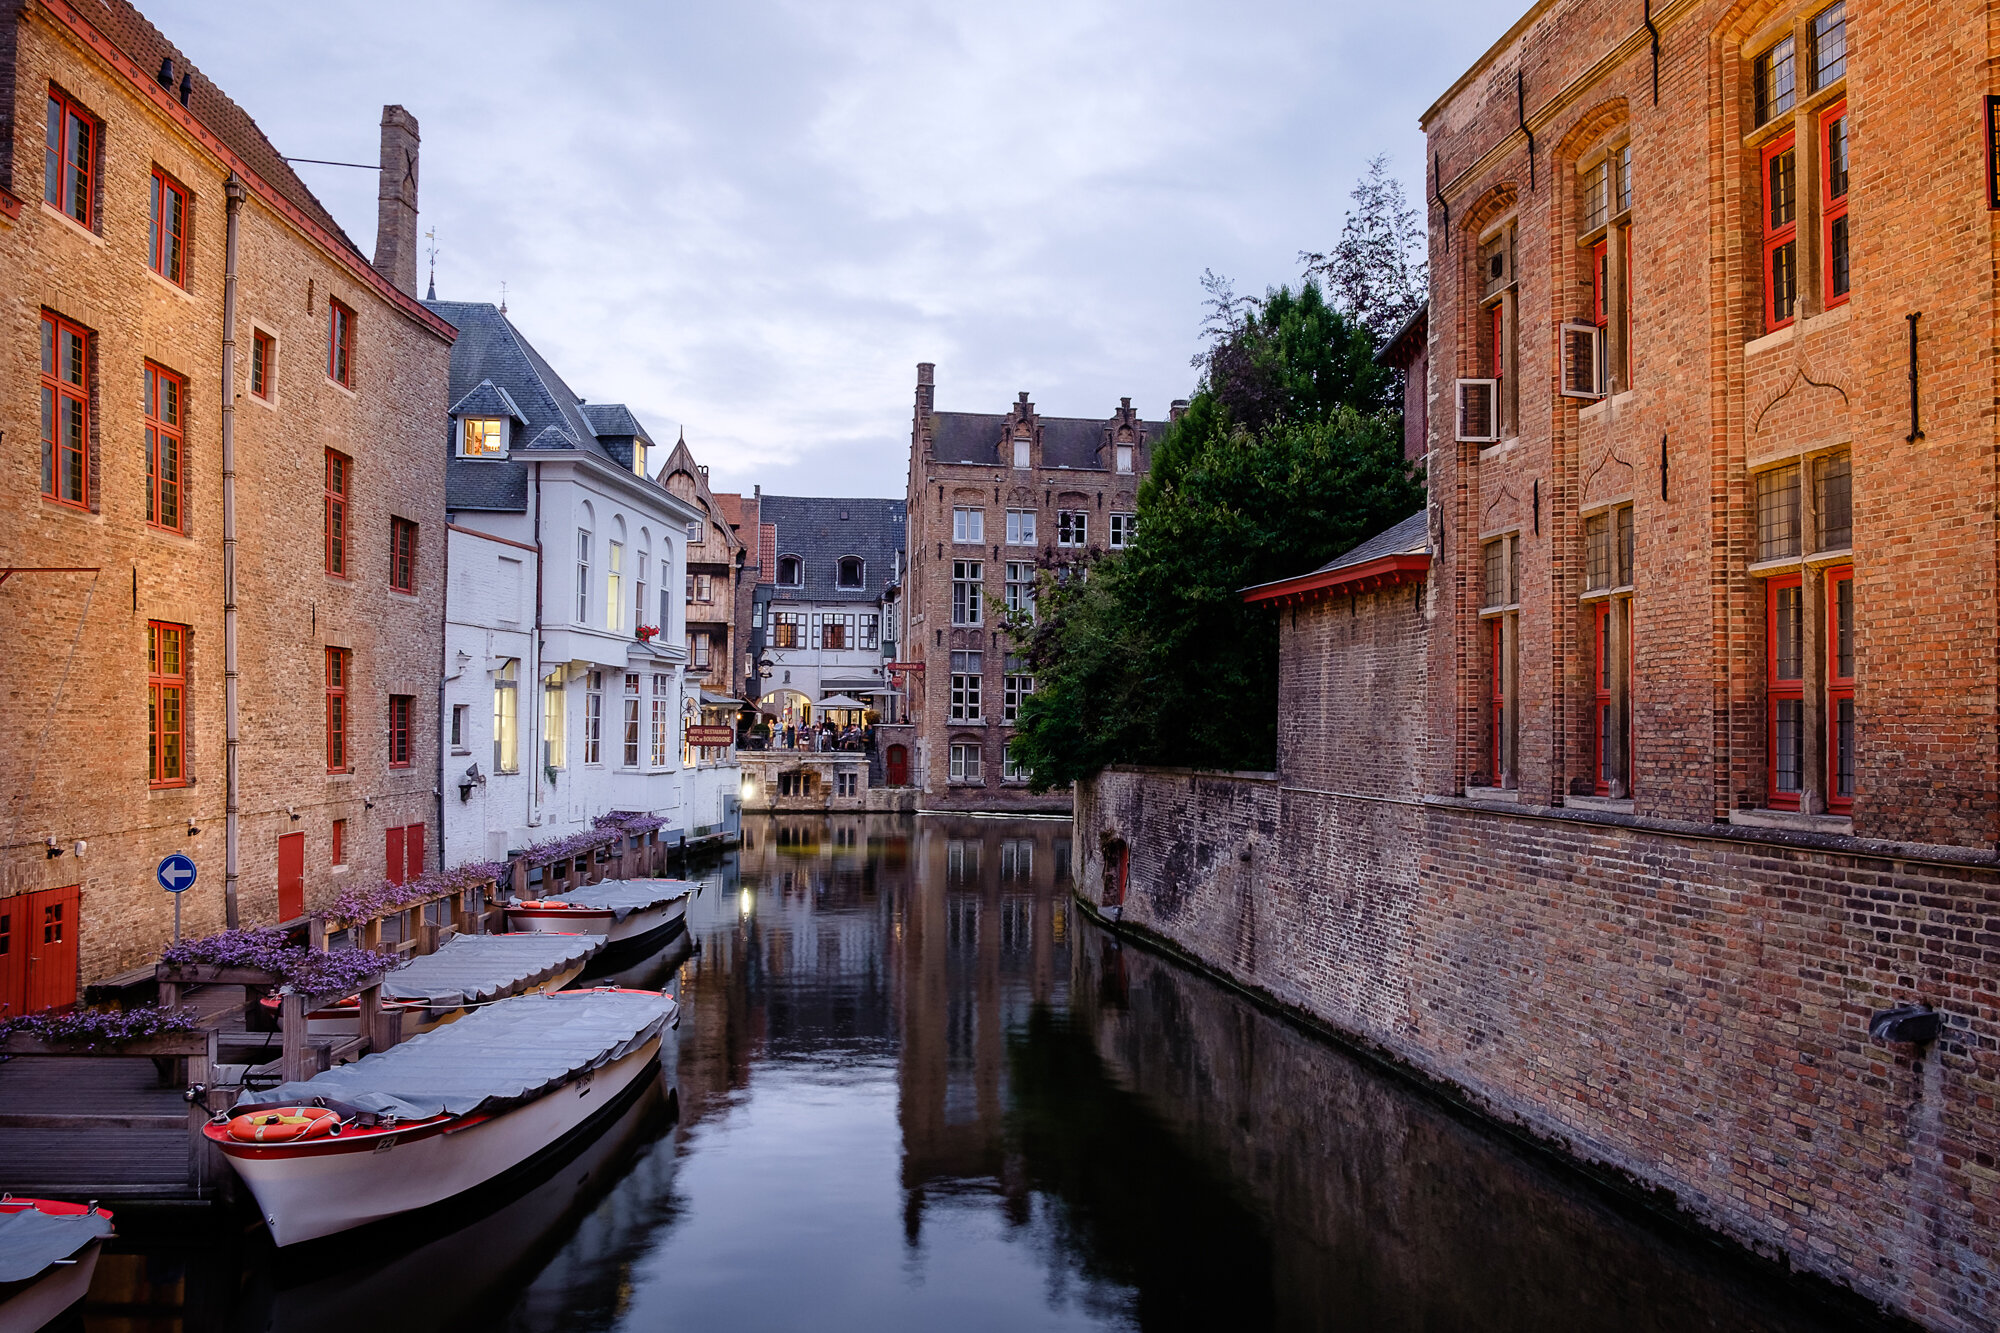
Dijver Canal
There are some great photo opportunities along the very pretty Dijver Canal which is part of the main canal system that runs through the centre of Bruges. For this photo, I stood on the Wollestraat Bridge to capture the canal with the tower belonging to The Church of our Lady in the background. It’s such a beautiful composition but the bevy of swans that swam in to the scene as I was taking the photo finished the shot off nicely. I just couldn’t have timed it better if I tried.

Fujifilm XT2 | XF18-55mm | 26mm | 1/40th Sec | f/7.1 | ISO200
In the photo below, I took a wide angle shot of the Dijver Canal and the Relais Bourgondisch Cruyce (more on that below) and this view shows where this particular stretch of the river starts. I like the composition of this image as its as close to an epic cityscape as I got while in the city the two towers work well to balance the image.

Fujifilm XT2 | XF10-24mm | 10mm | 1 Sec | f/11 | ISO200
Relais Bourgondisch Cruyce
One of the most famous views along the Dijver Canal is where the river zig-zags past the very pretty Relais Bourgondisch Cruyce Hotel. As I mentioned earlier in the post, I got up before sunrise to try to capture the city without the hustle and bustle of my fellow tourists. I think the feeling of calm and tranquility does show in the photo below and the canal being so calm, almost mirror-like provides some fantastic reflections.

Fujifilm XT2 | XF10-24mm | 12mm | 1/10th Sec | f/11 | ISO200
I think the swans like having their photo taken. Here they are again adding some interest into this closeup of the canal.

Fujifilm XT2 | XF18-55mm | 44mm | 1/50th Sec | f/7.1 | ISO200
Here’s one more image from my early morning shoot of this location. Between the tree and the reflections, I they balance the image nicely.

Fujifilm XT2 | XF10-24mm | 15mm | 1/15th Sec | f/11 | ISO200
As I mentioned at the beginning of this post, I have grouped the shots I took by location rather than time and I headed back at this location to try and capture the Relais Bourgondisch Cruyce Hotel at sunset. The sun was still quite high in the sky when I captured the shot below and unfortunately the epic light didn’t arrive and this was the best it got on this particular evening.

Fujifilm X-T10 | XF18-55mm | 23mm | 1/320th Sec | f/5 | ISO200
A different view of the hotel scene is shown below. As soon as the sun goes down, the very warm artificial lights turn on along the canal and gives a very orange glow from the buildings. The architecture can create fantastic lead-in lines and some cracking compositions and in the shot below the boats on the left and building on the right do just that.
Fujifilm X-T10 | XF18-55mm | 18mm | 1/10th Sec | f/4.5 | ISO200
The final image I took at this location was after the sun had set and blue hour had kicked in. I had to tone down the orange lights quite a lot in post processing to balance the exposure a little but now thats done the vibrant blue sky and the orange buildings work really well together in the final image.

Fujifilm X-T10 | XF18-55mm | 18mm | 1.9 Secs | f/10 | ISO800
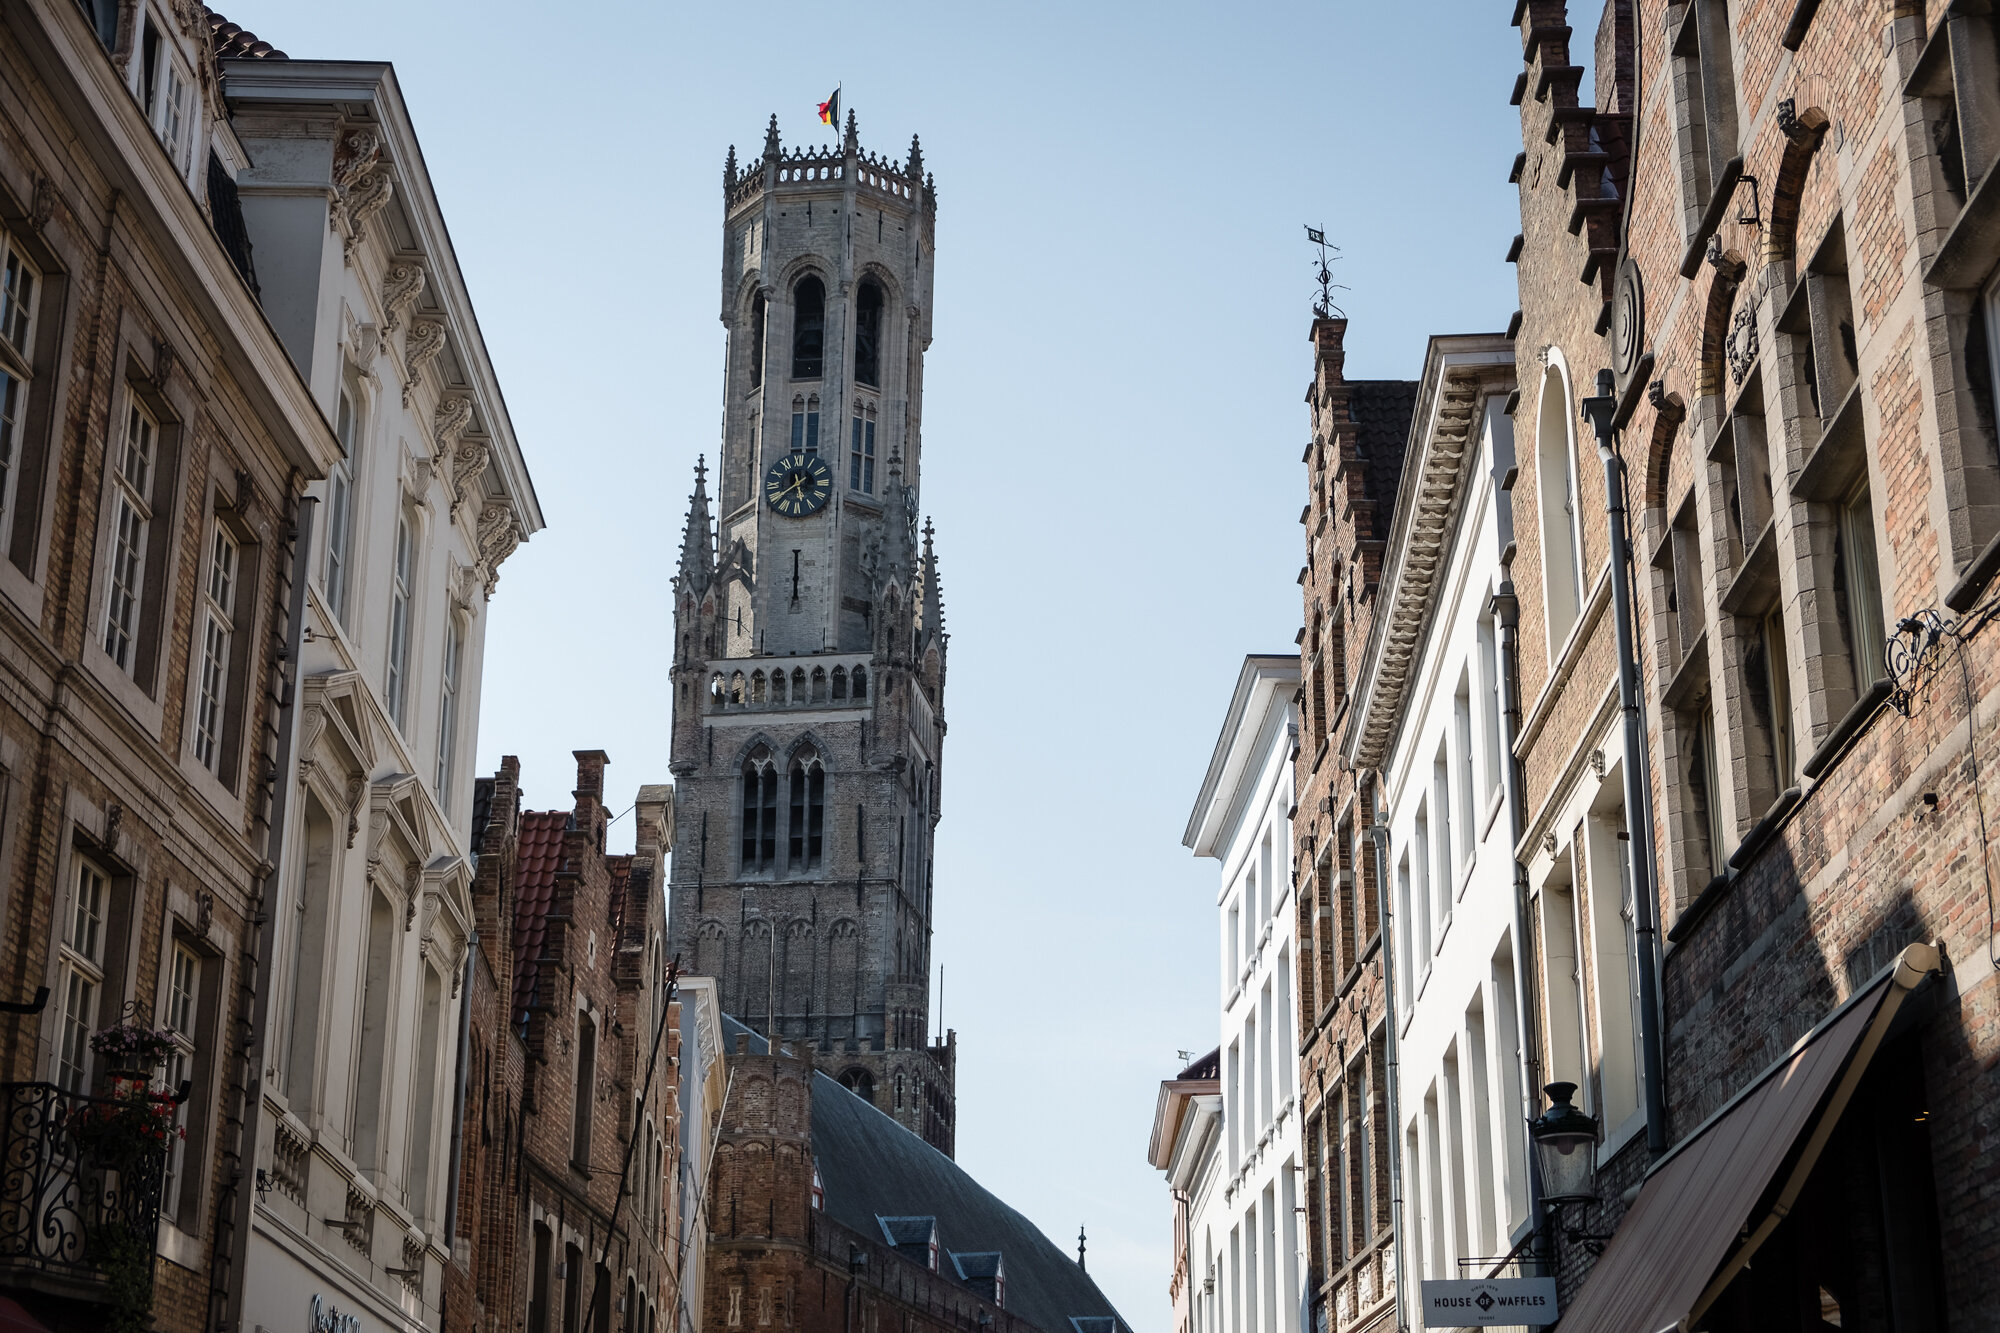
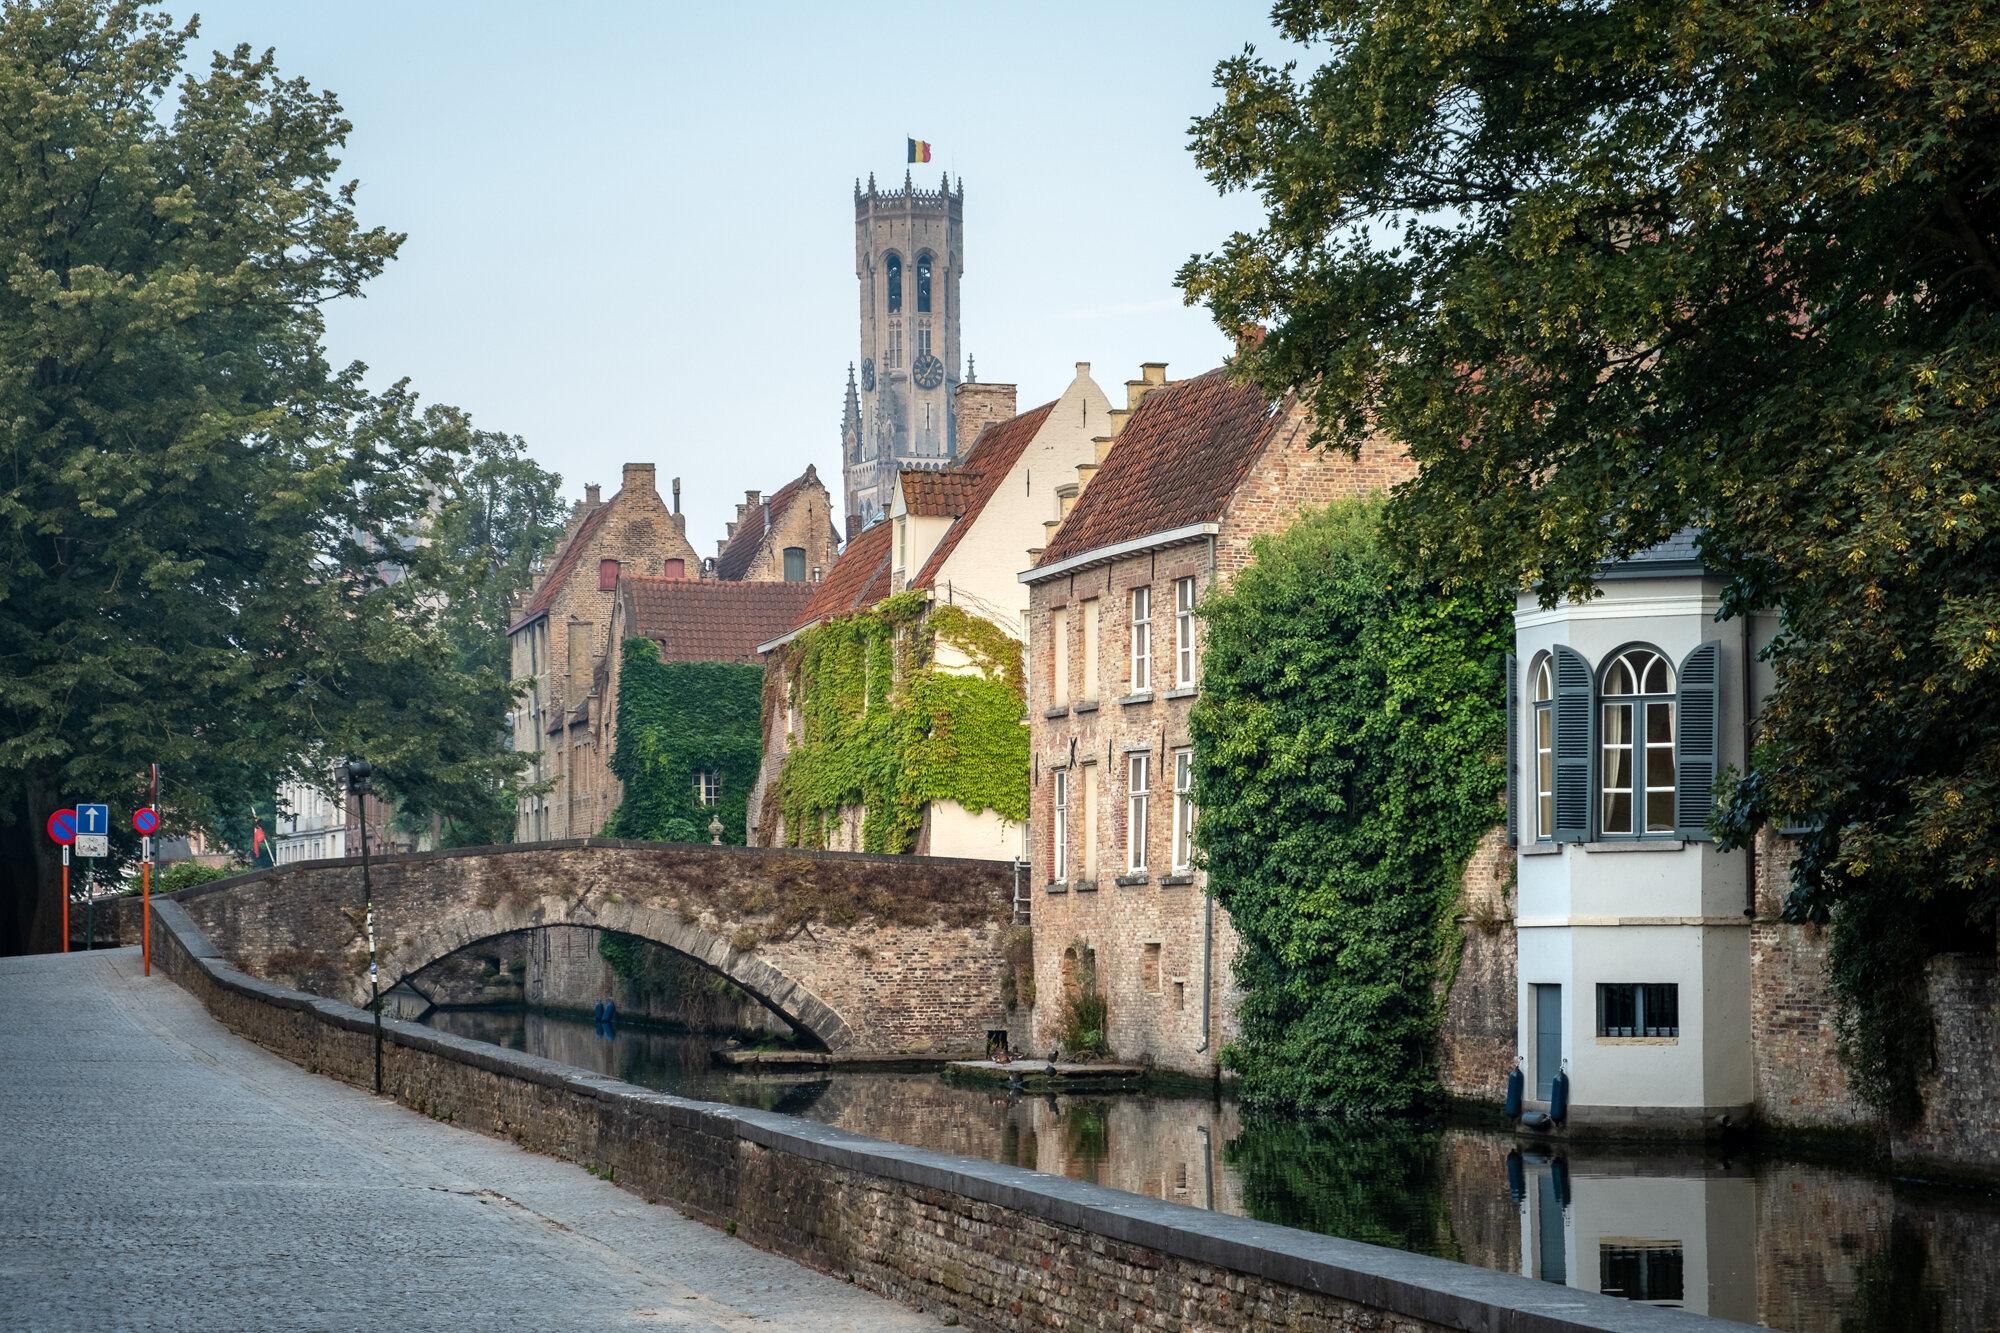
Belfry of Bruges
Visible from practically anywhere in the city and situated on the market square, this medieval bell tower stands 83m tall and towers over the entire city. You may have already noticed but I took so many photos which featured the Belfry Tower somewhere, in fact it was pretty hard not to.

Fujifilm XT2 | XF18-55mm | 18mm | 1/40th Sec | f/7.1 | ISO200

I took the photo above as I walked away from the canal along Wollestraat. This street had some amazing chocolate shops.
In this particular shop there was so much variety and the staff would be wandering around with different flavoured chocolate tasters. You can buy chocolate by the bar, truffles and you can even buy chocolate tools such as edible screwdrivers and hammers.
As you can see in this picture, these shops made great photographic subjects. Just open up that aperture and fire away.

Fujifilm XT2 | XF18-55mm | 37mm | 1/170th Sec | f/7.1 | ISO200
I took this photo above at around 6am and as you can see, it was calm, clear and ever so slightly hazy. Although the sky lacked drama, it did mean there was nothing to distract from the tower standing proud and unrivalled as the main focal point of the image with the hotel and reflections in the canal forming an attractive foreground.
I mentioned earlier that this city is so charming with it’s mixture of medieval, and gothic/neo-gothic styles, it really is something you would find on a chocolate box but if you follow my usual style of cityscape images, you will see I like a bit of the wow-factor in my compositions and that can mean adding scale using tall buildings and thats why I think, photographically the Belfry of Bruges and the other towers are such an important feature on the city’s skyline as they add impact to the otherwise relatively low city skyline.
Below is another photo of the tower taken along Wollestraat during a midday walk around the city.
Fujifilm XT2 | XF18-55mm | 33mm | 1/7,500th Sec | f/4 | ISO200
GROENEREI
The Groenerei is another stretch of the canal that runs through the city but in contrast to other parts of the river with the strong architectural features flanking the water, this small section looks more like a pretty little town in the country rather than a significant European city.

Fujifilm XT2 | XF18-55mm | 44mm | 1/60th Sec | f/6.4 | ISO200
Although the style of the buildings remains in line with many other buildings in Bruges, the trees, foliage and old bridges along the river change the look significantly providing a wealth of varied photography opportunities.
The photo above is one of my favourite images I took while in the city. It has some nice light, a balanced composition provided by the buildings and trees and some beautiful reflections in the canal.
When trying to capture the essence of a location, some say to start wide (the cityscape) and then gradually get closer, picking out features or the location such as the chocolate shop above and this charming little structure which looks like a mix between a location to moor a boat and a summer house at the end of the garden.
Note to self: Work harder to capture the details when visiting new locations rather than focusing solely on the cityscapes and architecture photos. Maybe a little street photography too.
Below is a photo of the Groenerei looking back up towards the centre of the city. Another image featuring the Belfry Tower.

Fujifilm X-T10 | XF18-55mm | 26mm | 1/140th Sec | f/3.2 | ISO200
Fujifilm XT2 | XF18-55mm | 46mm | 1/110th Sec | f/7.1 | ISO200
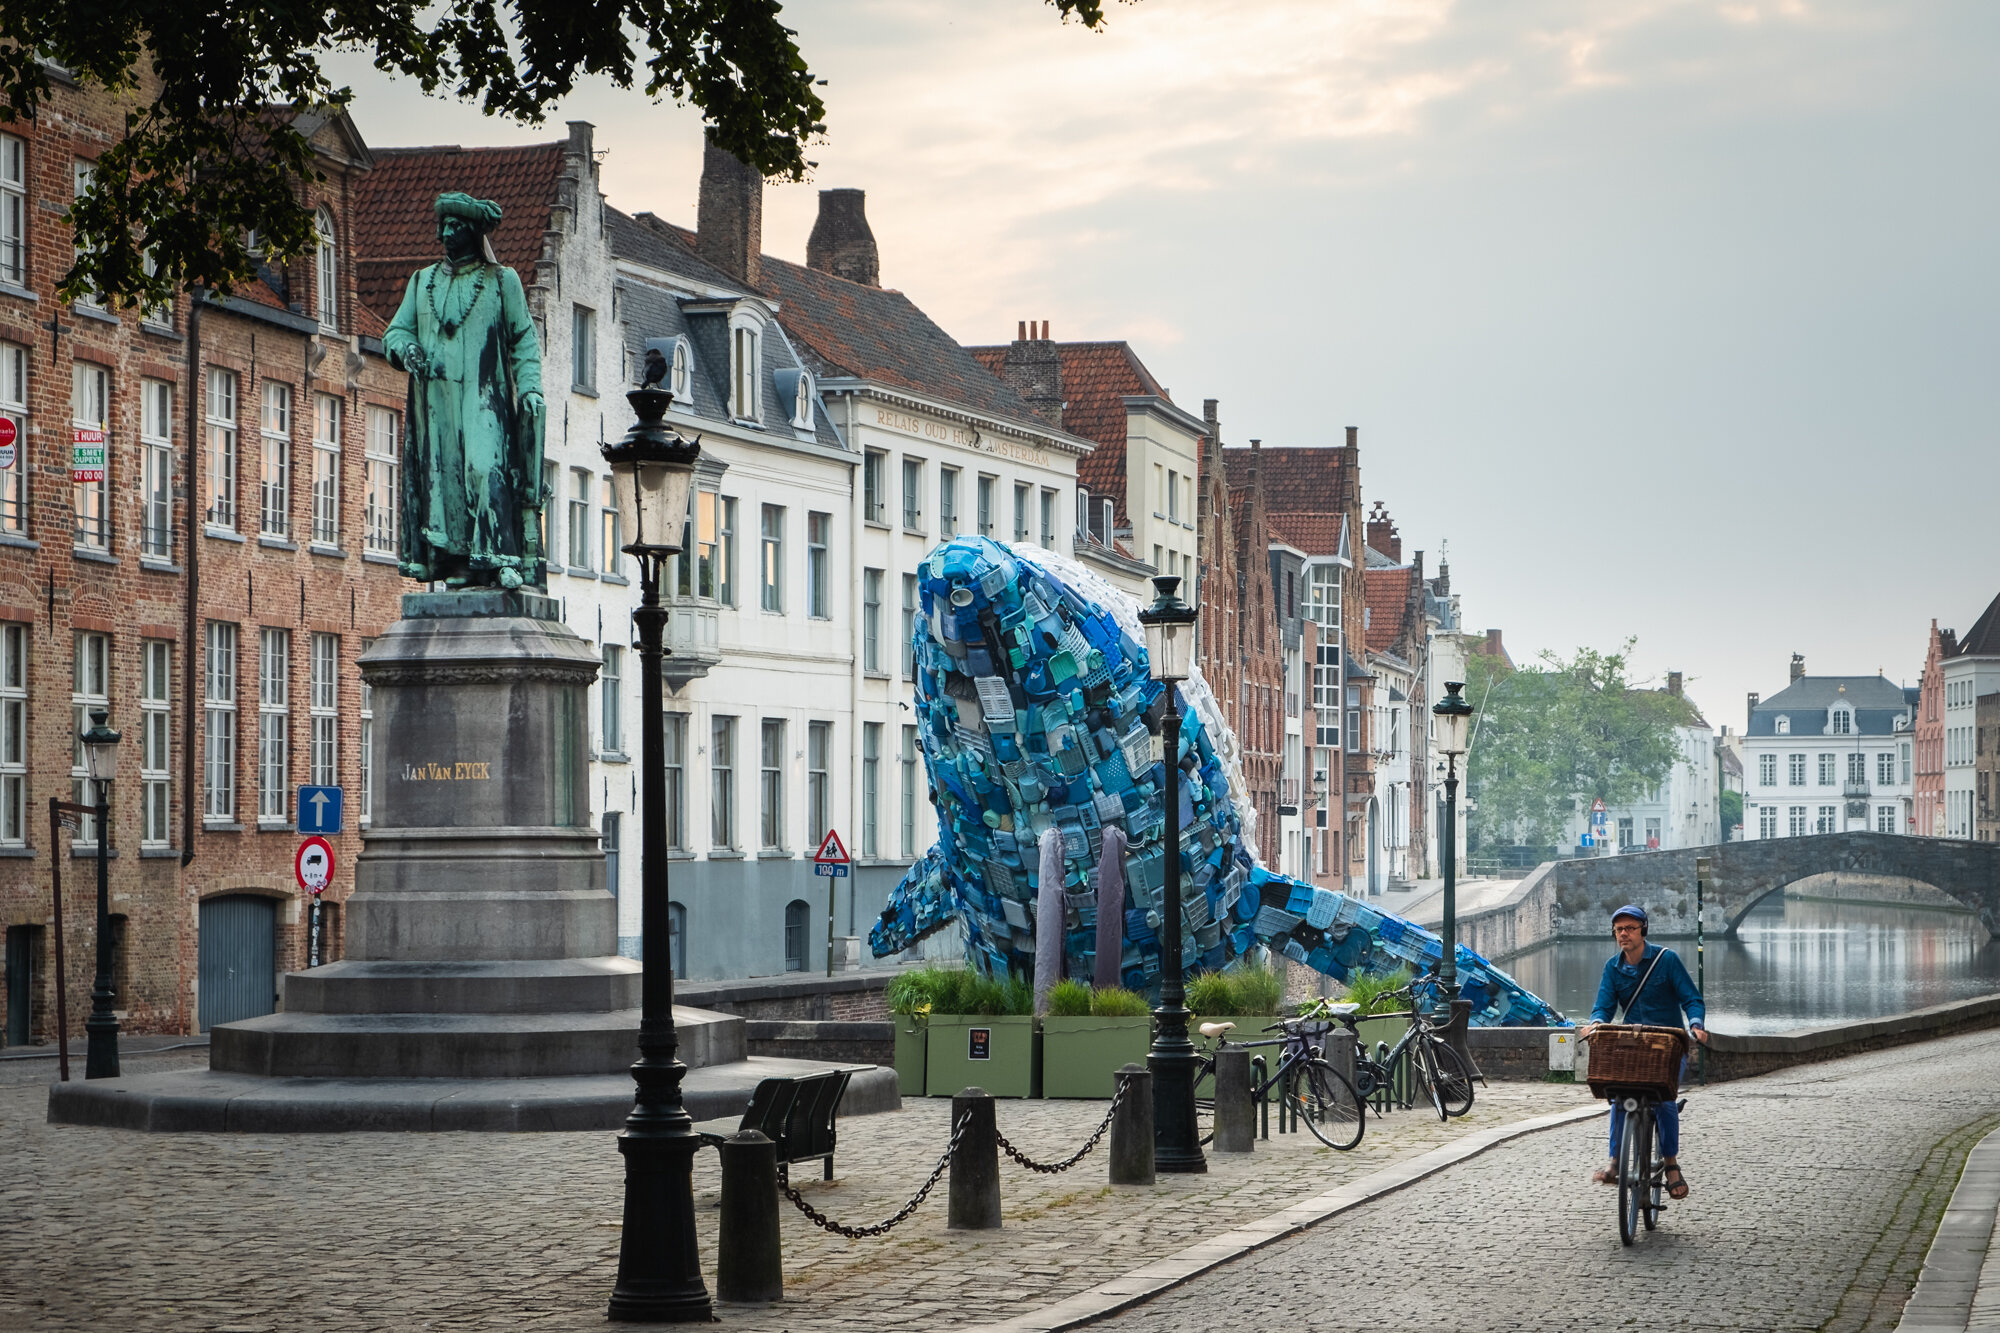
JAN VAN EYCKPLEIN
The last stop on this photographic tour of Bruges’ major sites is Jan van Eyckplein (Jan van Eyck Square). Named after the painter himself this pretty cobbled square used to be the main harbour in Bruges.
It was around 7.30 when I took this photo to the right here and the light was a bit flat but I just had to capture this great composition as I walked towards the square. The cobbled street leads the eye tight towards the main focal point of the square which is usually the Poortersloge (The Burghers' Lodge) and it’s slender tower reaching into the sky but while I visited Bruges there was also a temporary art installation of a whale leaping from the water which will likely draw your attention.
The image below is taken a bit further down the canal and has the Poortersloge’s tower situated more centrally with the bridge obscuring the whale sculpture somewhat. This time I used the wall on the left hand side as the lead in line towards the square.
Built in the late 14th and early 15th century the Burghers' Lodge was the place where the "important" citizens (poorters) had their meetings and where they received their trading partners.

Fujifilm XT2 | XF18-55mm | 55mm | 1/240th Sec | f/7.1 | ISO200

Fujifilm XT2 | XF18-55mm | 39mm | 1/170th Sec | f/7.1 | ISO200
Jan van Eyck was a renowned Bruges painter who lived in the 14th and 15th Century. As shown below, he has a statue in the square in his honour. Jan van Eyck was one of the founders of Early Netherlandish painting and one of the most significant representatives of early Northern Renaissance art.
I don’t take many photos with people in it but I liked the traditional look of this chap on the bike and him riding up the cobbled street as i think it adds to the composition and story nicely.
Fujifilm XT2 | XF18-55mm | 44mm | 1/160th Sec | f/8 | ISO200
Skyscraper (the Bruges Whale) is an art installation for the Bruges Triennial which invited globally renowned artists to create artwork based on the changing world and the pressures it puts upon all forms of life. This particular creation was made of 5 tons of plastic waste fished from the Pacific and the Atlantic Oceans to represent the 150 million tons of plastic waste that has been dumped into the world’s oceans. What a fantastic representation of what is a growing global concern.
Although photographically I may have preferred to capture the traditional view of Jan van Eyckplein there is no question this amazing but temporary sculpture added something different to the scene creating its own unique story.

Fujifilm X-T10 | XF35mm F2 | 35mm | 1/4,000th Sec | f/2.5 | ISO200
One of the problems about spending such a short time in any city is that you don’t get a lot of time to explore inside many of these fabulous buildings and basilicas. I mentioned at the beginning of the post that I will likely return to Bruges in the near future where I will try to venture inside the buildings more often and try to capture some some of the close-up details of the architecture around the city.
As ever, I welcome any questions or feedback about this or any of my posts.
Until next time.

How I Printed This Image of The Shard London
I love to see my photos printed but for some, printing at home can be both daunting but equally rewarding. In this blog post I walk you through the simple steps I took when printing my own London cityscape photo of The Shard on Fotospeed’s Metallic Gloss paper using photoshop and my Canon PRO-10S printer.
So, last year I decided to buy my first professional printer in a bid to start printing my own images at home. I was at the UK Photography Show in Birmingham and I brought the Canon PRO-10S. This printer had a show exclusive £150 cash-back on it’s already reasonable purchase price of £500 so in end I paid £350 for it. Bargain!
Although there are cheaper and more convenient ways to get my images printed by using third party printing labs, I wanted to own the entire creation process from capture to edit and then print with the aim to experience more of my work in a tangible print form while careful selecting the paper and styles to get the print exactly how I want the finished article to look.
I’m not going to cover in this post how I originally edited the image I chose to print, nor the process around calibrating screens as this is a topic for another day. In this post I will run through how I prepared the image to print and talk about some of the settings I used along the way. If you want to read a post covering how I edited a print from RAW to finished image, see this blog post:
Editing Sunset at The South Bank
Below is the photo I decided to print. This is a long exposure photo I took of The Shard in London from across the River Thames. This is a great spot to capture an iconic view of London and what’s great about it is that although the vantage point is private property on the grounds of the Tower of London, they don’t have restrictions around the use of tripods which can be an issue elsewhere in London. That being said, the usual rules should still apply when using a tripod in busy areas such as not getting in peoples way and being polite and thoughtful of those around you.

Fujifilm X-T10 | XF10-24mm | 13mm | 100 Secs | f/13 | ISO200
Step 1: Choosing the right Paper
I learned quite quickly that it’s particularly important to ensure the photo matches the paper it is printed on. Some images just won’t look at their best when printed on a high gloss paper and likewise, other images wouldn’t be at their best with a matt finish. For that reason I chose to print this image in particular as with the reflections in the glass and highlights in the clouds and water, it was crying out for a glossy, vibrant finish and I just happened to have recently bought some of Fotospeed’s Metallic Gloss paper to test out. See here for Fotospeed’s own description of this particular paper:
Metallic Gloss 275 is a flat, stiff, middle-weight paper with a metallic effect gloss finish. The paper has a neutral white base and an instant dry, microporous coating. This paper has a wide colour gamut and a high D-MAX which delivers beautiful images, both in colour and B&W.
Step 2: Preparing the Image
Now with paper and image chosen, I went about preparing the image for print in photoshop. Since this image is already processed, I didn’t need to do a lot to it to get it ready but I do think these steps are crucial to ensure the image looks its best in print.

Start with the highest quality image you have: When I edit photos, I always export a gold master copy in TIFF format. TIFF does not compress the image and from this gold master, all copies of the image can be made from a consistent baseline. I will create lower resolution copies for web or like in this instance, edit a copy in readiness for printing.
Brightness and contrast: There is a big difference between how an image is illuminated between on screen display and print. On the screen, the image will be back-lit and appear brighter whereas on print, the image is illuminated via reflective light so it will react to the environment. If the room is dark, the print will be dark. As such, I always increase brightness and add a little contrast to my images before printing. For this image I increased brightness by 20% and contrast by 10%. As always, watch those highlights and shadows by using the histogram and make use of a layer mask to mask out the effect where needed.
Resize the image: I always resize my images at this stage to ensure the image is at the right size to print to prevent resizing taking place at the print stage. I will use the Image->Image Size option in the menu and use the appropriate recommended settings to ensure the image is the exact dimensions I want to print the image. I used the following settings (also see image above):
Width = 11 inches (to print on A4 paper with a small border)
Lock aspect ration to auto adjust the hight
300 pixels per inch for print resolution quality
Reduction option to preserve sharpness on the resample option
Sharpen the image: I always sharpen my images a little when I print. In Photoshop, I create duplicate layer of the image, and I use the High Pass filter (Filter->Other->High Pass) add a 1-2 pixels to taste being careful to not to add too much to keep the image looking at its best. In this image, I added 1.5 pixels. Next, to allow the base layer to show through, change the blending mode to Overlay on the layer with the High Pass filter applied.
Vibrance and Saturation: The last thing I do before I print is add a little more vibrance and saturation as I notice on colour prints, I can lose a little bit of the punch in the image so I like to add this back a little. With another Adjustment Layer, I added 15% Vibrance and only 5% saturation. Be very careful not to overdo these effects but they need to be adjusted based on the image being printed.
That’s it, the image has been prepared for print. See below for a before and after image. As you can see the effect is noticeable but not extreme and will ensure the image looks fantastic when printed.

Step 3: Printing the image

So, now it’s finally time to get the ink to paper!
Before I printed my image, I made sure that I downloaded and installed the correct printer/paper profile from Fotospeed’s website. This is important to ensure the print, paper and ink all match which goes a long way to ensuring the colours render correctly when the image is printed.
So, still within photoshop and once the print dialog box was open, I chose the following settings:
Selected the correct printer
Ensured Photoshop was handling the colour
Chose the correct printer profile mentioned previously.
Centred the image on the paper to make an even boarder
So off the printer went and out came my image. The image to the right was taken as soon as the printing had finished.
Tip: Leave the print at least a few hours before handling to ensure the ink fully dries. The tones may also change a little too so don’t inspect the finished print until it has had tome to dry.
So there you have it….
Below is the final print in all it’s glory. Although this photo doesn’t do it justice as it looks a little too blue/purple, it looks fantastic in person and much more alike to the image at the top of this post.

It was far from a comprehensive overview of the printing process but to some it is quite daunting to try and this post shows that it can be done well with minimal steps.
Feel free to add any of your own tips to simplifying the print process in the comments below.
Until next time.

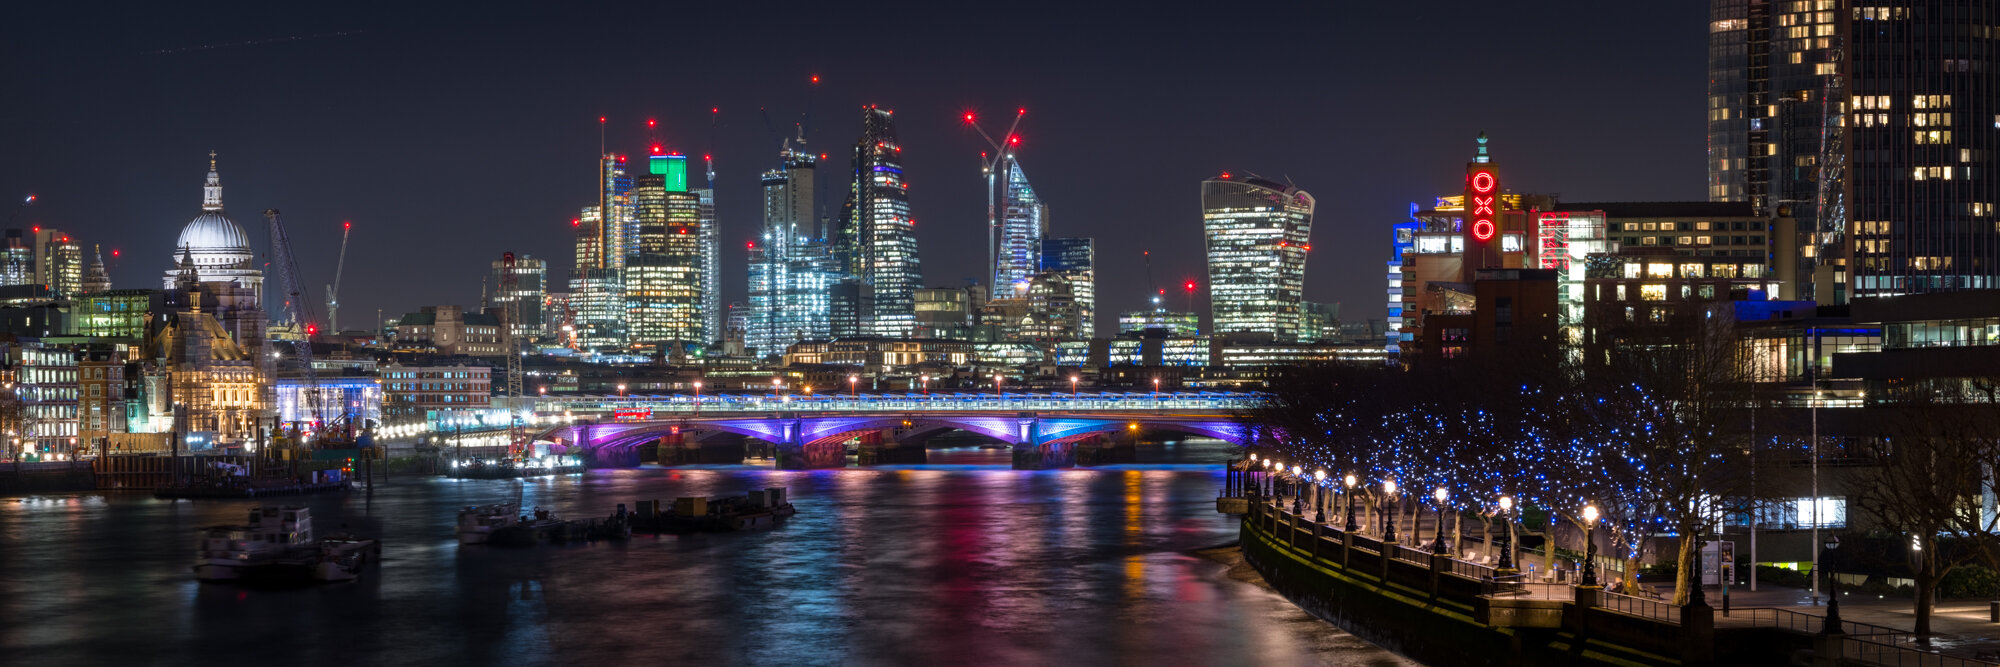
How I Created This Epic London Panoramic
Do you want to know how I created this epic panoramic of London’s skyline? In this article, I walk you through the capturing and post-processing steps I used to create the final image.
At the beginning of 2018, I ventured out into a clear, cold London to capture a new panoramic of the ever-changing skyline. Although cold, the conditions were great as the night was clear and city lights were lighting up the scene nicely.
In my bag, I had my Fujifilm XT2 and three lenses. The XF10-24mm, XF18-55mm and the XF55-200mm. For this shoot, I used the XF55-200mm with the XT2 and you will read why shortly.
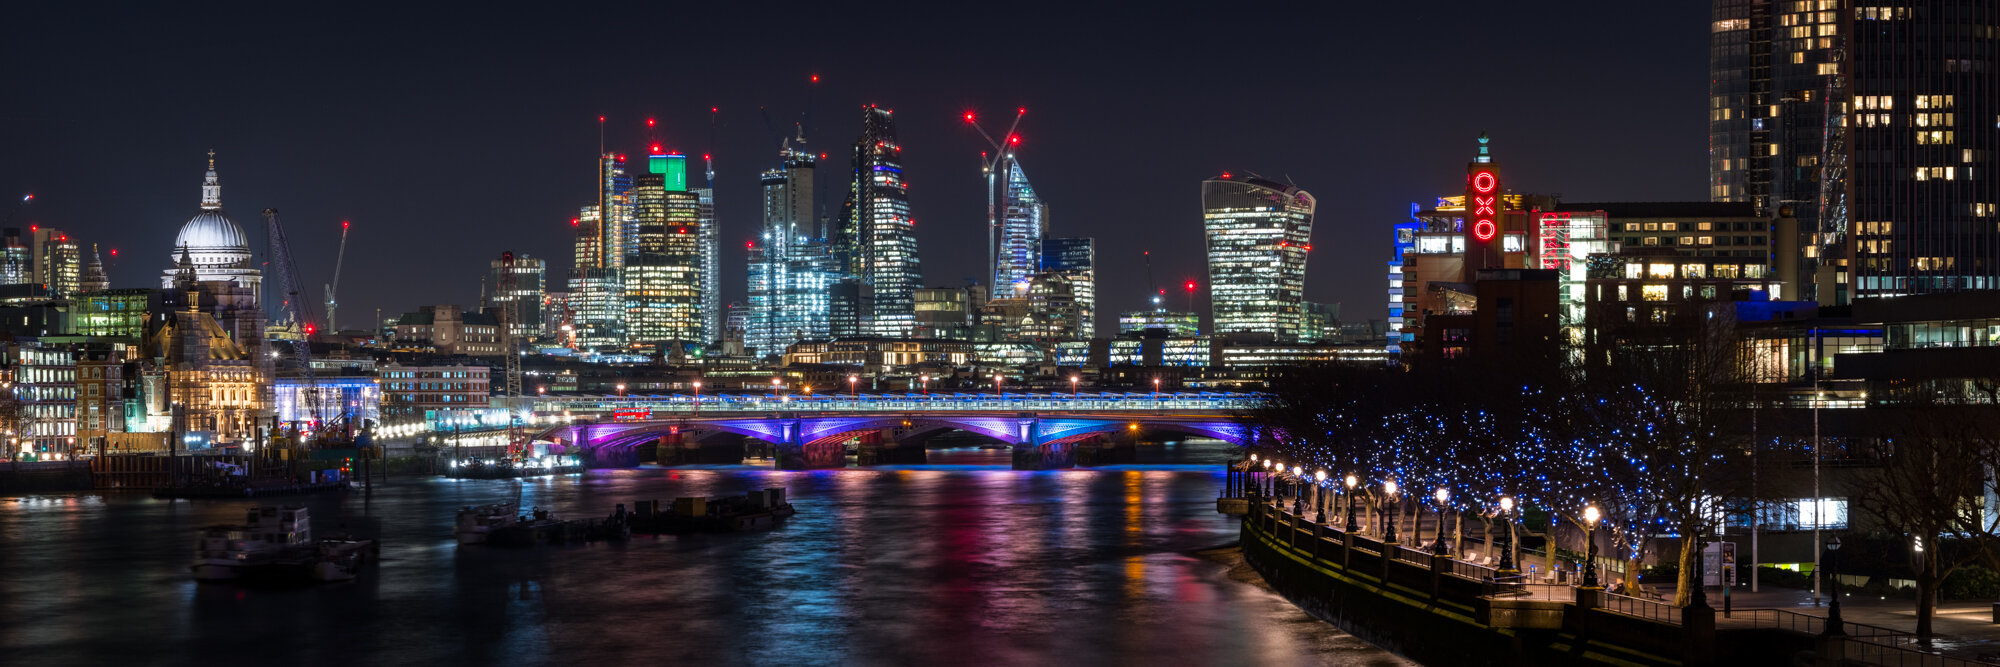
Fujifilm XT2 | XF55-200mm | 82mm | 6-30 Secs (bracket) | f/14 | ISO200
On Location, capturing the photos
So, let's start with the obvious question. Why take a panoramic image when even a standard 18-55mm lens would capture the entire scene in one shot?
Well, it will vary scene to scene but one of the characteristics of using a wider focal length is it tends to push the background further away, de-emphasising it from the composition somewhat. This is really not what I wanted for the final image as the tall buildings in the background are an important part of the image and need to remain prominent so I needed to use a telephoto lens to bring the background closer. So, on this occasion, I had already prepared to use a longer focal length and take multiple images from left to right.
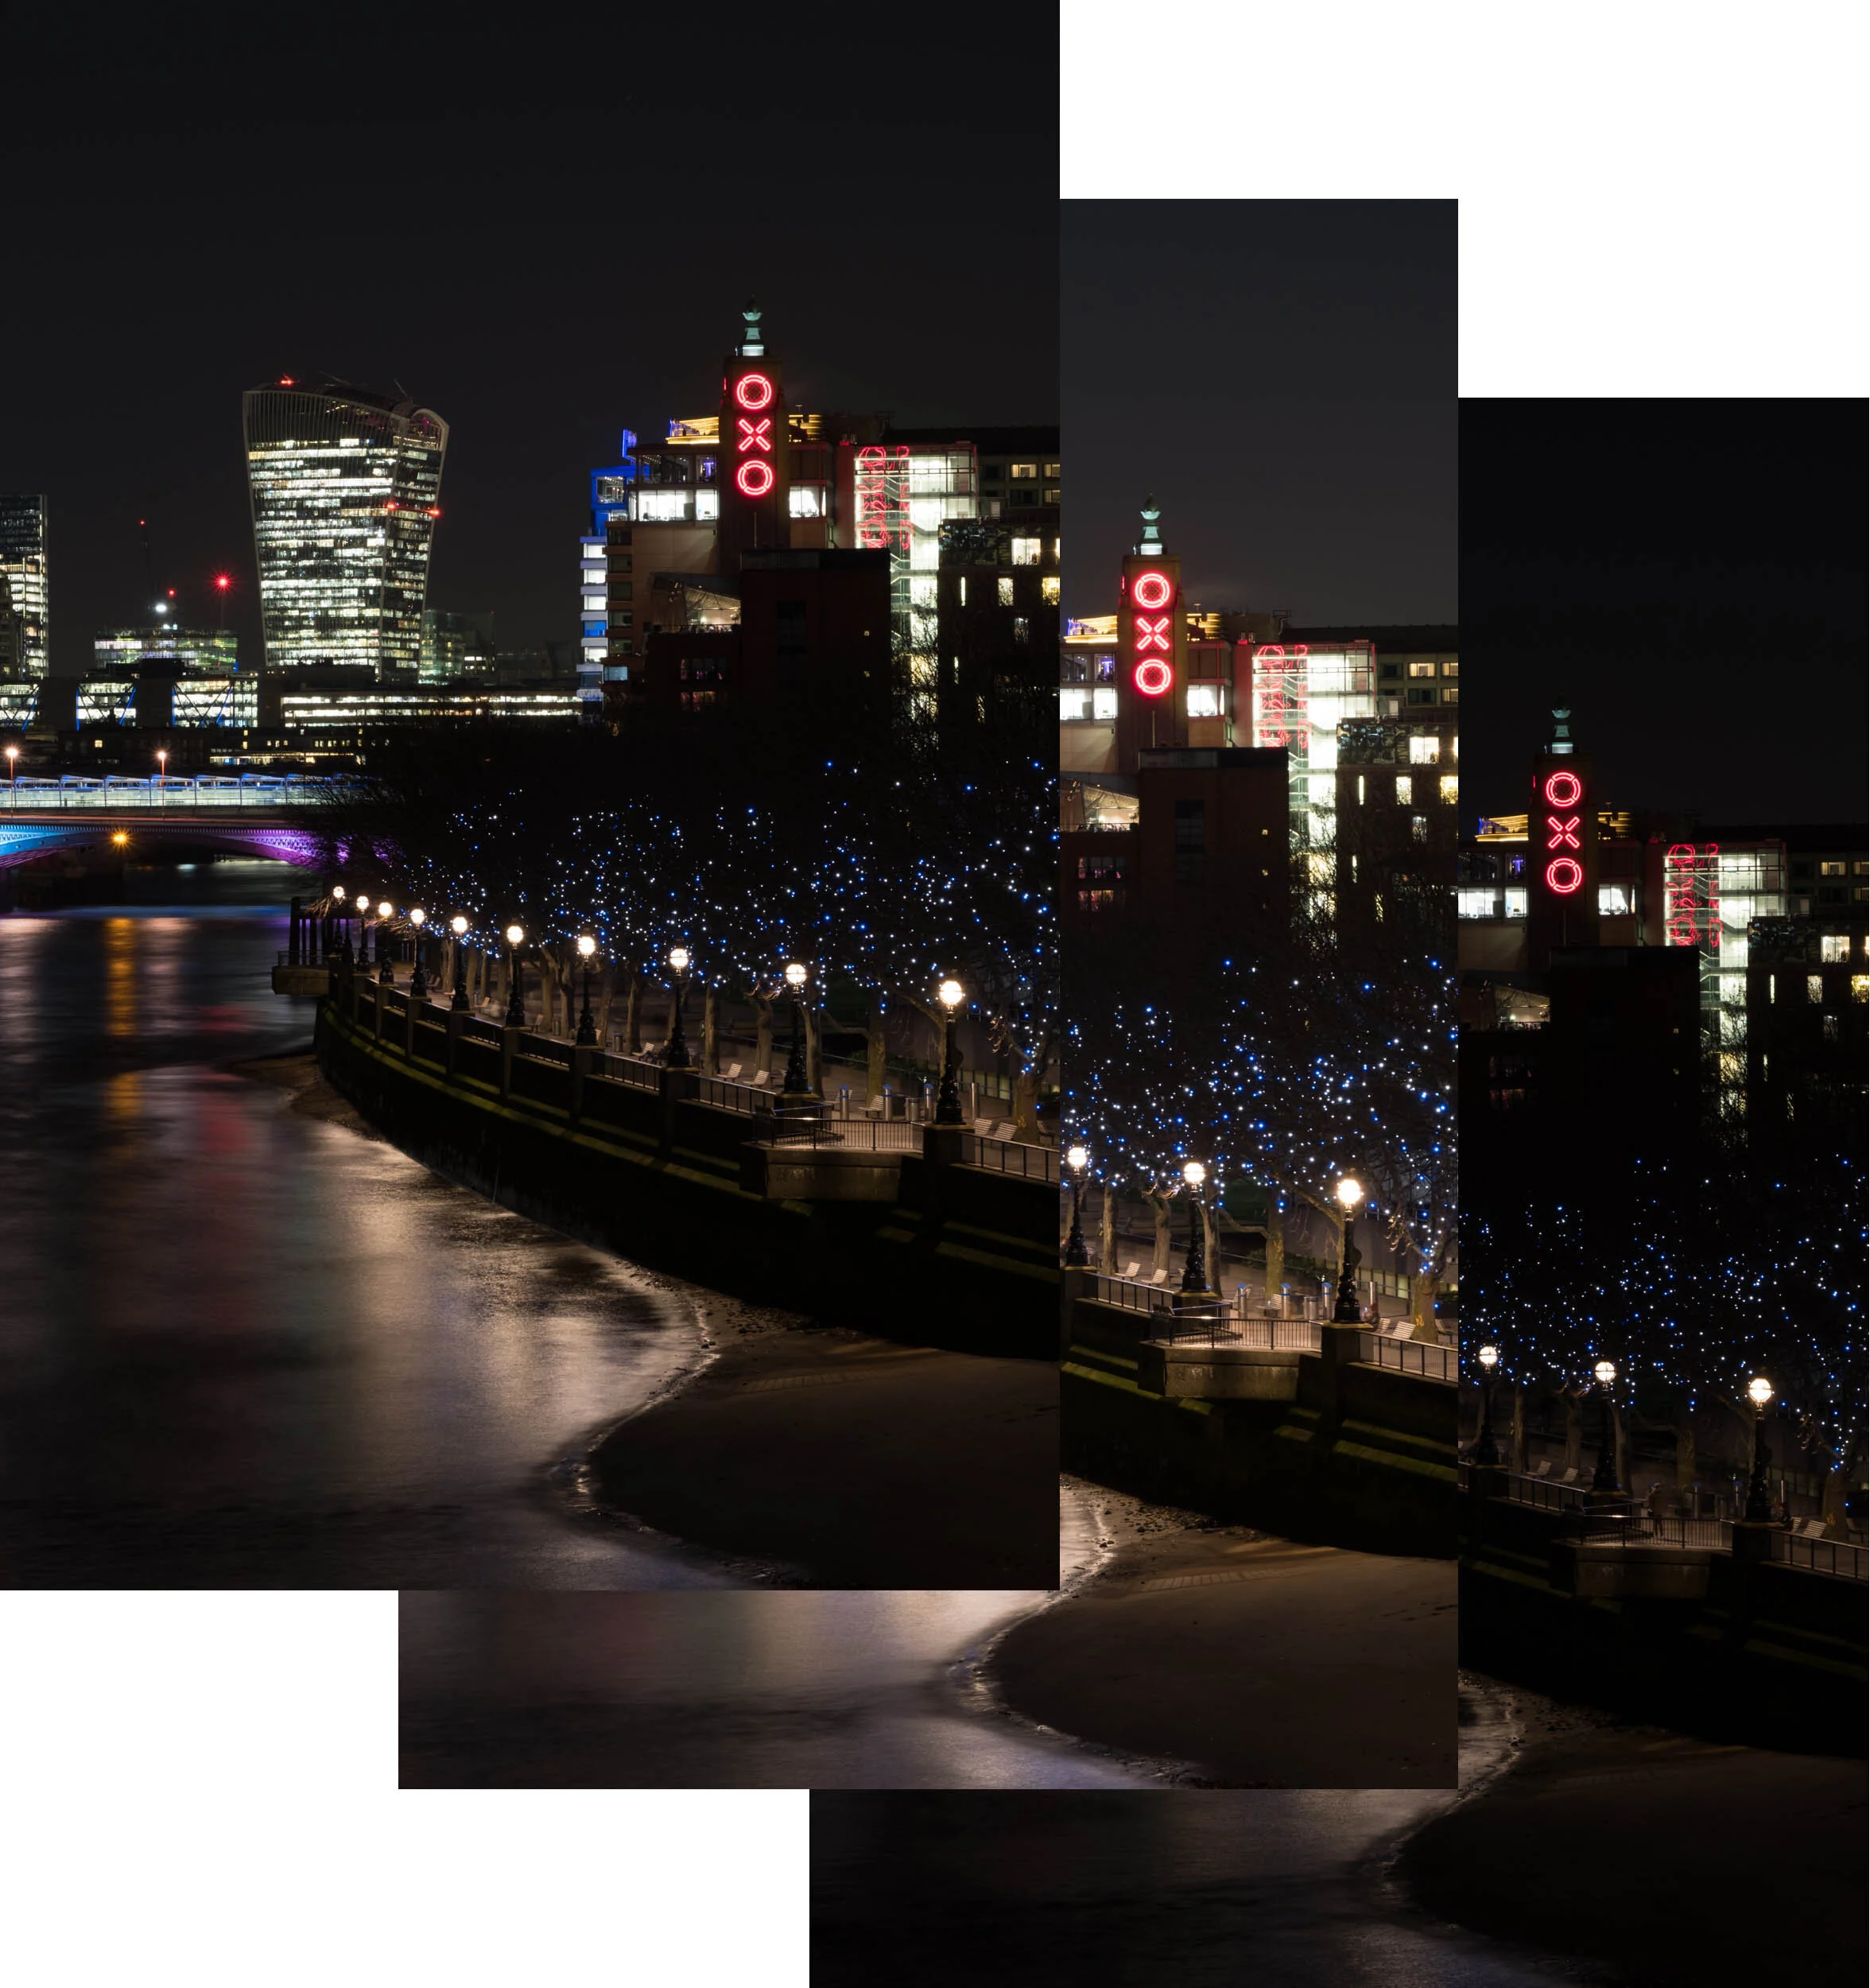
This panoramic of London was taken from Waterloo Bridge. I like this composition as it has recognisable structures such as the dome of St Pauls, the Oxo Tower to the right and the many new modern buildings in the background. I also particularly like the way the lights on the Southbank sweep into the frame leading the eye towards the city skyline.
Due to the dynamic range within the scene with deep black shadows and bright lights, I also decided to bracket each photo by 1 stop of exposure.
On went the 55-200mm lens and with my XT2 mounted in portrait mode I panned from left to right, ensuring I overlapped by 50% or more to help the stitching later. The focal length used was 82mm at f14 with each bracketed exposure ranging from 6 to 30 seconds each. I also carefully checked each image to ensure it was sharp and once I was happy I had the sots in the bag, off I went to catch the train home.


Back home, combining the bracketed images
Now back home, I loaded the RAW files into Lightroom and proceeded to merge each bracketed shot resulting in an image with lots of dynamic range to play with. To do this in Lightroom, select Photo - Photo Merge - HDR. I was then left with just 7 HDR images.

Now, a quick note about HDR. Although some like it and others don't, done correctly HDR can be a valuable tool in the post-processing workflow. As long as the effect is not overdone, using HDR subtly can help create some fantastic images.
Once I had the 7 images (in DNG format), I gave them all a star rating and filtered my view by that star. It's a neat way to declutter your workspace as it leaves you just the images you want to work with.
Creating the panorama
Next, with the 7 DNG files ready, I then proceeded to merge the images into a panorama. To do this, I selected all 7 files then chose
Photo - Photo Merge - Panorama.

I selected the Spherical projection and let Lightroom do its thing. As you can see, by taking the images in portrait mode, it has allowed for extra height for when some inevitable cropping is needed. However straight you set your camera up on the tripod, there is always some cropping required. Below is the merged, cropped image ready for some post-processing.

Post Processing
Next, I commenced my usual Lightroom workflow, working down the different sliders enhancing the image. Here are the settings I used:

As you can see, it didn't take a huge amount to create the image here. I cooled off the white balance, toned down the highlights, then gave the image a bit of vibrancy to bring out the colours in the city lights. After adjusting the curves and adding a small vignette and I was done. Below is how it looked after this stage of the process.
The final step in the process was to export the image into Adobe Photoshop. Here I performed the following:
Cloned out a few light trails left by the lights of a plane
Added a bit more contrast using levels and curves
Used the high pass filter on a new layer to add just the right amount of sharpening
(I rarely add sharpening in Lightroom)
And that's it! The final image is below (select the image for larger version)

Fujifilm XT2 | XF55-200mm | 82mm | 6-30 Secs (bracket) | f/14 | ISO200
With the resulting image being over 62 megapixels, it can be difficult to demonstrate just how much quality and detail there is so be sure to check out the video below to better show off this final panoramic photo.
And there you have it, the full end to end process I followed to create this striking panorama of London's vibrant skyline. If you have any questions for me about this or any other image I have created then please get in touch by emailing me at photo@trevorsherwin.co.uk or using my contact page here.

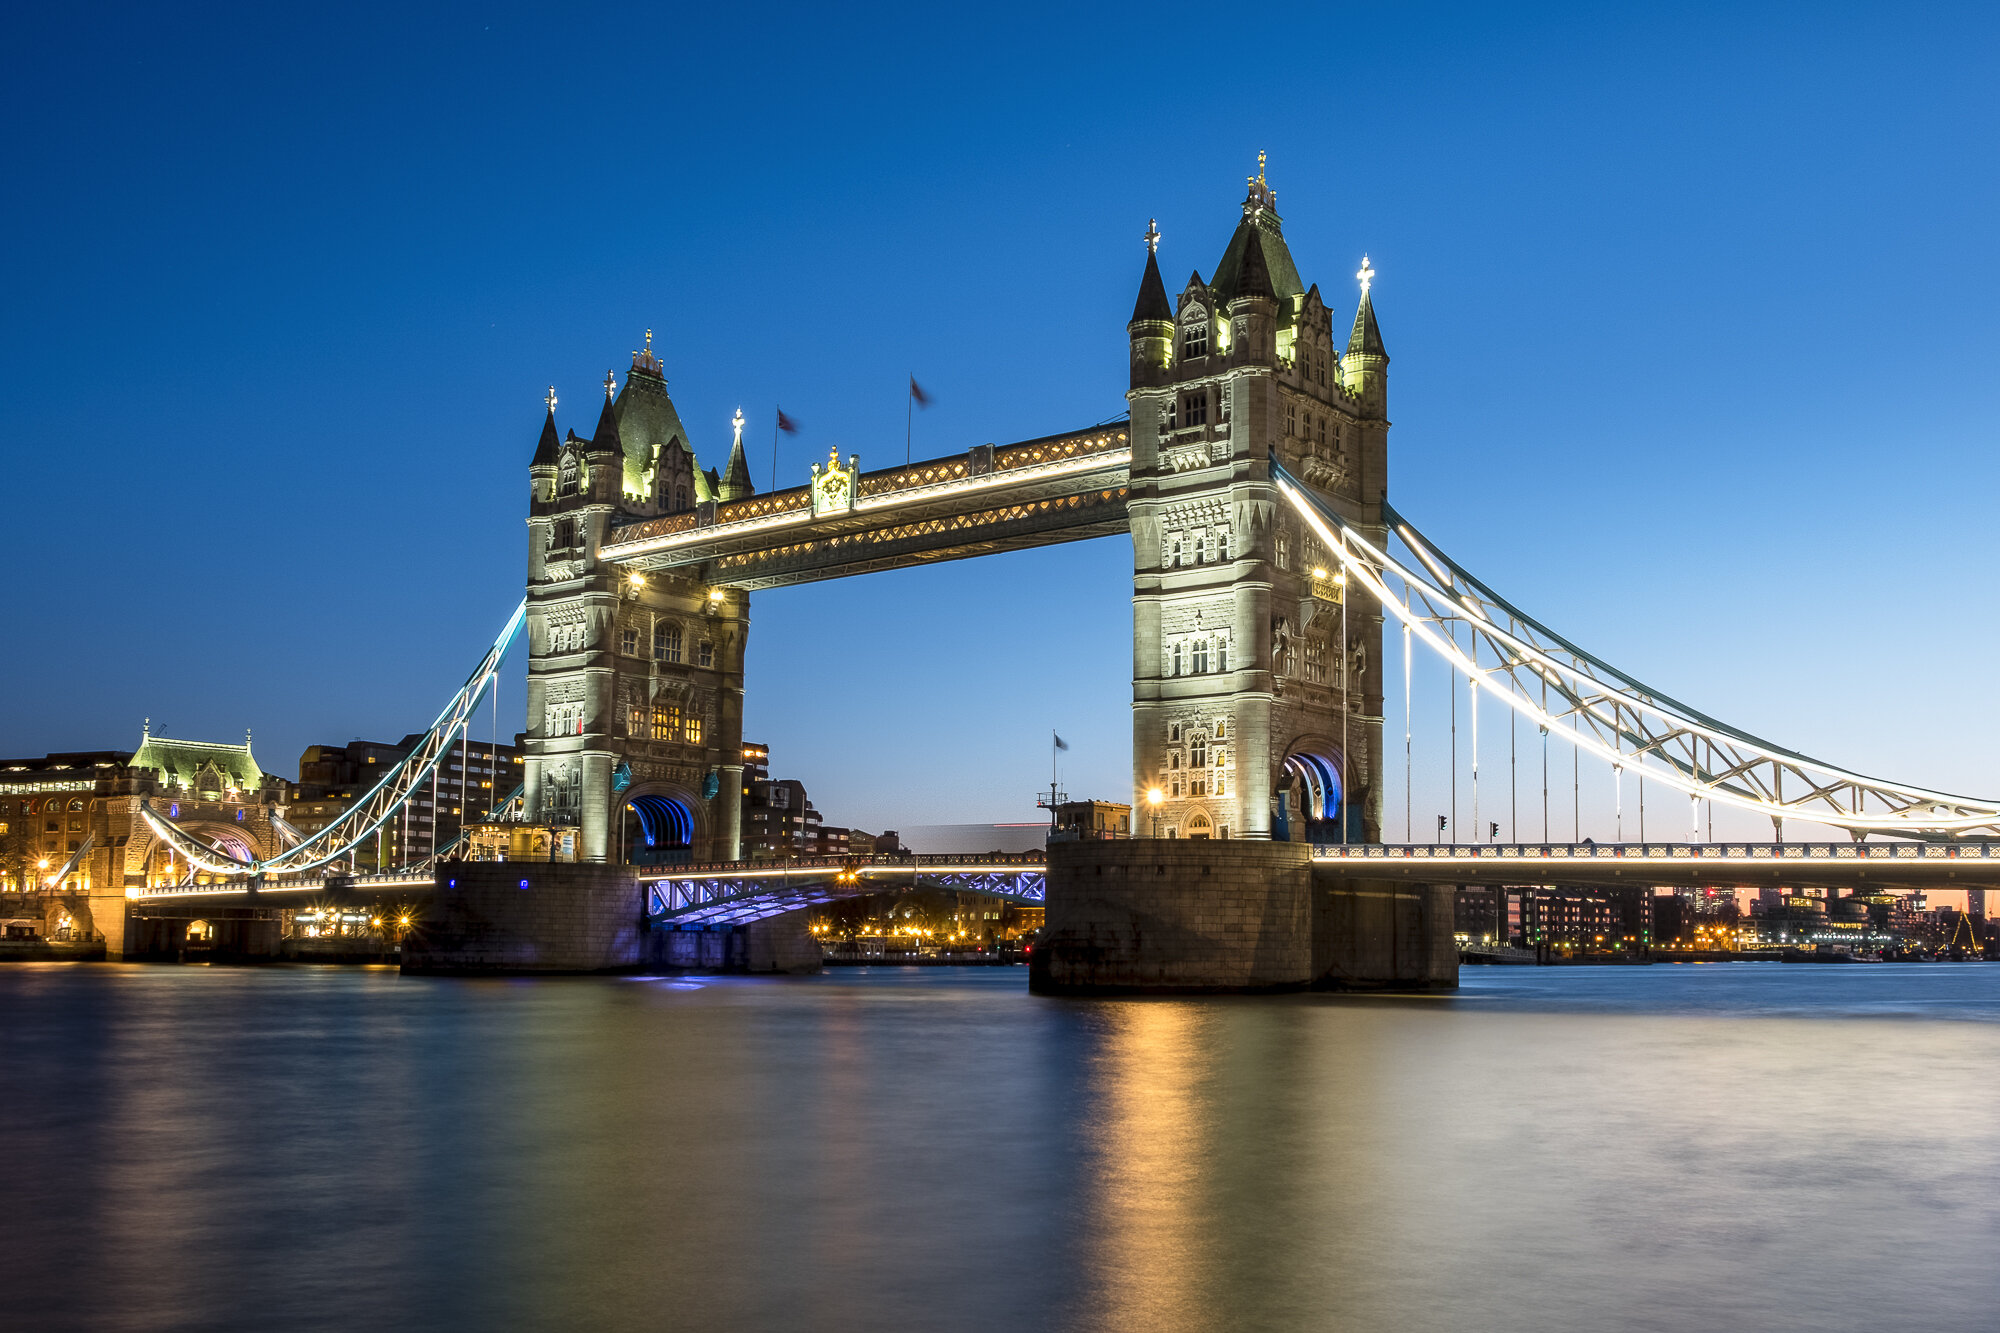
On Location Photographing London Day and Night
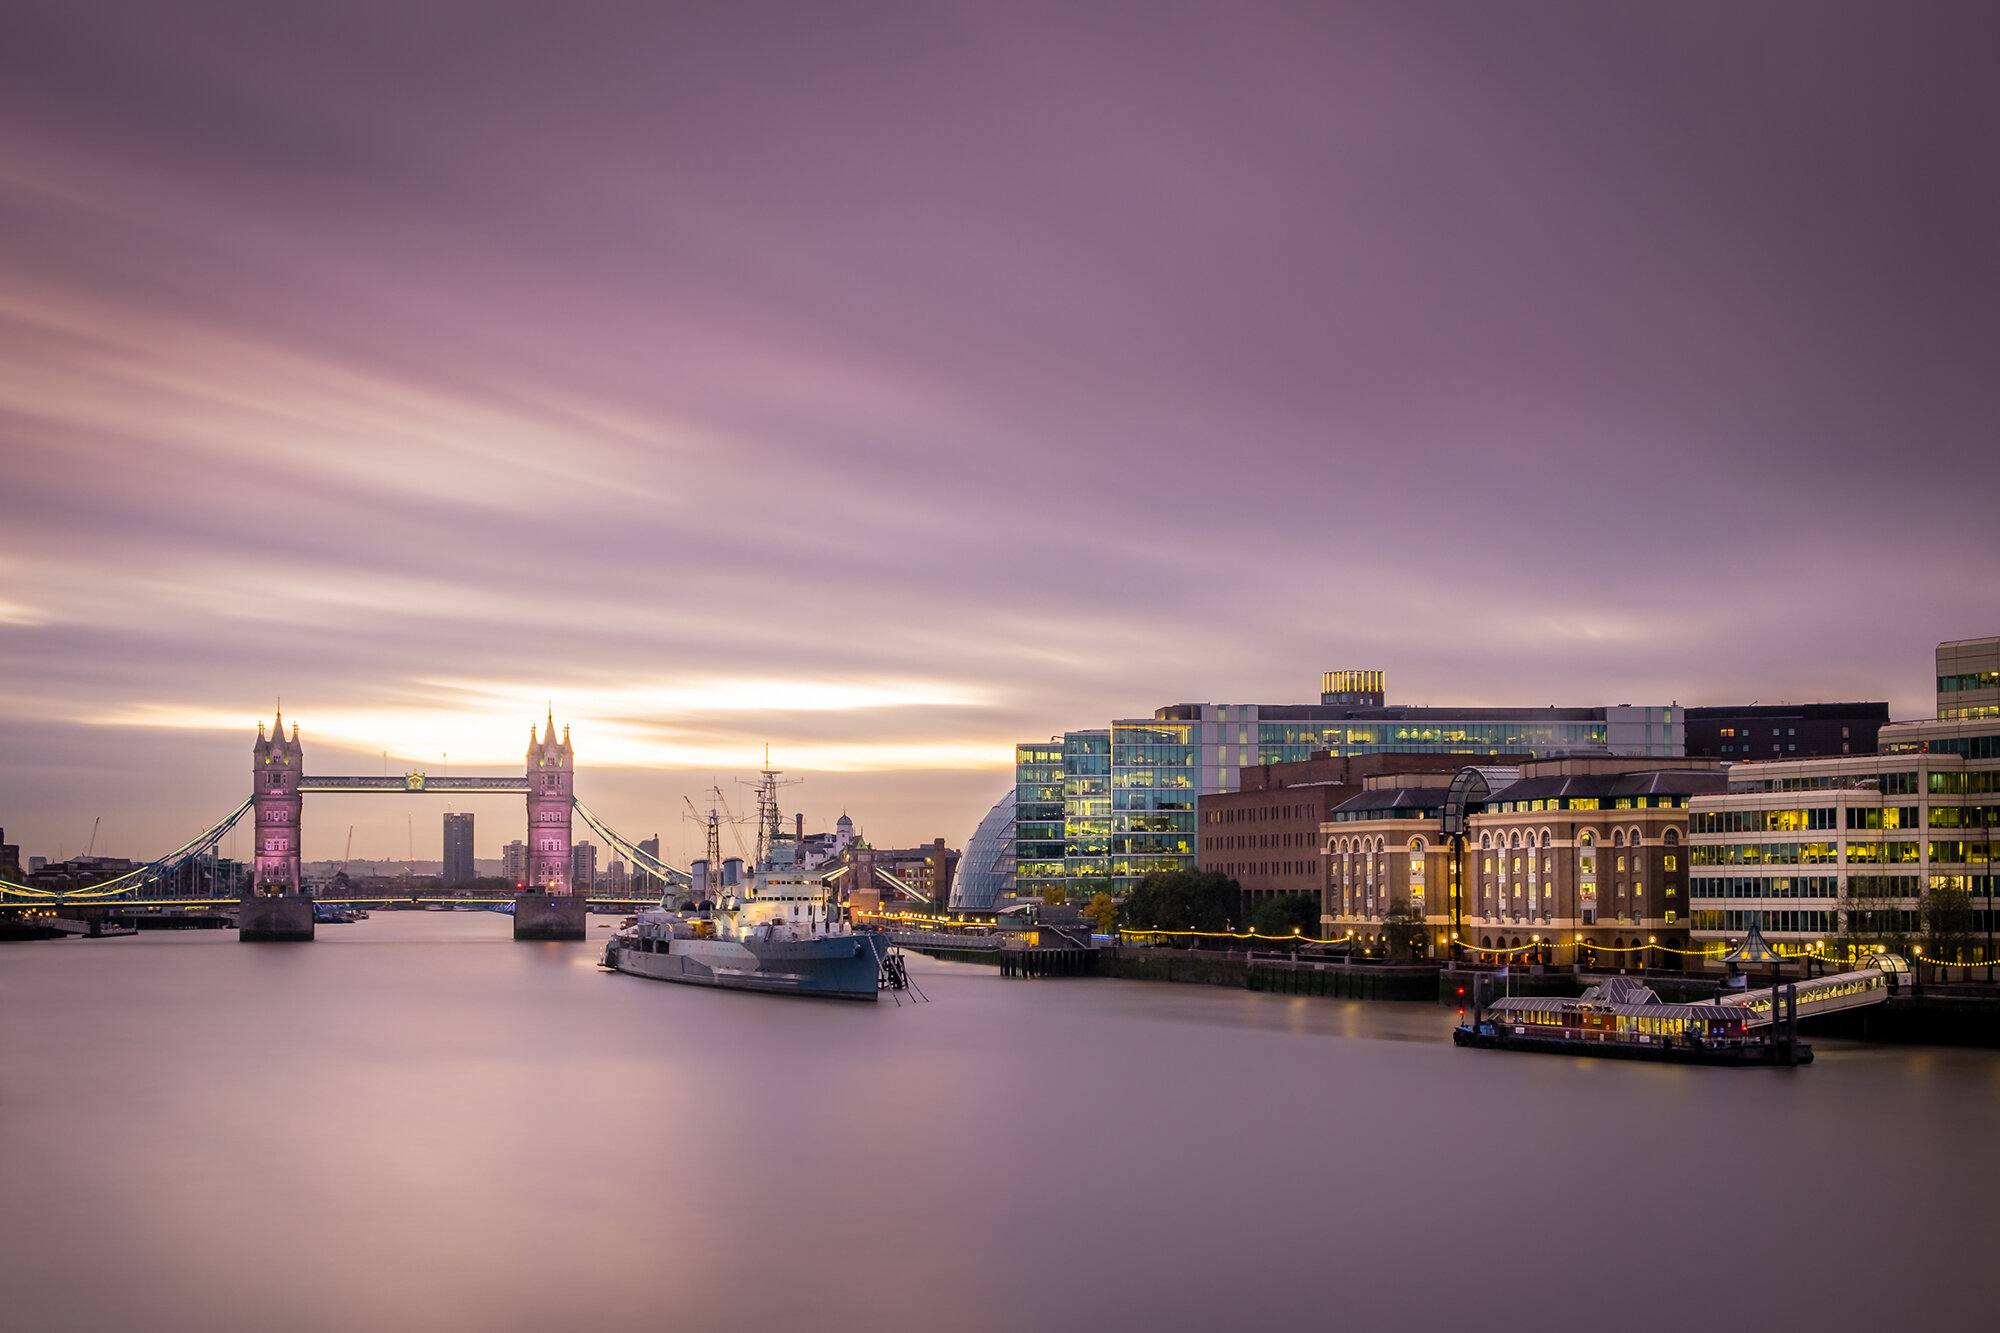
I recently spent a rare full day in London capturing sunrise at Tower Bridge and sunset over at Canary Wharf. This post covers the shots I took ending with a time-lapse video taken throughout the day.
Regular readers of my blog will know that I often spend time in London taking photos but usually just a few hours at a time and normally before or after my day job and it is a lot less often I decide to spend an entire day dedicated to wandering around, photographing the city so I decided to get out for the day and see what I could capture.
I started the day capturing Tower Bridge at sunrise then over to Canary Wharf at sunset while in between I captured some images for a time-lapse compilation which you can see at the end of this post.
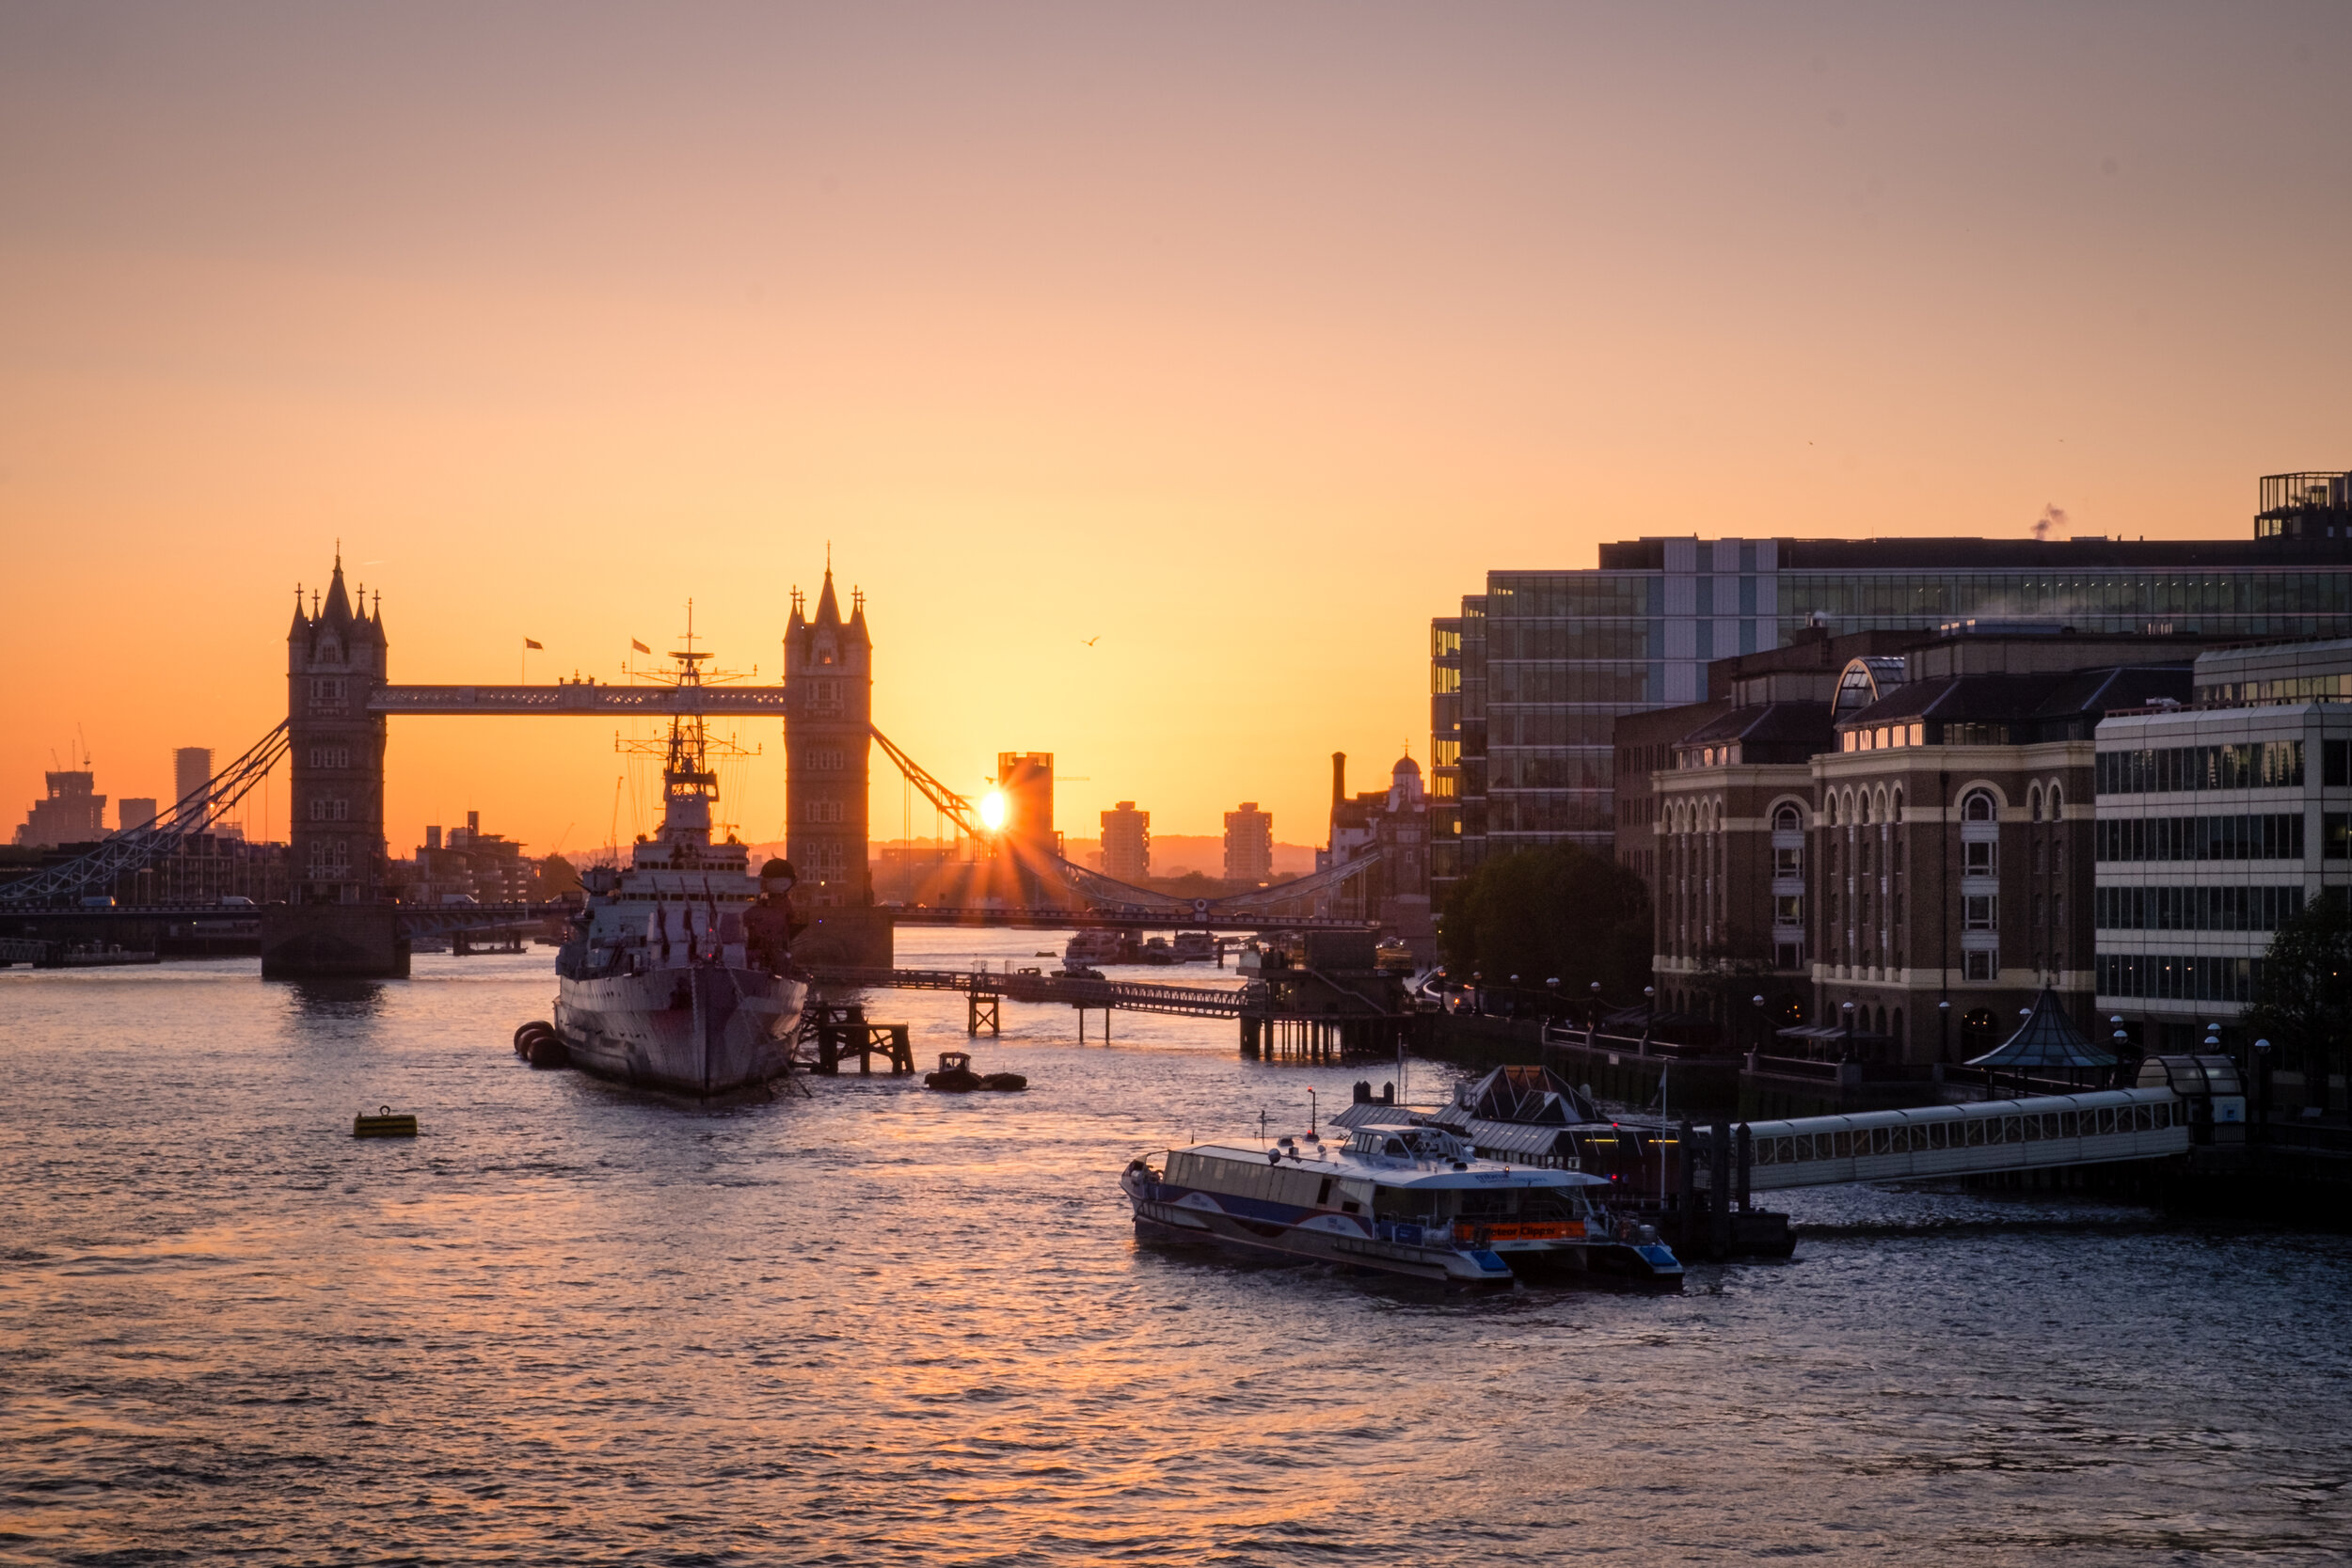
The first shot below is a photo of Tower Bridge during the Blue Hour which is the time between night and sunrise. If you look to the bottom right-hand side of the shot you can just see the first hints of sunrise just underneath the bridge.
Fujifilm XT2 | XF18-55mm | 18mm | 1.7 Secs | f/13 | ISO200
Looking east along the River Thames, the photo below captures St Katherine's docks with the towering buildings of Canary Wharf in the background. More shots of those later.

Fujifilm XT2 | XF18-55mm | 55mm | 0.6 Secs | f/13 | ISO200
Now on the other side of the river, this shot of the "Girl with a Dolphin" fountain in front of Tower Bridge is a pretty popular composition but I really like the timing here with the ambient light complimented by the artificial lights from the lamps and Tower Bridge. You can also see The Shard in the background.

Fujifilm XT2 | XF18-55mm | 18mm | 0.9 Secs | f/13 | ISO200
Moving further away from Tower Bridge, below is a photo of the sundial at St Katherine's Docks. Although I would prefer more interest in the sky, the good thing about a cloudless sky is you often get to see the subtle pastel pinks and reds above the horizon just before the sun rises. It is rather beautiful and adds a touch of simplicity to the image.

Fujifilm XT2 | XF18-55mm | 19mm | 1/8th Sec | f/13 | ISO200
At this point I wanted to try a composition I have already captured at sunset further east along St Katherines Docks but it turns out the gates to that stretch of the waterfront is closed at this time (so much for planning ahead, right?) so with the best light about to appear I had to think fast so I rushed back and captured the photo below with the warm glow from the sun lighting up Tower Bridge.

Fujifilm XT2 | XF18-55mm | 18mm | 1/17th Sec | f/11 | ISO200
My last photo of the morning was from the other side of Tower Bridge, capturing the shot below of the sunburst underneath the bridge.

Fujifilm XT2 | XF18-55mm | 18mm | 1/100th Sec | f/20 | ISO200
So, that was the morning shoot. As mentioned before, I continued throughout the day to capture a few time-lapse sequences but luckily with the shorter winter days, there's not a long time to wait before the light starts to improve again as the sun starts to lower before sunset.
I captured the photo below of the Royal Naval College in Greenwich from across the river. With the longer exposure, I smoothed out the river, removing any distractions and keeping this symmetrical scene as simple as possible.

Fujifilm XT2 | XF18-55mm | 36mm | 30 Secs | f/9 | ISO200
My last image of the day was taken from just in front of the Millennium Dome which provides fantastic views of the skyscrapers of Canary Wharf on the Isle of Dogs. With the colours evolving in the sky as the sun was setting and the long exposure blending the changing light, I really like the tones in this final image.

Fujifilm XT2 | XF18-55mm | 29mm | 345 Secs | f/9 | ISO200
I am still learning loads about time-lapse videos and have not created as many as I had hoped so far but below is the result of a day of capturing multiple smaller time-lapses and editing them all together to create the video below.

My Top 6 Photos of Venice
A few months ago I took a trip to Venice and while most of the trip I took handheld photos, I did have the opportunity to grab some sunrise long exposures and capture some of my favourite photos of this unique city.
A few months ago, I spent some time in the wonderful city of Venice and absolutely loved it.
I have visited quite a few cities such as Paris, New York, Valencia, Barcelona and of course London but Venice is like nothing I have experienced before. From the many canals breaking the city lots of smaller islands to the ornate very typically Venetian architecture this place has a unique atmosphere full of culture, art and history.
One thing any person visiting the island in the summer months will notice is the number of people. During my visit, it was packed full of tourists from about 9am as they all arrived in their droves from the many boats that bring them in. I can't complain though, as I was one of them but it was for this reason I decided to approach my photography a bit differently from my normal approach while in a city. For each day I was there I took just one camera and lens out with me as I knew I would be blocking pathways and just getting in other people's way if I tried using my tripod through the narrow streets and canal paths.
I am so glad I made this decision as I came home with a collection of images that I was really happy with and not in keeping with my usual style. I took so many photos during my visit and covered so much ground so I wrote a two-part blog post documenting my visit below.
As I have already covered my visit in detail within the above posts, I won't repeat myself here but if you are interested in finding out a little more about the images I took, grab a coffee and give the above posts a read.
So, all that being said, I am still a fine art, landscape photographer and I'm not happy unless I have the camera mounted on the tripod, methodically dialing in my camera settings and fitting my filters to capture a carefully composed image. I decided to venture out before sunrise one morning to capture the city as it sleeps. As an urban landscape photographer, whatever city you happen to be in, there is no better time to capture it than at sunrise. This is the time where you can have the place to yourself and capture the landscape in a way it is not normally experienced by most other people so below are my favourite shots from my early morning shoot in this magical city.
If there was one shot I just had to capture during my stay it was this composition below looking down the Grand Canal towards the Basilica di Santa Maria della Salute in the distance. The light wasn't as epic as I hoped but if I was going to capture a long exposure, this had to be it.
What I really like about this image is I had one chance to capture it while there was some light in the sky. The eight-minute exposure makes the water almost mirror like with a touch of etherealism and the resulting image is a clean crisp shot ensuring the sweeping curve of the water leads the eye to the main focus being the architecture and Basilica.

Fujifilm X-T10 | XF18-55mm | 18mm | 480 Secs | f/8 | ISO200
Now, I know the composition below is similar to the above but I had to include it in the post too. I really like the atmosphere in this shot. It suits the location and represents the feeling I had while I traveled around the city. You see, a photo does not have to be technically perfect for it to be a favorite. It just has to be an image that evokes a personal and emotional bond with the viewer. Well, this shot does that for me.

Fujifilm X-T10 | XF18-55mm | 37mm | 0.5 Secs | f/11 | ISO200
Here's a little lesson for any landscape photographer. Always look behind you! While still on the Accademia Bridge and as I had just taken the image above and I looked behind me and the view up the Grand Canal was beautifully lit with the sun lighting up the clouds with this fantastic magenta. I was not expecting to capture another composition from this bridge so I was really happy with that!

Fujifilm X-T10 | XF18-55mm | 18mm | 0.7 Secs | f/11 | ISO200
Although on its own, this is a nice shot of the entrance to St Mark's Square from the river with Doge's Palace to the right of the shot, what I like most about the image is the Lion of Venice standing to attention on top of the pillar appearing to welcome the sunrise as it just hits the top. I'm not sure if the statue is deliberately placed in that location and that height but I like to think that this was more about fortuitous timing and witnessing a moment not many will.

Fujifilm X-T10 | XF18-55mm | 34mm | 6 Secs | f/8 | ISO200
Next up is a photo of the Bridge of Sighs. Again, if you wanted to know more about this location, check part 2 of the blog via the links above. There are a lot of ornate, architectural details in the buildings in Venice and it should stand out and be prominent which is why I decided to take another long exposure to smooth out the water and any distractions. That coupled with the central composition and lines leading in from the edges of the image results in a more striking image of this beautiful bridge.

Fujifilm X-T10 | XF18-55mm | 24mm | 4 Secs | f/10 | ISO200
Last but not least is one of the more popular compositions of the Venice Gondolas. This one took a bit of work to get the composition right as the water level was high and spilling over to the walkway and the boats were moving up and down, left to right in the water but I got there in the end. I had to use the ND Grad filter for this shot to capture the motion of the boats with a longer exposure and I am really pleased how this turned out with the central composition and the prominent wooden poles adding contrast and texture to the image.

Fujifilm X-T10 | XF10-24mm | 17mm | 14 Secs | f/7.1 | ISO200

On Location taking Long Exposures at The Shard
A few weeks ago, I headed out to one of my favourite photography locations in London to capture a few shots of The Shard and City Hall at sunset. This has proved to be a location that has left me wanting time and time again. Can I get the shot this time?
A few weeks ago, during a cold winter's evening, I headed out to one of my favourite photography locations in London to capture a few shots of The Shard and City Hall with my newly acquired Fuji XT2 camera. I've never really been much of a kit guy. I like to have the right tools to use but I was a little excited to see how this new camera would perform.
I parked myself across the river from The Shard, in front of the Tower of London. I love this area, especially as it is a private path but they still allow tripods which isn't that common in the Big Smoke these days. As you can see in the map below, this spot is perfect as you get great compositions of the cityscape across the river and of Tower Bridge too.

So, although this is a popular place to shoot the London cityscape, it is one of the hardest to get right in my opinion. The best light would normally hit the buildings in the summer months as in the winter the sun drops down behind the buildings which is nice but with all of that glass on show, it really comes alive when the sun is setting off to the right of the scene casting the light across the image from right to left. On top of this, the light's dynamic range is through the roof making it really difficult to avoid creating a silhouette of the buildings. I didn't bracket these shots hoping that the camera will capture this dynamic range allowing me to pull the details from the shadows and rescue the sky. It did not disappoint.

Fujifilm XT2 | XF18-55mm | 18mm | 1/75th Sec | f/22 | ISO200
Although the light was good on this particular evening, the weather was not playing ball. Here in this image, you can see my Fuji XT2 camera poised to capture this iconic view and there are hardly any clouds in the sky.
Before heading out, I had checked the weather and all was looking good for the right amount of cloud cover and the direction of the wind was supposed to mean the clouds would be traveling away from me but alas, the cloud cover was lighter than expected and the wind direction wasn't quite right. If the clouds were moving towards or away from me, they would create great lead in lines and make fantastic compositional elements in the image.
Nevertheless, the golden rule with landscape photography is that you never know what might change and it's not over until it's over. As the sun dipped below the horizon, a few more clouds turned up and the sunlit those up nicely so on went the 10 stop ND filter and off I went capturing the shot below.

What I think works about the image below is that the long exposure has captured and elongated the clouds making them a little more prominent in the shot with the warm light emphasising them even further.

Fujifilm XT2 | XF18-55mm | 18mm | 43 Secs | f/10 | ISO200
To try to demonstrate how much better the clouds look when moving towards or away from you when taking long exposure images, I took changed direction and took the image below of Tower Bridge. Again, the cloud cover was not perfect, but you can still see how the direction the clouds are moving is important and how it can change the entire look of the image.

Fujifilm XT2 | XF18-55mm | 18mm | 60 Secs | f/10 | ISO200
My last shot in this particular spot was back looking across at the Shard as the last of the sun's warm light was in the sky. Again, cloud cover was lacking but with the light levels dropping I was able to take an even longer exposure of 120 seconds with some darker reds in the sky resulting in a totally different looking shot than before. This is another important lesson about photography and that is the light is everything and compositions that have been shot a thousand times before will take on their own unique look and feel as the light changes. No two images are ever the same.
If like me, you like a cleaner, more minimal shot of London, long exposures can really help simplify the scene. The boat traffic on this stretch of the Thames is particularly busy and this technique helps remove these distracting elements.
I covered this topic a bit more in my post titled Slowing Time: Why the Long Exposure?

Fujifilm XT2 | XF18-55mm | 18mm | 120 Secs | f/10 | ISO200
Heading back for the day (as the cold had got the better of me) I snapped this pleasing composition of Tower Bridge. I had seen an image like this before so by no means an original composition (if such a thing exists for London cityscape photography) but with the lights providing my lead-in line to the Tower Bridge itself, it came out pretty good.

Fujifilm XT2 | XF18-55mm | 55mm | 6.5 Secs | f/11 | ISO200
I think my first outing into London with the Fuji X-T2 was a successful one. It performed well and was, like others before great to use with all the tactile dials and knobs quickly accessible rather than having to hunt around the menu system to make changes during the shoot. I still think the composition of the Shard and City Hall has more to offer and I will no doubt be back again at some point to try to capture it again. But for now, I am really pleased with the images I came home with on this particular day in London.

My Favourite Images of 2017
It’s important to review your work regularly. In this article I review some of my favourite landscape and cityscape images I took in 2017.
Time seems to speed up every year and 2017 was no exception. It went so quickly. With busy schedules and so many distractions, I find I am always looking forward and spending less and less time looking back and reflecting.
I sometimes look back at older images but only briefly and rarely have time to contemplate them in context of my photographic journey and how my style, abilities and equipment has progressed and impacted my more recent work. From this point forward, I plan to review my images more regularly and below are some of my favourite images of 2017.

Fujifilm X-T10 | XF18-55mm | 18mm | 28 Secs | f/9 | ISO200
I have to start with a few of my favourite images of London. I like working with long exposures in London as visually, there is so much going on and removing some of this noise from the scene helps simply the landscape and provides a more pleasing composition.
Although classic views of London, I have applied my own style and individuality to these images and with London captured by so many people, this is in itself a challenging task to accomplish.

Fujifilm X-T10 | XF18-55mm | 23mm | 58 Secs | f/11 | ISO200
Read more about when I took the photo above: On Location from Tate Modern to Waterloo.

Fujifilm X-T10 | XF18-55mm | 21mm | 1/3rd Sec | f/10 | ISO400
The next three images are my favourite images from my local area. 2017 was an important year in this regard as I decided to properly explore other photographic subjects and focus my effort on finding and shooting local landscapes. I really like the simple composition and vibrant colours in the image below.

Fujifilm X-T10 | XF10-24mm | 15mm | 30 Secs | f/16 | ISO200
The next two images are especially important as not only are they two of my favourite landscape shots but they are close to where I grew up and where I used to hang out when I was young. Capturing a sunburst isn't particularly easy and I'm so pleased how the shot below turned out.

Fujifilm XT2 | XF18-55mm | 25mm | 1/20th Sec | f/14 | ISO200

Fujifilm XT2 | XF18-55mm | 23mm | 1/25th Sec | f/9 | ISO200
The next two shots were captured on a trip to Venice in July and I like them both a lot. The classic view of the Grand Canal and Basilica di Santa Maria della Salute is one I am particularly proud of as I wanted to capture an extra long exposure and the resulting shot was 8 minutes long and with the best light lasting only a few minutes, I only had enough time for one shot. Thankfully it worked out fine.

Fujifilm X-T10 | XF18-55mm | 37mm | 0.7 Secs | f/9 | ISO200

Fujifilm X-T10 | XF18-55mm | 18mm | 480 Secs | f/8 | ISO200
I plan to review my images more regularly so look out for future photo reviews.

How to take long exposure photos
How I take long exposure images. With my long exposure work getting a bit more attention, I am getting asked more often about how I take these images and what equipment I use. So I thought I would write this article to provide information about my tools and process while out in the field
With my long exposure work getting a bit more attention, I am getting asked more often about how I take these images and what equipment I use. So I thought I would write this article to provide information about my tools and process while out in the field.
I will start off by saying, I won't be covering the post-processing stage here. I recently wrote an article covering how I took a long exposure RAW image out of the camera to the final retouched photo which can be found here: Editing Sunset at the South Bank.
I will cover below what are, in my opinion, the three most important aspects to achieving successful long exposure photos which are the location/conditions, the equipment needed and technique but it should go without saying that practice and learning from your own experience is at least equal to and arguably more important than the information below. This post is just designed to provide someone enough information to get started with long exposure photography.
The right Location and Conditions
I explained in a previous post which can be found here that long exposure photography can be used as a compositional technique as the moving elements like clouds and water can create fantastic lead in lines or areas of interest.

Fujifilm X-T10 | XF18-55mm | 18mm | 90 Secs | f/16 | ISO200
So how does this relate to the location and conditions? The location is important as it can provide the moving elements for example, water along a river or by the coast. If the location does not lend itself to long exposures, the weather conditions, although less predictable can solve the problem by providing some moving clouds in the sky.
All of that being said, static subjects can be equally important and should not be forgotten, be it a bridge across a river or foreground interest in a landscape. Long exposure photography still requires a well-composed image.
Tip: Using websites or apps such as MeteoEarth or yr.no you can see what direction the wind and clouds are moving and the type of cloud cover. Armed with this information, you can pick your location specifically to ensure the clouds are moving towards or away from you rather than from side to side as this creates much stronger images when taking long exposures.
The Right Equipment
There are two areas that need particular focus when taking long exposure images. Firstly, the light. Long exposure images when there is still too much ambient light are only made possible by tricking the camera's light meter into thinking it is darker than it is so the camera opens the shutter for longer to let more light in. To achieve this, a neutral density filter can be placed in front of the lens to reduce the light hitting the sensor.
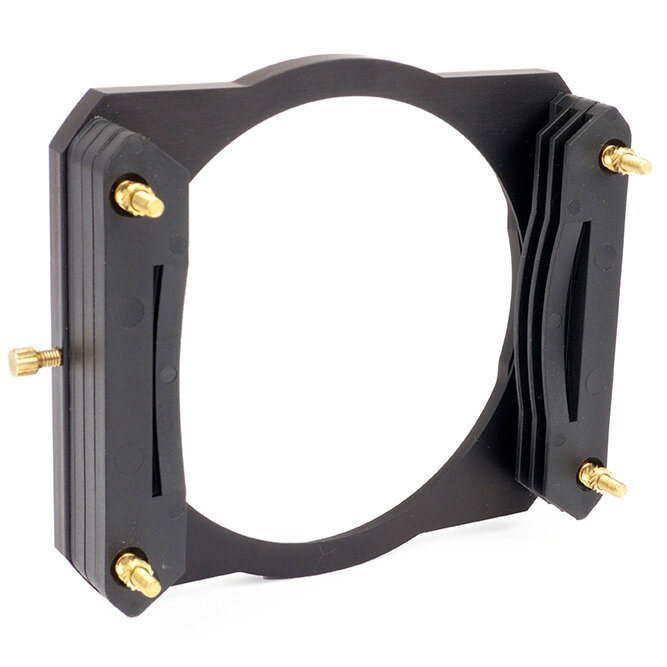
Currently, I am using the Formatt-Hitech 85mm filter system. More information can be found here. I use a filter system as it can be used with multiple lenses without the need to buy multiple filters. These systems are also ideal for using graduated filters when there is a need to balance a bright sky and a darker foreground.

The adapter ring shown here enables the filter holder above to be used with different lenses. All that is needed is the right adapter to fit the thread size on the lens. The size is measured in mm and can usually be found on the very front of the lens itself.

This is the neutral density (ND) filter itself to fit the holder above. I use a 10-stop filter that essentially reduces the light entering the lens and sensor by 10 stops. Here is an article to help understand what a "stop" is in relation to camera exposure.

Using one of the more professional kits in the industry, as shown above, can be expensive. If you are just starting out and want to dip your toe in the long exposure water then buying a screw in filter like this one is a great way to start as it can be a much more cost-effective option. Just be aware that you will need one of these for each of your lenses that have a different thread sizes.
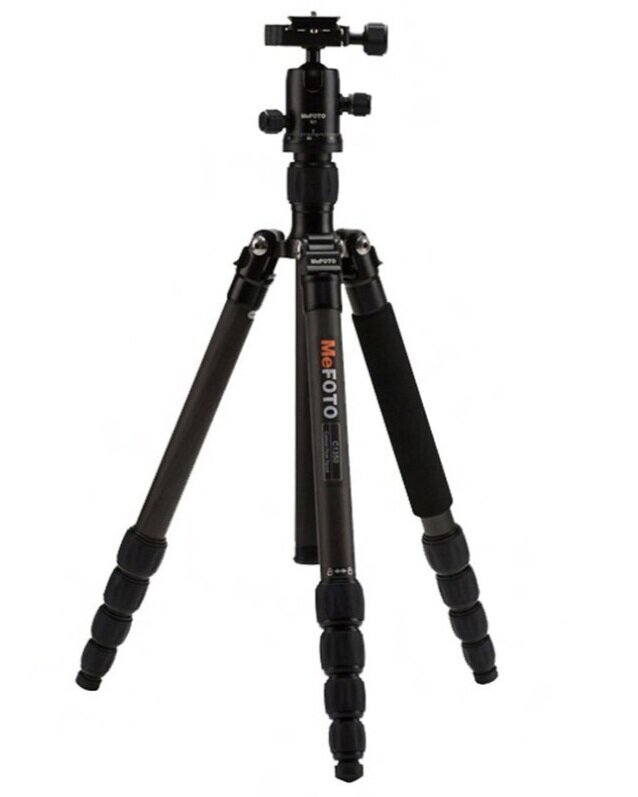
Next up, is the second area to cover which is camera stability. When the shutter is open, it is imperative that the camera stays absolutely still. This is where a sturdy tripod comes in. I use the MeFOTO tripod below as it is light but strong and collapses down quite small which is useful as I walk around London. This isn't a recommendation as such but if you are shopping around for a mid-range, capable tripod, the MeFOTO range is worth checking out.

A cable release, as shown below is usually required once you start taking images above 30 seconds and need to switch the camera to its bulb mode. Regardless of exposure time, by using a cable release you avoid physically touching the camera when the image is taken so to avoid camera shake. In addition, when taking a long exposure in bulb mode, the cable release can be locked in place which means not having to hold the button down and makes the entire process much more comfortable for the photographer.
Tip: If using a cable release, I still tend to use a 2 or 10-second timer as this forces the camera to have just a little time to settle and any vibration stopped by the time the picture is taken. This is particularly useful when using a longer focal length as any vibration is exaggerated when fully zoomed in.
The Right Technique
So, you have found your location and readied your equipment. Your filter holder is on and cable release attached, then what now? You have to actually take the shot so below I will walk through the process I generally use to capture the image and expose it correctly.

Compose: Mount the camera on the tripod, compose the image and set the focal length when using a zoom lens.
Set Aperture: Set the desired aperture. When in doubt, start with around f10 but it really should be set based on the depth of field you need and the amount of ambient light available.
Focus: Set the focus, be it auto-focus or manual, this is the right time to do it as when the filter is attached, there may not be enough contrast for the camera to focus later. Make sure when the focus is set, set it to manual to prevent the camera trying to focus again when taking the shot.
Turn off IS: Some cameras will auto-detect being on a tripod, others won't. Whatever method works, make sure image stabilisation is turned off as the system may cause the image to be soft or blurry.
Capture exposure time: Without any filters attached and with the exposure time set to auto, take a test image and if exposed correctly, make a note of the exposure time the camera used e.g. 1/10th second.
Fit Filter: Whether you have a filter system or screw in filter, now is the time to attach the filter to your lens. Be careful not to move anything on the lens especially if using a zoom.
Calculate Exposure time: Using a long exposure conversion tool or app, calculate the correct exposure needed for the filter you intend to use. I use an app called "LE Calculator". With this app you can see what exposure time you need based on the filter you have the and exposure time you were provided by the camera. The image shows based on the 1/10th second exposure and using a 10-stop filter, I need to have an exposure time of 1m 42s.
Bulb Mode: Next you need to set you camera to bulb mode so you can control how long the camera shutter is open for.
Set timer: As I mentioned earlier, this part is optional but I usually set a 2 or 10 second timer just to force a small break into the process to allow the lens to settle just in case there is a tiny vibration from when I was setting up the camera. The camera has to be totally still!
Take image: Now, using the cable release, take the exposure for the time provided by the calculator tool you have used. When the time is up you should have a correctly exposed long exposure image. If your camera does not provide an on screen timer, you might want to ready your phone to measure the time.
The process above may look daunting at first and quite involved but with a little practice, it will become easier and you should end up doing some of these without thinking.
Tip: If taking long exposure images during sunrise or sunset, the light levels can change very quickly so your required exposure time may change while you are taking the shot itself. Experience will help here but be prepared to add a few seconds to the exposure if the light levels suddenly reduce or remove a few seconds if the light quickly increases.

Fujifilm X-T10 | XF18-55mm | 21mm | 280 Secs | f/9 | ISO200
So that's about it. I think I have captured the important points and I hope it provides some useful information for someone starting up with the long exposure technique. If I have forgotten anything, feel free to leave a comment and I will update the post.

On Location Capturing Tower Bridge at Sunrise
Revisiting London Bridge to capture the sun rising behind Tower Bridge and HMS Belfast. Find out how I got on creating both a panoramic and a long expose of this view of London
A week or two back, I took an early morning stroll to London Bridge to capture the sun as it rose from behind HMS Belfast and Tower Bridge. It's a classic view of London and one I have tried to capture before (see pic below taken in 2016) and although it's a nice enough image, I wanted to revisit and try to capture an epic sunrise.
Fujifilm X-T10 | XF18-55mm | 28mm | 240 Secs | f/7.1 | ISO200
I checked the weather the night before and the Suncalc app and all looked good with a moderate amount of cloud for the sun to light up as it made its appearance that morning. As you can see from the image below, that much-needed cloud didn't materialise, so no epic sunrise again. One of the things you just have to accept as a landscape photographer is that with all the planning in the world, there are just no guarantees when it comes to the weather.
While the sun was still 15 or so minutes away from making its scheduled arrival I decided to take a panoramic using my 55-200mm lens. If you read my previous article (link below) you will see I have been taking a few panoramic images lately and the purchase of the 55-200mm lens has reinvigorated my interest in them. I explained in my previous post some of the advantages of using a longer lens for these panoramic images.
Previous article: A View of Everything in the Surrey Hills

Fujifilm X-T10 | XF55-200mm | 100mm | 3 Secs | f/6.4 | ISO200
With the sun now close to making its appearance, I wanted to catch a long exposure with a slightly tighter composition so I adorned my lens with a Formatt-Hitech 10 stop natural density filter and a soft graduated filter to take the edge off the sky a little and balance the expose and in went the cable release to avoid camera shake as I took the shot.
Still being aware that there was no cloud cover, I still thought I could capture a cleaner, more simple composition taking advantage of the way the longer exposure blends the changing light and softens the image, hopefully resulting in a more tranquil mood in the image telling the story of what London really feels like at this time of the morning when you are on your own on a bridge normally swarming with people. I wrote a bit about the long exposure and why I specifically use this technique in the article titled "Slowing Down Time: Why the Long Exposure" found here.
So, although the sky lacks drama, I still like the way the image turned out with the sun's orange glow providing a nice backdrop to this classic cityscape.


Fujifilm X-T10 | XF18-55mm | 50mm | 125 Secs | f/9 | ISO200
Finally, I snapped a shot just as the sun appeared over the horizon. I closed the aperture down to f22 just to try and emphasise the sunburst.
Fujifilm X-T10 | XF18-55mm | 48mm | 1/35th Sec | f/22 | ISO200
So, this is my second visit to this spot for capturing this view of London. The first had too much cloud and the second not enough. It looks like I will need to go back again to try and capture that perfect shot but as mentioned above the weather is hard to predict even with the tools we have available. Being a landscape or cityscape photographer means that good light is everything and if you are expecting to get the "portfolio shot" every time then you will be disappointed. In my opinion, chasing the image is part of the process and makes it all the better when I capture an epic shot. I will return for a third visit at some point so maybe on that occasion, it will be third time lucky, maybe not.
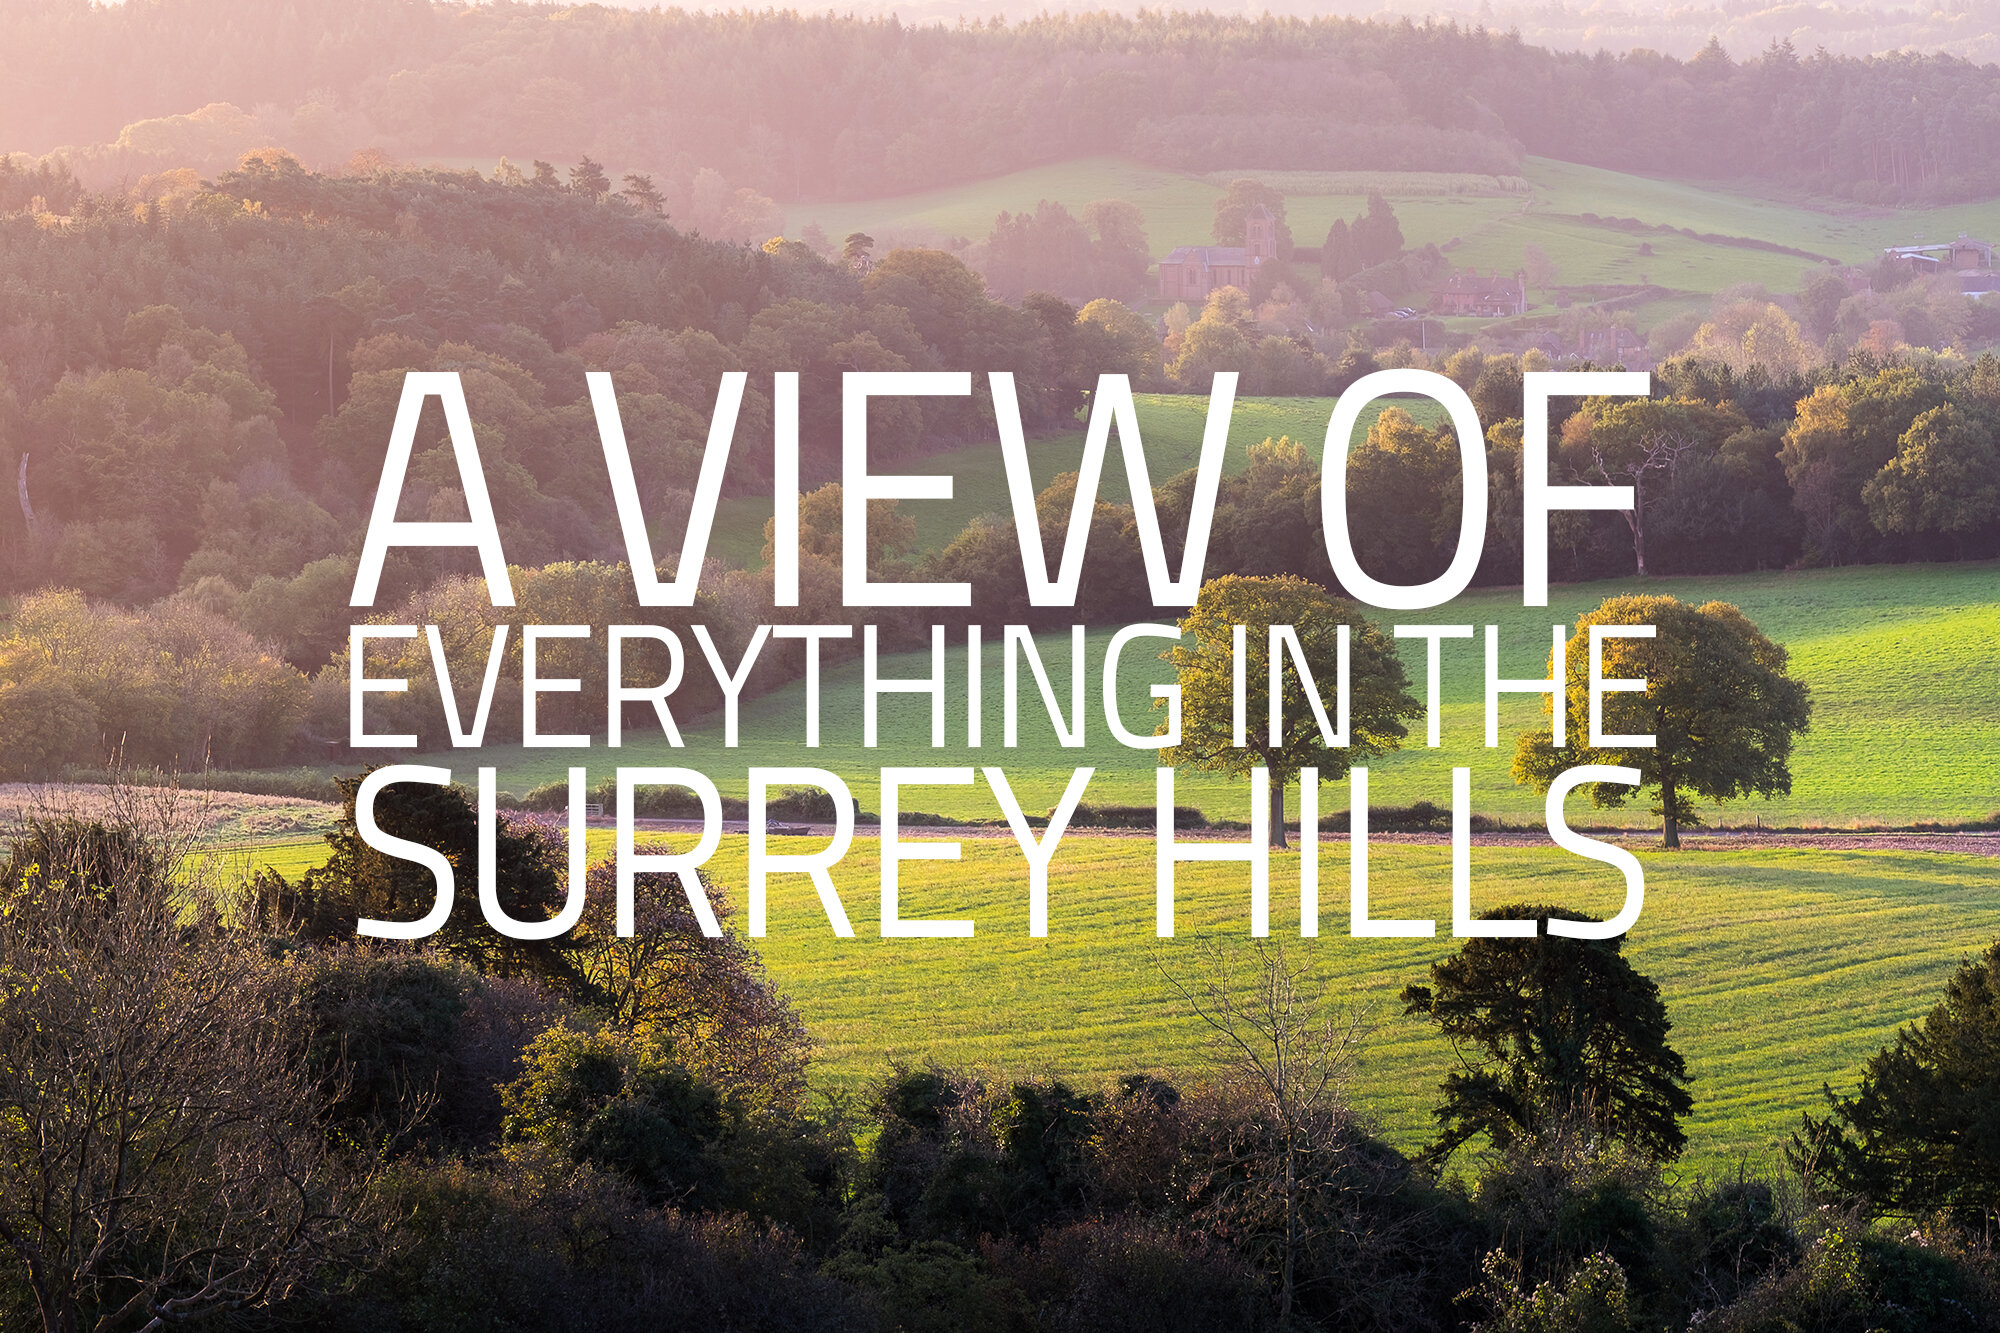
A View of Everything in the Surrey Hills
The Surrey Hills are beautiful and Newlands Corner has some stunning views. In this post I am in there taking panoramic images of this quite stunning location.
In the last few weeks, I have once again been out and about in my local area. This time I visited the quite beautiful Newlands Corner in the Surrey Hills which has spectacular views across the south of England. Normally, quite a busy place with hikers, dog walkers, families etc. I headed off at the crack of dawn to grab the best light of the day and at just after 7 am, when the sun rises at this time of year, I had the whole place to myself.
Even though Newlands Corner has these stunning views, it can still be difficult to translate these beautiful, imposing panoramic views into images that can be viewed on screen or printed that have the same breath-taking wonder felt when standing there, soaking up the stunning vistas. One of the best ways to do this is to create panoramic images made up of multiple, individual shots.
Now, I could have just rocked up with my Fuji X-T10 camera and 10-24mm wide angle lens and captured the entire scene in one shot., packed up and headed for breakfast. On top of this, there would have been far less post-processing involved so all round a significant time saver. There is nothing wrong with using a wide angle for capturing landscapes, I use mine, all of the time, especially when capturing some close-up foreground interest in the frame but one thing wide angles do is make distant subjects very small which actually prevents them from adding anything to the picture's composition, almost ceasing to exist in the shot.
I wanted the 2 trees in the middle of the closest field to be present in the image and not thrown into insignificance somewhere in the background and the only way to do this was to use a longer focal length but then I would be zoomed in too close and not capture much of the rest of the scene. This is when creating a panoramic comes in.
Panorama is a combination of two Greek words, "pan" and "horama" which literally means "a view of everything".
With the camera affixed to the tripod and in portrait mode, I proceeded to pan the camera from right to left, taking 8 or 9 images each time, allowing around 30% overlap to make sure I would have no issues stitching them all together in Adobe Lightroom. It is probably worth noting here that you need a bit of grunt in your computer when stitching so many images as the resulting file sizes are huge and it would be a slow process on older hardware.
The first two images below were taken with the 18-55mm lens at 55mm and 52mm respectively. I wanted to capture some of the subtle, pastel-like colours in the sky created by the sun as it was just appearing on the horizon off to the left of the shot.

Fujifilm X-T10 | XF18-55mm | 55mm | 1/6th Sec | f/10 | ISO200
Another advantage of creating these panoramic stitcher photos is that the resulting image sizes are pretty huge. All of the examples in this post are between 49 and 55 megapixels and that's after some cropping in post-production. What that actually means, in reality, is that I can make 1 meter wide prints at 300dpi without any kind of enlarging techniques used. Hanging on the wall, a print at that size with that much detail is quite something.

Fujifilm X-T10 | XF18-55mm | 52mm | 1/8th Sec | f/22 | ISO200
For the last image below, I used the 55-200mm lens at a focal length of 100mm so I could emphasise the trees further in the composition. The sun was a little higher now and the warm light was casting a glow across the scene creating a nice atmosphere in the resulting image.
One more benefit of using a longer focal length that should not be overlooked which works well with a shot like this is the compression effect you can see as the different layers in the shot (in this case the hills) are pulled forward creating a real feeling of both depth and intimacy. You won't get this kind of look with a wide-angle lens.

Fujifilm X-T10 | XF55-200mm | 100mm | 1/25th Secs | f/8 | ISO200
Being a landscape photographer is in part about trying and adopting different techniques and using these to capture the shot you intended and visualised while out on location. Panoramic images are nothing new and I have used them for my shots of London as you can see here but it is still and will continue to be a valuable tool in the arsenal of any landscape photographer.

On Location Photographing Venice | Part Two
This travel photography article is part two of my visit to Venice in July 2017 with my Fujifilm X Series camera. Jump into the article to see some more photos, settings, stories and history from this trip.
This is part two of my travel blog covering my trip to Venice. If you haven't yet seen part one, you can find it here: Photographing Venice - Part One.
Part one of this blog finished with some shots taken from the Accademia Bridge as the sun was beginning to rise. This was my one and only early morning shoot so I wanted to make the most of it. There is no other time you can get the city (almost) all to yourself with the best light of the day.
Saint Mark's Basilica
At Piazza San Marco (St Mark's Square) once again, with the 18-55mm lens attached, I wanted to capture Saint Mark's Basilica. The most famous of Venice's churches. The building has taken various forms since its inception in the 9th century. It was burnt down and restored in the 10th century and has undergone various developments since then. One thing is for sure, with its highly decorative facade, it is quite something to behold.
Capturing Saint Mark's Basilica can be quite tricky when trying to nail the composition. Being quite low to the ground to get the spires in the shot and having to be as wide as possible meant that there was a lot of distortion (keystone effect) where the usually straight vertical lines would converge nearer the top of the image. I managed to correct this in post but in hindsight I should have left just a bit more headroom in the shot to allow for this correction by moving slightly further back. Link to Google Map of the location this image was shot from.

Fujifilm X-T10 | XF18-55mm | 18mm | 6.5 Secs | f/8 | ISO200
Bacino San Marco
Just to the right of Sant Mark's Basilica, the square opens up with great views across the Bacino San Marco. In this scene, I particularly liked the ornate lamps and Doge's Palace architecture coupled with the way the rising sun is just catching the Lion of Venice on top of the column. I think the palace on the left and column on the right balances the composition nicely.
I used a 10 stop ND filter mounted on the lens for this shot as a few people were starting to wander around the square and with them not adding anything to the image I took a longer exposure which helps blur the figures out of the image as they move.

Fujifilm X-T10 | XF18-55mm | 35mm | 6 Secs | f/8 | ISO200
Riva degli Schiavoni
This image below is taken just in front of the Doge's Palace, just a few yards from the image above. I tried to isolate the lamp as the main subject with the Venetian architecture in the background.
You have to see to believe the difference a few hours make between the shot below and when the tourists start rolling into the city. This area along the waterfront, called Riva degli Schiavoni is absolutely packed during the day. Seeing it like this almost feels like a privilege as not many people will see this unobstructed, peaceful view of the city.

Fujifilm X-T10 | XF18-55mm | 25mm | 6.5 Secs | f/10 | ISO200
Revisiting the Bridge of Sighs
Heading towards my hotel and ready for breakfast, I decided to capture the Bridge of Sighs again but this time as a long exposure. With so much architectural detail on the scene which I couldn't and wouldn't want to change, I used the 10-stop filter again which gave me a 4-second exposure, allowing me to smooth out the water, softening the image a little and emphasise the bridge. The composition was also helped by the converging lines leading the viewer's eye into the image to the bridge itself. Link to Google Map of the location this image was shot from.

Fujifilm X-T10 | XF18-55mm | 25mm | 4 Secs | f/10 | ISO200
The famous moored gondolas
I couldn't visit Venice without capturing a couple of images of the famous moored gondolas. Once again, I used the 10 stop natural density filter to slow down the shutter speed to 1.9 seconds which allowed me to capture the movement of the boats bobbing up and down on the water. If there's any view that is instantly recognisable as Venetian, then I think this is it.

Fujifilm X-T10 | XF18-55mm | 18mm | 1.9 Secs | f/10 | ISO200
For the image below I got close up to the gondolas to really capture their movement with a more central composition so I attached the wide-angle XF10-24mm lens and parked my camera on the tripod right on the water's edge. I particularly liked the contrast between the softer moving boats and the pin-sharp wooden poles as it balanced the image really well.

Fujifilm X-T10 | XF10-24mm | 17mm | 14 Secs | f/7.1 | ISO200
Riding the gondolas
Getting on to the end of my last full day in the city, it was time to take a ride on the famous gondolas. The gondola rides in Venice are a must for anyone visiting the city. Not cheap (100EUR for 30 mins) but if you can, you most certainly should. I was lucky enough to have a really good gondolier who spoke of the historic locations as we travelled through the canals. It was almost like having my own tour guide.
The image below was taken as we followed another gondola out onto the Grand Canal providing a great view of the Rialto Bridge which dates back to 1591.

Fujifilm X-T10 | XF18-55mm | 33mm | 1/320th Sec | f/9 | ISO200
The gondolas are covered in ornate decorations which creates the character and charm of these beautiful boats. The shallower depth of field provided by a wider aperture (f4) used here emphasises these details nicely.
The second shot, albeit wider taken from aboard the gondola. This trip took place around 19:30 and without a doubt, this is the best time of day to take the ride during the summer months in my opinion. During the day, the canals can be like the equivalent of the roads around London during rush hour. There can be gondolas 2 or 3 abreast sailing around the canals. It really is that busy. As the sun goes down and the evening draws in, the canals really quieten down and the ride I took was so peaceful and relaxing.

Fujifilm X-T10 | XF18-55mm | 55mm | 1/80th Sec | f/4 | ISO200

Fujifilm X-T10 | XF18-55mm | 18mm | 1/150th Sec | f/2.8 | ISO200
As I wandered back to the hotel, I passed the Chiesa di (church) San Giorgio dei Greci once more. I spoke about this fascinating church with its lop sided tower in part one of this blog. I was drawn to the way the light hits the side of the tower and the way it seems to be leaning towards the sun's warm evening light, longing for it not to go.

Fujifilm X-T10 | XF18-55mm | 55mm | 1/300th Sec | f/5.6 | ISO200
Back at the hotel, another bank of cloud rolled in from the mountains but before it completely engulfed the sky, I managed to capture a few pictures of the Basilica di Santa Maria della Salute just after the sun had gone down. There was a nice pink glow from beyond the horizon providing great light for the shot so out came the 55-200 lens again.

Fujifilm X-T10 | XF55-200mm | 82mm | 1/300th Sec | f/3.8 | ISO400
Another shot of the basilica just a few minutes later than the one above with the last remains of the sun's pinky-red light and the city lights now turned on.

Fujifilm X-T10 | XF55-200mm | 61mm | 7.5 Secs | f/8 | ISO200
So, my last day in Venice started with a walk across the Grand Canal, over the Rialto Bridge, providing fantastic views of this incredibly busy water way. During the day, there are gondolas, delivery boats, water taxis, trade boats and water buses sailing up and down, avoiding each other along the canal. I decided to continue with the longer 200mm lens and take it out for the day as I walked about to take some tighter shots and isolate the subjects a little.

Fujifilm X-T10 | XF55-200mm | 58mm | 1/1500th Sec | f/5.6 | ISO200
Exploring the streets and canals of Venice
Walking around the narrow maze-like streets south of the Grand Canal, the different intricate features along this street is what caught my attention, from the ornate lamps on the side of the buildings to the window shutters. The 200mm focal length gives a nice feeling of depth to the scene.

Fujifilm X-T10 | XF55-200mm | 200mm | 1/210th Sec | f/6.4 | ISO200
Heading back across the Grand Canal, once again I crossed the Accademia Bridge. Having already captured the traditional views from the bridge, I used the longer lens to capture the below shot of the gondola floating towards me. I really like the way the gondola appears to be all alone in the water when in fact I just got a bit lucky with the timing and the river traffic just quietened down enough as I took the image. Luck certainly plays its part in the photography process.

Fujifilm X-T10 | XF55-200mm | 200mm | 1/750th Sec | f/5.6 | ISO200
Continuing the gondola theme, the next few images were taken around the canals as I wandered around in my last few hours before heading to the airport. The reason I like the image, in particular, is the pleasing composition created by the canal leading the eye deep into the image and the way both the canal and the gondola are nicely framed by the buildings either side.

Fujifilm X-T10 | XF55-200mm | 55mm | 1/100th Sec | f/10 | ISO200
I like the shot of the gondola below as it shows off the traditional Venetian boat as the main subject without a cover on or full of tourists having a ride. As mentioned before the longer lens allowed for this isolation and cut out a lot of other distracting elements that would be in the shot if a wider lens was used. The scene looks typically Venetian and with subtle touches like the mooring poles along the edge of the water, it really does complete the scene.

Fujifilm X-T10 | XF55-200mm | 55mm | 1/80th Sec | f/16 | ISO200
As I headed back to the hotel to collect my bags before heading to the airport, I spotted this gondolier just chilling on a bridge. With the chap dressed for the part and the composition having a nice symmetry to it I zoomed right in and snapped away. I did have to crop the image a bit as he was standing right underneath a Greek national flag which looked obviously out of place.

Fujifilm X-T10 | XF55-200mm | 200mm | 1/140th Sec | f/16 | ISO200
For the final few of images, we have come full circle and back to the location of the very first image in the first blog (Part 1). Right above me is the Bridge of Sighs and on the edge of the canal is a small ledge where you can relax and watch the gondolas float past as they start another circuit around the winding canals. I mentioned earlier in the blog that during the day the gondolas can be really busy and you can see that in the shot below.
I do like the composition in this image as the busy canal is nicely framed and leads into the shot to the bridge in the distance. The light in the far background is also pleasing as it adds depth to the image.

Fujifilm X-T10 | XF55-200mm | 105mm | 1/50th Sec | f/16 | ISO800
The final image below captures 3 gondolas in a row as the canal quietens down a little. I composed the shot in a way that shows a lot of depth in the scene and the gondolas on the canal are again nicely framed to the left and up top by the Bridge of Sighs. I was really happy with this shot when I took it and even happier with it after a bit of post-processing.
I tried to keep the post processing as consistent as possible as it is important to me that the images throughout this story of my trip look like they belong together. Individually I think the images are nice, not amazing but together they tell a story of the city and how it looked and felt to me. Whenever I look at the photos or re-read this blog it will take me back there over and over again.

Fujifilm X-T10 | XF55-200mm | 55mm | 1/60th Sec | f/14 | ISO200
I am really happy I took my Fuji X-T10 with me and even more glad that the times I was out and about, I used just the one lens for a period of time. It made me work with what I had and find the images in the scene that worked with the focal length I was using. Yes, I probably missed a few images but not having to fiddle with the camera, changing lenses throughout the trip allowed me to look around the city, spot a shot, capture the image and move on, resulting in images I might not have taken, or even seen for that matter.
I'm not a travel photographer. I have a day job but of all the places I have visited, I will be going back to Venice one day. It's the kind of city you need many visits to before you can feel you have exploited the place photographically. I just hope I don't have to wait too long before I go back!
Thanks for taking the time to get to the end of this journey as it was certainly a long read and feel free to leave a comment and ask any questions I may not have covered in either part of this blog post.

On Location Photographing Venice | Part One
In July 2017, I spent a few nights in Venice and wow, what a city! It really is something else. This travel blog is part one of two, covering my visit and the photos I took with a little bit of history thrown in
In July, I spent a few nights in Venice and wow, what a city. It really is something else. The architecture, the history, the romance. I had a great time wandering around the city capturing the views on my camera (Fuji X-T10), so in this two-part blog post, I'm going to share some of the pictures I took accompanied by some information about the location and maybe a bit of history thrown in for good measure.
Traveling from Venice from the UK was so quick. It took just 1h 45m. Once landed, I took a boat from the airport to the city, dumped my bags at the hotel (more on the hotel later) and went to explore this beautiful city.
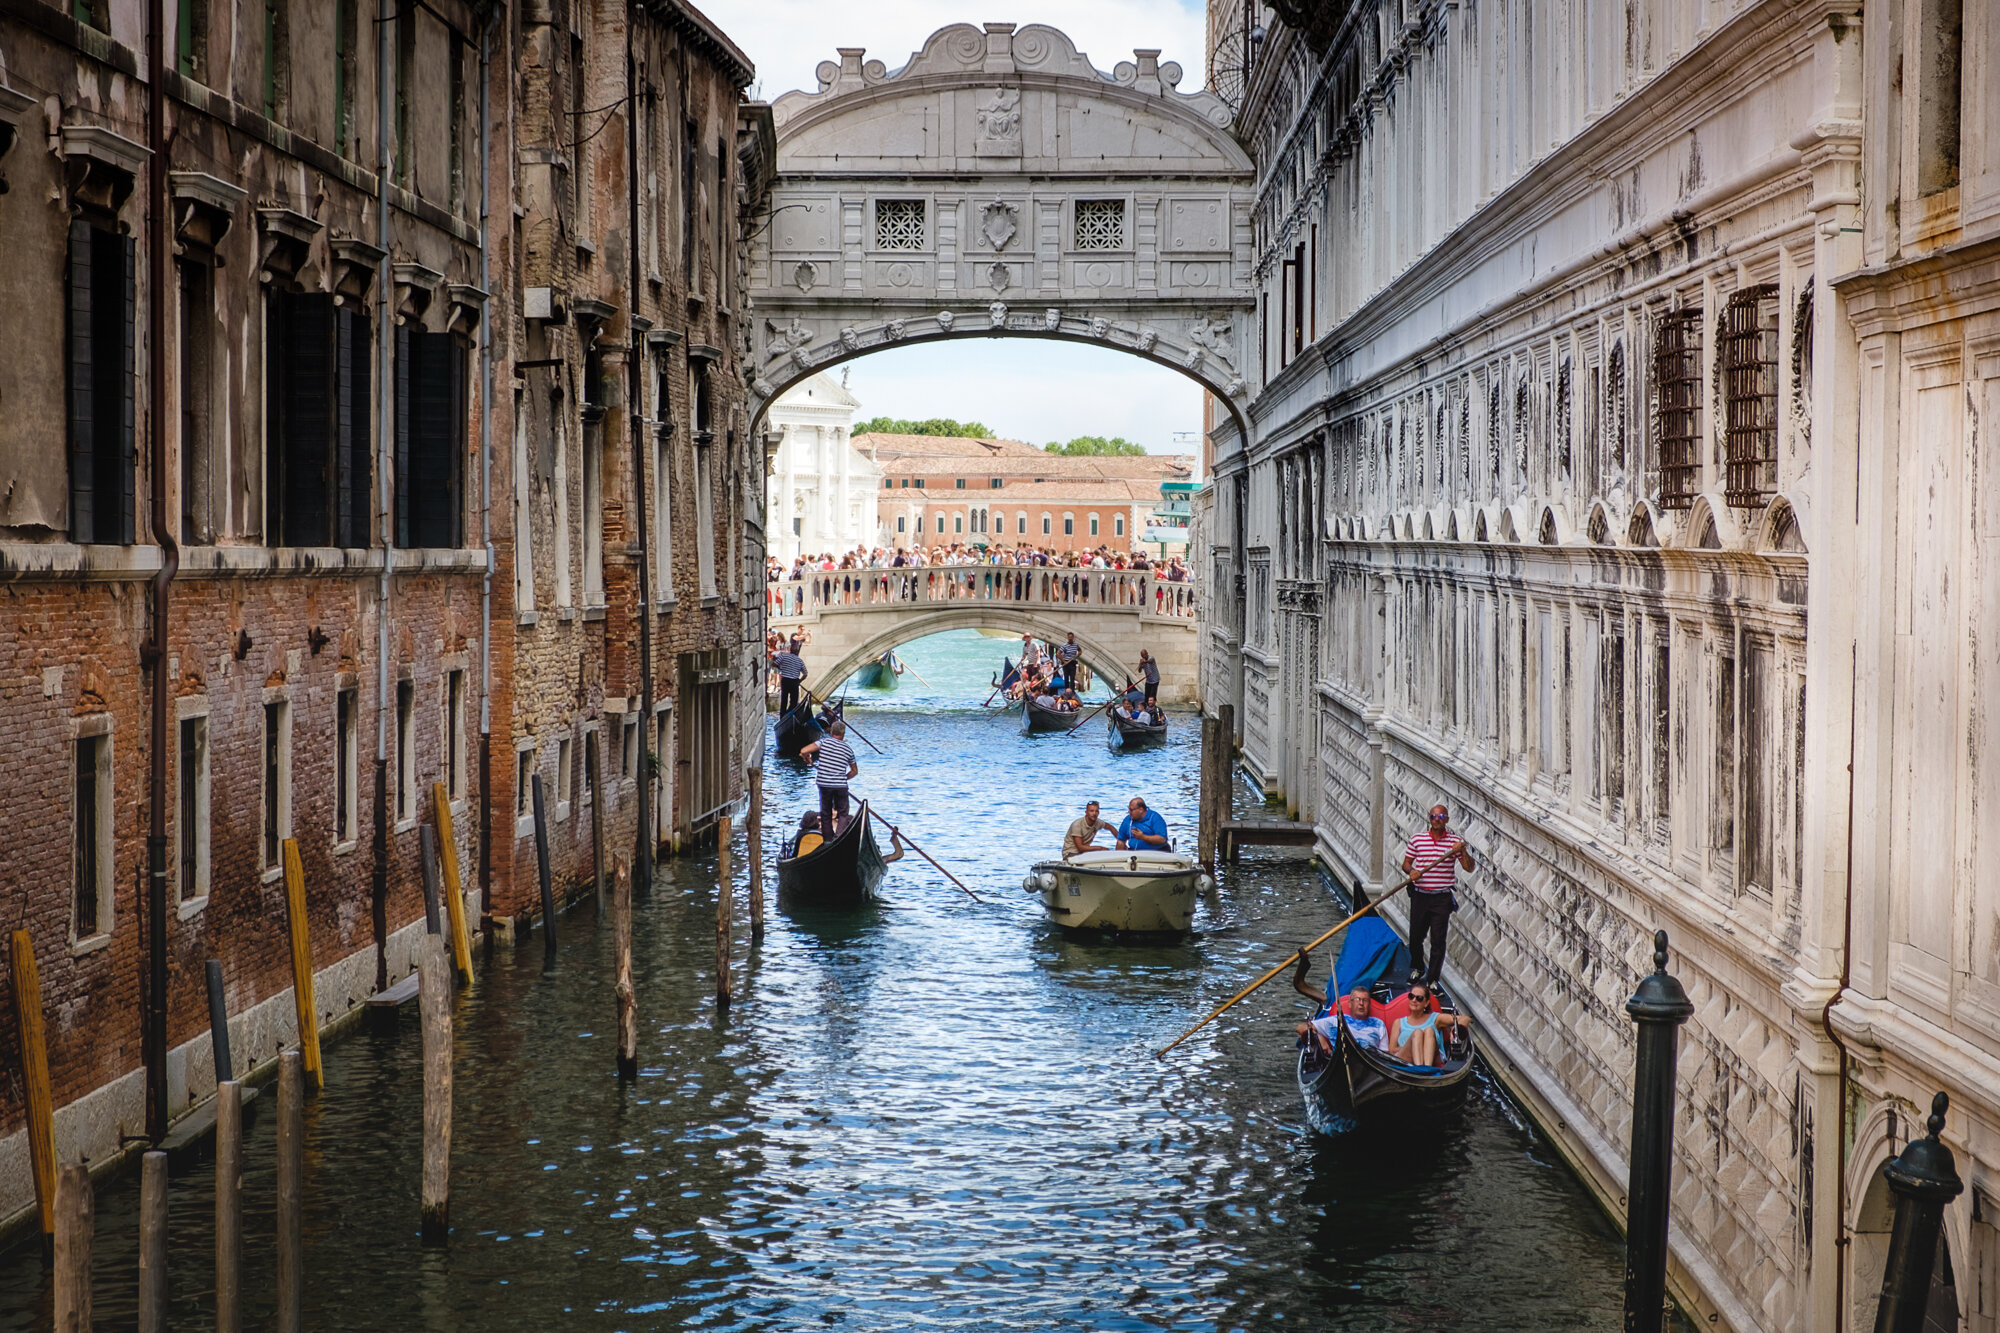
Bridge of Sighs
The first image below is a slightly different view of the Bridge of Sighs. This is a really popular bridge in Venice and as you can see below, the bridge in the distance is packed with tourists trying to grab a view of the beautifully sculptured walkway.
This ornate, limestone walkway was a solution to a problem way back, when authorities needed to transport prisoners from Doge's Palace to the new prisons across the Palazzo river. Thought to be named because of the sighs that could be heard from the prisoners, the bridge, or more specifically the holes in the side would have provided prisoners a last glimpse of the outside world before heading to their cells.
The image below was taken from Memoria Ponte. Link on Google Maps. Although still busy, it is a much quieter location than the one opposite.
One thing to note is that although I took multiple lenses to Venice. I would tend to only go out with the lens attached to the camera. Having the restriction of one lens is actually quite liberating. There is less to carry and it removes the fuss around changing the lens or not being sure which lens to use for each shot. I see the shot, pick the best composition, move if I have to (or can) and snap away. The first three images below are taken with the XF18-55mm.
Fujifilm X-T10 | XF18-55mm | 55mm | 1/420th Sec | f/6.4 | ISO200
I would be lying if I said I could remember where the next shot was taken. It was just one of the hundreds of bridges over the miles of canal somewhere in Venice. All I do know is that based on the time stamps on the images, it is only 7 minutes walk from the next image below. It was the red and black mooring poles here that caught my attention. They were quite striking and a typically Venetian.
Fujifilm X-T10 | XF18-55mm | 55mm | 1/120th Sec | f/5.6 | ISO200
One of the more surprising observations I had when wandering around Venice is that there are very little in the way of paths running along the canals, particularly the Grand Canal. It was something I didn't really consider before which does actually seems obvious to me now. This means getting pictures of buildings along the Grand Canal is more difficult than you might imagine. You will tend to cross the canals rather than walk along them in this city.
Basilica di Santa Maria della Salute
The next few images focus on the Basilica di Santa Maria della Salute. I took the image below from a jetty along the Grand Canal, just opposite (Link to Google Maps).I think it is such a beautiful and recognisable structure along the canal. Maybe it's because the dome has a little St Paul's Cathedral about it which as you may know, pushes the right "London" buttons for me. Officially a minor Basilica, this structure is one of the largest churches in Venice.
The church was built on the back of a promise the locals made to the Virgin Maria in exchange for salvation from the Plague and when the plague was finally defeated in 1631, the church was erected.

Fujifilm X-T10 | XF18-55mm | 28mm | 1/350th Sec | f/13 | ISO200
The hotel I stayed in was fantastic. It was right where you would want to be while staying in Venice, a few minutes from the Piazza San Marco with riverside views of the San Marco Basin and the mouth of the Grand Canal. The hotel we stayed in is called the Hotel Locanda Vivaldi. I booked the hotel because the location was great and it had a traditional Venetian look and feel and during my visit I really wanted to soak up as much of Venice as I could and this hotel really delivered.
The shot below was actually taken from my hotel room window. I purposely booked a superior room as they all have waterfront views and as you can see, it did not leave us wanting.

Fujifilm X-T10 | XF55-200mm | 128mm | 1/850th Sec | f/5.6 | ISO200
For the shot above and the two below, I used my XF55-200mm lens. I've not had this lens too long and yet to see its full potential.
On the image below you will see the start of what turned out to be quite an epic storm coming in from the mountains to the north of the city. It turns out this is quite a regular occurrence in the late afternoon during the summer months. Thankfully it only happened the once during our visit and only lasted an hour or so but when it hit, it was epic.

Fujifilm X-T10 | XF55-200mm | 55mm | 1/200th Sec | f/5.6 | ISO200
To give the lens a run for its money I grabbed a close up of the church's domes from across the San Marco Basin. I loved the way the storm clouds gave the dome a moody backdrop and even at 200mm, the image was nice and sharp and no tripod in sight. The storm clouds really help the statue at the top of the bell tower stand out and I really like how the windows reflected the warm, yellow evening light too.

Fujifilm X-T10 | XF55-200mm | 200mm | 1/75th Sec | f/5.6 | ISO200
San Giorgio dei Greci
Traditionally Venetian on the outside and Greek Orthodox on the inside, the leaning tower of Chiesa di (church) San Giorgio dei Greci in the picture below is one of the tallest bell towers in Venice. Located beside the canal running alongside my hotel, I took this picture of the tower with the 35mm F2 lens attached. There is no distortion in this image despite how it appears, the tower actually does have an obvious lean which, so I read, started pretty much as soon as the tower was completed.

Fujifilm X-T10 | XF35mm F2 | 35mm | 1/120th Sec | f/4 | ISO200
Piazza San Marco
At the end of my first day in Venice, I ended up in the Piazza San Marco (St Mark's Square). When wandering around the city, this square seems to have some kind of strange magnetic force as no matter how far I walked and how lost I got throughout my stay, I always seemed to end up at St Mark's Square.
The ambience of the square late at night is very different than during the day. In the day there are literally thousands of people around the square trying to capture the views around the square or standing in a very long line waiting to get into the St Mark's Basilica. At night, it is surprising how fast the square quietened down. With a lot fewer people, the bands playing romantic music around the square, it was a nice time to walk around and soak in the romance of the city.
Still, with the 35mm attached, I thought that the architecture in the background creating deep shadows and the sculpture of the traditional, ornate lamp post casting the light across the ground captured the feeling of this location beautifully. The detail rendered by this great lens made it a great choice for the job too. Link to Google Map of the location this image was shot from.

Fujifilm X-T10 | XF35mm F2 | 35mm | 1/25th Sec | f/2 | ISO1600
Accademia Bridge
I continued with the X-T10/35mm F2, camera/lens combo the next day as I ventured to one of the famous bridges across the Grand Canal, the Accademia Bridge (Ponte dell'Accademia). Most famous for two reasons. The first is obvious and that's the classic composition it provides of the city. Arguably the most recognisable view in Venice. Secondly, the bridge's history. The bridge was supposed to be temporary and was built after the previous iron structure was removed in 1932. The bridge was actually replaced in 1986 with a bridge made from the same plans as the original.

Fujifilm X-T10 | XF35mm F2 | 35mm | 1/16000th Sec | f/2 | ISO200
So after crossing the bridge, I had a wander around to the Basilica di Santa Maria della Salute and on the way back, found a cute little area with a bridge across a small canal right next to a cafe that served the best ice cream in the city and trust me, we tried a few.
Time for ice cream
The cafe was called Luganegher (google street view link) and with the temperature up near the 30s, it went down a treat!
Back at the Bridge of Sighs, I found a great little spot to have rest and dip my feet in the water while watching the gondolas float past. I since found out that putting your feet in the water is probably a bad idea as the city does not have a sewer so you can imagine where it all goes ;-) but with the temperature as it was it felt so good at the time.

I grabbed the shot below of the gondolas starting their circuits around the canals with a new batch of paying customers. In this picture, the river leads the viewer nicely into the shot and the canal is also nicely framed by the bridge above.

Fujifilm X-T10 | XF35mm F2 | 35mm | 1/200th Sec | f/10 | ISO200
I mentioned earlier in the post about the hotel I was staying at but one thing I left out was its roof terrace. A cute little area to have some food and drink with some great views of Venice. It also provides a nice view straight down the adjacent canal so I grabbed my 55-200mm lens again and zoomed in down the canal which gave a lens compression effect which works quite well for this shot.

Fujifilm X-T10 | XF55-200mm | 135mm | 1/125th Sec | f/9 | ISO200
The Grand Canal
I decided to venture out into the city just before sunrise. I often do this in London to capture the sunrise and there is no better time to experience any city in the world. While everyone else is asleep, the calm and tranquillity a city has to offer without the hustle and bustle is quite something to experience and I recommend to photographers and non-photographers alike to experience this when visiting a new city.
Using the 18-55m lens again, I started off capturing the view I've always wanted to get in Venice namely the Grand Canal and the Basilica. I had already checked the sunrise location out on suncalc.net so I knew that all being well with the weather, the sun would rise in the general direction I was shooting. The sky was pretty clear on this particular morning but not wanting a too cluttered composition, I was fine with this.

Fujifilm X-T10 | XF18-55mm | 18mm | 0.6 Secs | f/10 | ISO200
During the day, the Grand Canal is full of water taxis, gondolas and all manner of boats so experiencing this view without all of that was a bit special. I'm pretty sure this morning's photoshoot was the one and only time I used a tripod during my stay in Venice and with the camera firmly mounted, I captured another composition of this classic view below. Link to Google Maps of this location.

Fujifilm X-T10 | XF18-55mm | 37mm | 0.5 Secs | f/11 | ISO200
While on the Accademia Bridge, I checked the view facing up the canal and I spotted the scene below with the morning sun lighting up the few clouds drifting past and I could not let that escape without capturing it. I love the way the different shapes and sizes of the buildings that line the canal provide the character of the city. I am sure each and every one will have a story to tell especially as some date back around 1000 years.
Fujifilm X-T10 | XF18-55mm | 37mm | 0.6 Secs | f/11 | ISO200
That's it for part one of my trip to Venice. click on the link below to see the next instalment.
Photographing Venice - Part Two
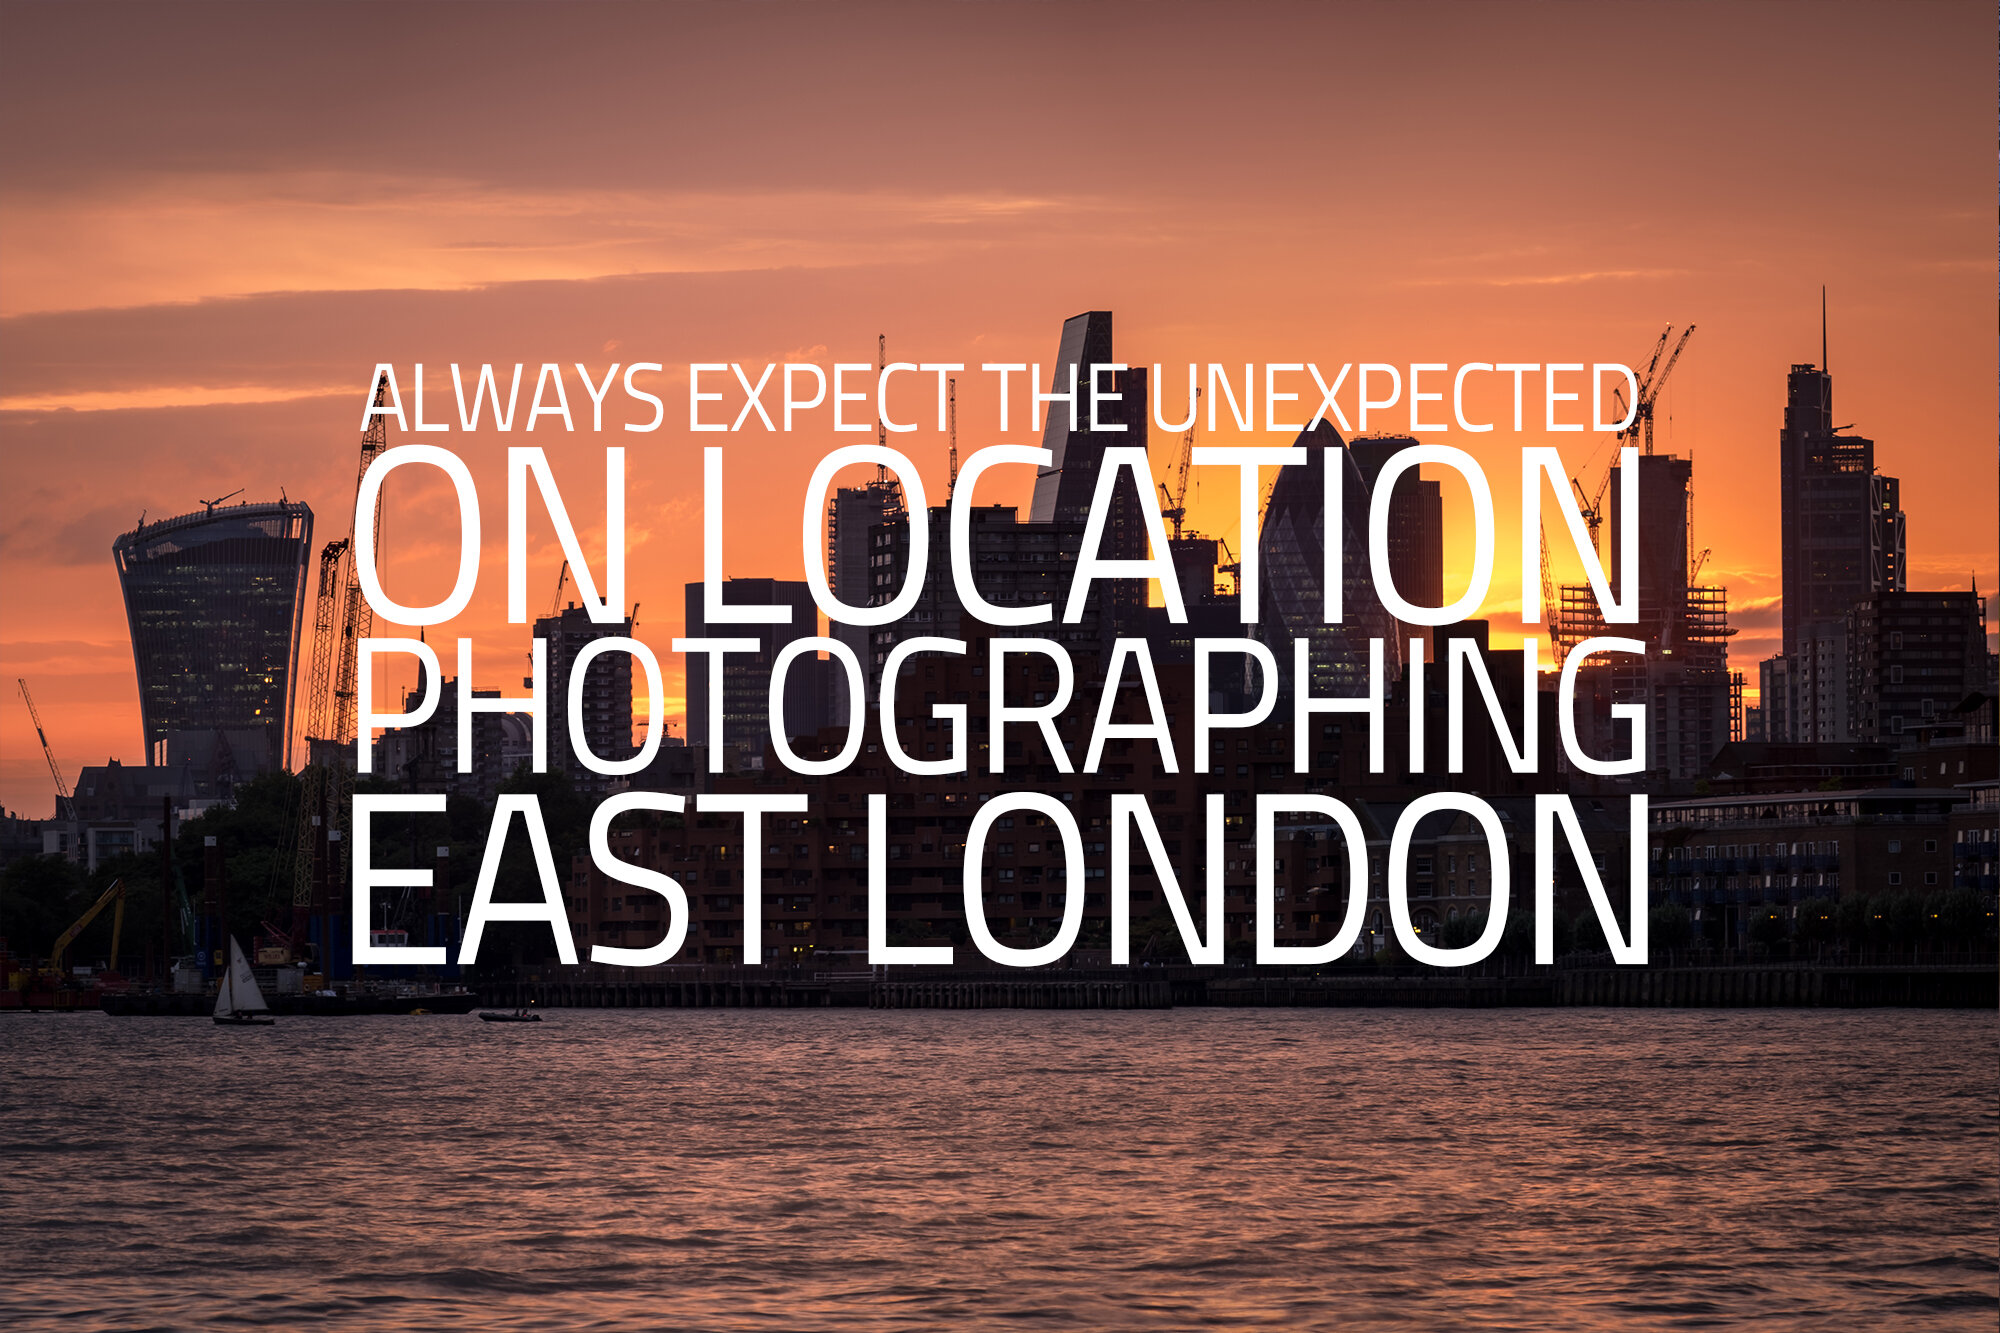
Always Expect the Unexpected: On Location Photographing East London
I ventured out to photograph the City of London with my new Fujifilm XF55-200 lens on a dull, dreary day. I did not expect to see any light. Boy was I mistaken. I certainly learned the lesson to always expect the unexpected
I had a couple of hours to kill a few evenings ago so I decided to have a wander around the Isle of Dogs in East London, home to Canary Wharf, one of the two major financial districts of London. See my previous blog to read about a previous outing which ended with some cool pictures of Canary Wharf from the Blackwall Basin.
I wanted to try out my recent purchase of the XF55-200mm Fuji lens. It has been a long time since I had a longer lens and I brought it for a couple of reasons. First is I plan to try more isolated or even abstract shots of London. I also wanted to try some more distance shooting, taking advantage of lens compression which is essentially the phenomenon of background elements appearing larger than they actually are at longer focal lengths (when zoomed in). This technique, when used correctly, it can help create some fantastic images.
One view I wanted to check out was of the skyscrapers in the other major, more central financial district in the City of London. It was a particularly overcast day and with this in mind, I thought it might end up being a scouting trip so at least I would know the best spot to return to in better conditions.
So, from Canary Wharf tube station, off I went to find the best view. I walked north-west along the river and found the spot with the best view of the City of London. I wanted to find a view that would have the financial district on the north of the river and The Shard on the south.
After a 20-minute walk, I found the spot. I remember thinking to myself that the view on this particular evening was a bit "meh" as the sky was dull, without any real drama and the moisture in the air meant the buildings from this far back (2.3 miles) lacked a bit of clarity but I knew this would be a great spot for another day with the air clearer and more drama in the sky. With the sunrise location behind me, the scene would also look great all lit up by the rising sun. Mental note taken.
I hung around, with the camera, trying out a few compositions on the iPhone and after a few minutes, I noticed the clouds breaking a little near the horizon and a little colour sneaking through. Within 5 minutes, the sky lit up with a beautiful orange glow. It really was quite something.
As the colour appeared I quickly set up my tripod and took a few shots on my Fuji X-T10 while the colour blasted across the sky. The dynamic range was pretty high so I popped on a Formatt-Hitech 3 stop ND soft graduated filter to tone down the light in the sky just a bit which enabled me to pull a little more detail out of the buildings.

Fujifilm X-T10 | XF55-200mm | 164mm | 1/6th Sec | f/6.4 | ISO200

Fujifilm X-T10 | XF55-200mm | 105mm | 1.4 Secs | f/18 | ISO200
Before I packed up and as the light was fading, I took a panoramic image of the view to show the entire scene in one frame. The image below is made of 10 separate images taken in a portrait orientation stitched together in photoshop. The resulting image is pretty huge I can tell you.

Fujifilm X-T10 | XF55-200mm | 164mm | 1/5th Sec | f/6.4 | ISO200
So, what did I learn on this particular evening? Well, I really didn't predict that the dull, dreary scene would produce such great light for the few minutes it did as the sunset. So, the lesson here is to never quite before it is really over and always expect the unexpected. If I had arrived at the location an hour earlier, I may have left before the sun had set and I would have missed it all together. Sometimes you just get lucky.
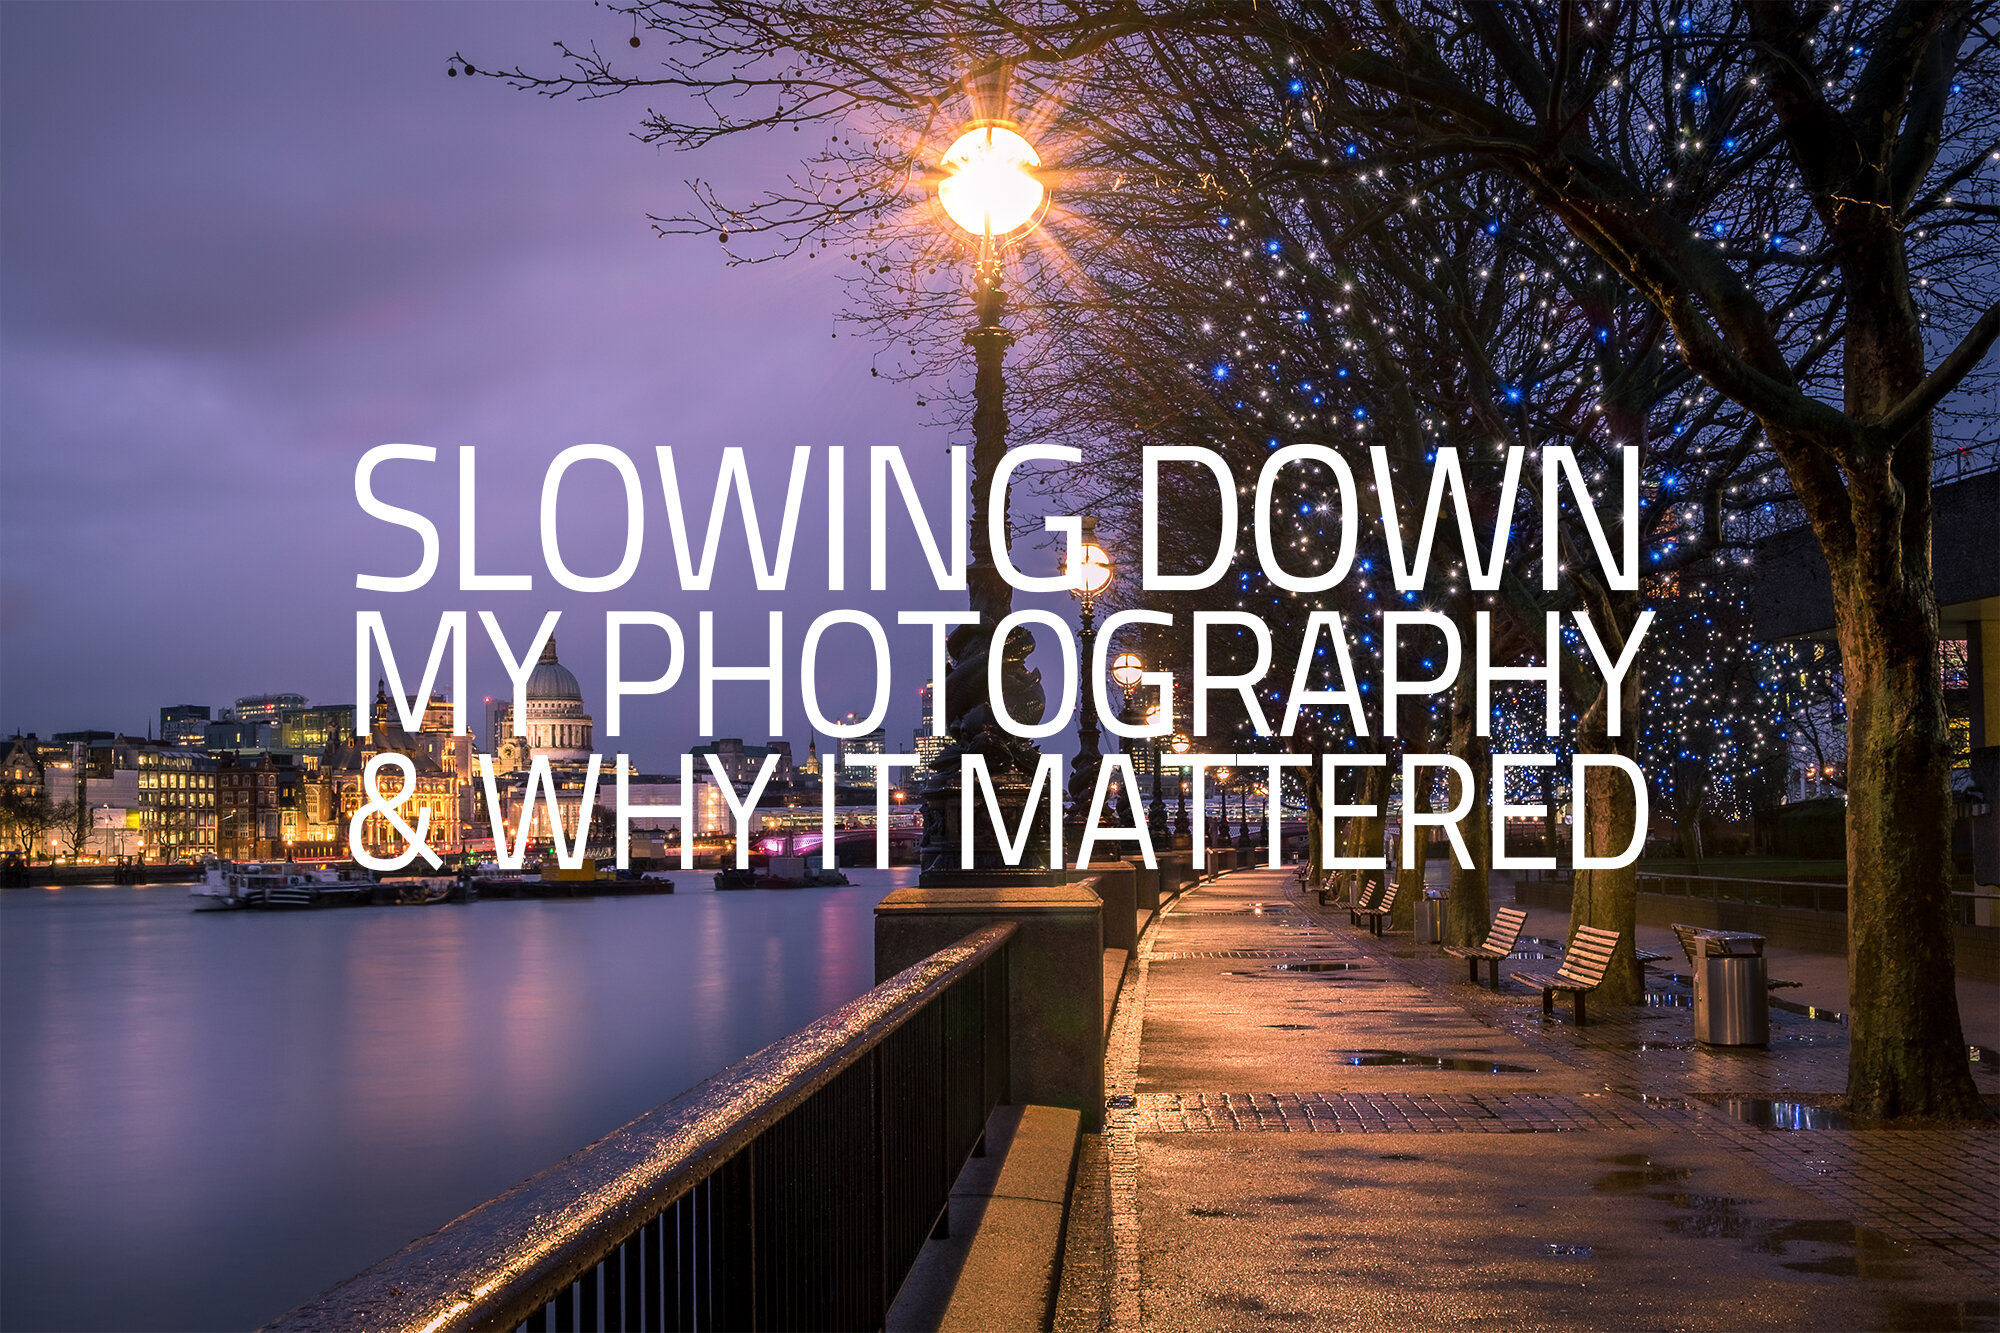
Slowing Down My Photography And Why It Mattered
See how slowing down the three stages of my photography process has contributed hugely with helping me become a better landscape photographer.
When I first started to take photos in London (or pretty much anywhere), it would be a rather fast, disorganised ordeal from clicking away, taking hundreds of images around the city, to then getting back home, wading through and editing the images. I had no real plan or agenda when I would head out, there was no pre-meditated intention other than being there with my camera and the results certainly showed. I would occasionally take an "ok" photo but rarely would I take a photo I really liked such as the one below, taken more recently, which I would be happy to hang on my wall.

Fujifilm X-T10 | XF18-55mm | 26mm | 14 Secs | f/18 | ISO200
At the same time, all this was going on, I wasn't giving the right attention to the images I was taking. Nowadays I know I have a "keeper' the minute the shot is taken and I will be excited to get home and produce the final result. Way back when, I might not have even remembered the shots I'd taken and it wouldn't be until I viewed the images later that I would know if I had captured anything noteworthy.
Fast forward over ten years to today, and my photography is much calmer and deliberate. The photos I take are now more considered, pre-visualised and in nearly all cases, intentional.
Read on to see how slowing down the three stages of my photography process has contributed hugely to helping me become a better landscape photographer.
Stage 1: Planning the shoot
Before I head out to take photos, in most cases I will know exactly where I am headed and how long I need to get there. This might be because of previous scouting I've done or have used online tools such as Google Maps and other photography sites for inspiration such as 500px and Flickr.
Once I know the subject I intend to shoot I will check the right time to shoot with Suncalc.net. SunCalc will tell me what time the sun will rise and set on any given day as well as the angle of the sun at any time so I always know the best time of day or even time of year to capture the subject in great light. I will also use apps to check the weather such as MeteoEarth which will show me the expected cloud cover, wind direction or if rain is expected. Although with the famous English weather there are never any guarantees, with these tools I am able to increase the chances of coming away with a great shot of my chosen subject.
The important point to all of this planning is that if all goes to plan, I won't be rushing to get to a location and fumbling around trying to figure out a composition while missing the best light. The shoot should be calmer and more controlled allowing me to focus on taking the shot.
Stage 2: Taking the shot
It pays to find tools to help slow down your photography. One of the first tools I started to use was the trusty tripod. Tripods are a must for landscape/cityscape photography and having my camera attached to one of these automatically slows the picture taking process down as there is always an element of set-up to be done, adjusting the height, levelling the tripod head and so on.
In addition to the tripod, filters also help me slow down the process quite a bit, especially as I use a filter holder system which takes a little more setting up than the screw in kind. I use the system made by Formatt Hitech which I have found to be great to use with really high-quality filters. Popular amongst us landscape photographers, filters can be used to help balance the light in a scene or reduce the light for long exposure photography.
It is important to note that these tools can slow you down, but should not hinder you while in the field. Sometimes you need to act fast and being familiar with your tripod and filters can be the difference between catching a stunning shot with the best light or an average shot when the best light has disappeared. Having slowed down the process of capturing images, it allows me the time to focus on getting the right composition, the right light, removing distractions around the frame. Essentially getting as much of the finished image in camera as possible.
Stage 3: Post Processing the image
When I started to slow the process of taking photos down, one of the results was I now have far fewer images to process after the shoot. This is a good thing. I use Adobe Lightroom to for almost all of my processing but I rarely use presets so I edit from scratch for each image. Check out a recent post when I edited the Sunset at the South Bank image shown below.
With fewer images to edit and getting more right in camera, I spend less time overall editing photos. Don't get me wrong, I actually enjoy editing images, but I just don't have the time or patience to process through hundreds of them for each shoot.

Fujifilm X-T10 | XF18-55mm | 25mm | 58 Secs | f/11 | ISO200
So, there you have it, slowing things down allows me to head out to capture my chosen subject in good time, focus on the important things such as light and composition while capturing the shot and saves me time in the post-processing stage. All of these combined have resulted in my photography taking a huge leap forward from where it was before and I recommend it to anyone who might be looking for a way to progress further along their own photography journey.

6 Reasons to Photograph Close to Home
What may look familiar or even mundane to you may well look exotic to others. Here are 6 top reasons why you should spend more time exploring your local area and photograph around your home.
The romance and adventure of travel photography is the dream of many photographers. Travelling to far away places, recording the scenes and stories of the different landscapes or cultures will no doubt inspire, especially when visiting for the first time. Unfortunately, regularly experiencing travel photography is only feasible for some so in this post we will explore the benefits of the more accessible local photography. The familiar or even mundane may not immediately inspire those photographic juices in quite the same way as the new or glamorous locations we all see on social media, but remember, what's normal or mundane to you might well look exotic to those living in other parts of the world, you may just need to work a little harder to see past the familiar and find those subjects that inspire you. This post will run through 6 of the benefits I feel when photographing my local area.
One important point to note from the get-go is that it really doesn't matter what photography style you prefer, any photography enthusiast can read this post and use some, if not all of the information below.
What is local photography?
Let's face it, anywhere you might travel to away from home could technically be classed as travel photography so there is no single rule that determines what location would be classed as local. In the Australian outback, your next door neighbour could be tens of miles away making your local community larger than some small countries, where in New York City, you might consider just a few blocks to be local. There is, of course, no right or wrong answer here so decide what's best for you.
My take on it is that anywhere I can travel to within 35-40 minutes in the car is local. The surrounding towns, villages or countryside within this time are familiar and I know the area quite well.
So lets jump into my 6 reasons to photograph close to home.

Fujifilm X-T10 | XF10-24mm | 15mm | 30 Secs | f/16 | ISO200
The image above is called "End of the West Pier" and was taken in Brighton, East Sussex, UK and is on the limit of what I call "local" with it being a 40-minute drive from my home. This structure was called the West Pier and has suffered fire and storms since closing and just some of the metal structure remains. With the silhouette set against a simple backdrop, the detail in the structure really stands out so for this image only a long exposure would do.
#1 Removes a lot of the pressure
The thing about visiting somewhere new and for a limited time is that you may feel the pressure to capture that portfolio shot during your one and only visit. I know I certainly have. I've visited New York, Paris, Prague and so on and as these locations are exotic to me and have cityscapes and structures recognisable across the world, I could not help myself and attempted to capture the classic shots during my stay. Most of the photos I took were holiday snaps at best and rarely did I get a great shot. The thing is, unless you get really lucky, getting the best shots sometimes means visiting a location time and time again before all the elements come together such as weather, light, timing and so on. When shooting locally, this pressure to get it right on your first attempt is instantly removed as you don't have to get that shot and you can visit again and again until those elements come together for the shot you are trying to capture.
#2 You can find some hidden gems
This point is related somewhat to point one above. When you have the opportunity to visit a location multiple times (removing the pressure) and the portfolio shot is in the bag then the real exploring can begin. You start to see the hidden compositions and capture shots that you may not have seen before, documenting the location in new and innovative ways.
The shot below was taken at a place called Colley Hill in Surrey, UK. and was actually close to where I grew up. Now it is around a 20-minute drive from where I live. It took a number of visits to capture the shot I wanted of the moment the sun created this starburst effect as it dropped behind the hills. Capturing this image did not mean I stopped visiting. Since then I have started to explore the area further, trying to isolate subjects in the area and capture new compositions.

Fujifilm X-T10 | XF10-24mm | 10mm | 1/13th Sec | f/14 | ISO200
#3 It takes up less time
Let's face it, most of us who do not practice photography full time can only dedicate so much time to the craft and the further we travel, the less time we have available for actually taking pictures. Staying local means less travel and more photography. This means I don't have to dedicate an entire day or afternoon to a shoot. I will regularly pop out an hour or so before sunset and still be at the location with 45 minutes to scout the locations and set my shot up.
The benefit of not having to dedicate long periods to a shoot is that it makes the decision to go out a lot easier and I find that I get out more often. The positive side effect (aside from the fact that I am out with my camera, doing what I love) is that I am using my equipment more often. This helps me build up more equipment experience and muscle memory that allow me to focus more on the image and less on using my camera.
#4 You can have a lighter bag
When I travel, I have to think hard about what I take with me. The thought of missing that portfolio shot as I don't have the right equipment normally means I pack as much as I can sensibly carry. Local photography means there are a couple of alternatives to this approach. First, if on foot, how about just taking a camera and one or two lenses. With the pressure reduced and opportunities to return I can take less equipment with me which not only lightens the load but has the added benefit of allowing me to occasionally restrict myself to just the one lens during a shoot. It is widely known in the photography world that creating artificial restrictions can help a lot with the creative process as you learn to overcome these restrictions with different compositions or take images you might not have seen using another lens. Alternatively, shooting local for me usually means I have my car nearby so without fully committing to taking just the one lens I can leave some of my gear in the car, so it is nearby at least.
Fujifilm X-T10 | XF10-24mm | 10mm | 0.9 Secs | f/10 | ISO200
Taken on an early summer's evening, the shot above is about 25 minutes in the car from my home. This river runs along the base of Box Hill and these stepping stones cross the River Mole.
#5 You can explore and exploit your local area
There is something I enjoy about finding new places that I didn't know existed close to where I live. Although close to London, my immediate area isn't particularly well documented photographically so that leaves plenty of places to go and discover myself.
Bonus benefit alert! For those looking to make a bit of money from their photography, exploring and taking images of your local area can actually generate a revenue stream. You can look to attend local art and craft fares and sell mounted prints to local residents or sell images to small businesses such as coffee shops and cafes.
#6 It just gets you out there with the camera
Yes, this one seems a bit obvious but as mentioned previously, shooting locally can often mean less travel planning, logistics and time so with hurdles removed, getting out with the camera should come easier an as such something that can be done more often. Having a good hike around the area has it's obvious health benefits as it can get the heart beating and the blood flowing. The health benefits of anything you enjoy doing should be exploited wherever possible.
The picture below was taken only a few minutes from my home. It's just a tree in a field I drive past all the time. It was winter and I was drawn to the strong shape created by the bare tree on the horizon so one evening I just popped out, parked just behind where this image was shot from and spent 30-45 minutes taking the photo and headed back home.

Fujifilm X-T10 | XF18-55mm | 36mm | 1/30th Sec | f/7.1 | ISO200
There are, without doubt, more reasons or benefits to photographing your local area than the six I listed above but these were some of the benefits I think about and are important to me which really help with the motivation, let's face it, we all need some time to get out there and take photos.

Editing Sunset at the South Bank
Join me as I walk you through how I edited one of my favourite photos of 2017, Sunset at the South Bank. Starting with the RAW file and taking you all the way to the final image.
This post is not to open that can of worms amongst photographers about how much editing is too much editing. Everyone will have a different opinion and is why art is so subjective and this is a good thing and to be celebrated. It is clear, there is no right or wrong answer but I think it's apparent where I stand on the subject based on the images I produce but in case you were wondering, this is my take on it. I will edit my photos unapologetically but within limits I impose on myself to stay true to the scene I captured such as working with the shot that was taken and not substituting the sky or removing permanent objects that will significantly alter the scene I saw while on location. I will remove the occasional distracting temporary object such as cranes in a cityscape or a bird in the wrong place etc but this is on an image by image basis. I do blend images when required and the dynamic range is just too big for the camera to work with but anything I blend in was captured at that time and place and not somewhere else.
So now you know my values as a photographer, let me show you the journey of the Sunset at the South Bank image shown below, from the Fuji RAW file to the final image showing some of the steps the image took along the way.
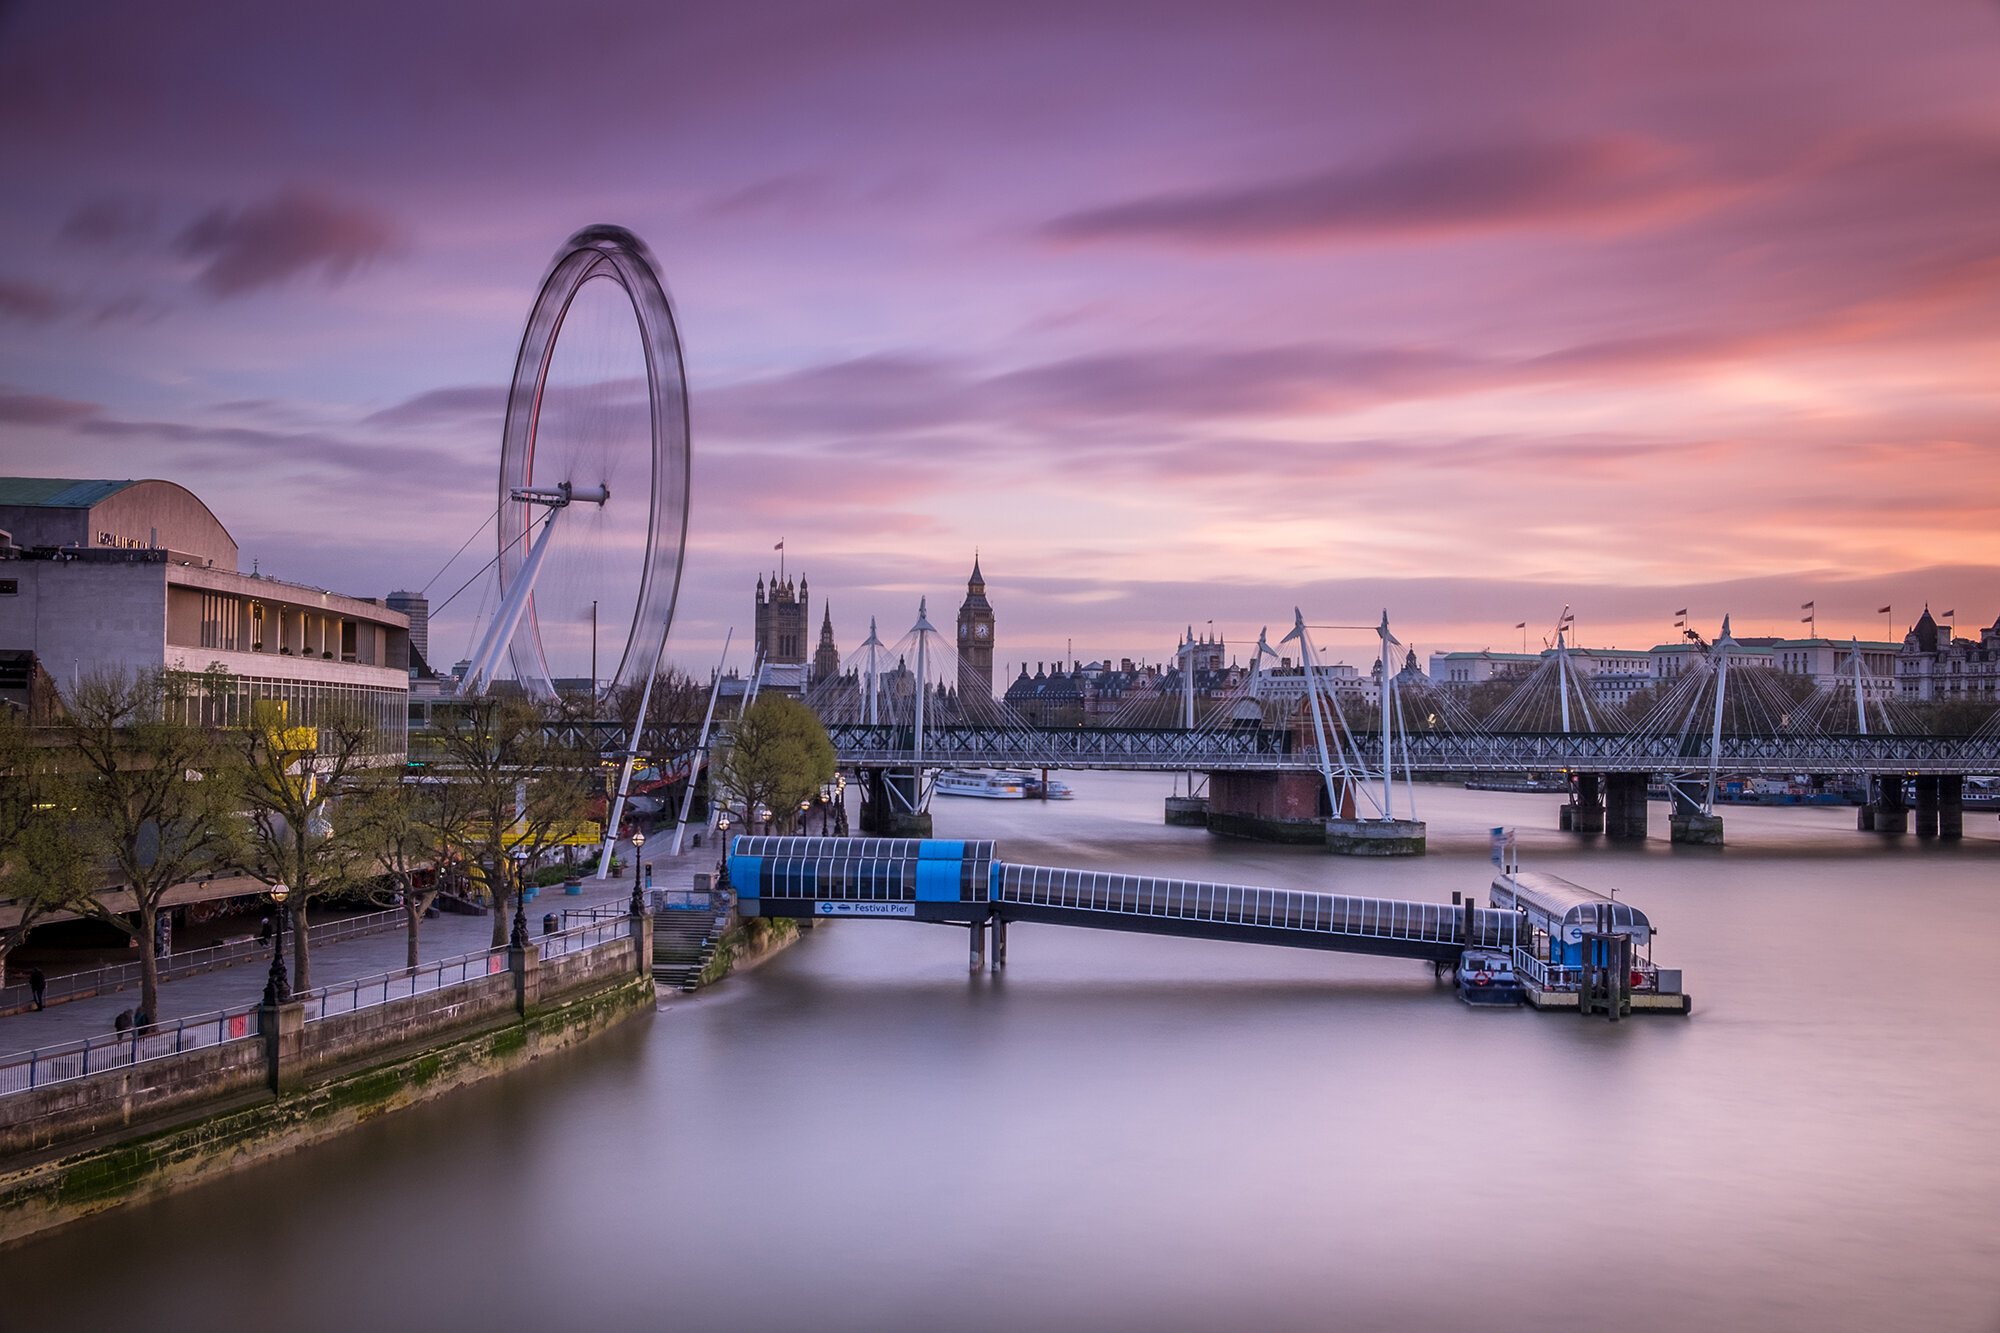
Fujifilm X-T10 | XF18-55mm | 23mm | 58 Secs | f/11 | ISO200
I recently posted an "On Location" blog with the story behind this photo shoot in London which you can read here so I won't go into too much detail. Steps 1 to 5 below were performed in Adobe Lightroom and only the final sharpening step took place in Photoshop.
The raw image
So this is how the image started, taken straight out of the camera. As you can see, there is already a lot of reds and pinks in the sky and across the scene to exploit later in the final image.

A few settings for your information.
Camera: Fuji X-T10 with XF18-55mm lens
Exposure time: 58 seconds (10 stop natural density filter used)
Focal length: 23.3mm (zoom)
Aperture: F11 (the size of the hole that lets the light in)
ISO: 200 (lowest number, less light sensitive)
Step 1 - Levels and Vibrancy
In the image below, I have adjusted the levels (darks and lights) to help boost the image. Additionally I have added a touch of vibrancy to start exploiting those colours. I also slightly levelled the image.
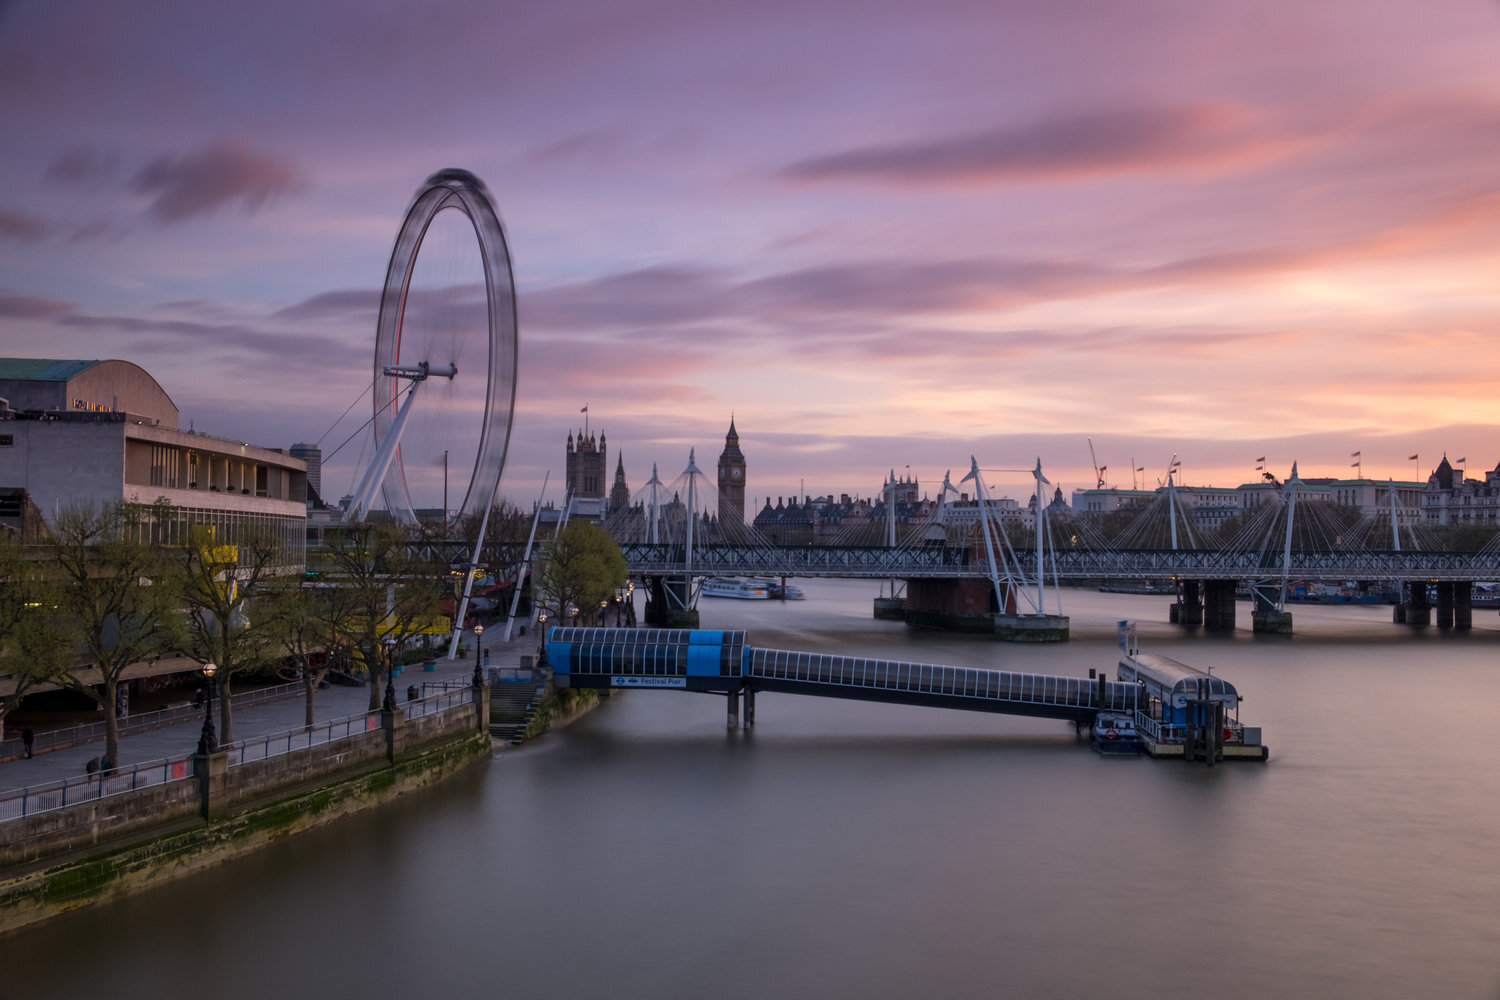
Step 2 - Lights and Darks (Curves) and Vignette
In this image, i worked on the contrast of the shot, making the shadows a bit darker and lights a bit lighter which adds contrast and helps the image pop a bit more. Additionally, I added a bit of vignetting which I think helps frame the shot.

Step 3 - Graduated filter to boost the lower half
Next, I worked on boosting the water in the lower half of the image. I used a graduated filter and brightened up the water and added a touch of magenta to bring out the reflected colours from the sky.

Step 4 - Selecting lightening
Next, I did something I do to a lot of my images and is very subtle but very effective. It is a kind of dodge of burn technique. I will use a radial filter and selectively lighten areas to really make them pop in the image. In this image I added some more light and/or contrast to areas such as the South Bank river wall on the bottom right, the South Bank Centre to the left and the Festival Pier in the water. I also further lightened the water in the foreground.

Step 5 - Shadow colour and more selective lightening
In the penultimate image, I have added a subtle blue in the highlight and a touch of magenta in the shadows to really boost the colours in the image. I lightened areas of the water a bit more to help give it that smooth luxurious look.

Final Step - Sharpening and removing a few cranes
In the final image, I opened the image in Adobe Photoshop (all previous steps were in Adobe Lightroom). Beforehand, I had removed the default sharpening Lightroom applies and once in Photoshop, I used the high pass filter to apply some selective sharpening to the image. Finally, I cloned out a few cranes from the top of the buildings in the distance and the image creation process was complete.

Fujifilm X-T10 | XF18-55mm | 23mm | 58 Secs | f/11 | ISO200
I hope you found that somewhat useful. As I mentioned at the beginning of the post, I don't try to hide the fact that the post-processing is equally as important to me as the taking of the shot as I want the final image to look how I envisaged in my minds eye when at the location behind the camera absorbing the scene in front of me.

On Location from Tate Modern to Waterloo
During this On Location session in London, I spent some time around Waterloo Bridge. I wanted to capture the classic scene looking south-east towards the London Eye during the sunset hour and I was not disappointed. Check out the post to read how I got on and see the images from this evening session.
I wanted to capture an image I have previously taken at night from the Waterloo Bridge looking towards the Hungerford Bridge and London Eye. You get so much in this composition such as Big Ben, the Golden Jubilee Bridges without the image being too cluttered. As you may already know from previous posts, it is important to me that the cityscape images I take, although will include plenty of structures, are not too messy and distracting. See more about long exposure composition here.
To help visualise the route I took, below are the three locations I stopped during the evening shoot.

Location 1: Blackfriars Bridge
A composition I have taken before. I had an hour or so to kill before heading to Waterloo Bridge so armed with my Fuji X-T10 camera I started close by on the Blackfriars Pier. Three popular landmarks for the price of one being Tate Modern, the Millennium Bridge and The Shard further back.

Fujifilm X-T10 | XF18-55mm | 18mm | 40 Secs | f/11 | ISO200
Location 2: Oxo Tower, South Bank
A quick stop as the sun is setting across the Thames. Just down the river in the background is Waterloo Bridge and with the sun setting, I didn't have a huge amount of time. The building on the left is the base of the Oxo Tower. Yet another former power station along the Thames as was the Tate Modern (according to Wikipedia) in the previous picture. The Oxo Tower was acquired in the 1920's by the makers of the Oxo beef stock cubes. You can't miss it with the big sign on the tower. See another image of the tower taken from the end of the jetty here in a previous post.
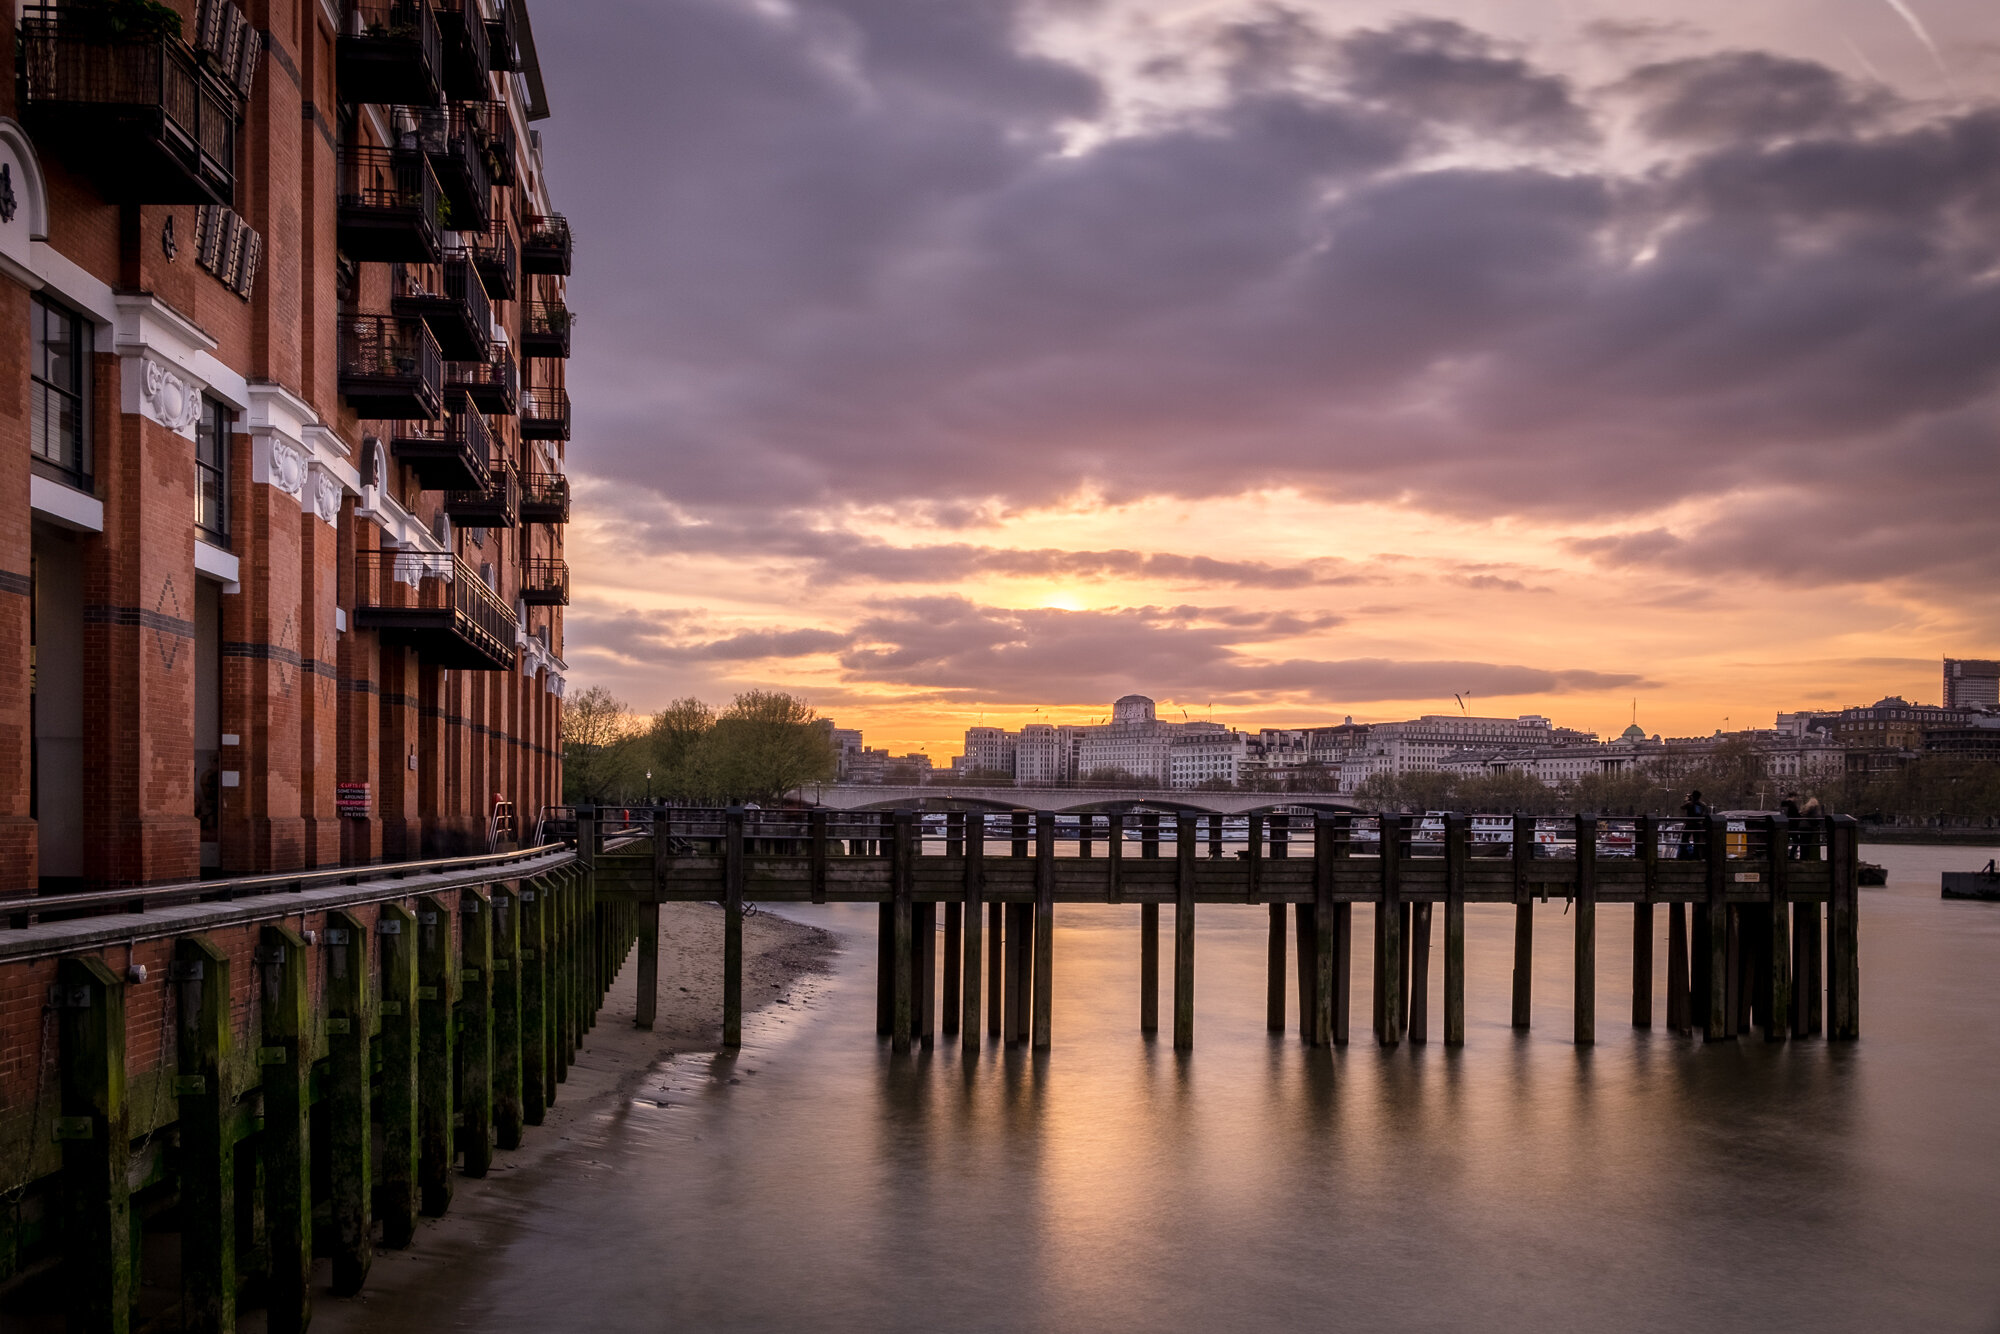
Fujifilm X-T10 | XF18-55mm | 21mm | 3 Secs | f/11 | ISO200
Location 3: Waterloo Bridge
So on to the third and final location of the evening. This is one of my favourite views of the South Bank and London Eye. As mentioned at the beginning of the post there is so much to see from this viewpoint. I wanted to capture this view at sunset and knowing the sun will be off camera to the right at this time of year, it was an ideal time to revisit.
I certainly got lucky on this particular evening. The sun played its part in the performance perfectly. On went the trusty 10 stop ND filter to provide those smooth waters and slightly bury clouds leading the eye ever so subtly in towards the London Eye and Big Ben.

Fujifilm X-T10 | XF18-55mm | 23mm | 58 Secs | f/11 | ISO200
As that majestic sunset continued and once I had the shot I really wanted, I started to hunt for other compositions. I turned my camera a little right, towards the sun and snapped Charing Cross Station at the end of the Hungerford Bridge. The dynamic range in this shot was through the roof. The bridge and station building were very dark in the original raw file. I was amazed by how much detail I could bring out of the shadows in the Fuji raw. Very impressive indeed.

Fujifilm X-T10 | XF18-55mm | 26mm | 90 Secs | f/11 | ISO200
It's not often for the colours of sunset to remain in the sky as long as this. I normally find a composition and focus on it rather than trying too many different shots as the reds, pinks and oranges seldom remain for too long but on this occasion, I even had time to change my lens and try a few wider shots with the 10-24mm attached.

Fujifilm X-T10 | XF10-24mm | 26mm | 2 Secs | f/11 | ISO200
To finish off a pretty successful evening and while I was taking photos, I also had my other camera (Fuji X70) taking a shot every 3 seconds for me for the 35-40 minutes I was there to create a time-lapse video later which you can see here.
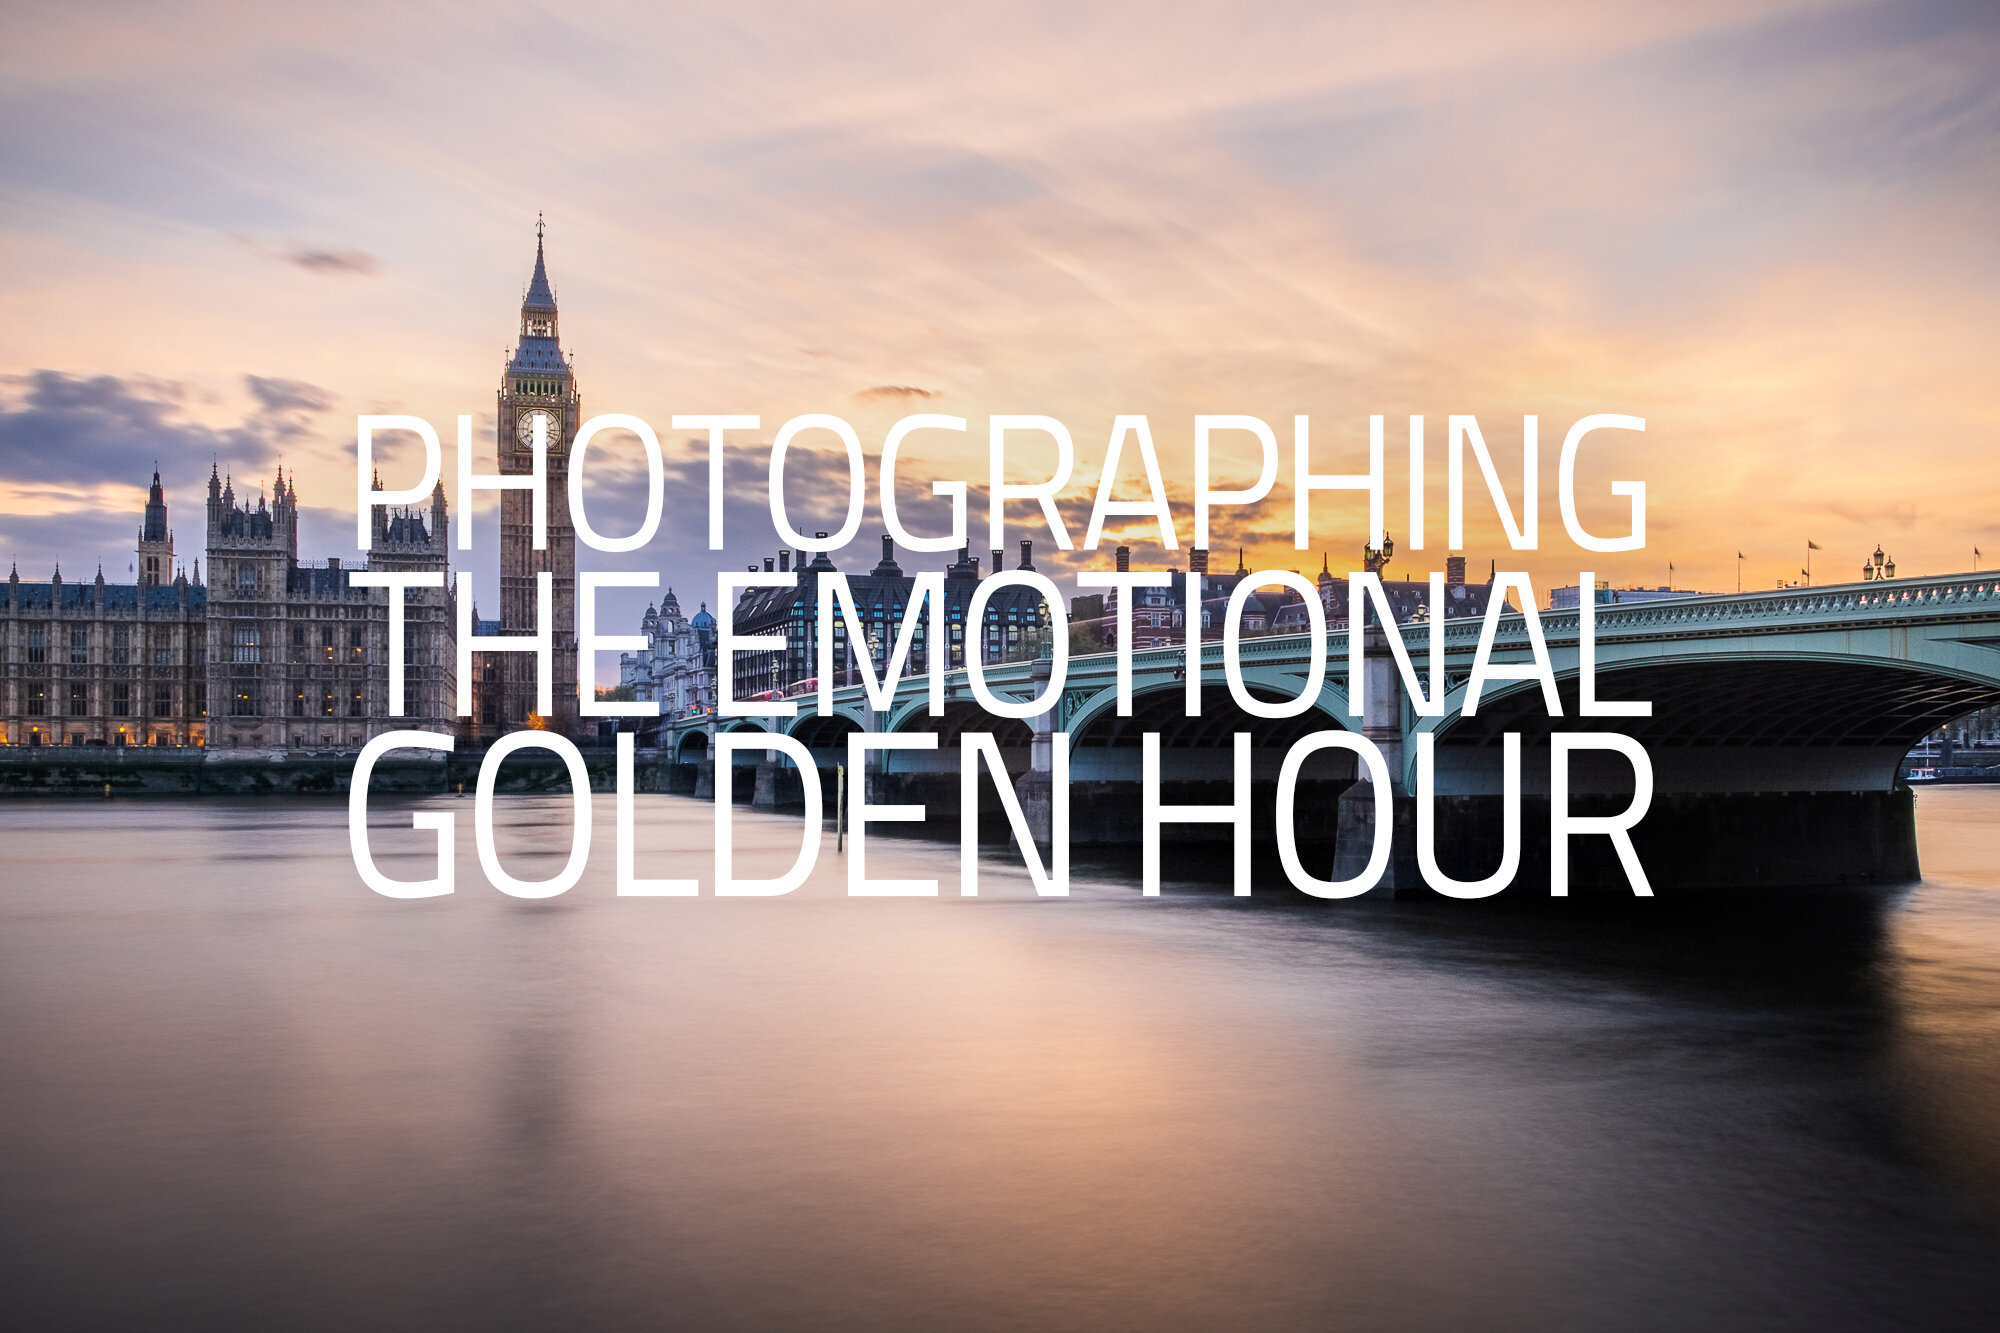
Photographing the Emotional Golden Hour
I often wonder what it is that draws us landscape photographers to the golden hour. What is it about the light at this time that makes us almost worship that great ball of fire in the sky. In this article, I discuss if there is something deeper than just contrasty scenes and pretty light.
Every day without fail, that golden, celestial ball of fire rises above the distant easterly horizon to bask the planet in warm, life-giving light and as the day's end draws closer, it will lower itself back towards the west, intensity reducing until it disappears behind the horizon at which point day gives way to the night. In the photographic world, in particular, these two events are commonly known as the golden hour.
Emotion in photography is as subjective as photography itself. One image can trigger different emotions from different people and the emotion I feel when capturing the image, cannot be assumed to be the same emotive response triggered by others that view my images. However, one thing is for sure, there is no landscape photo more likely to capture one's attention than one captured during the golden hour.
As a landscape photographer, I feel I am automatically wired to try and capture those beautiful red, orange and pink tones and is why I will patiently (and sometimes impatiently) stand, camera composed at the ready and wait for the sun's finest act to take place. The softer more pleasing light and longer shadows seem to enhance the image exponentially.
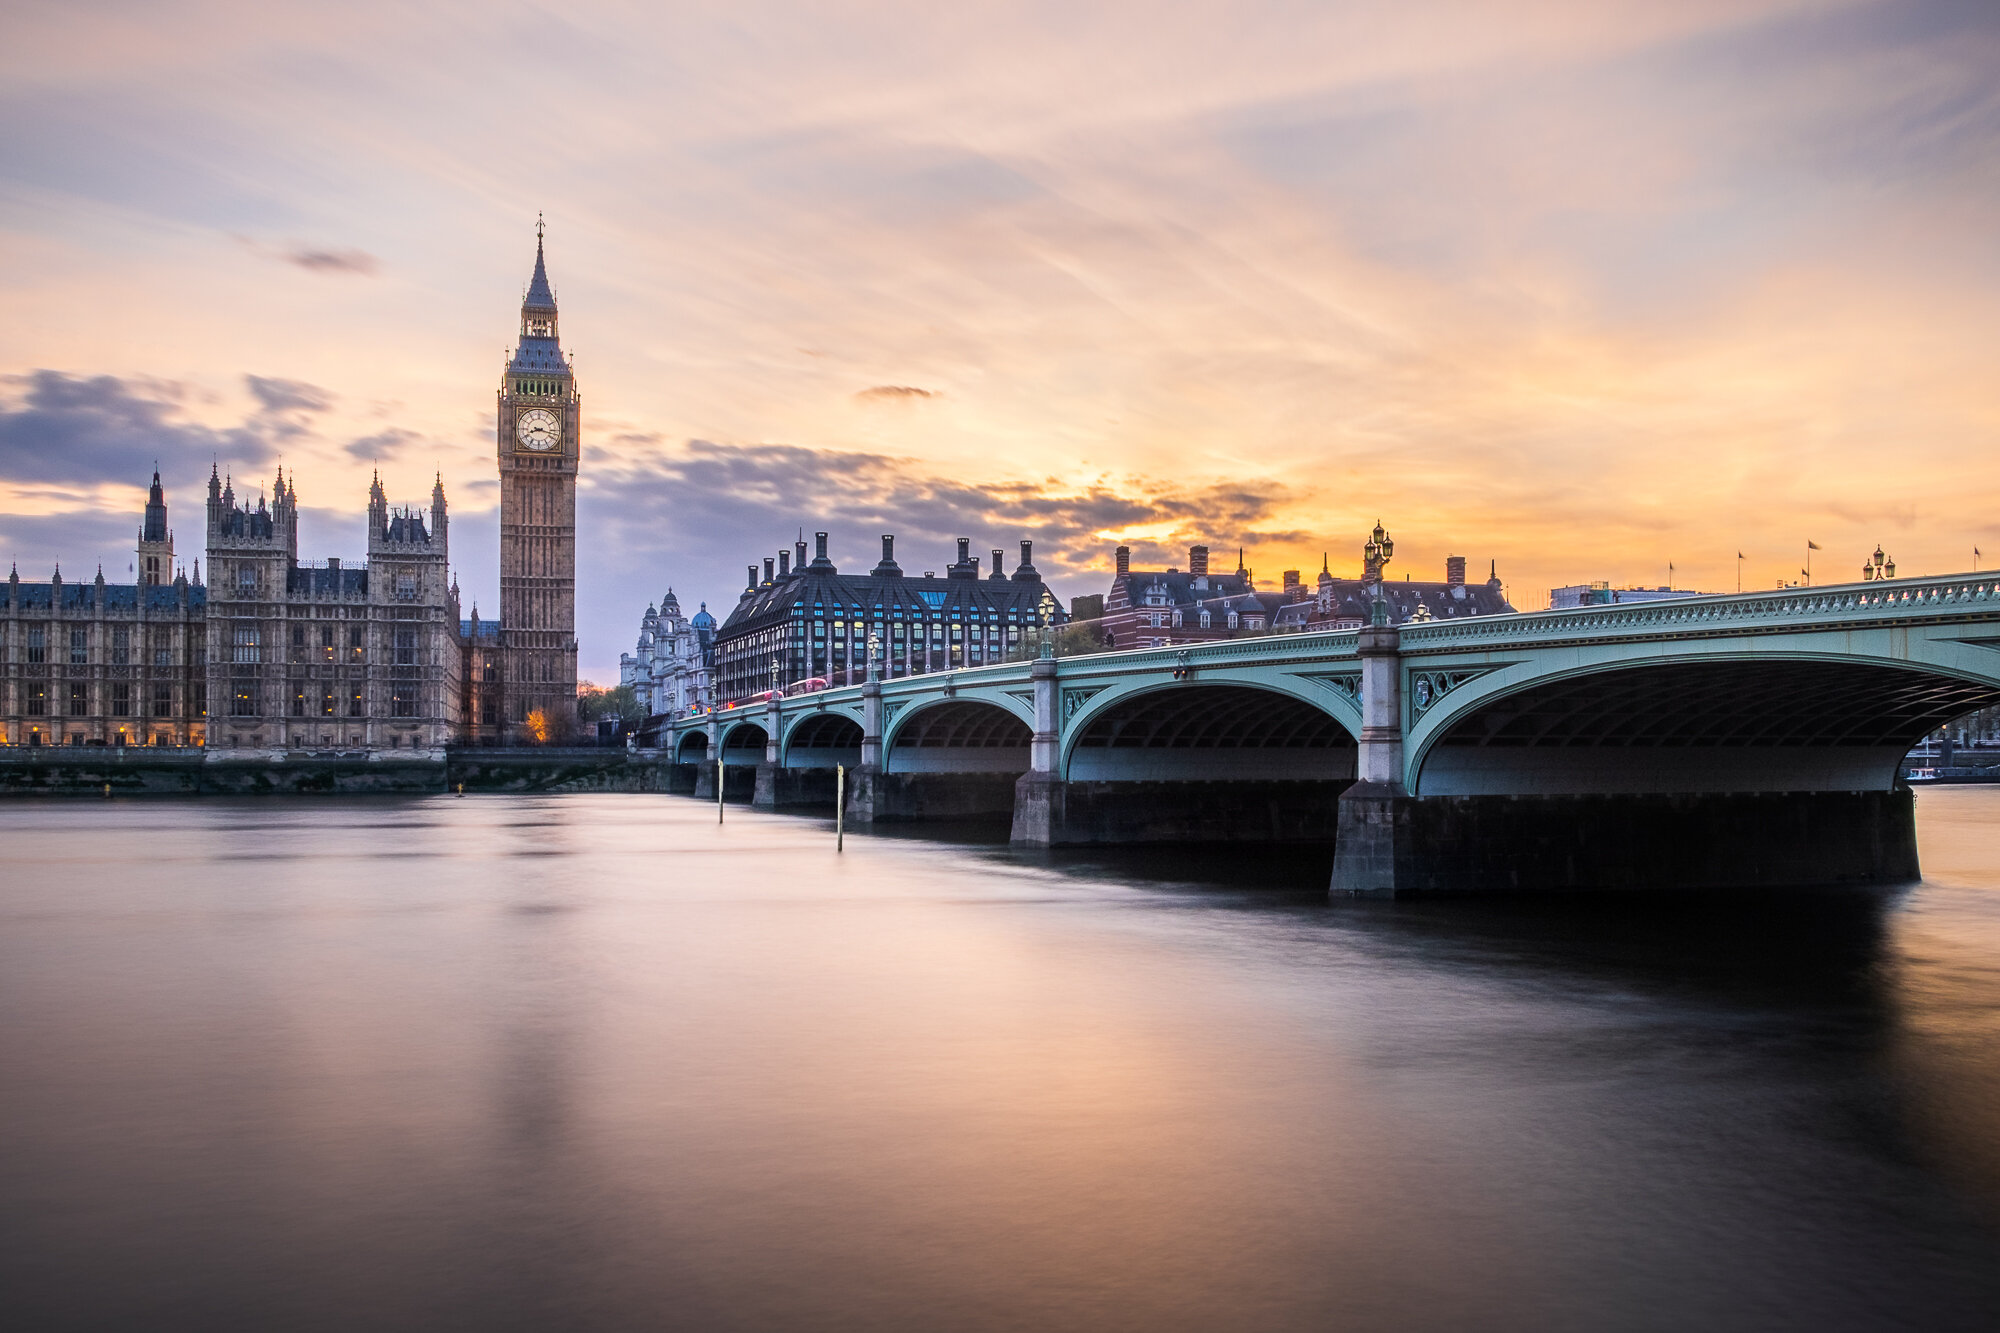
Fujifilm X-T10 | XF18-55mm | 18mm | 26 Secs | f/10 | ISO200
Why does the golden hour spark such emotions in us?
The sun (particularly during the golden hour) will likely evoke a primitive, positive feeling for most people which is why all over the world, the sun continues to be revered and worshipped in different ways, be it the summer solstice at Stone Henge or like below on sunset strip in Ibiza where I took this image of the sun-seekers daily celebration of the sun going down at which point the music is turned up. As the sun drops towards the horizon, there is a quiet calm along the rocky beach, onlookers are relaxed, gazing out to sea, almost mesmerised by the view and all experiencing their own unique emotions triggered by this celestial event. As the last of the sun disappears below the horizon there are cheers and clapping as they all celebrate this daily event.

Fujifilm X-T10 | XF18-55mm | 39mm | 1/60th Sec | f/3.6 | ISO200
As mentioned above, I will sometimes get to a location in plenty of time, weather checked and camera at the ready and wait for the scene to develop to something I had visualised in my mind's eye and the vast majority of times, I leave with less than I'd hoped due to too much or too little cloud to create those dramatic and emotive scenes. That's not to say there is no image to capture in cloudy or clear conditions as these will conjure their own albeit different emotional reactions but when there is a good chance of a sunset, for me, nothing else will do.
That moment when it all comes together
On the rare occasion, when the planning has paid off (or I get lucky which can also happen) and I know I am walking away from the location with a golden hour keeper, there is no better feeling as a photographer. It makes those hours of preparation, scouting and waiting around worth it.

Fujifilm X-T10 | XF18-55mm | 20mm | 30 Secs | f/9 | ISO200

On Location in Southwark from Dawn to Dark
In this On Location post, I spend some time with my new wide-angle lens capturing images around the Millennium Bridge at both sunrise and after dark with interesting compositions and some quite stunning light.
A long day along the Thames with my Fuji X-T10 camera started with capturing the sunrise at the Millennium Bridge and ended with a few night shots along Bankside.
On a cold February morning, I started my day on the north bank at around 7am. The sun was starting to appear providing the warmer colours to the east of the city and I spotted this composition as I approached the Millennium Bridge so I grabbed my 10-24mm wide angle lens and set up. Apart from the obvious lead-in line the bridge provides and the famous Tate Modern power station, there were two other reasons why I chose to take this shot. First, as I approached the bridge, the Shard started to be unveiled underneath leaving it and the rising sun nicely framed. Secondly, as the sun was only just rising, the shot appears to be in two halves. Dawn on the left and night on the right which I thought added another dimension to the final image.

Fujifilm X-T10 | XF10-24mm | 10mm | 0.9 Secs | f/13 | ISO200
I then walked west along the Thames towards Blackfriars. Looking over my shoulder I noticed how the clouds were pulling the eye back towards the sunrise creating an interesting composition, so with a quick set up framing the image with the lamp to add a bit of foreground interest, I grabbed this shot. Not a portfolio shot but interesting all the same.

Fujifilm X-T10 | XF10-24mm | 10mm | 1/3rd Sec | f/13 | ISO200
I then arrived at the location I had originally intended that morning. From the newly built Blackfriars Pier, I had seen this composition before while scouting the area. As you study the image your eye will likely be lead to the Shard but down in the right-hand side of the image is the understated but arguably equal star of the show. Shakespeare's Globe Theatre.
Although a reconstruction of the Elizabethan playhouse, the Globe Theatre is considered a close interpretation of the original. I love the idea that over 400 years ago that pretty little theatre would have held some 3000 theatregoers (yes, 3000 in that modestly sized building!) entertained by one of the most famous playwrights in history.
As with many of my London cityscapes, I used the 10 stop ND filter allowing the longer exposure to smooth out the clouds and water to allow the area of contrast and main focus to be the architecture along the Bankside. I particularly like the way the rising sun is reflecting off the building's glass facades creating other areas of light within the image.

Fujifilm X-T10 | XF10-24mm | 20mm | 28 Secs | f/8 | ISO200
Now fast forward 10 or so hours (with a bit of the day job in between) it is now after dark and I am back at the Millennium Bridge but this time looking back the other way towards St Paul's Cathedral and boy does the city look different at night. With the wide angle lens back on the camera, the dark triangle on the bridge and the lights along the edge lead the eye towards St Paul's Dome perfectly. Additionally, the long exposure allows the moving clouds to compliment this symmetrical composition nicely.

Fujifilm X-T10 | XF10-24mm | 10mm | 20 Secs | f/14 | ISO200
While I was heading to my final location of the night I grabbed this classic composition of the bridge and cathedral across the river. Well it's popular for a reason, right? Again, not a portfolio shot but certainly blog-worthy.

Fujifilm X-T10 | XF10-24mm | 18mm | 15 Secs | f/11 | ISO200
With a general lack of interest in the sky and city lights sometimes causing too much clutter in the scene I do tend to get closer to the subjects on cloudy night time shoots.
So, this is where I finished the night. The OXO Tower. When I purchased my wide angle lens, I already had this shot in mind to try so with only a short walk from the Millennium Bridge I wandered over. Another central composition, I am stood at the end of a jetty over the River Thames with the wooden walkway and side railings leading the eye into the image.

Fujifilm X-T10 | XF10-24mm | 10mm | 10 Secs | f/7.1 | ISO200
So, after a long day of both work and photography, I captured a few good shots of London's Southwark area along the Thames and had a good play with the new 10-24mm wide angle lens along the way.

Slowing Time | Why The long Exposure?
I started to use the long exposure technique to add a new creative dimension to my photography in London and this article is about what I think it brings to both the colour and composition of the image.
I started to use the long exposure technique to add a new creative dimension to my photography and this post is about what I think it brings to both the colour and composition of the image.
Now, in case you were wondering, a long exposure photo is when the camera's shutter remains open capturing one image over a relatively longer time than normal. To quote Wikipedia on the subject, "Long-exposure, time-exposure, or slow-shutter photography involves using a long-duration shutter speed to sharply capture the stationary elements of images while blurring, smearing, or obscuring the moving elements." More info can be found here on Wikipedia.
To achieve the long exposure effect you need to trick the camera into thinking the scene you are capturing is darker than what it is in reality and to compensate, the camera will open the shutter for longer in an attempt to let in more light. This is normally achieved by using a filter (a natural density filter) and placing it in front of the camera lens blocking some of the light from hitting the sensor. See my about page for details of the filters I use.
A Compositional Tool
Although London is one of the best (in my slightly biased opinion) and architecturally iconic places on earth, visually the city has a lot going on and it can be hard for the subject to stand out amongst all of the other competing shapes and contrast happening in the scene. Now, although long exposure images do nothing for static objects, such as buildings and statues. If there are moving objects such as water, people or clouds then this is where the technique can make all the difference. By blurring or even removing any moving objects in the image I am able to isolate the main subject making it stand out by removing distractions that will be contending for the viewer's attention. I will also use long exposures to add compositional elements, for example, blurring clouds that are moving towards or away from me can create some awesome lead in lines as in the photo of Tower Bridge later in this post.
Blending the Colours of the Light
A traditional photo captures the colours of the light in a split second and is a true representation of that particular moment in time. However, a long exposure photo will capture the colours as they change over time and blend the tones together which can have some quite beautiful and emotive results that might not normally be captured. Below are two images I took only a minute or so apart with identical post-processing. I shot the first image at 1/20th of a second and on its own a pleasant enough photo.
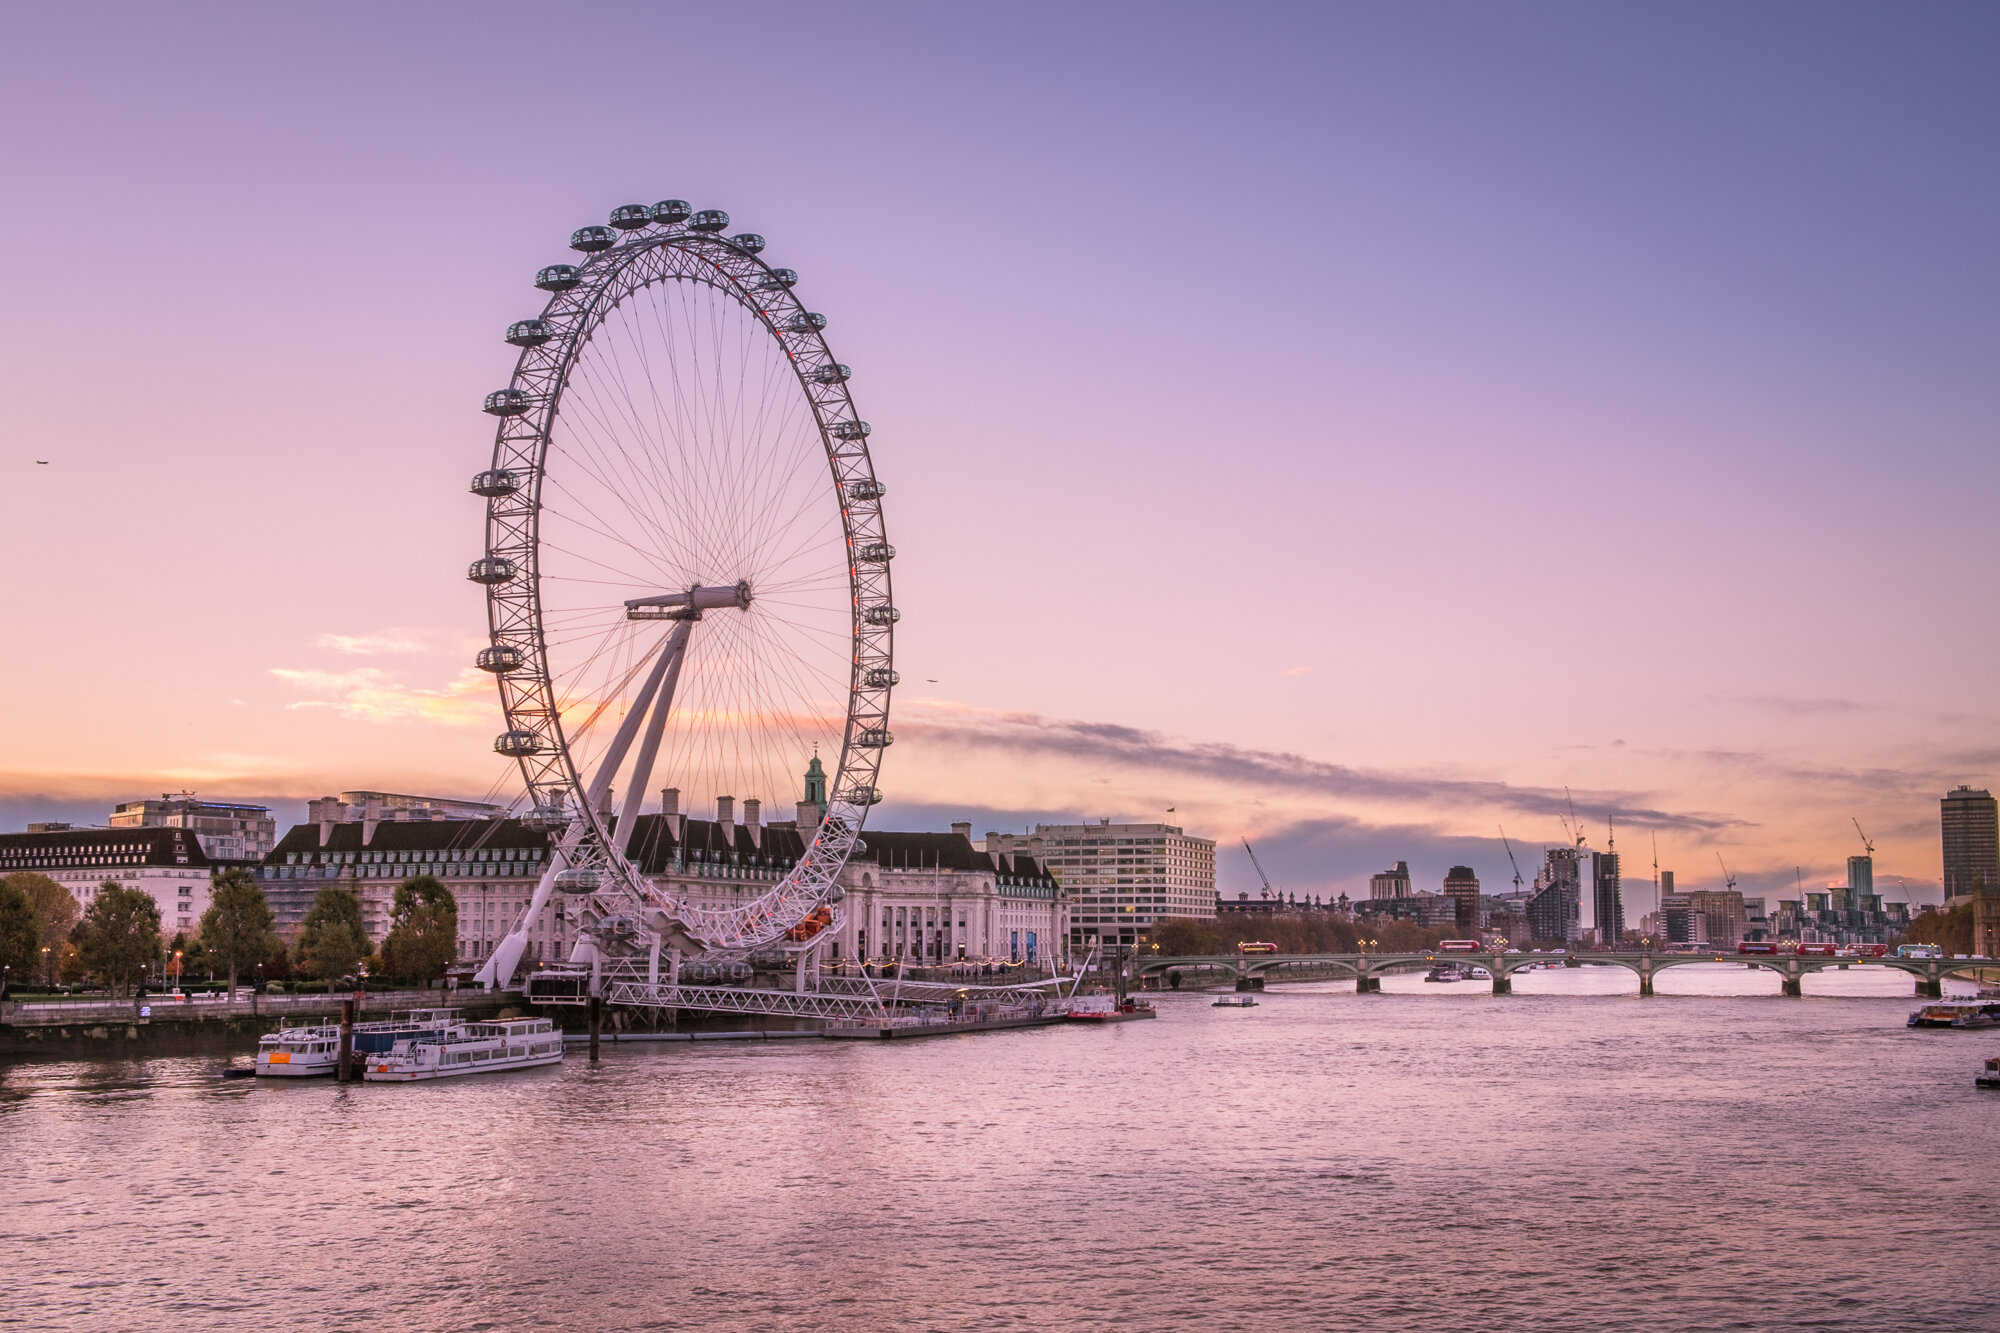
Fujifilm X-T10 | XF18-55mm | 21mm | 1/20th Sec | f/10 | ISO200
Next is the longer exposure, I took over 28 seconds. Straight away you will notice a less cluttered, simpler composition due to the river being smoothed out complementing the clear sky.
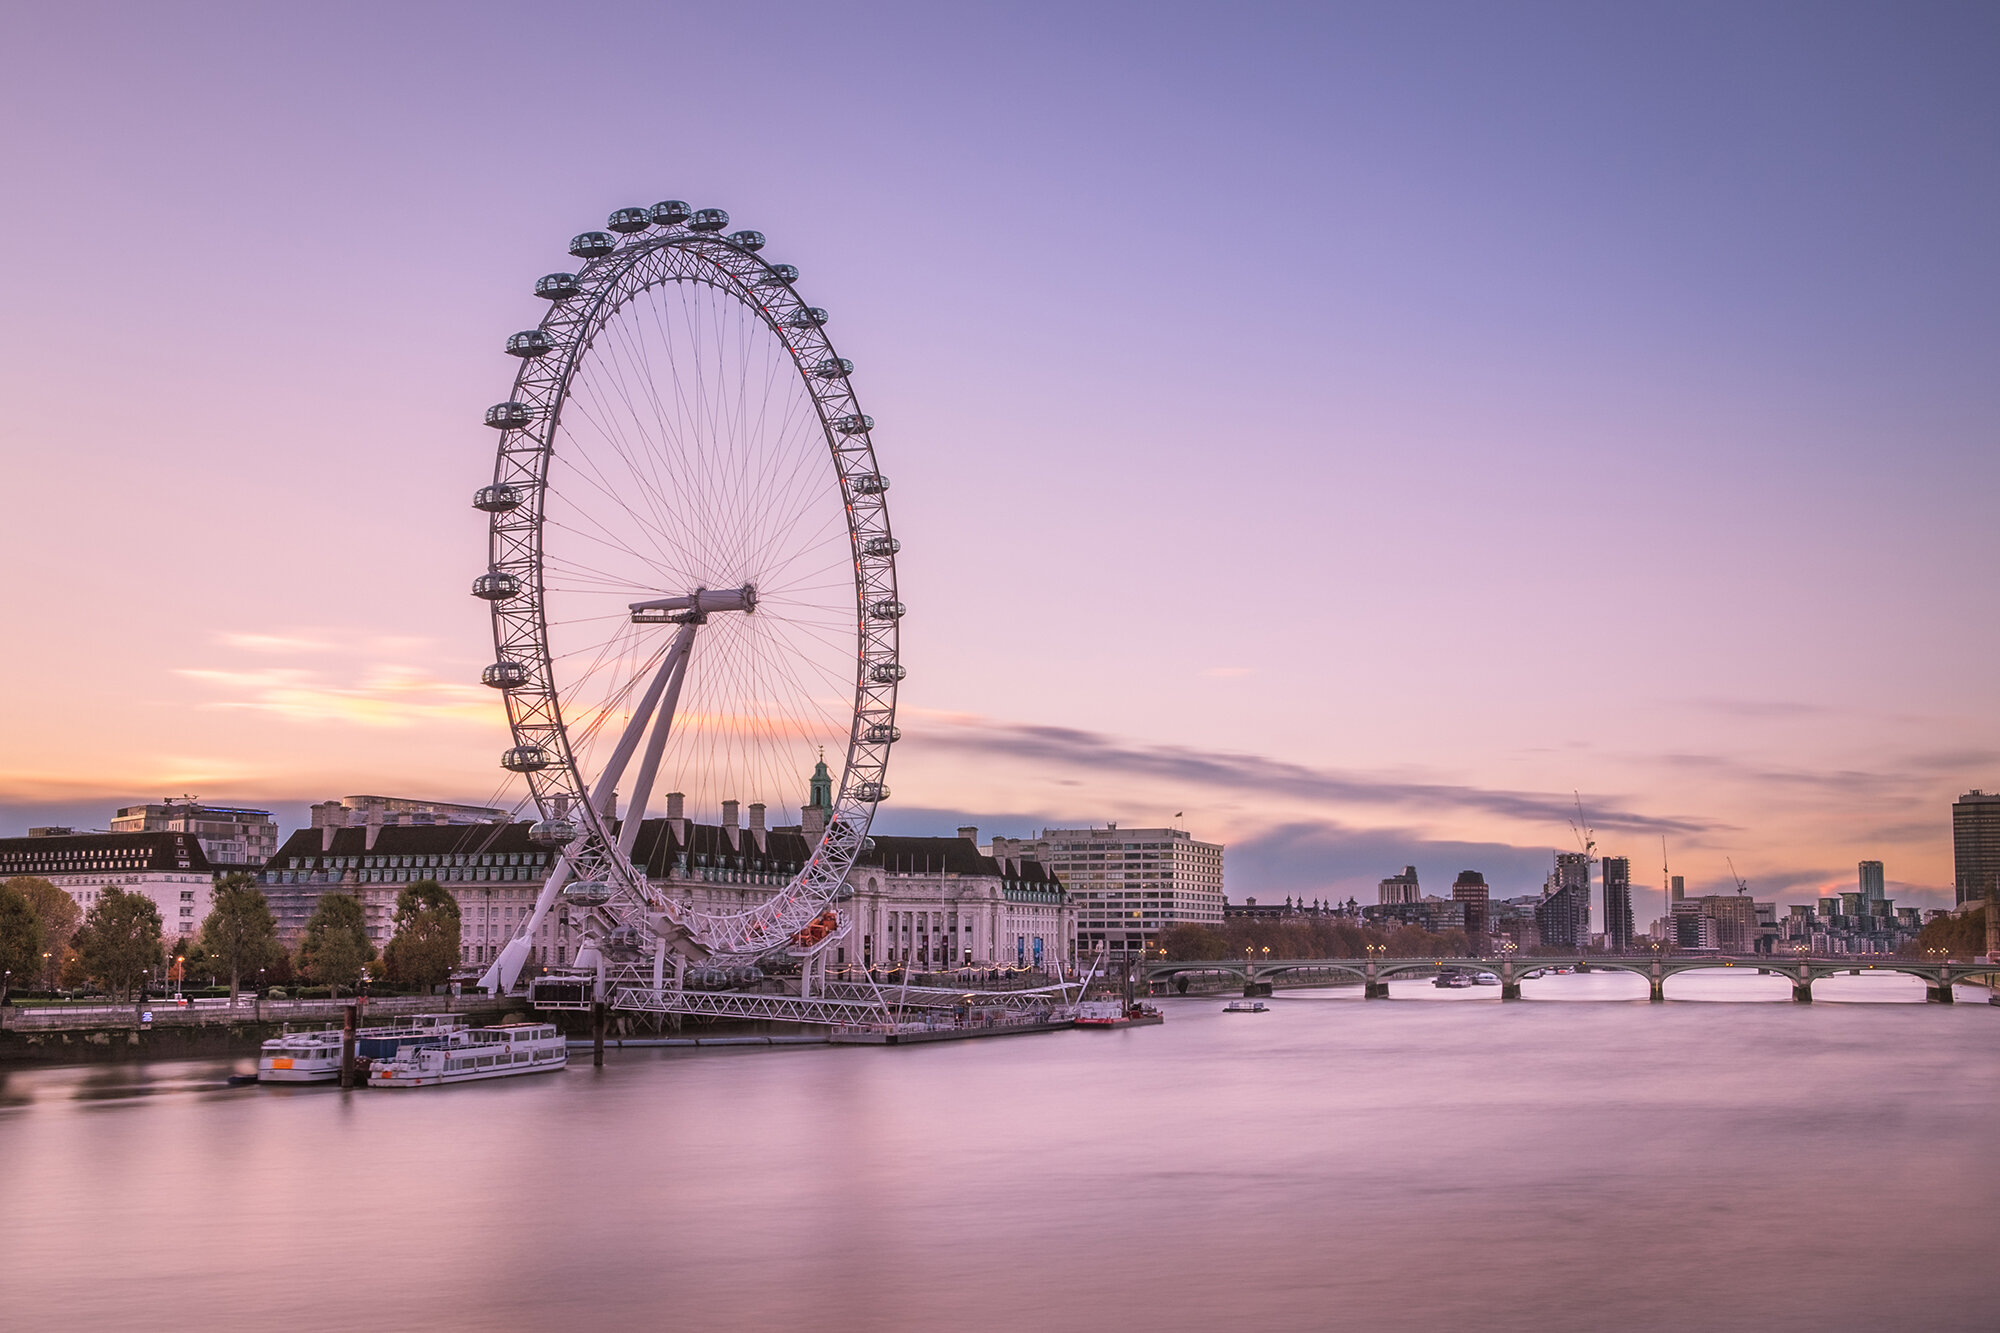
Fujifilm X-T10 | XF18-55mm | 21mm | 28 Secs | f/10 | ISO200
What might be less apparent are the subtly different tones in the image. The colours from the first image are still there but appear slightly more muted in the second, specifically the warmer orange. Also, although not many clouds, in the first image they appear to contend with the London Eye and fight for the same space whereas the softer look of the clouds in this image allows the structure to be more prominent in the scene.
It's not just colour images that benefit
If it is minimalistic architectural cityscapes you want then you can take it one step further and remove the colour altogether. Below is a similar shot of the London Eye taken on a dull, foggy morning when the light was less than ideal.

Fujifilm X-T10 | XF18-55mm | 21mm | 280 Secs | f/9 | ISO200
This image (above) is a 4 minute, 40 seconds exposure, resulting in the River Thames looking even smoother giving it an almost luxurious soft sheen and with the lower, diffused light, this black and white conversion allows the contrast in the London Eye and surrounding architecture to be prominent in an otherwise minimalistic cityscape.
So that's it, a few reasons why I use and enjoy the long exposure in my London cityscapes. To finish, below are a couple more examples of long exposures images I have taken since beginning this slow shutter journey.
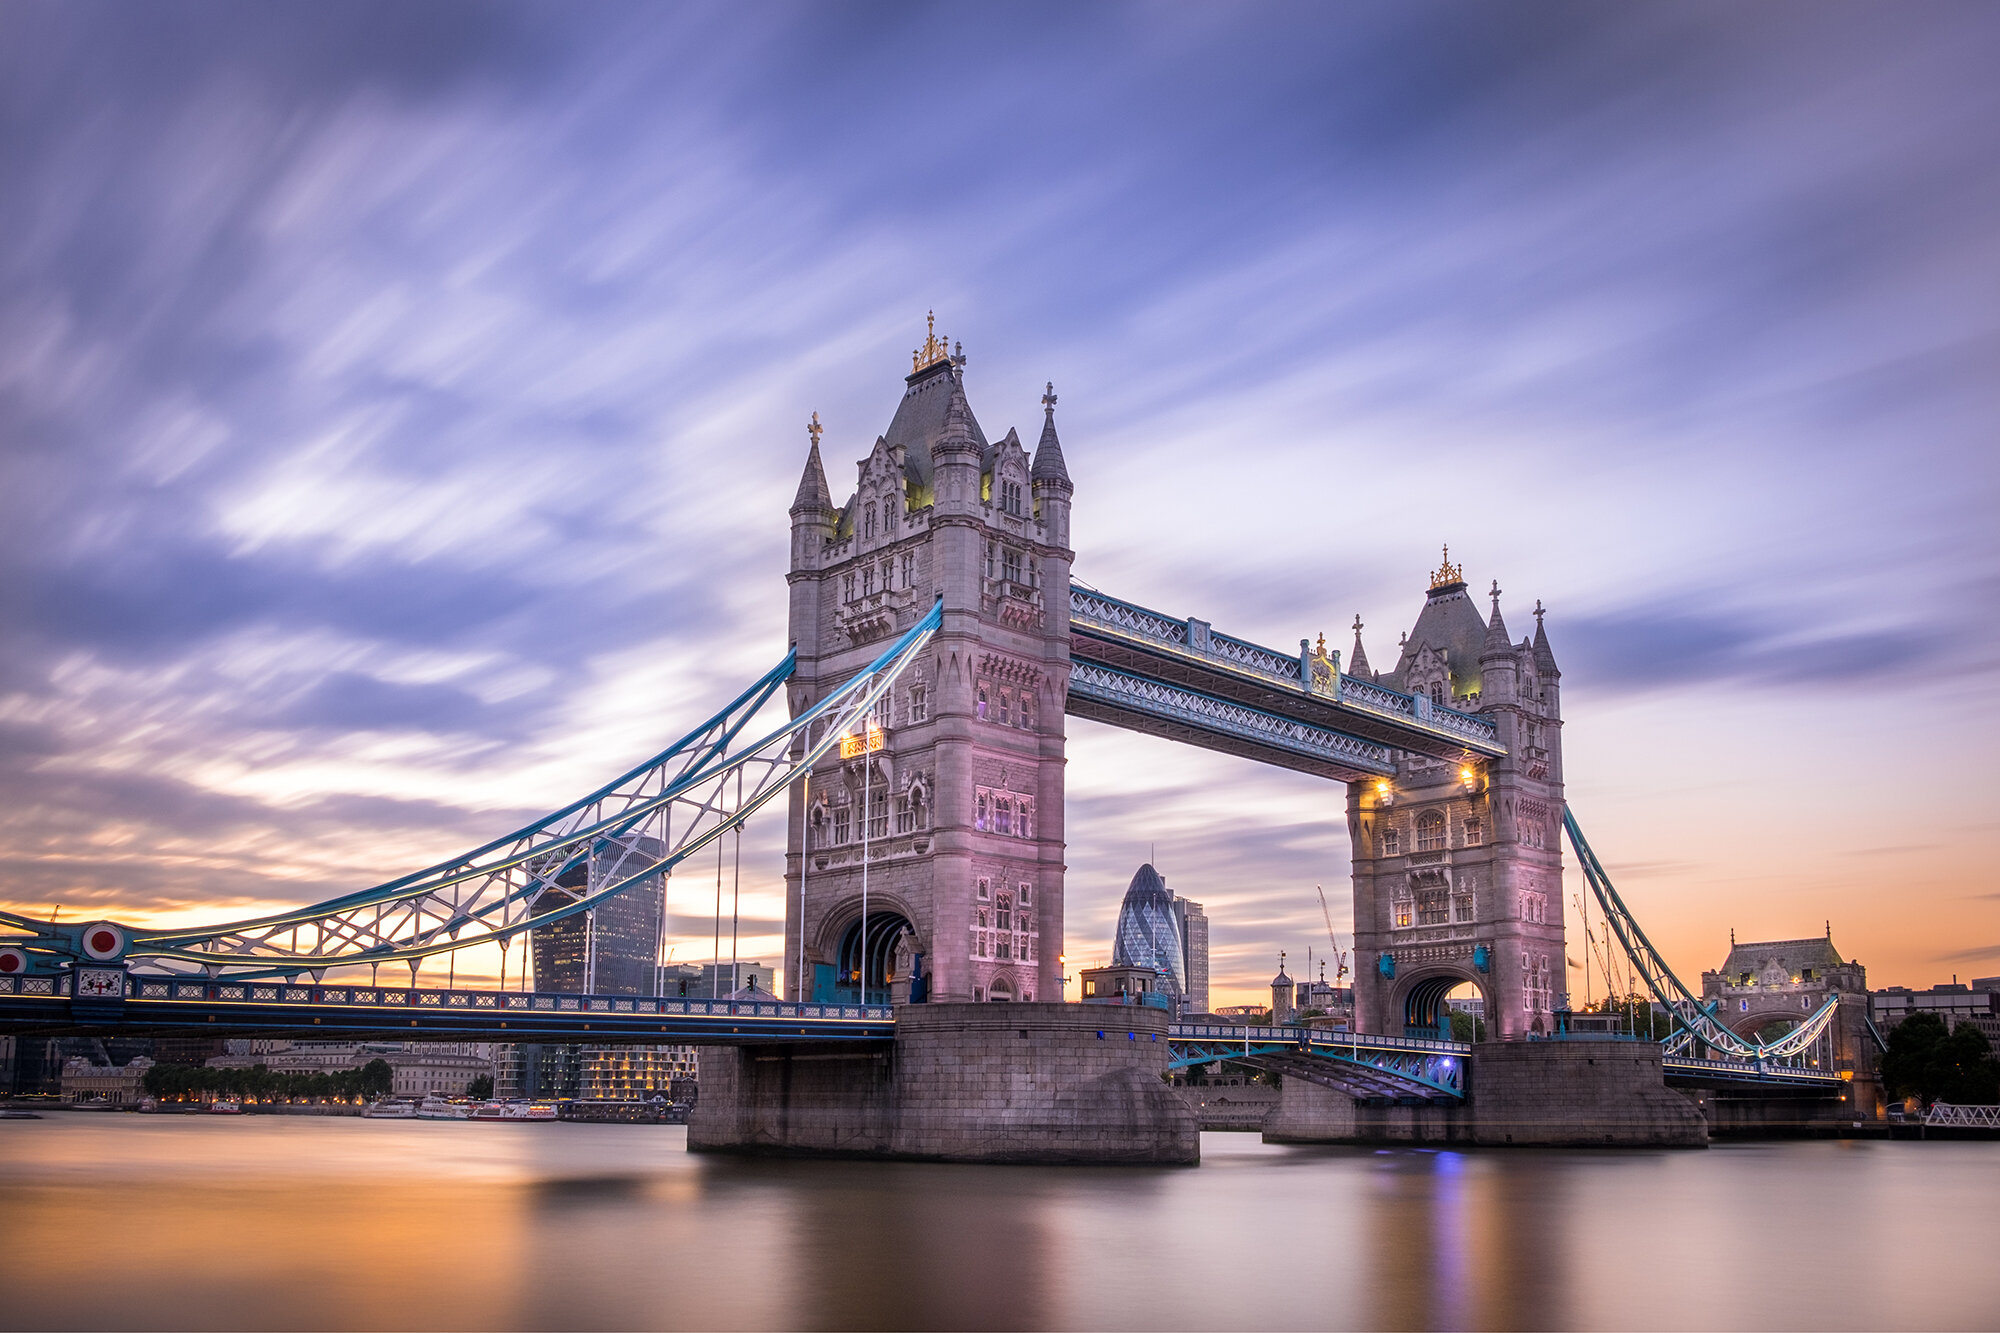
Fujifilm X-T10 | XF18-55mm | 18mm | 140 Secs | f/9 | ISO200

Fujifilm X-T10 | XF18-55mm | 18mm | 30 Secs | f/4.5 | ISO200