BLOG ARCHIVE
New Photos | Winter 2024
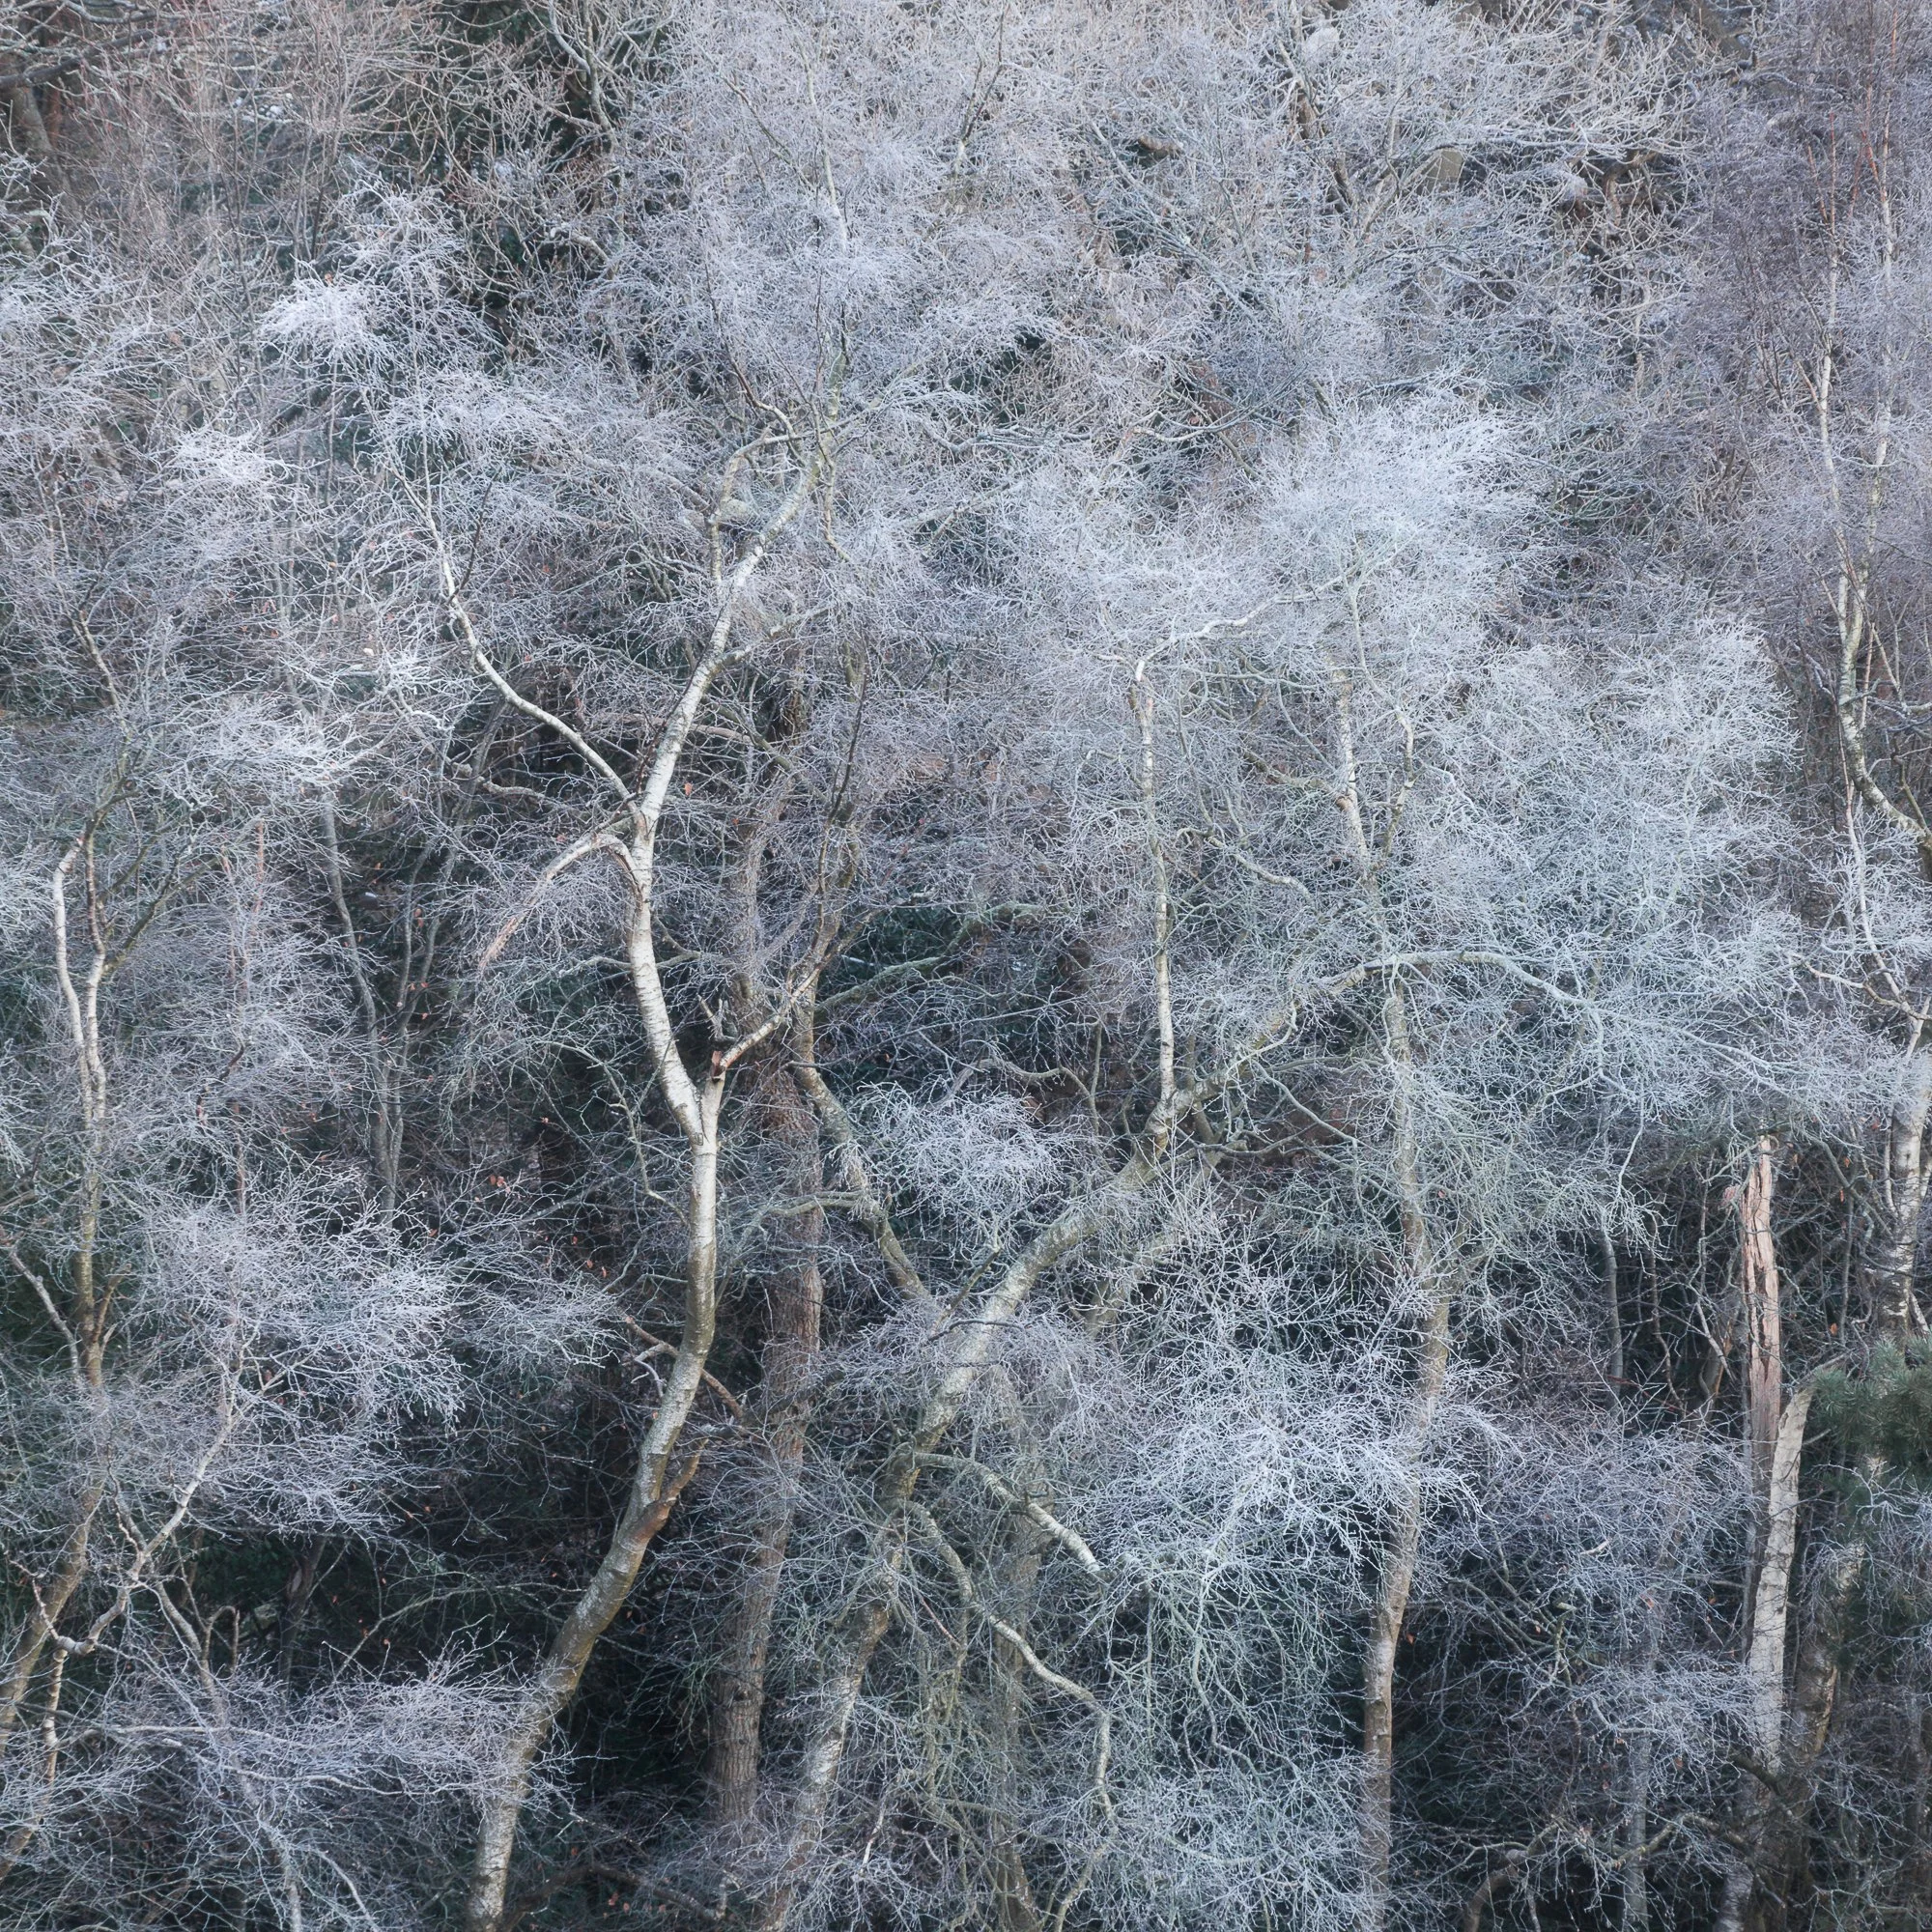
A collection of photos taken during Winter 2024.
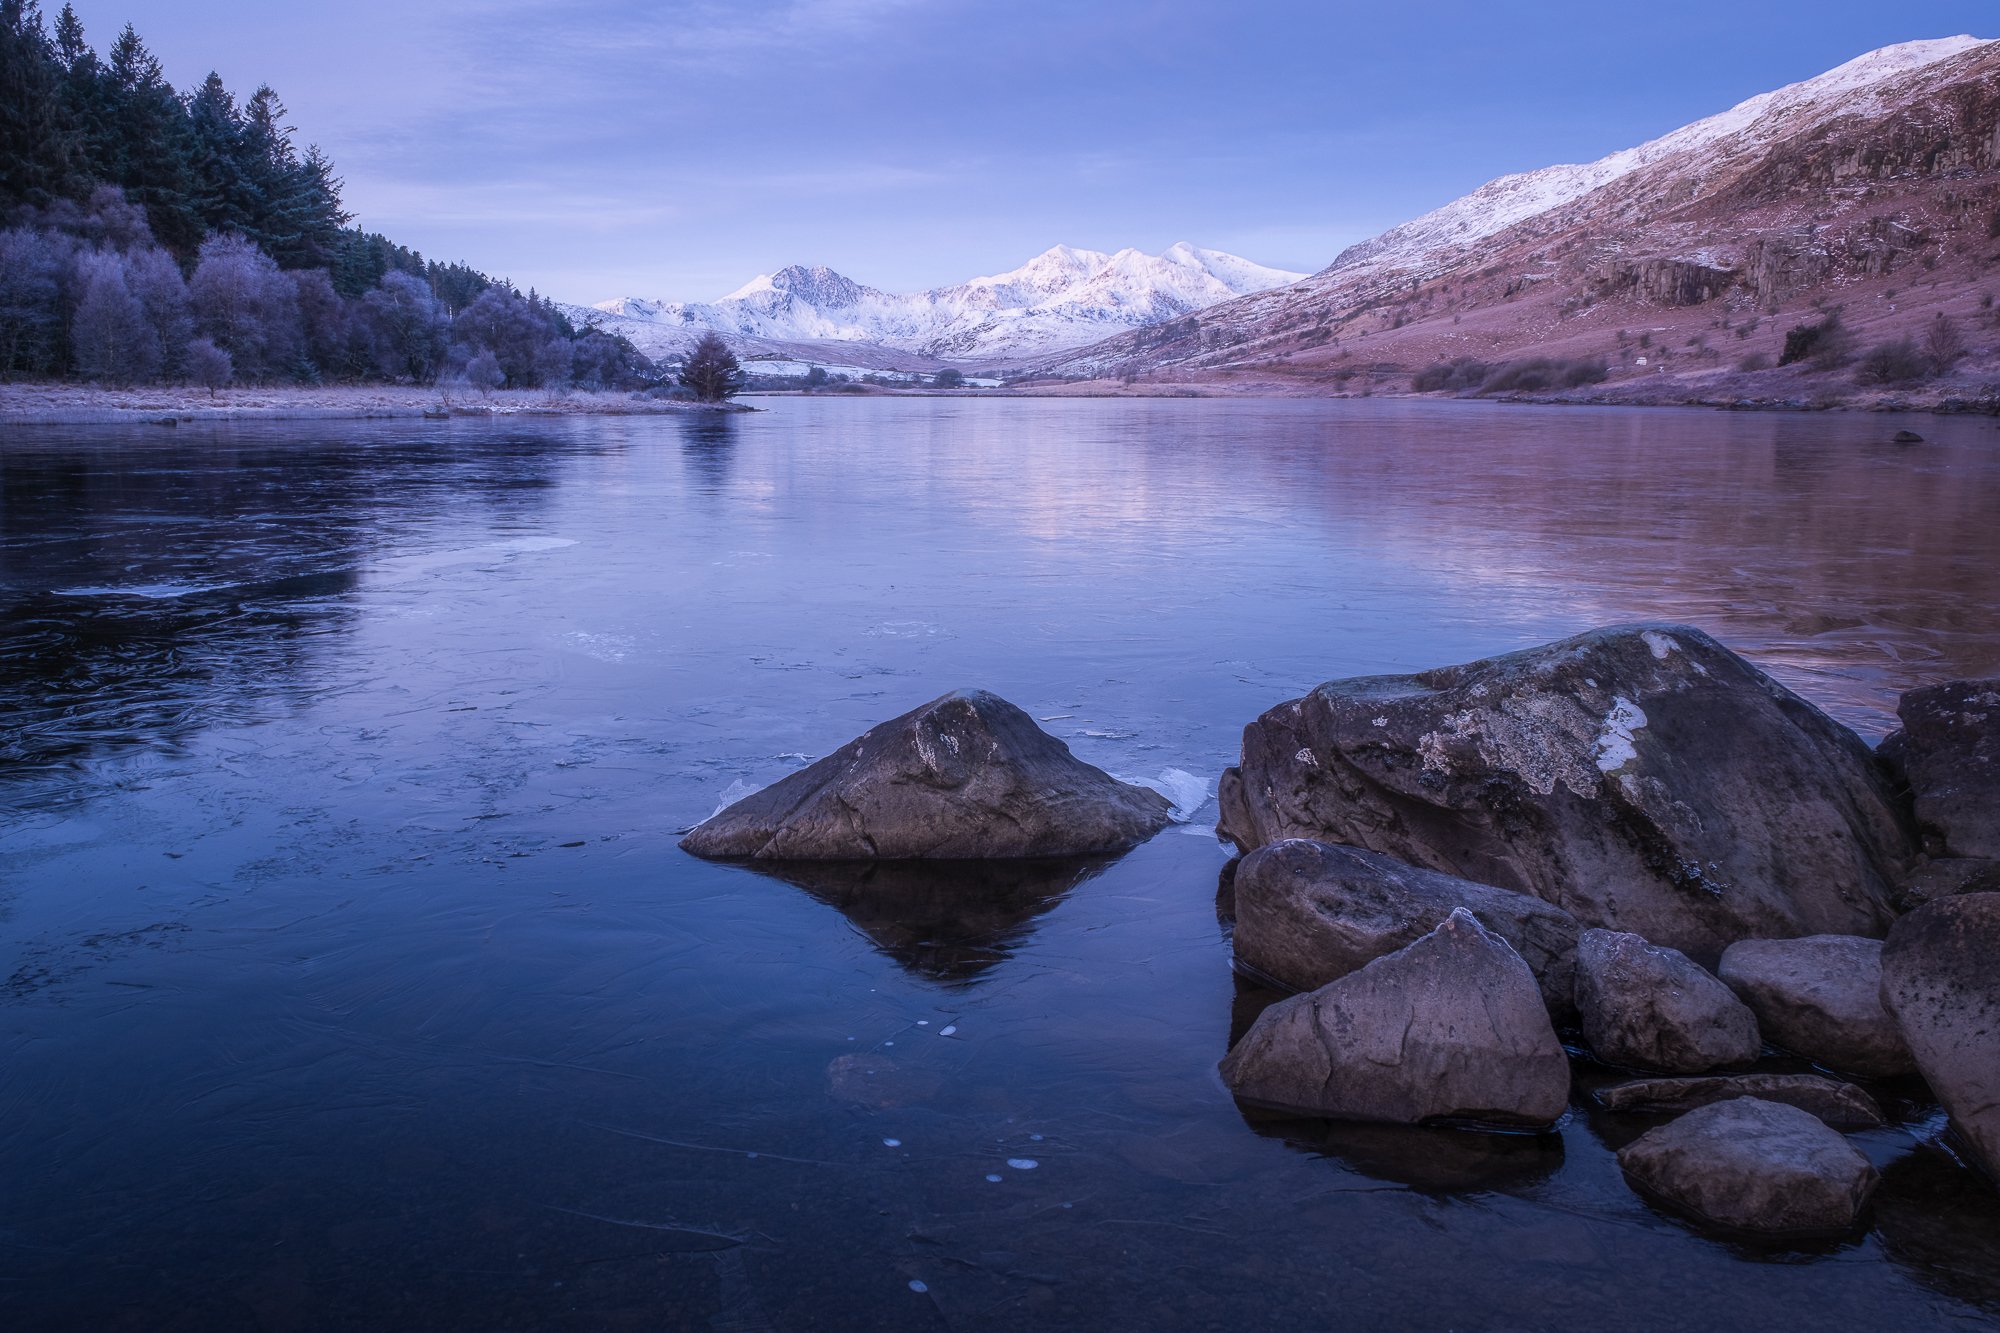
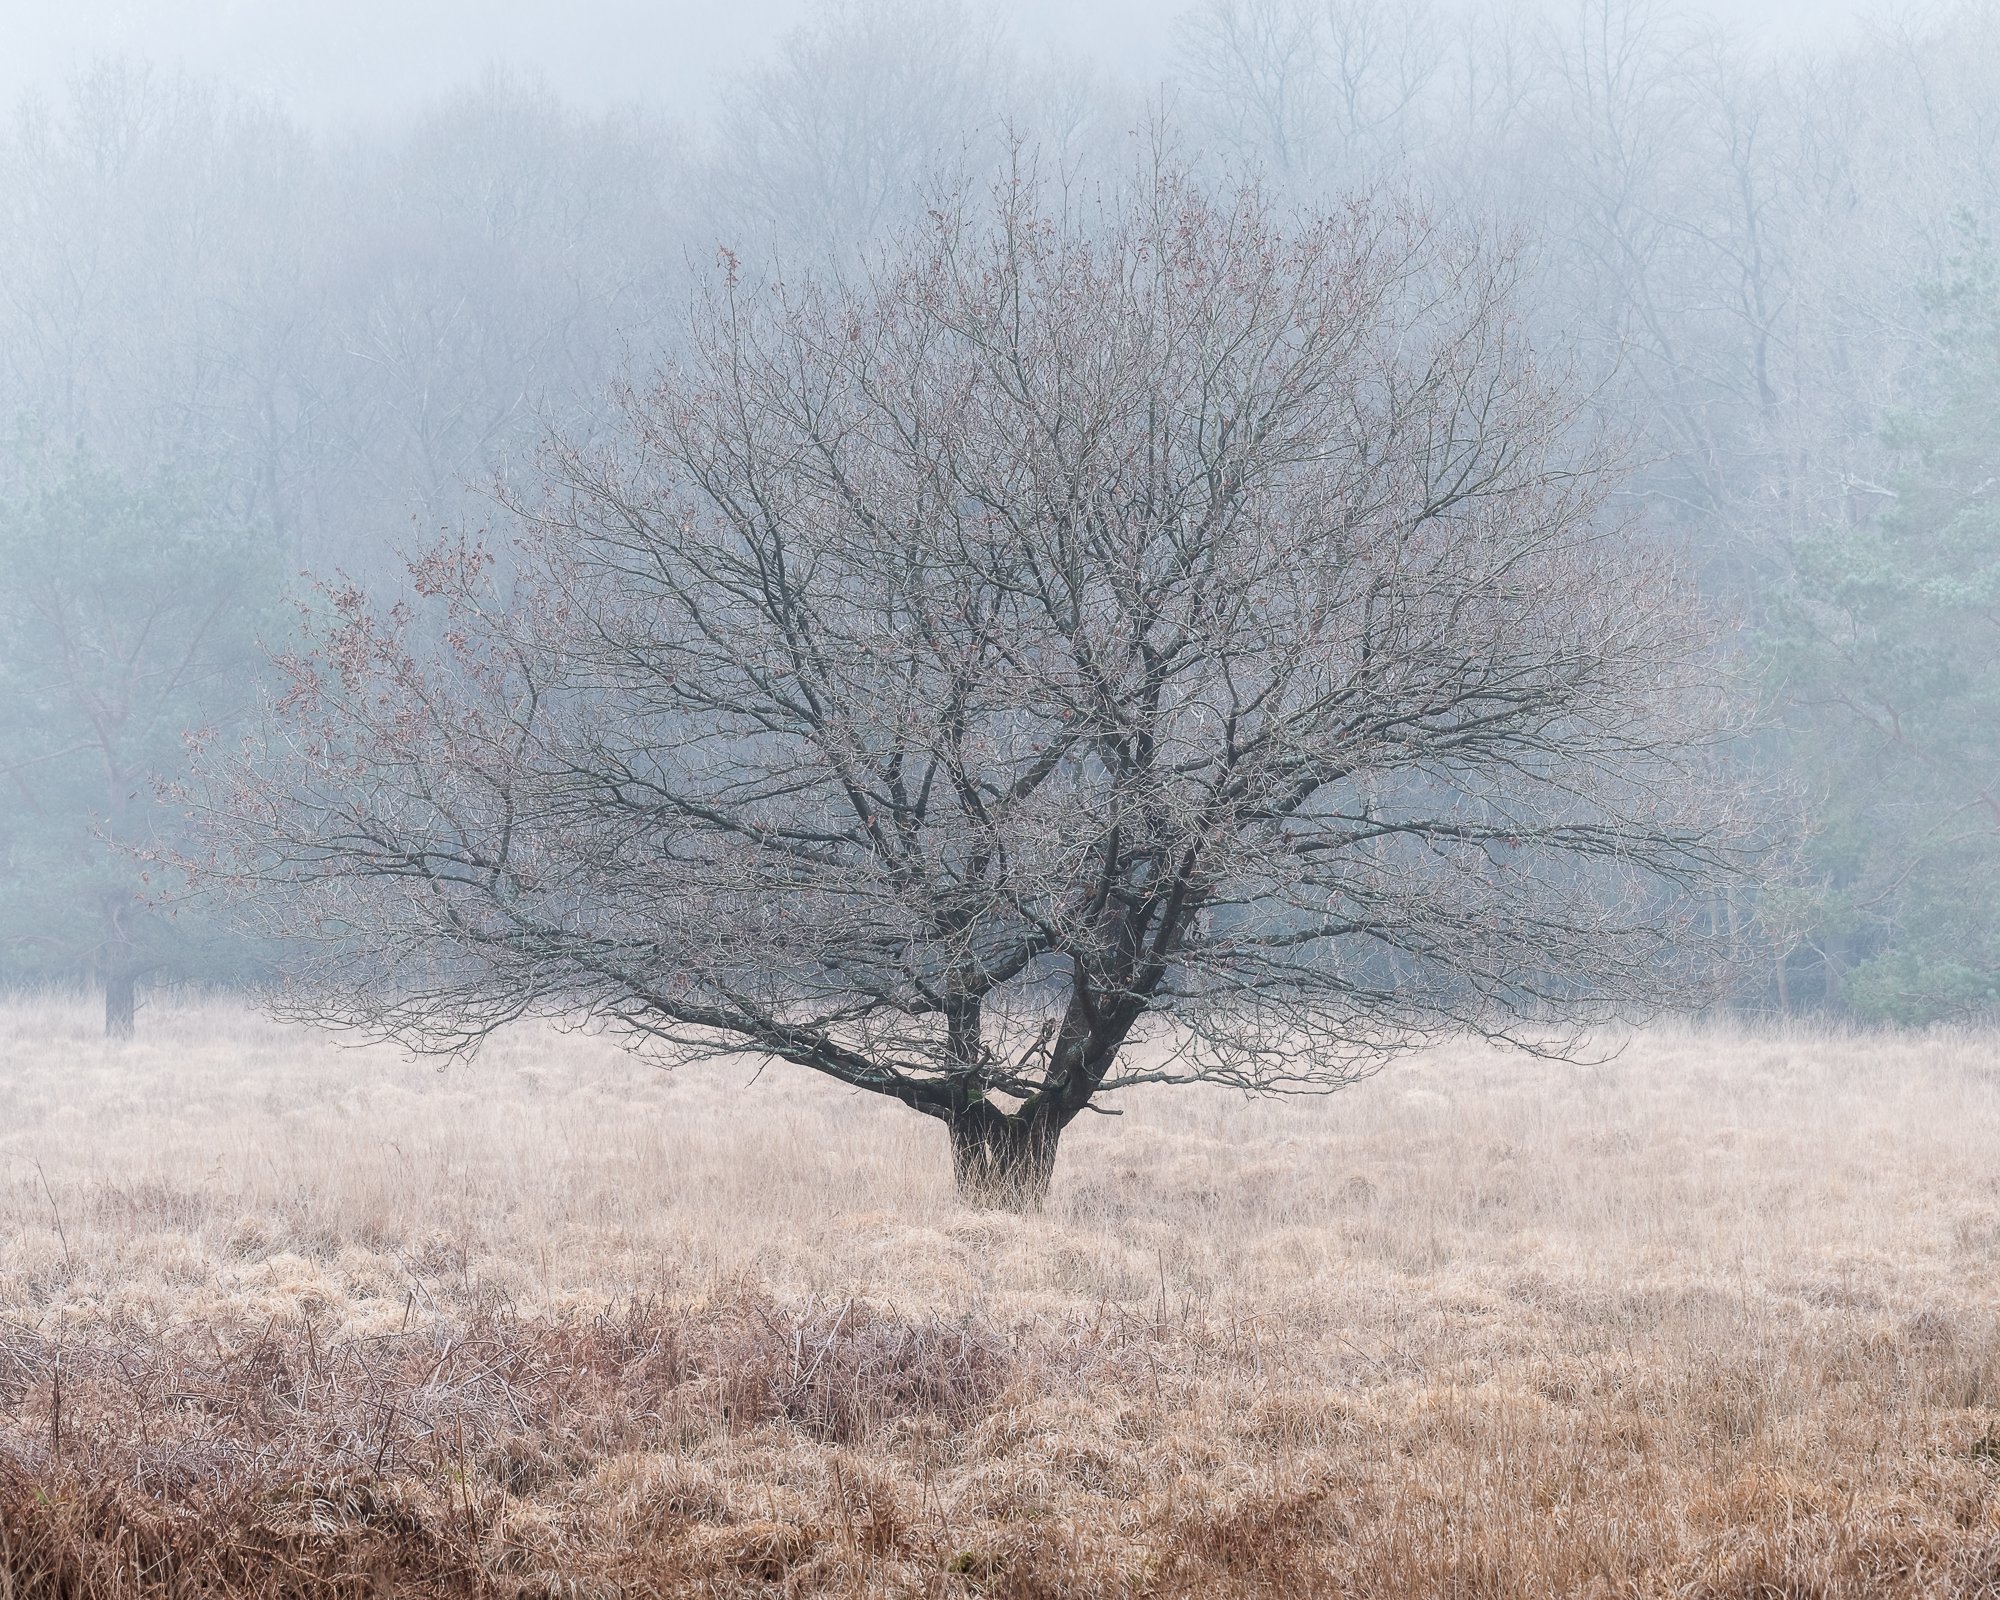
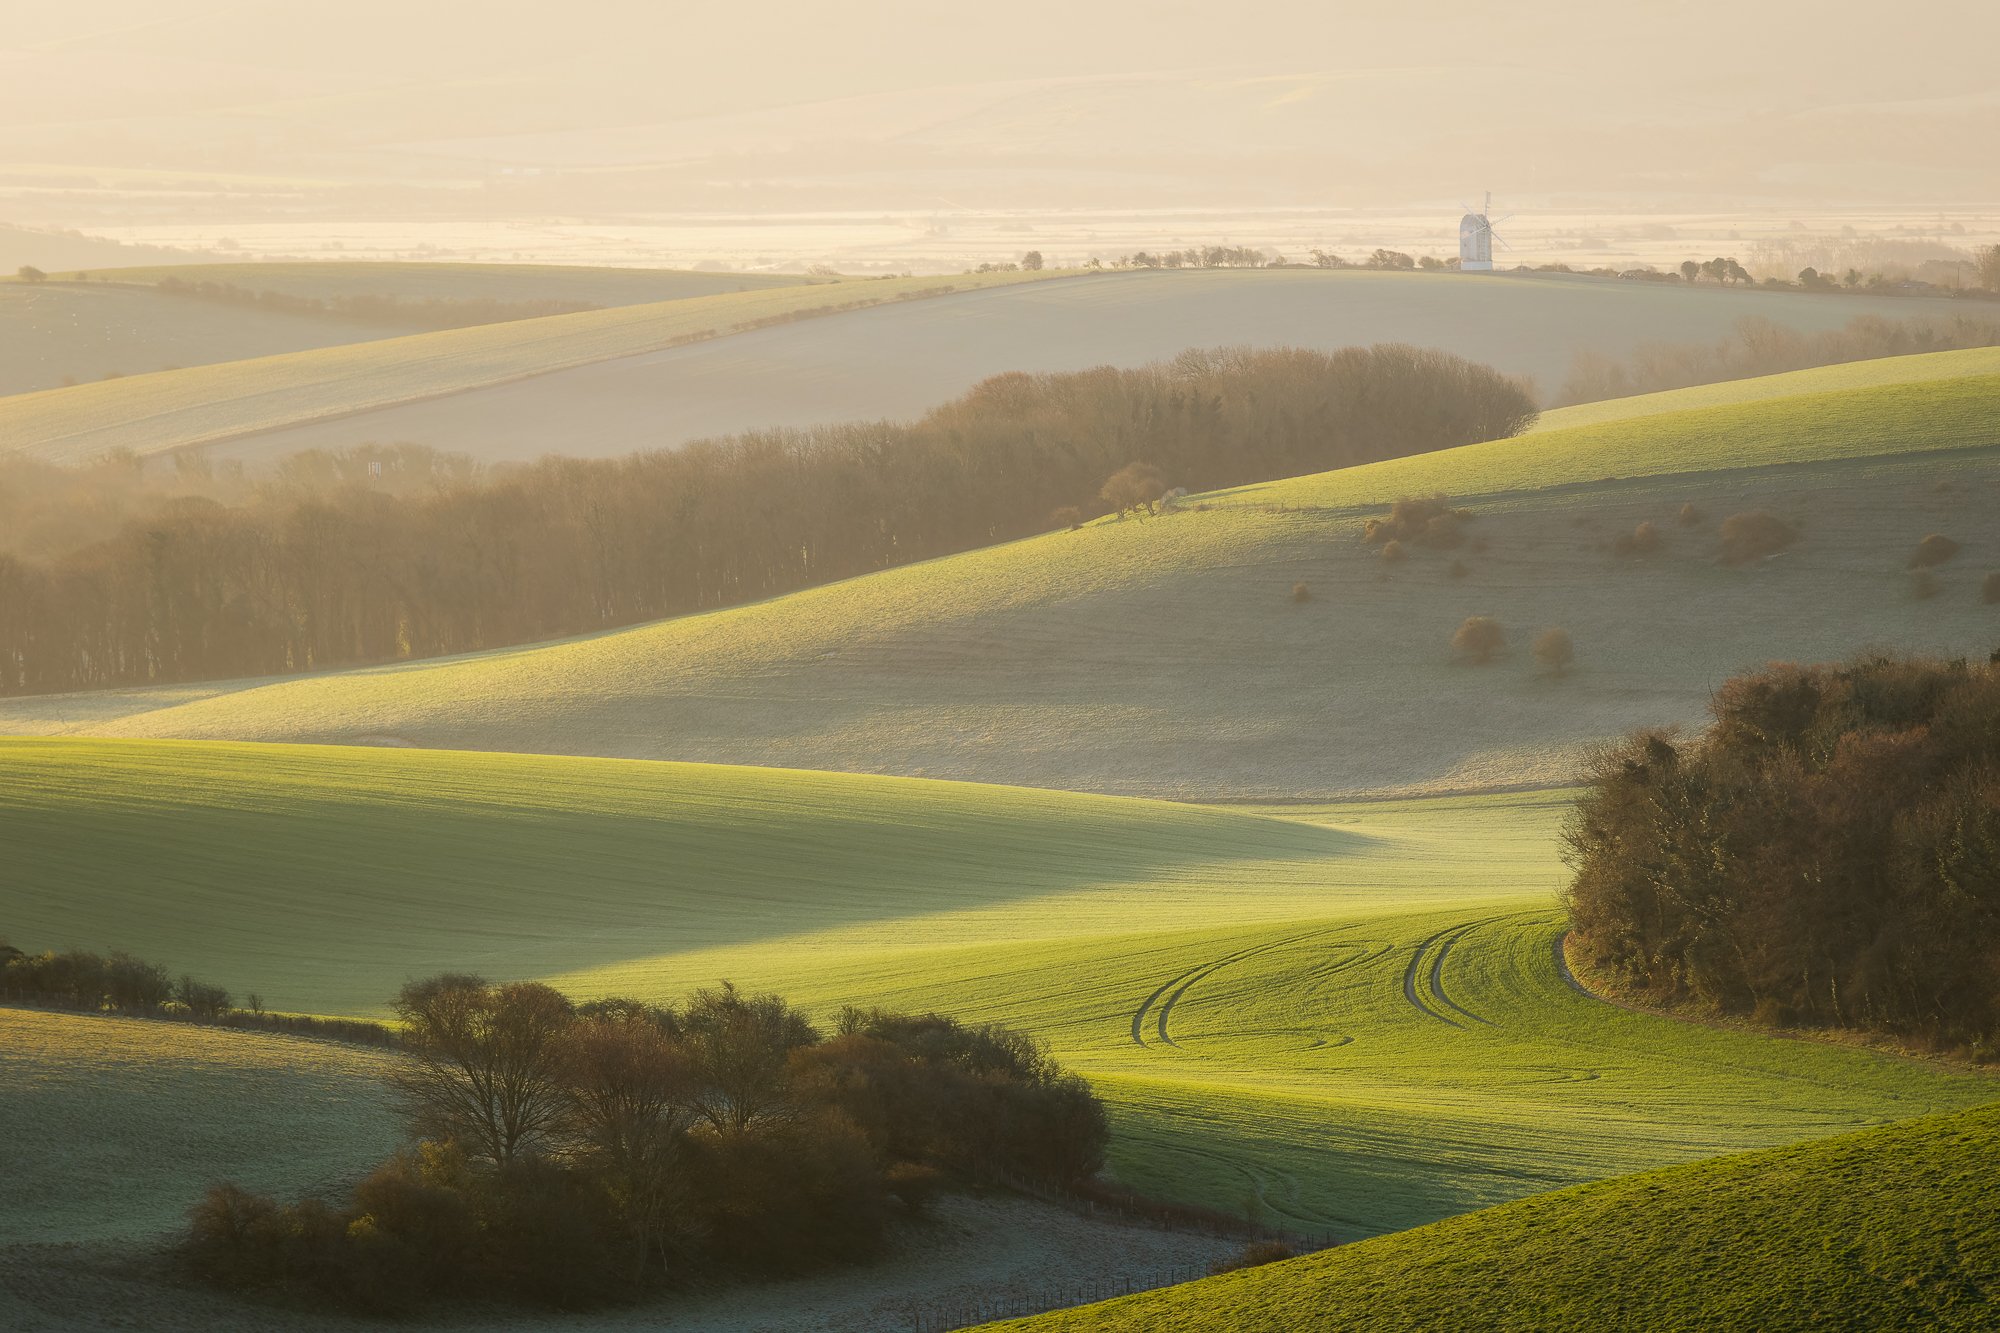
In keeping with the previous four seasonal photo updates, I’ve collected a few of my favourite photos taken during the winter months of 2024/2025. This is an opportunity for those visiting my site and reading my blog to see my latest work before it’s posted to social media in a format and style I want it to be presented in. There are no algorithms or preferential treatment here, meaning you get to see the photos I post in the way I want them viewed.
As ever, I welcome any feedback, comments or suggestions either by email, through my contact page or just as a comment at the end of this post.
Below are the previous four instalments of my “New Photos” series.
December 2024 to February 2025 - Winter 2024 collection.
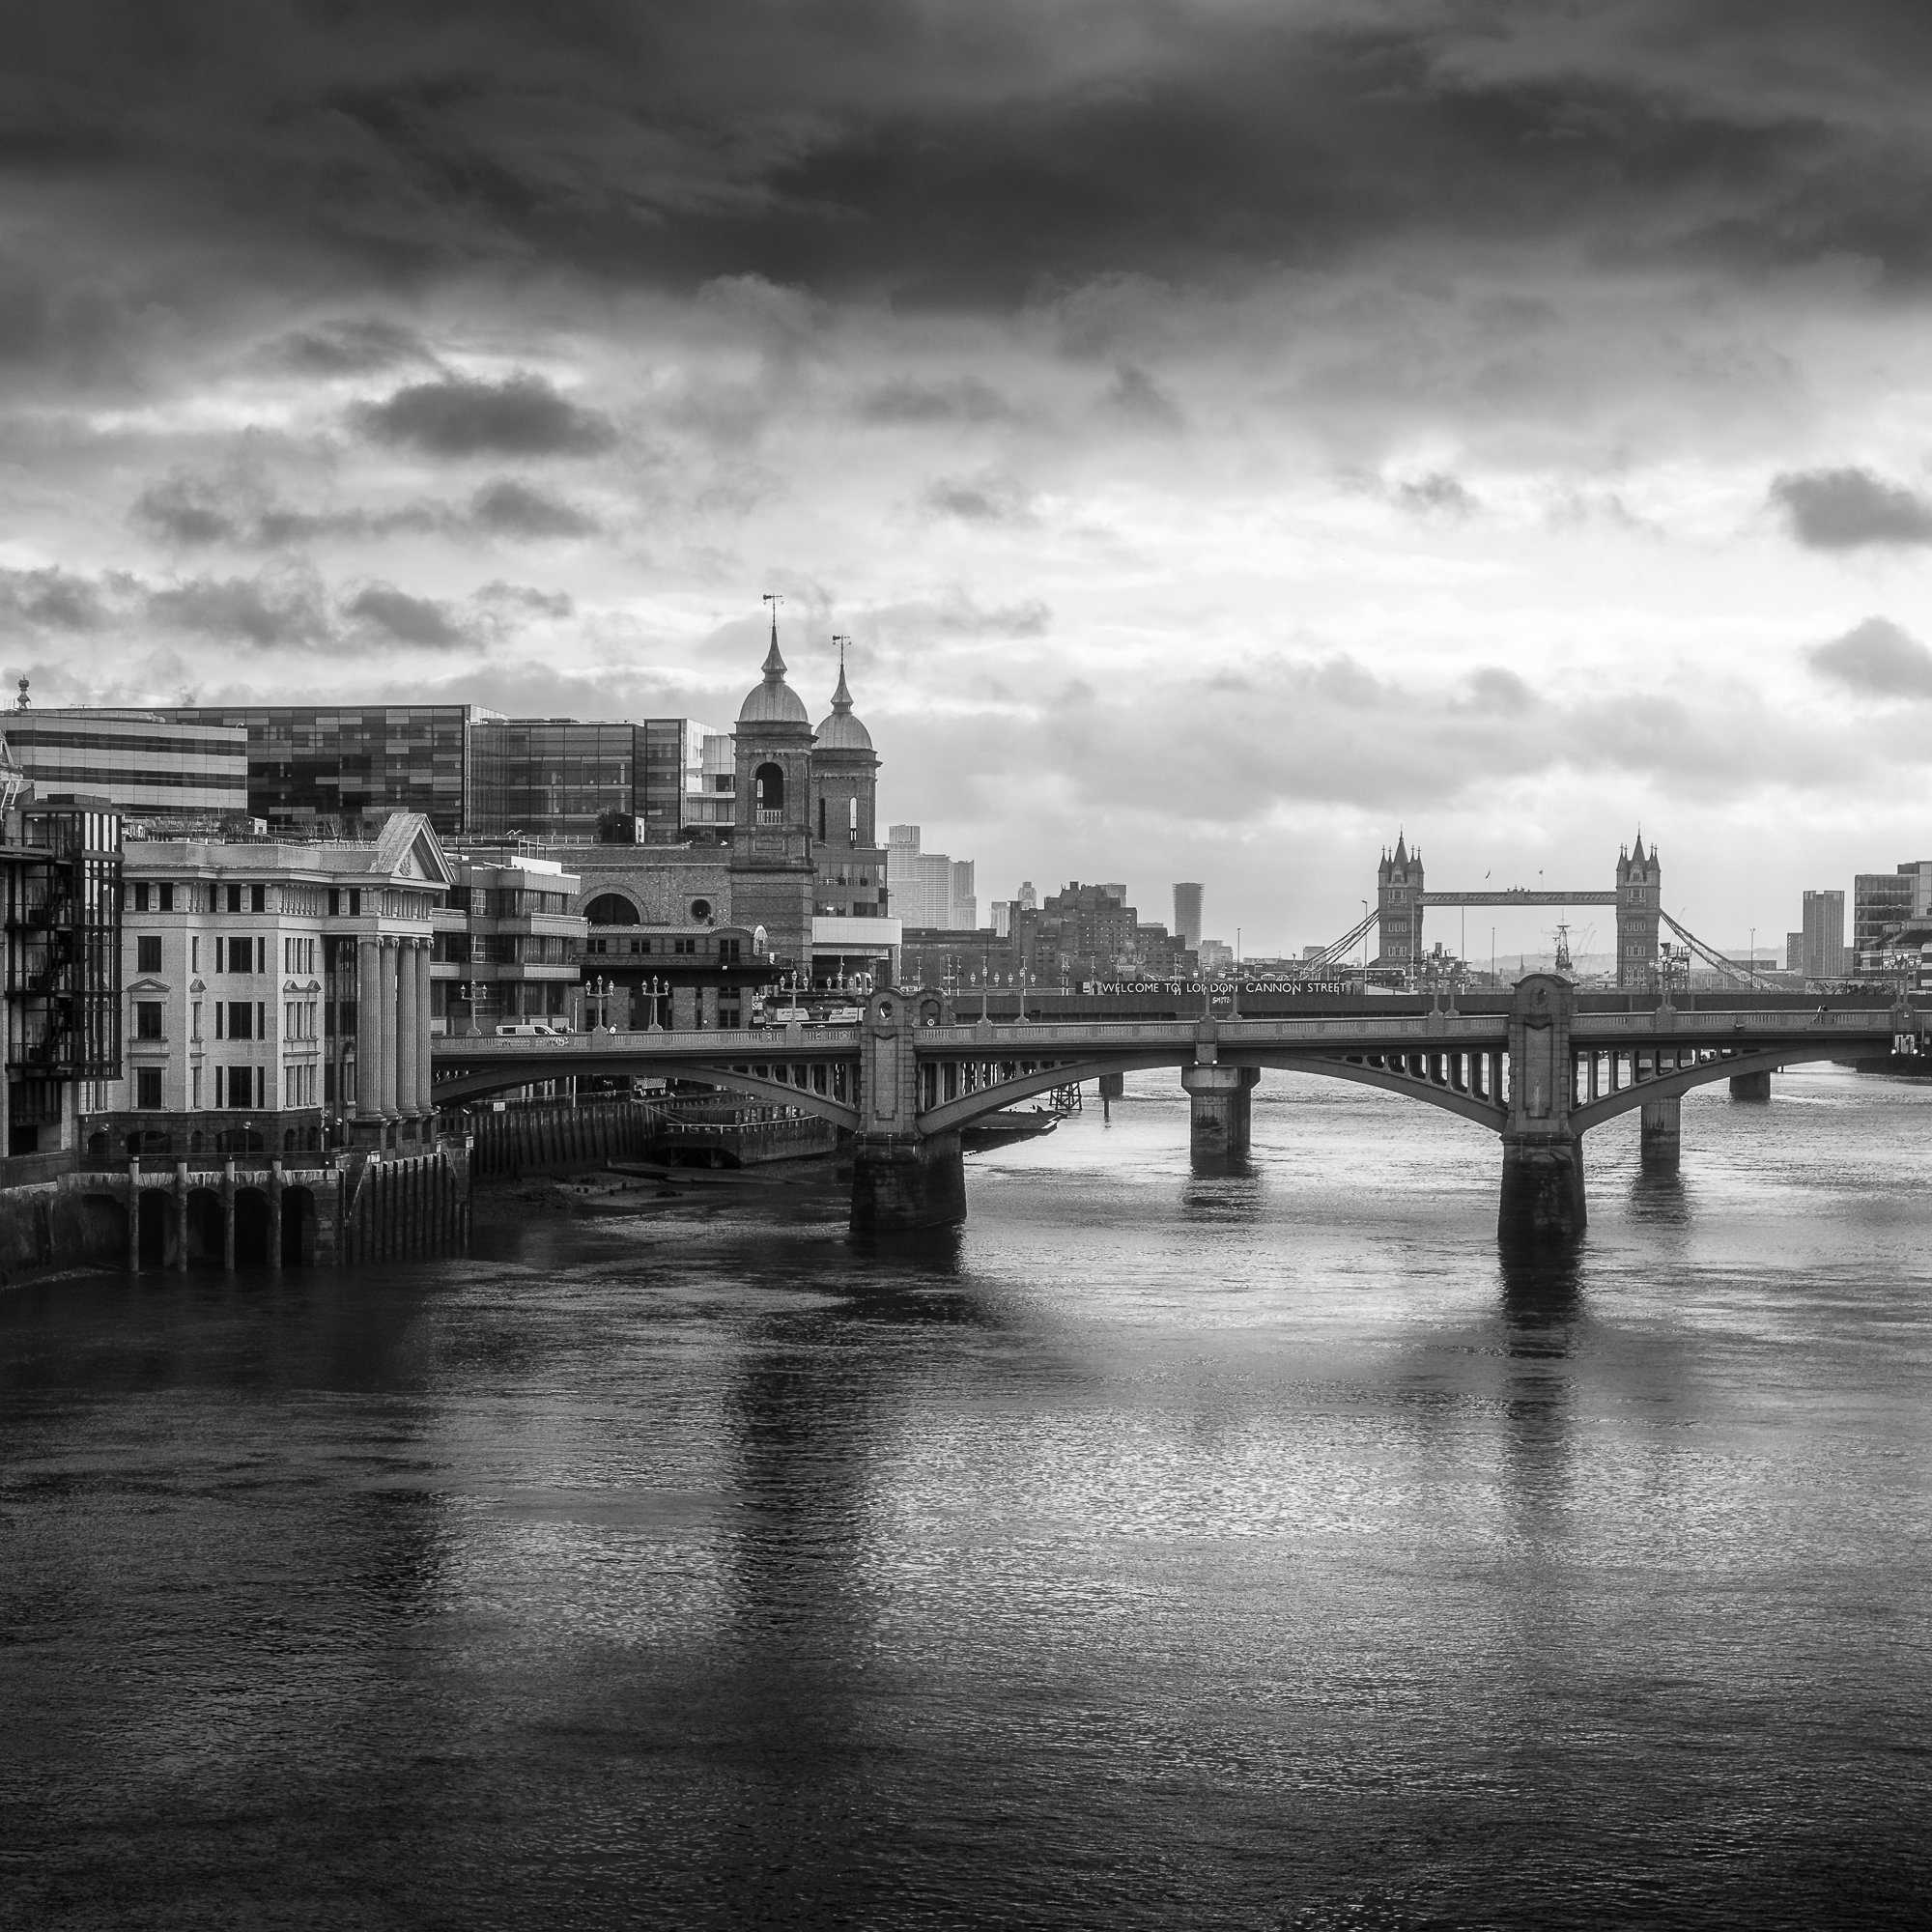
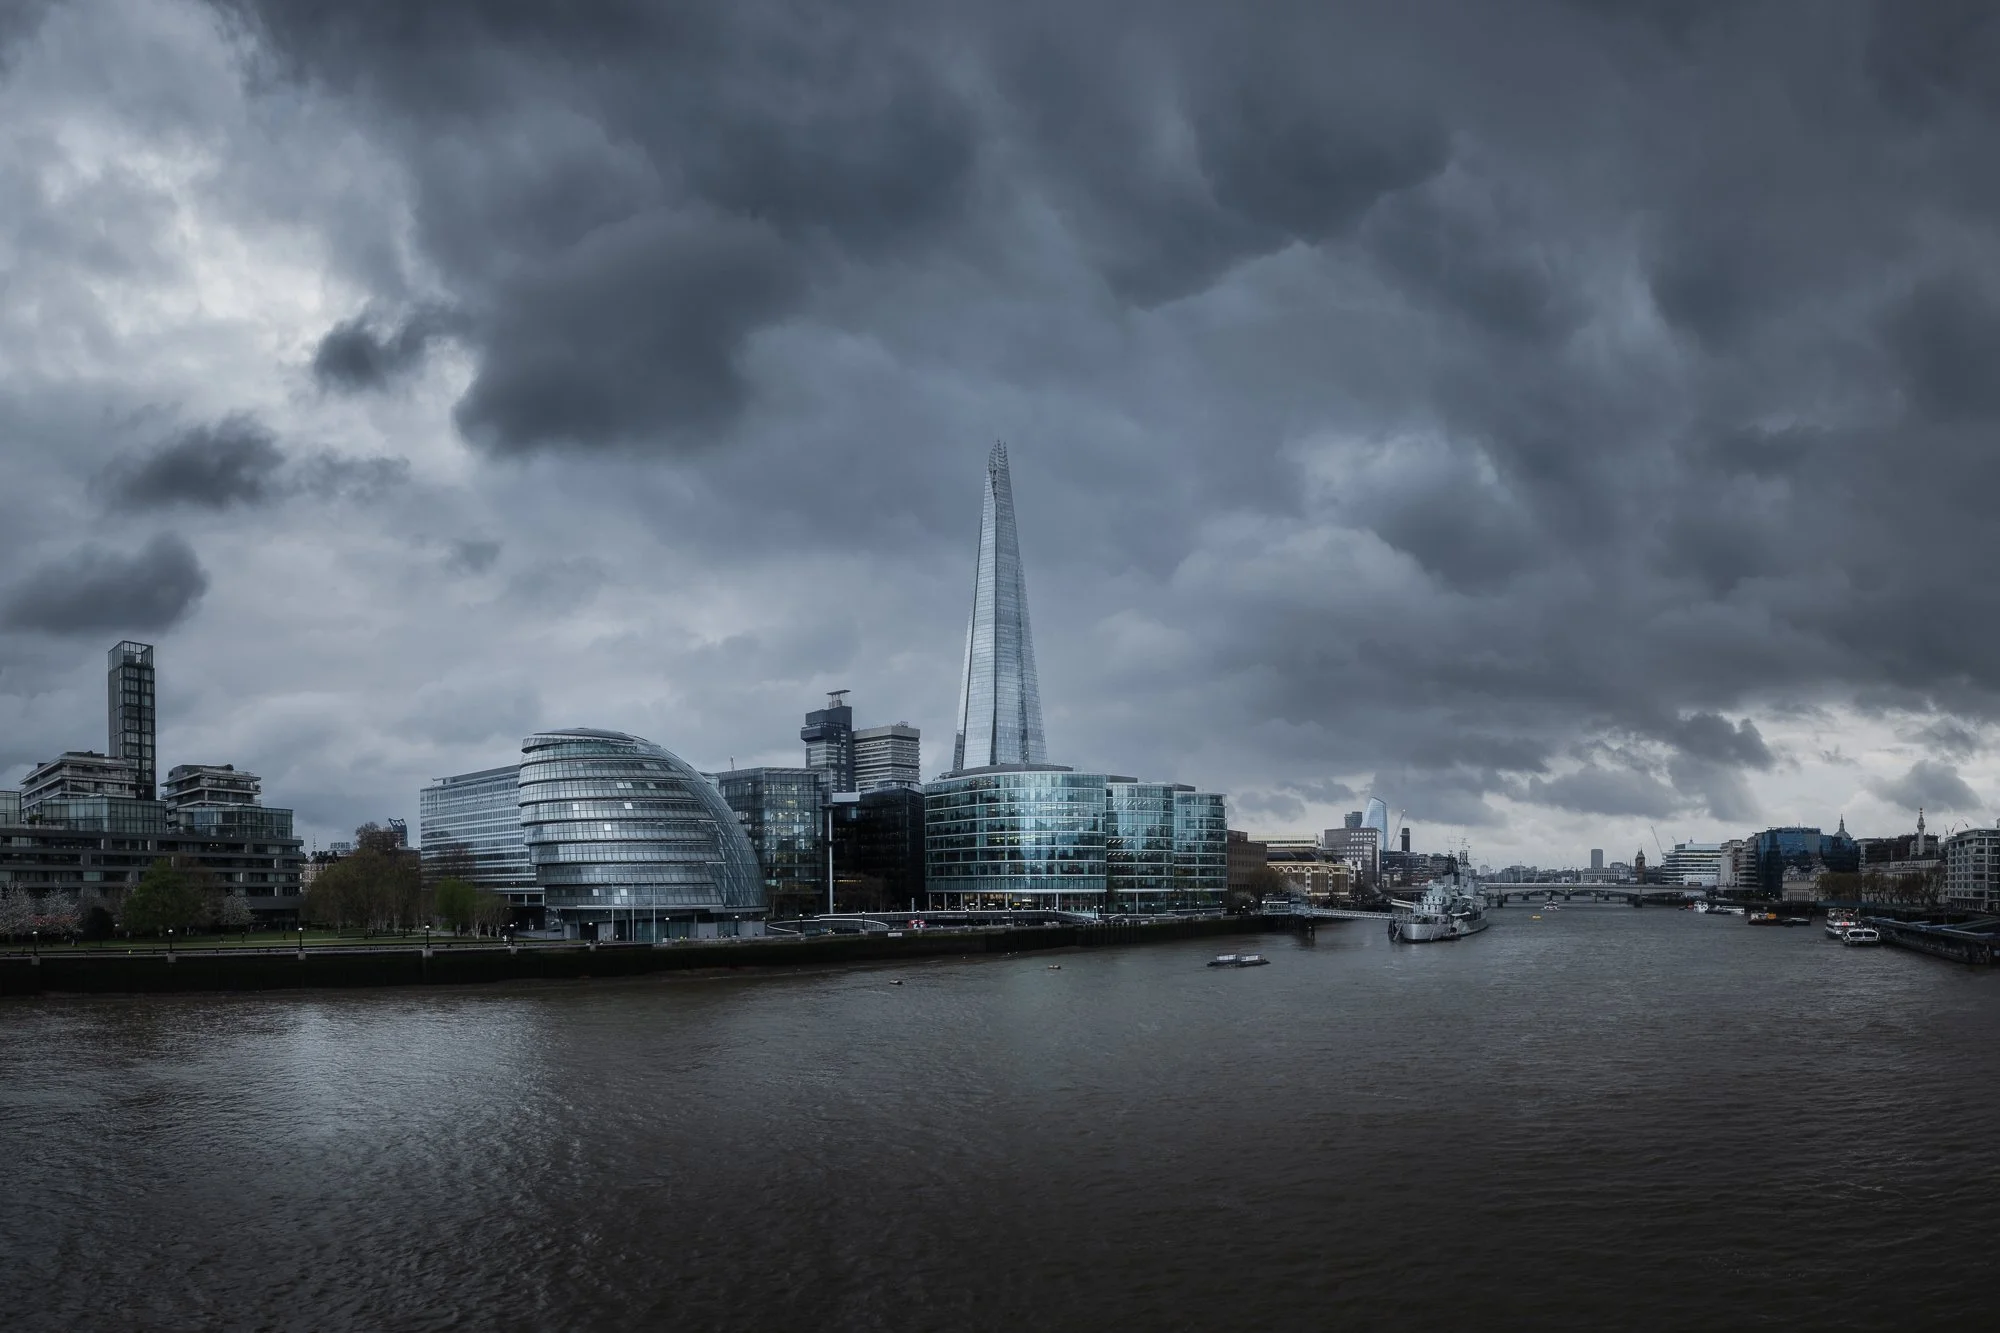
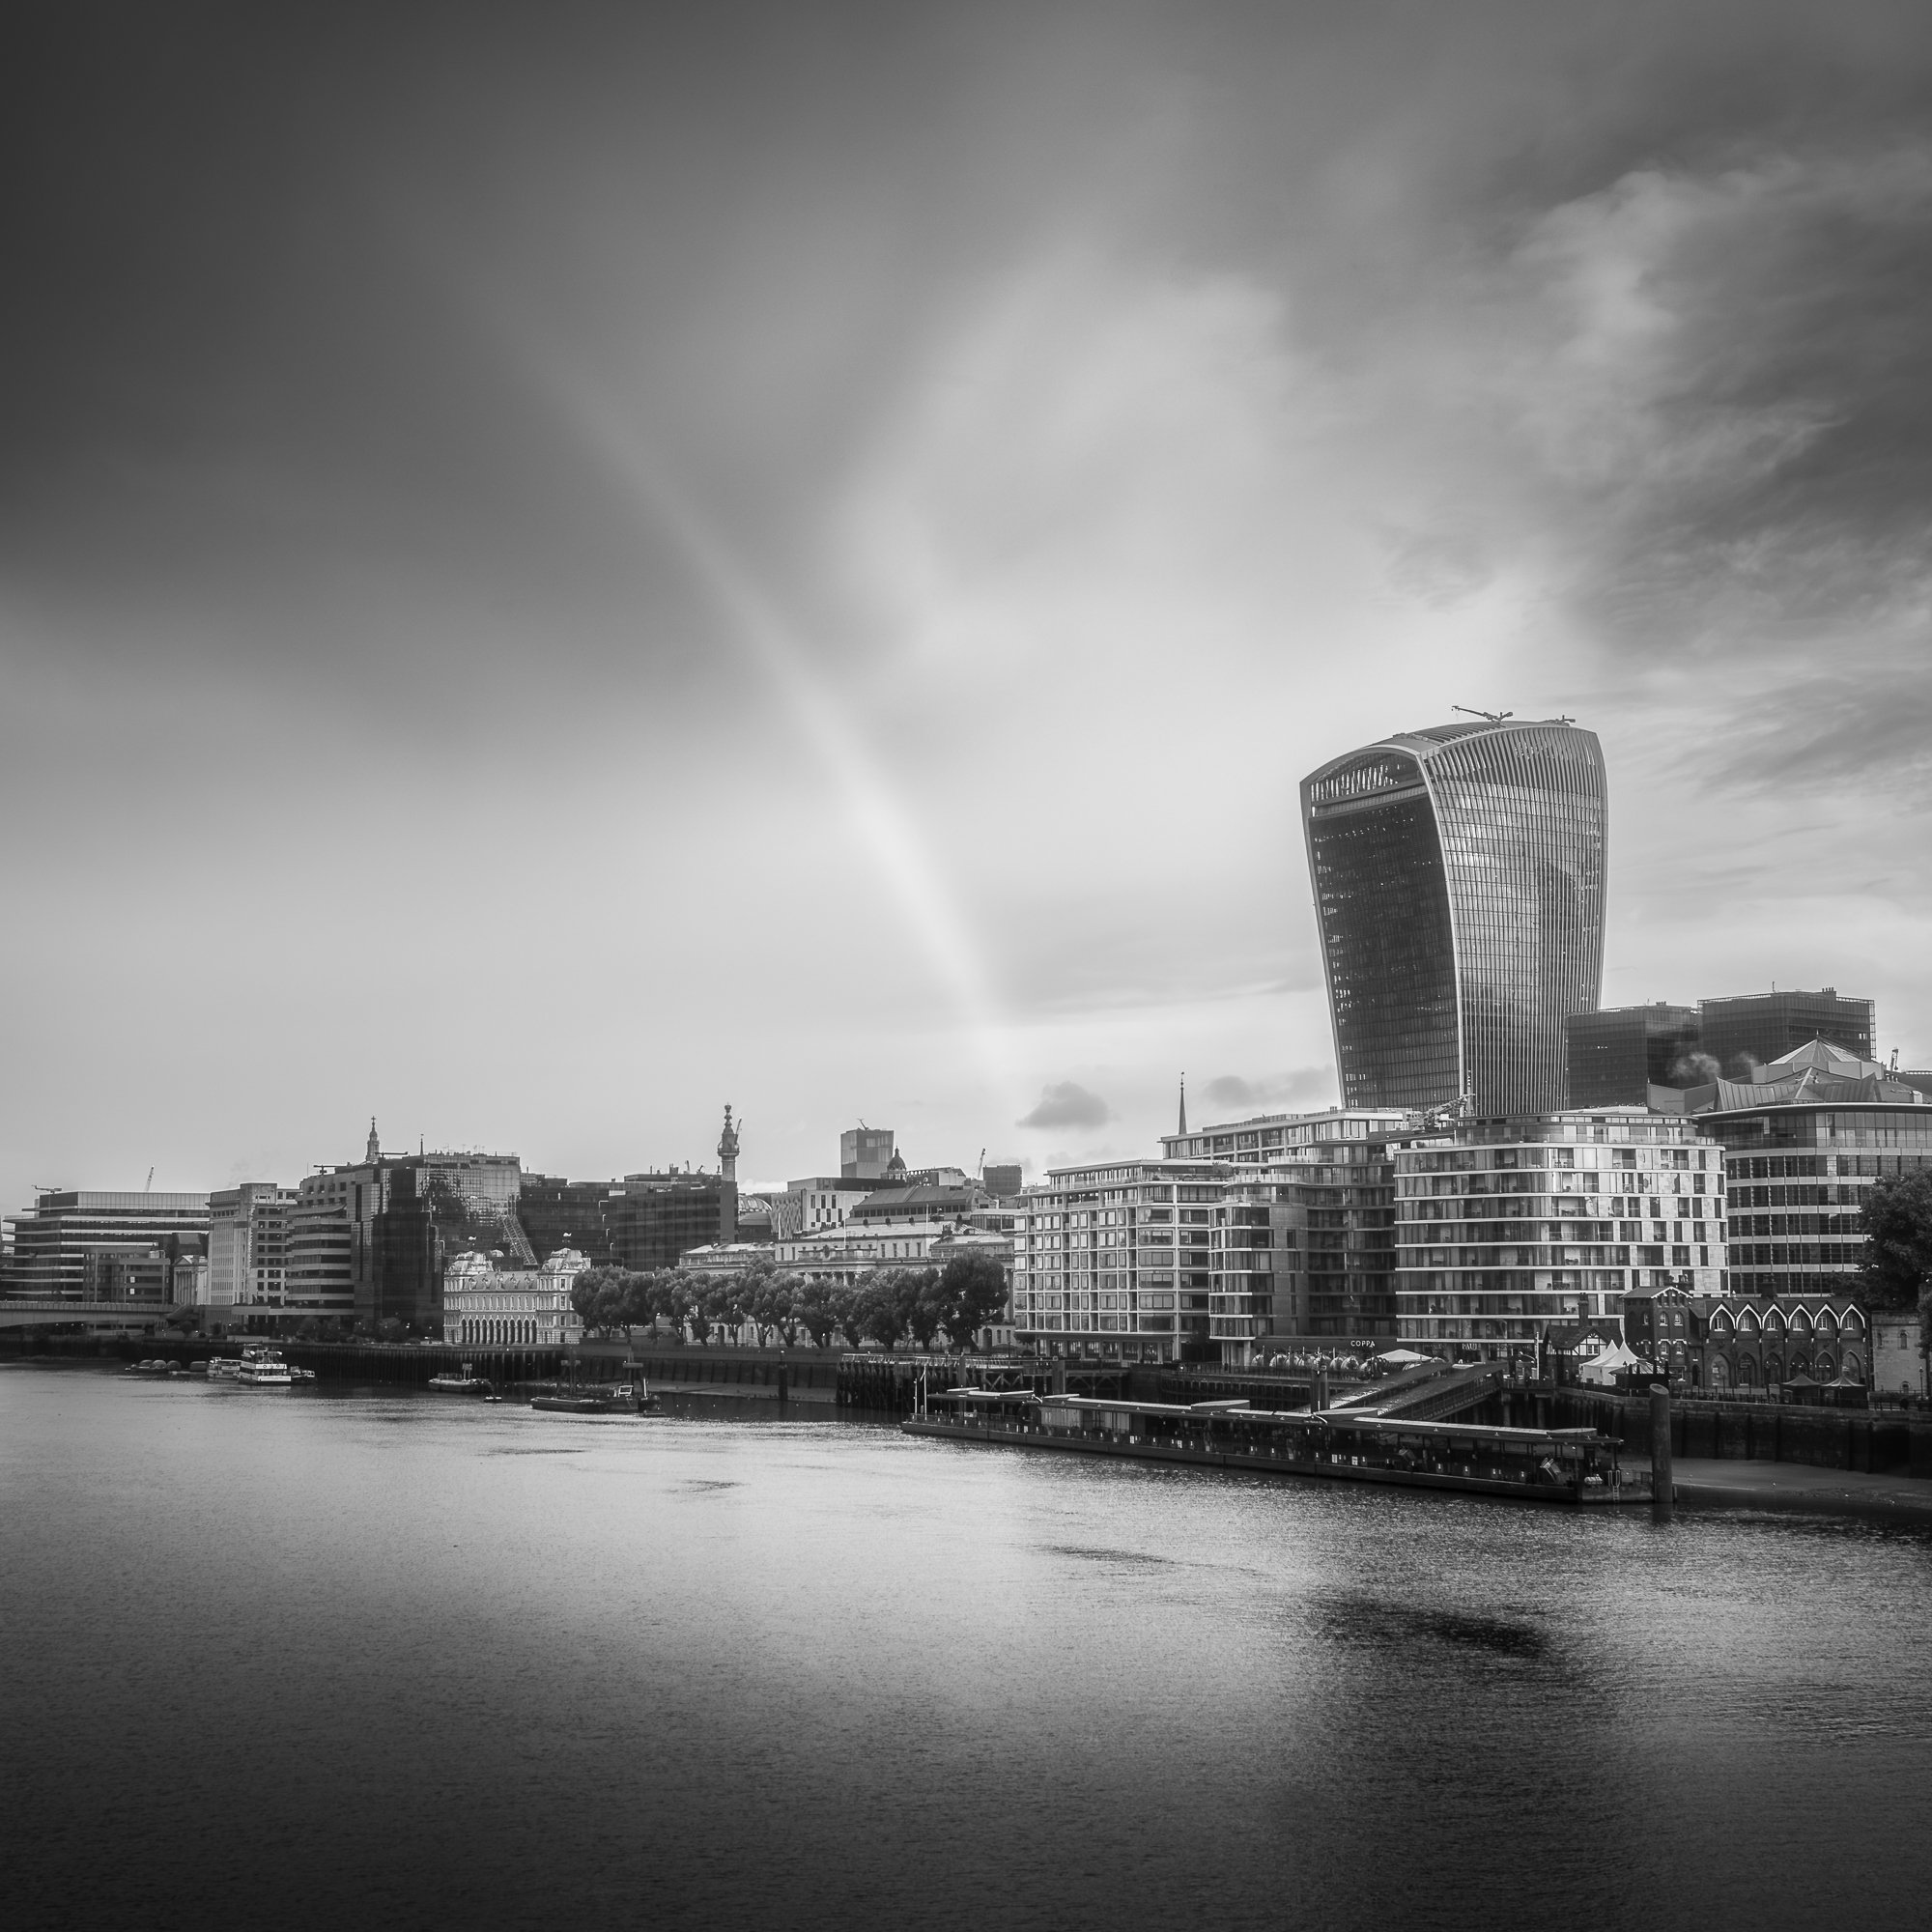
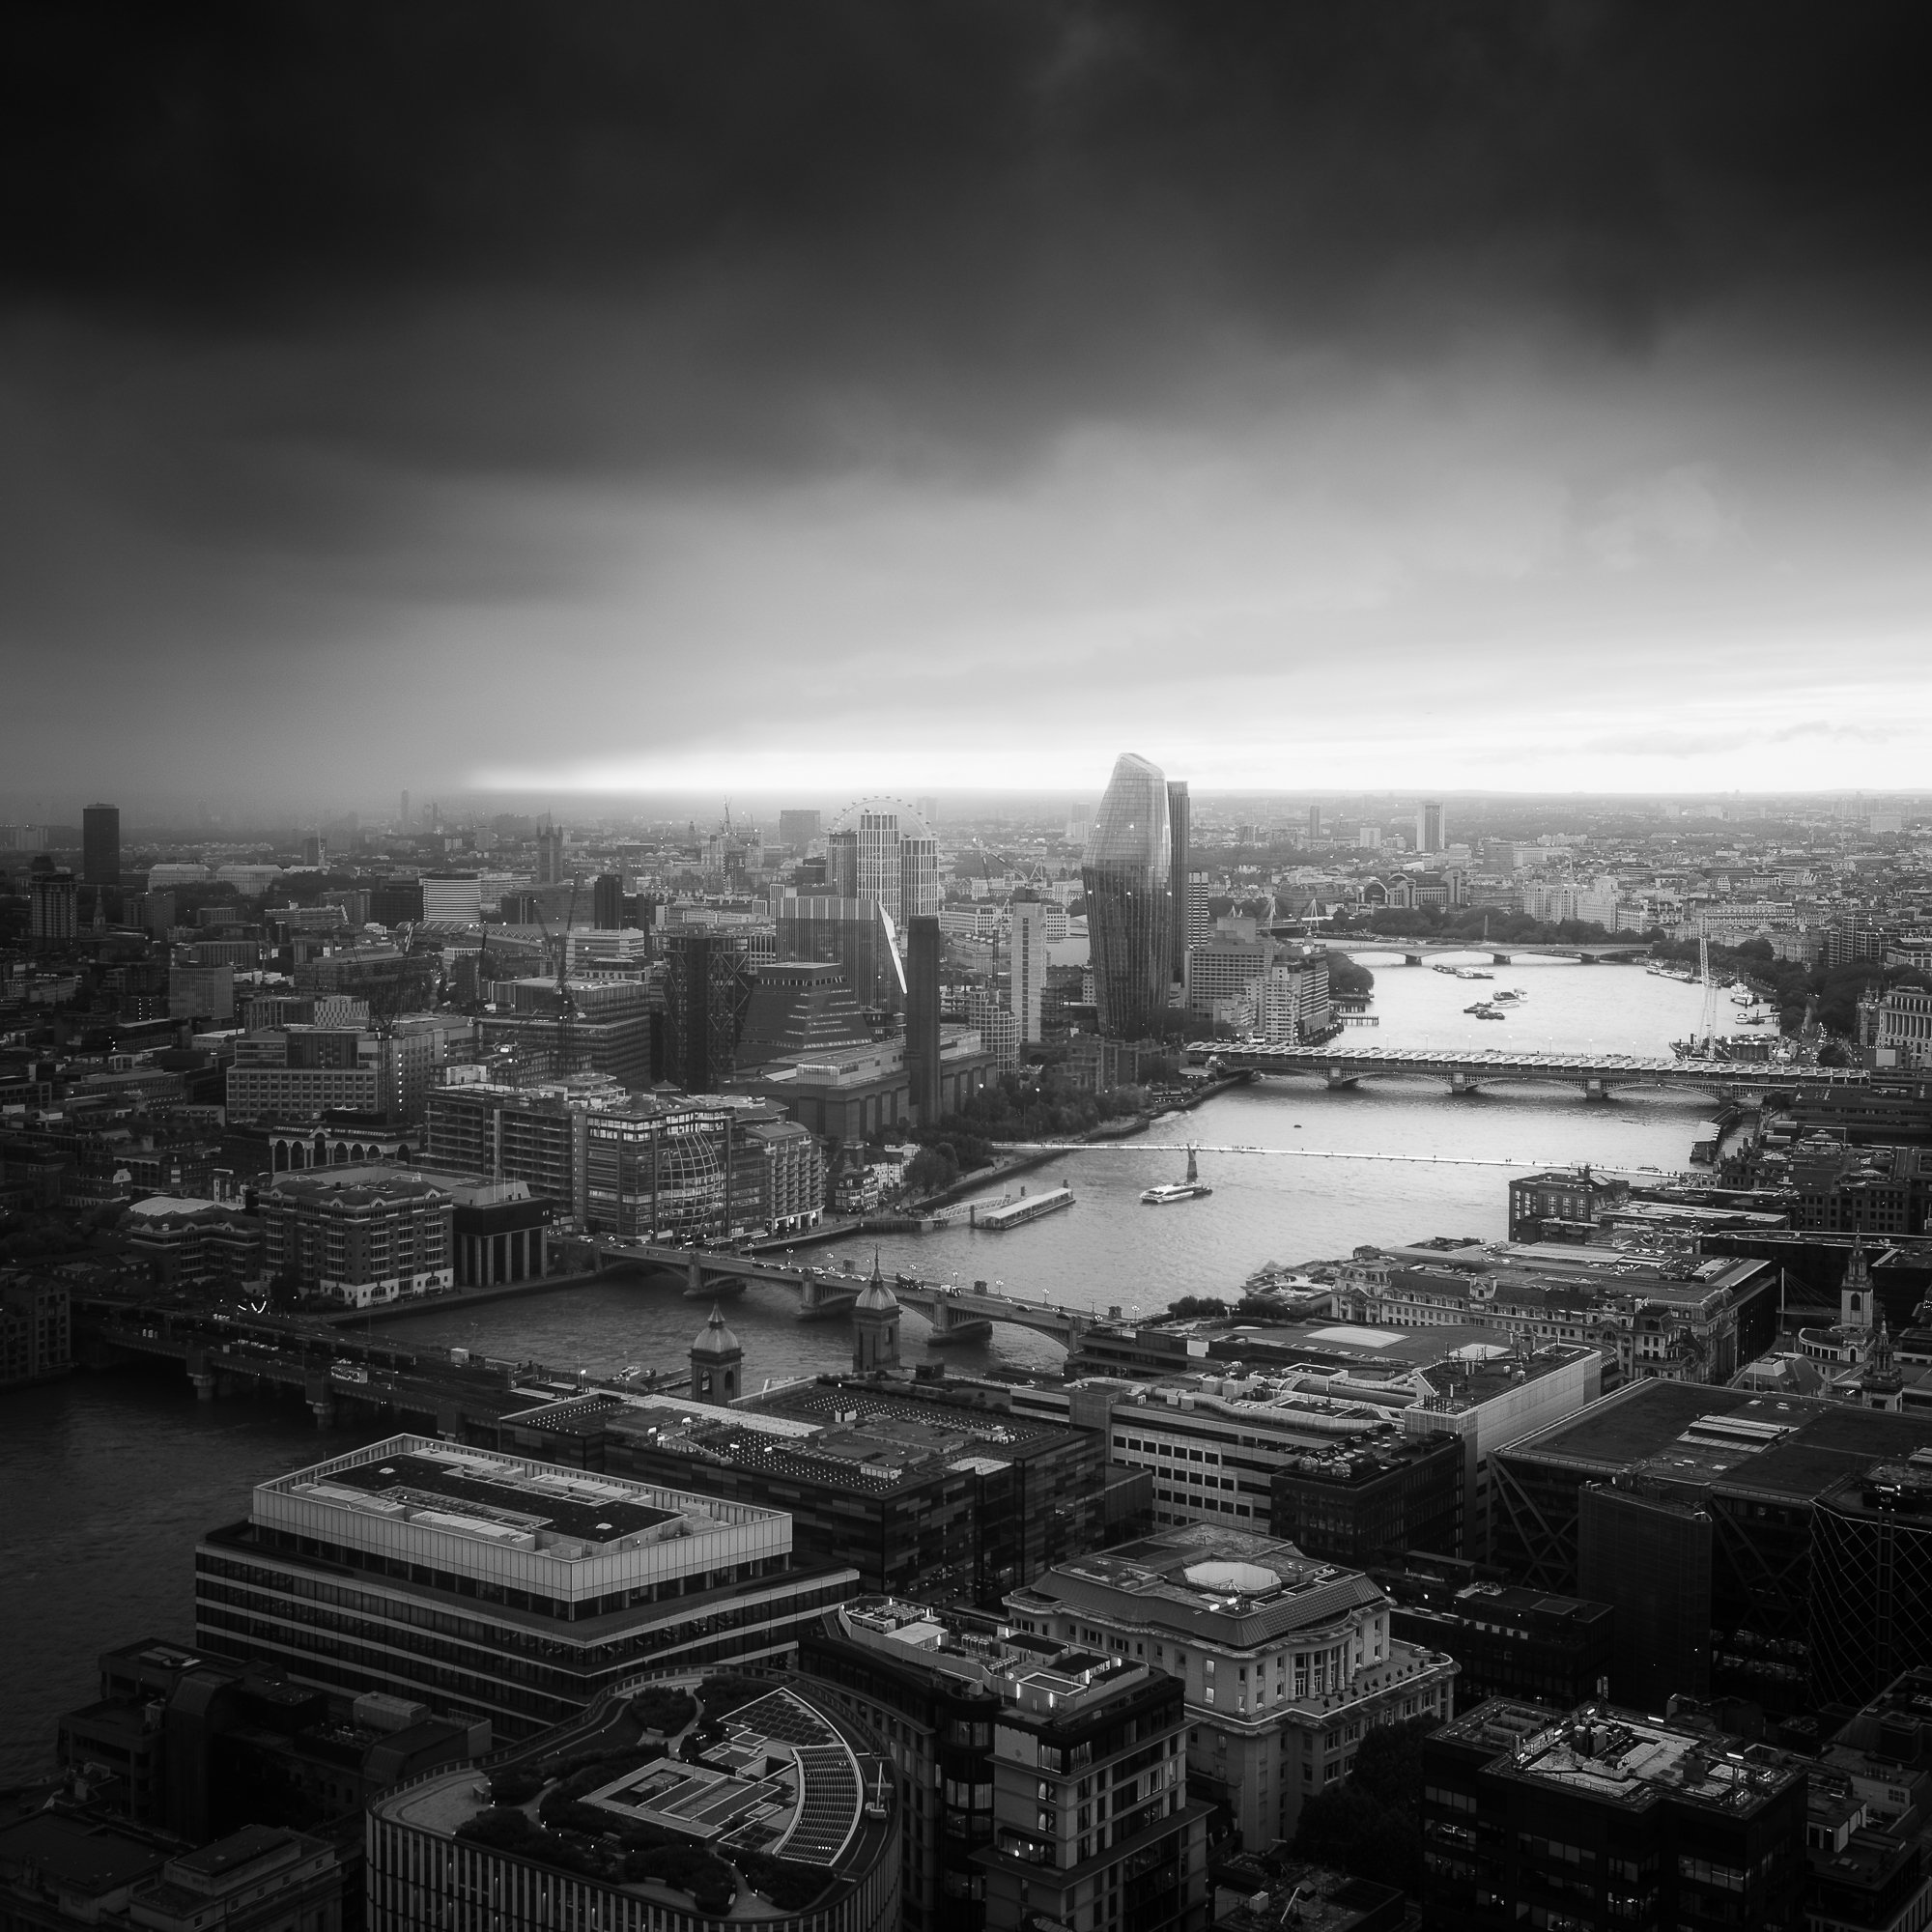
In a change from the previous seasonal collections, I’ve started this one with a few photos I took of London during winter. It may not be apparent to everyone just how much the different seasons affects the photos I take in the city, and for sure, visually, the differences might be less obvious than other landscape photography subjects, but the time of year still makes a huge difference to how I go about taking cityscape photos in London.
The main seasonal factors that affect the photos I take are the weather conditions, the sun’s lower position during the day and where and when the sun rises and sets. I’ll expand on these as we go.
Photographing London
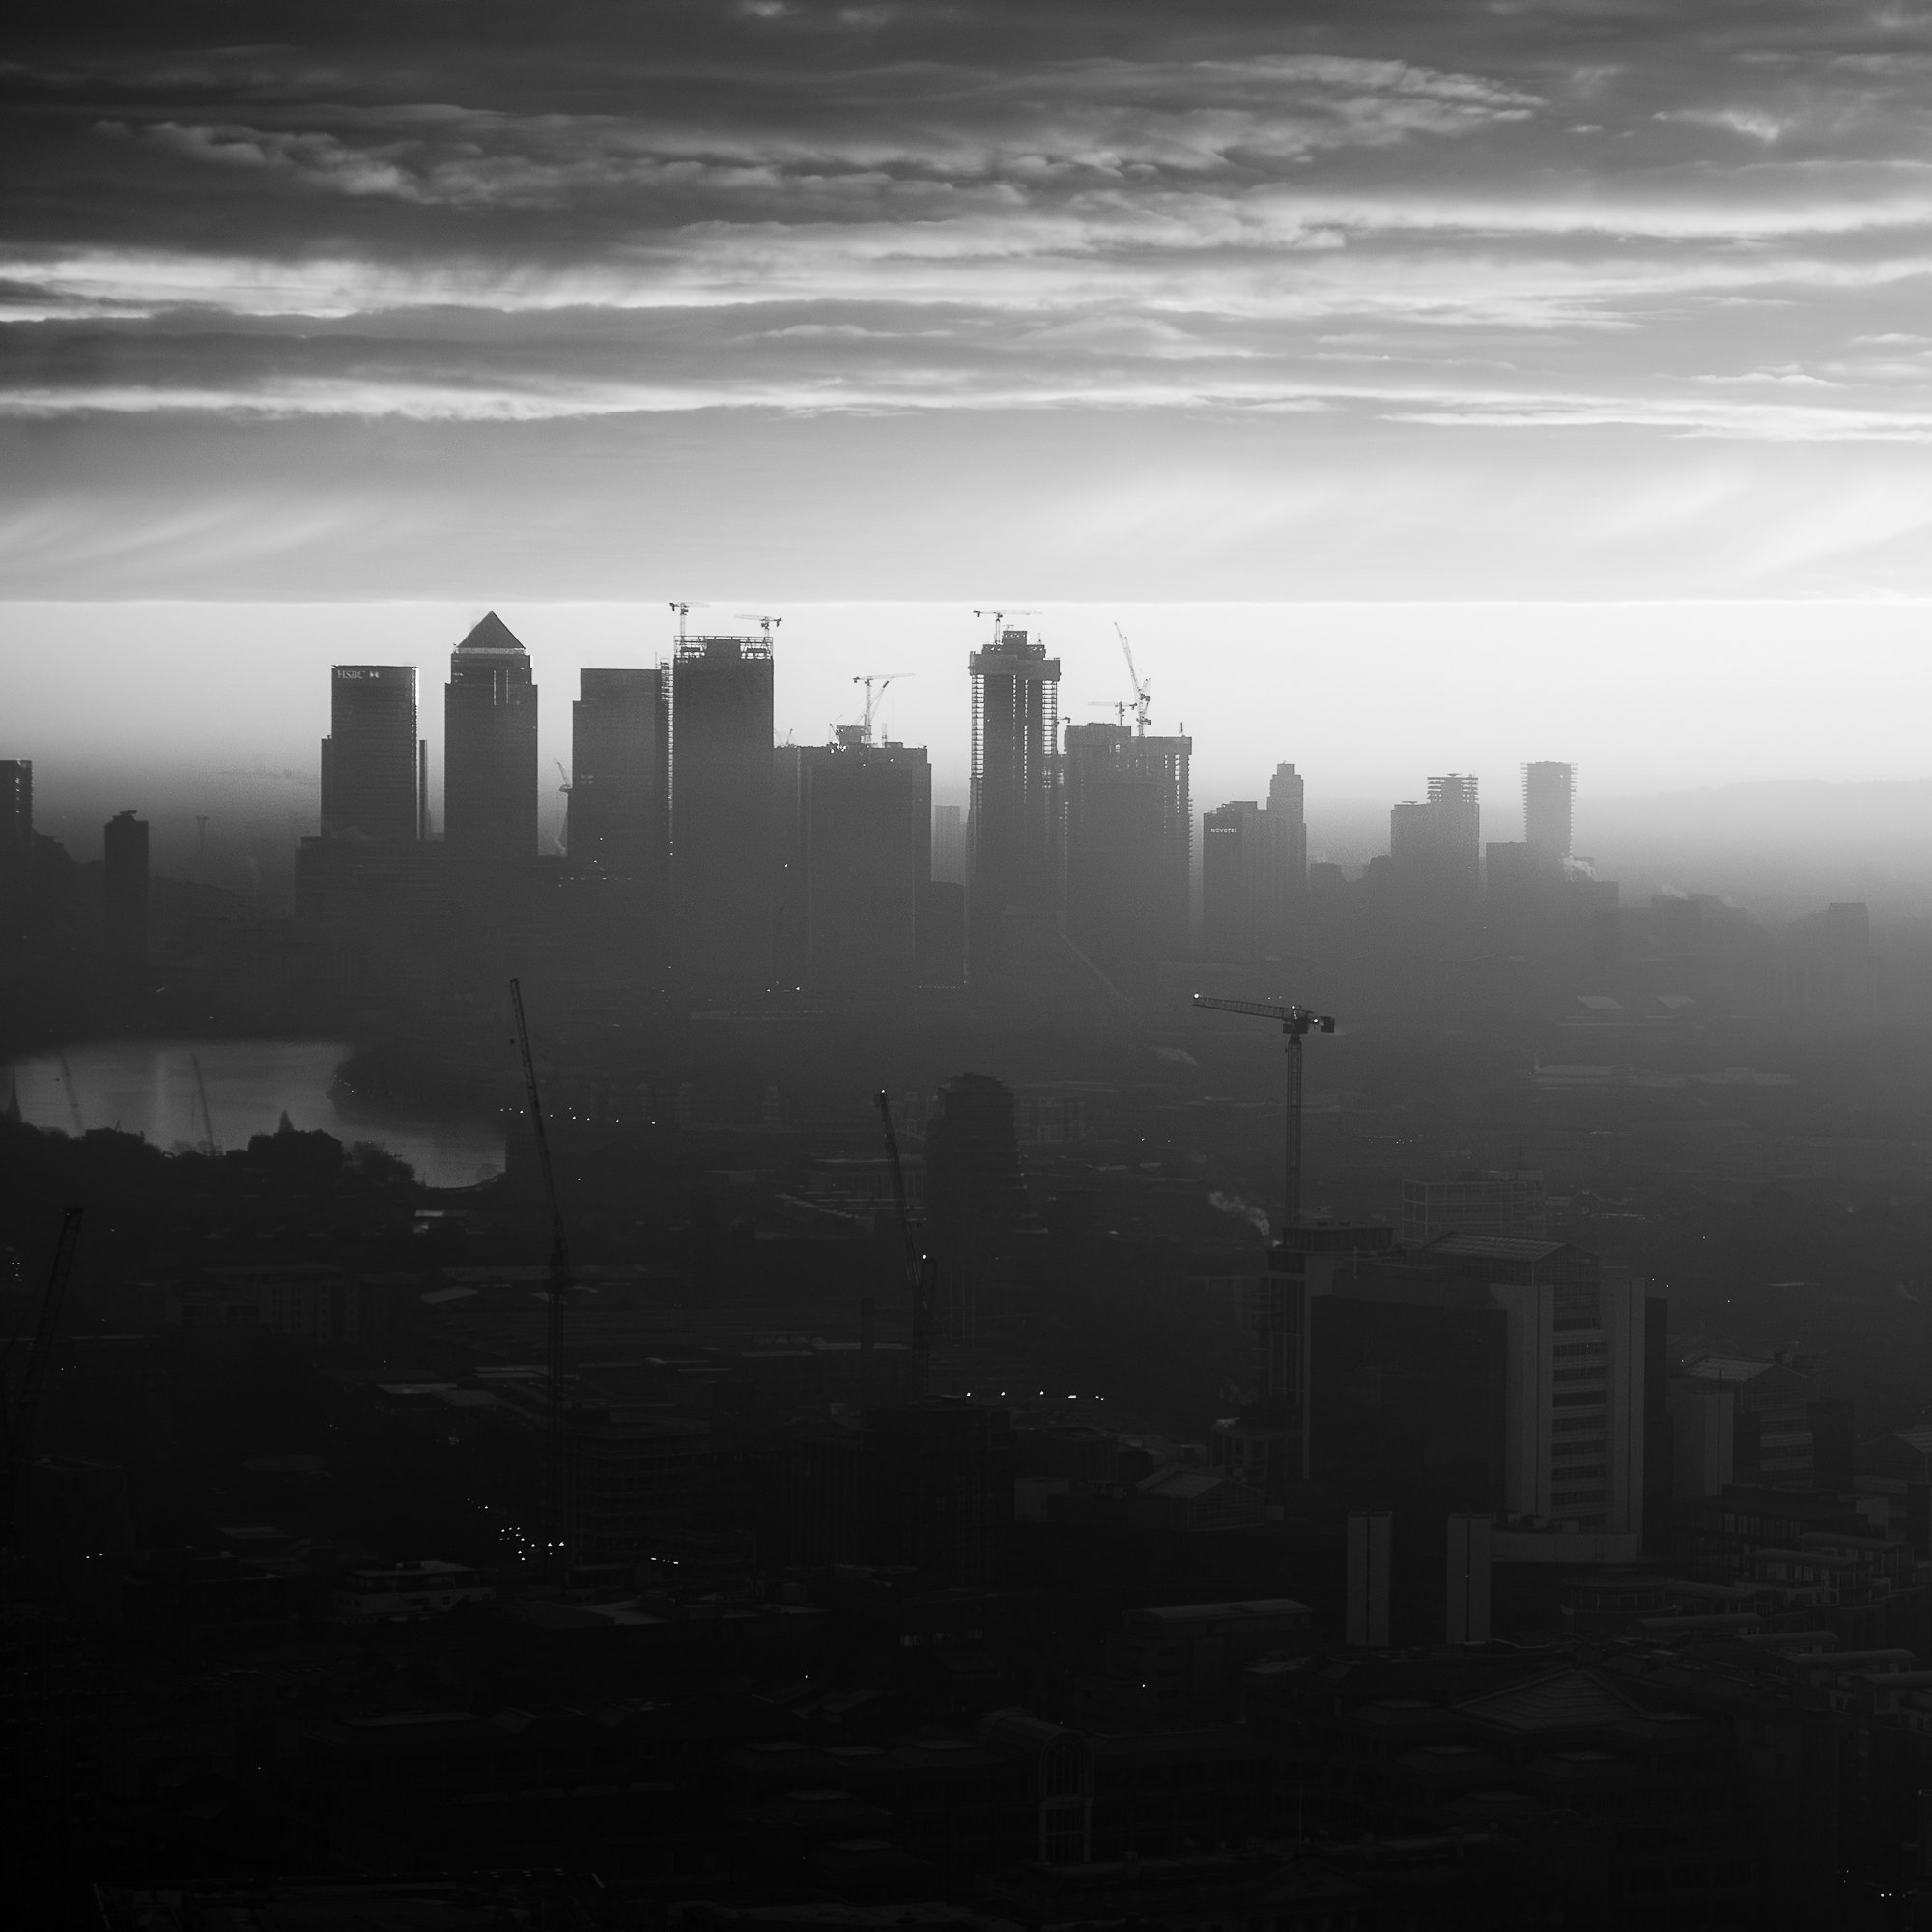
Although most of London requires you to obtain a permit(s), or at least formal permission to fly a drone, there are a few specific locations where my sub-250g drone can be flown freely and here, in front of the Isle of Dogs, is one of them. This photo I took of Canary Wharf highlights one of the key factors that affect my photos in London during the Winter….. the weather.
Blue sky days can be few and far between in the Winter, and the days are more likely to be cloudy like this. But to tell the truth, that’s how I like it. In the summer, I feel I am endlessly dodging the high contrast sunny conditions, which I don’t usually like to photograph in. Unless the light is amazing and the sunset/sunrise epic, I would much rather have an overcast, moody day to photograph the city.
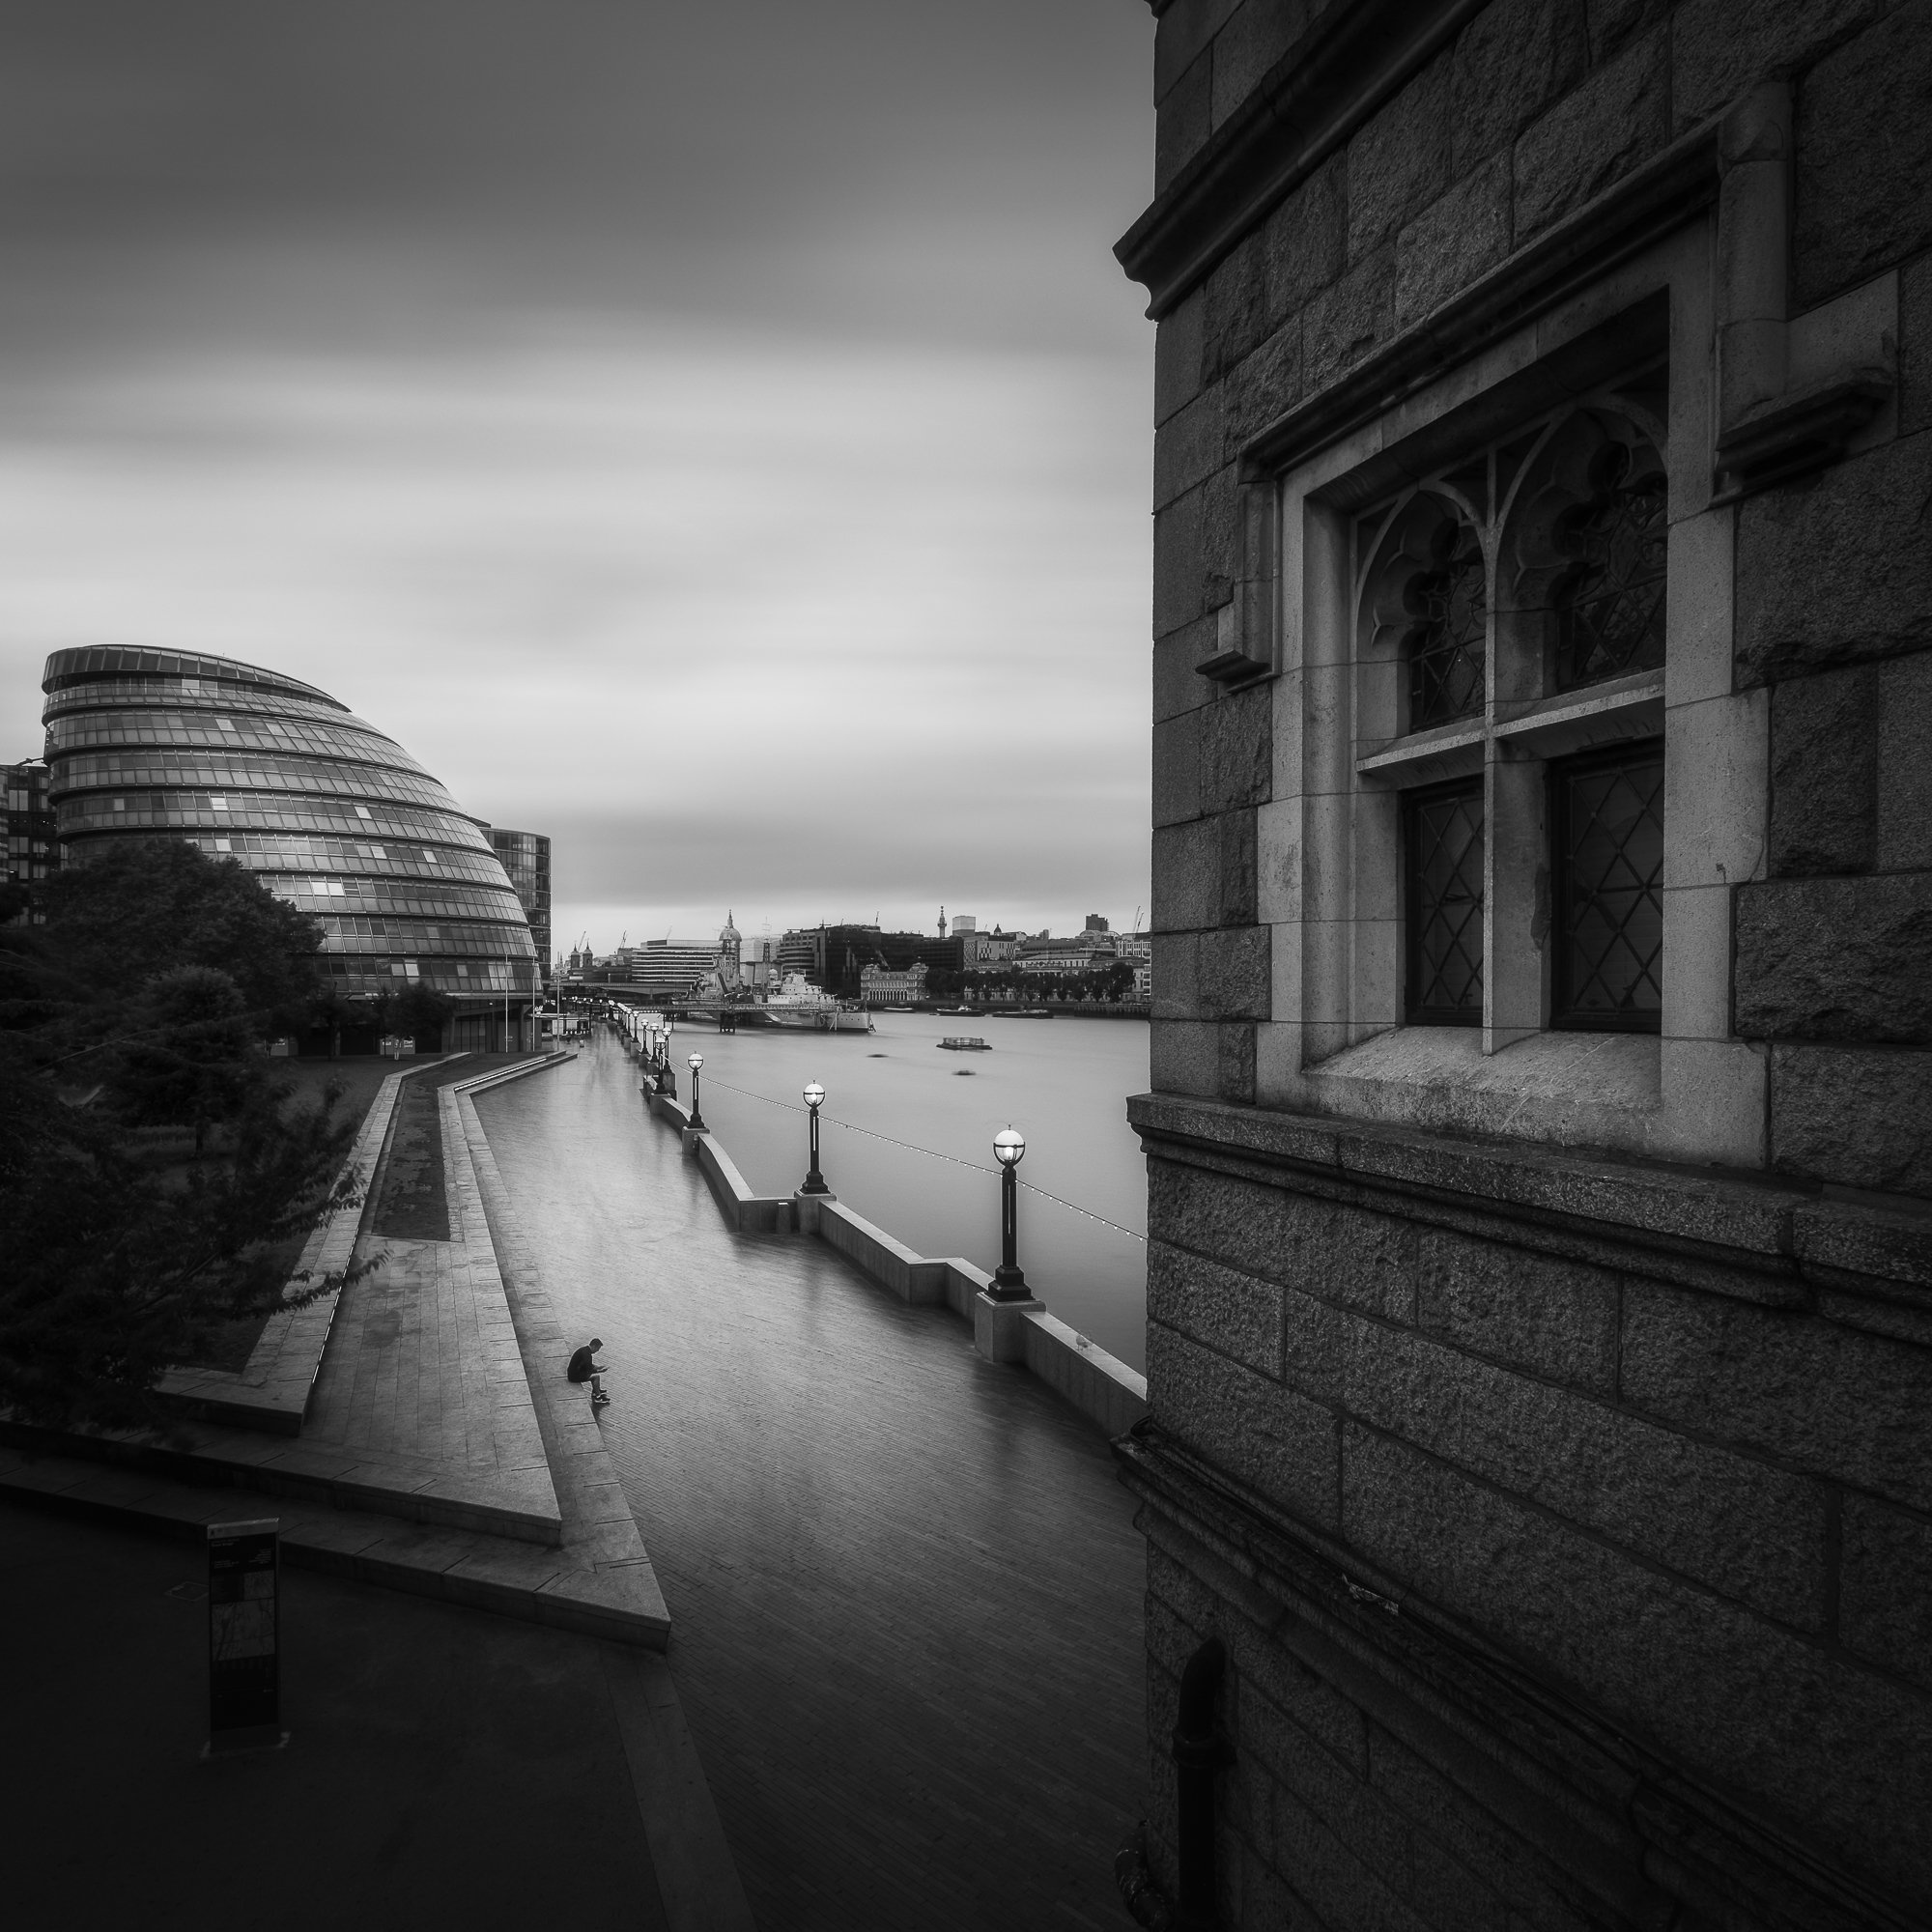
I’ve recently started to lean towards a vertical composition using the traditional 10x8 aspect ratio. I feel I can emphasise the height and scale of the city better in a vertical format, and cropping down to the 10x8 aspect ratio makes the overall composition look more balanced than the taller, native 3x2 my camera uses.
Another advantage of photographing London in the winter is being able to get to the city before sunrise and take some photos while it’s still dark. Of course, I could simply hang around after sunset in the evening, but the advantage of taking photos early in the morning is that it’s a lot quieter, and I don’t have to contend with so many people around me walking in and out of frame.
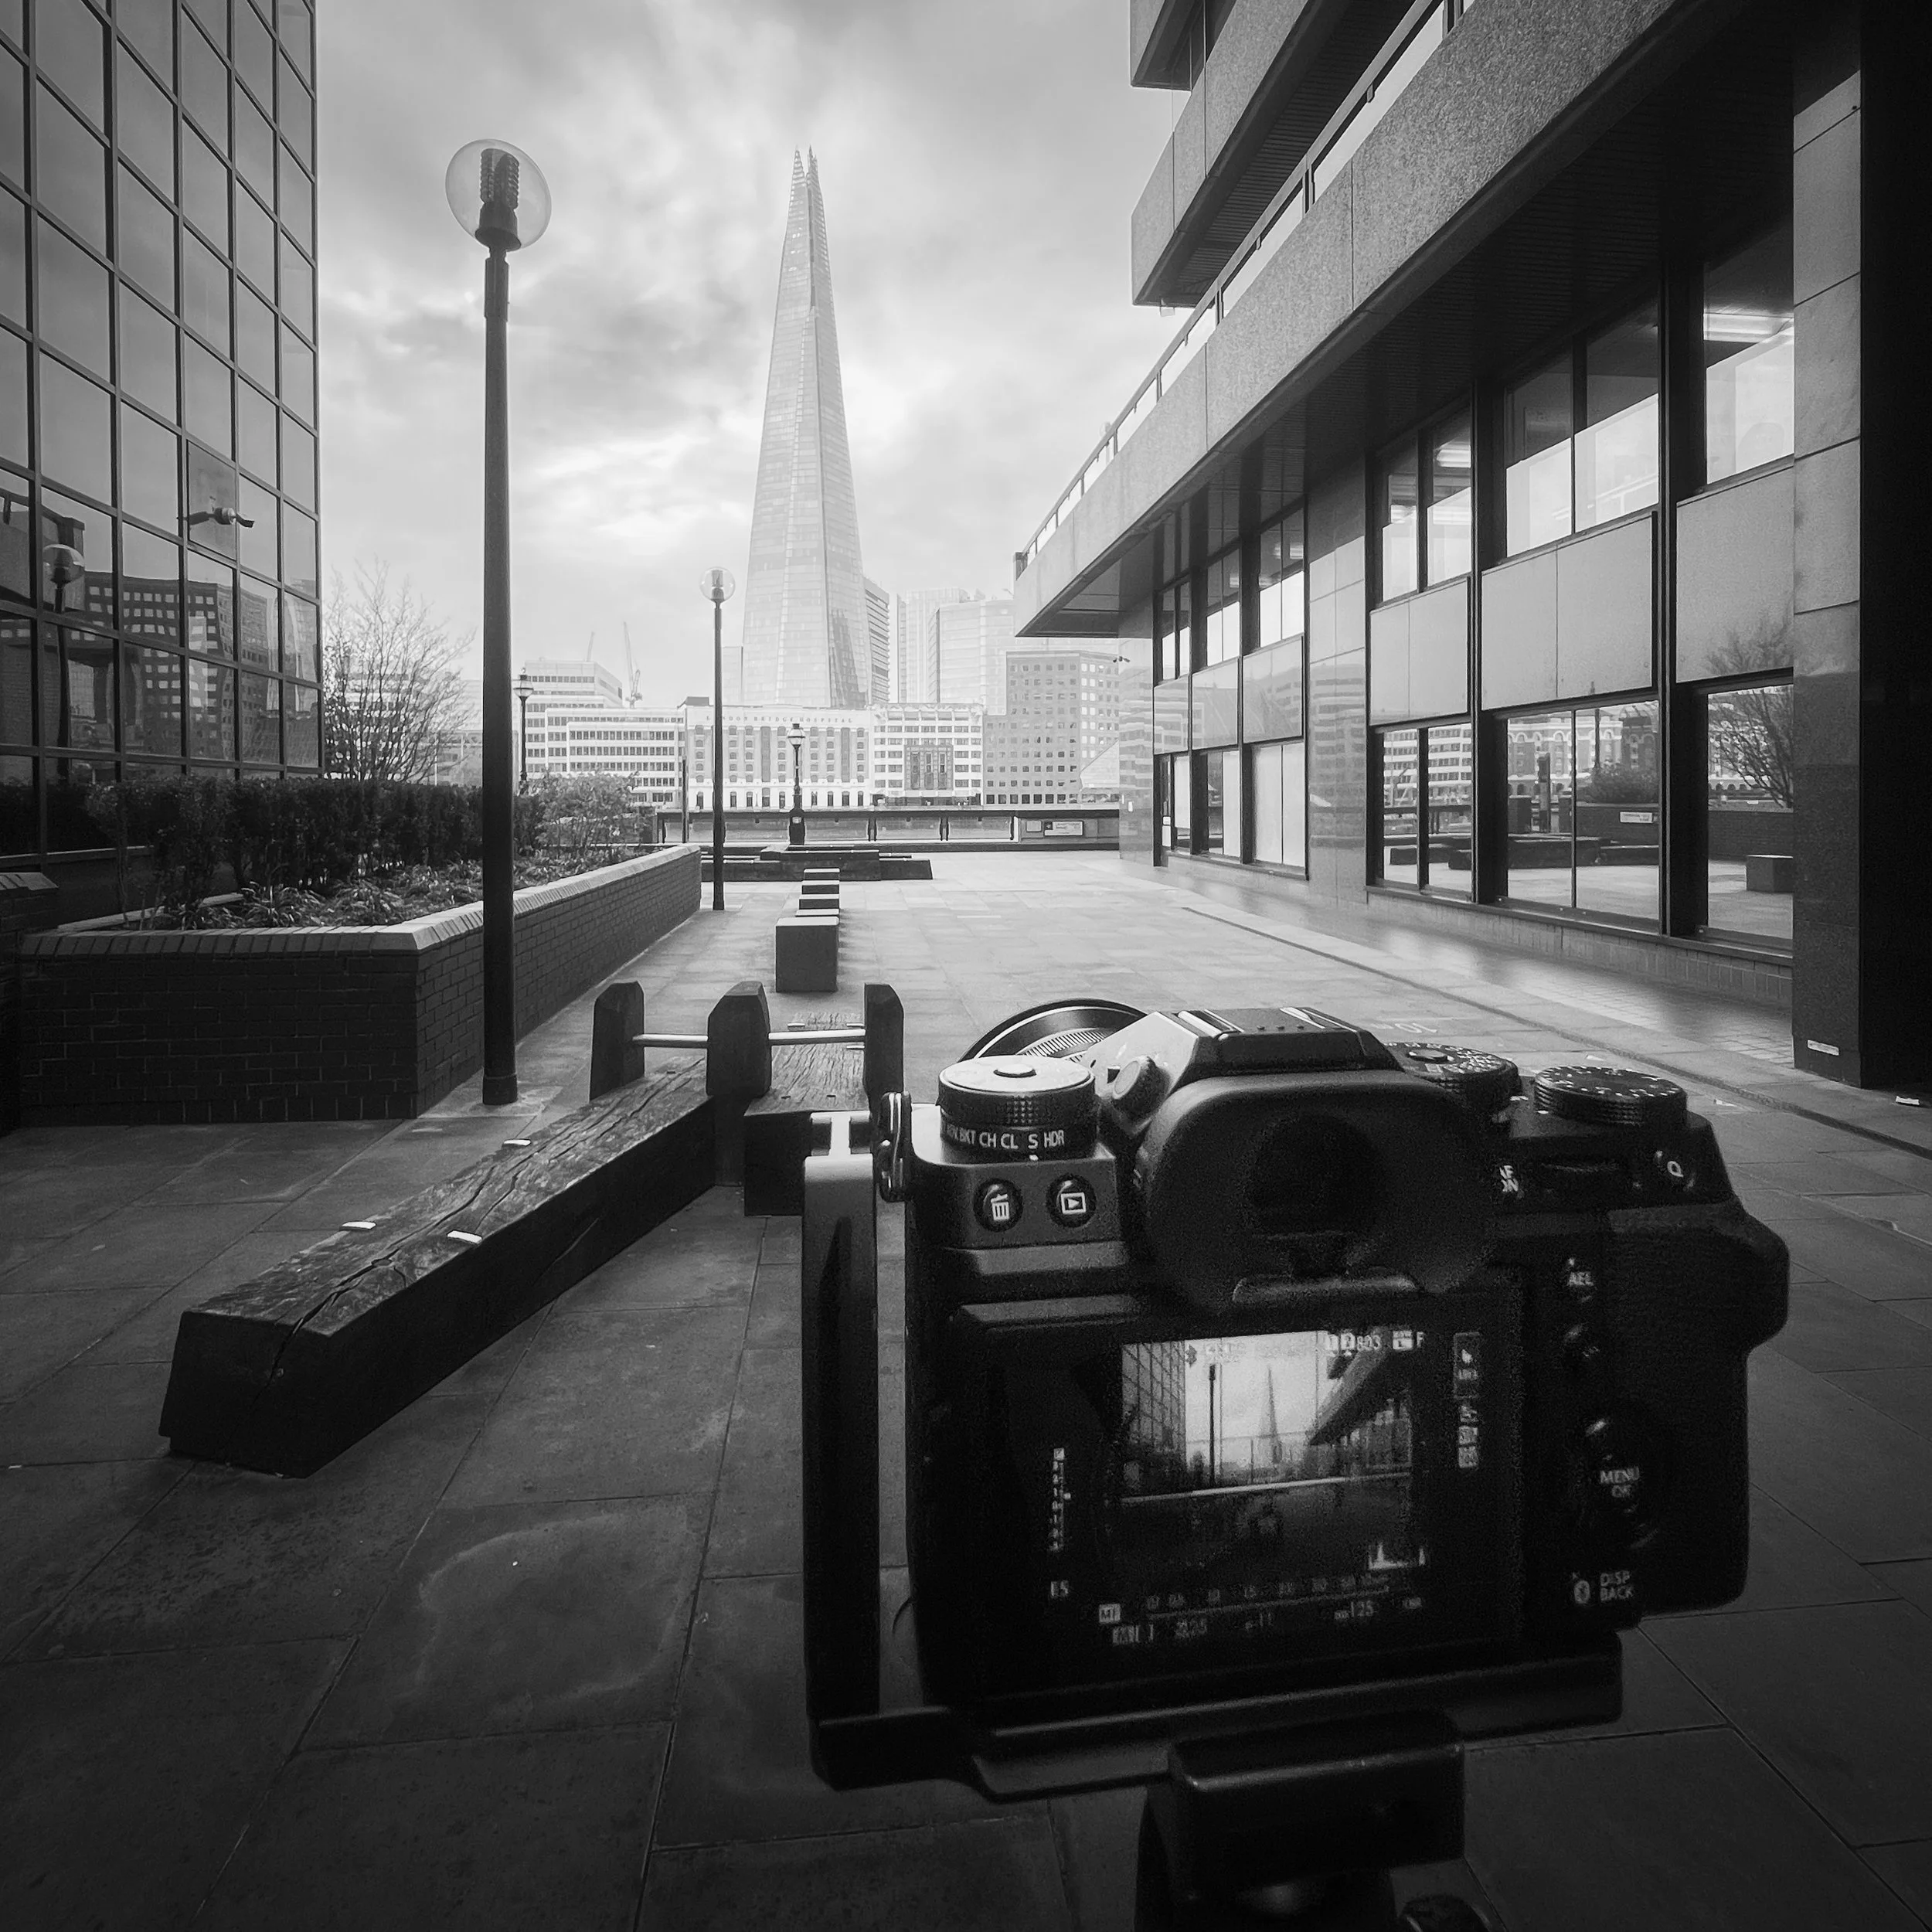
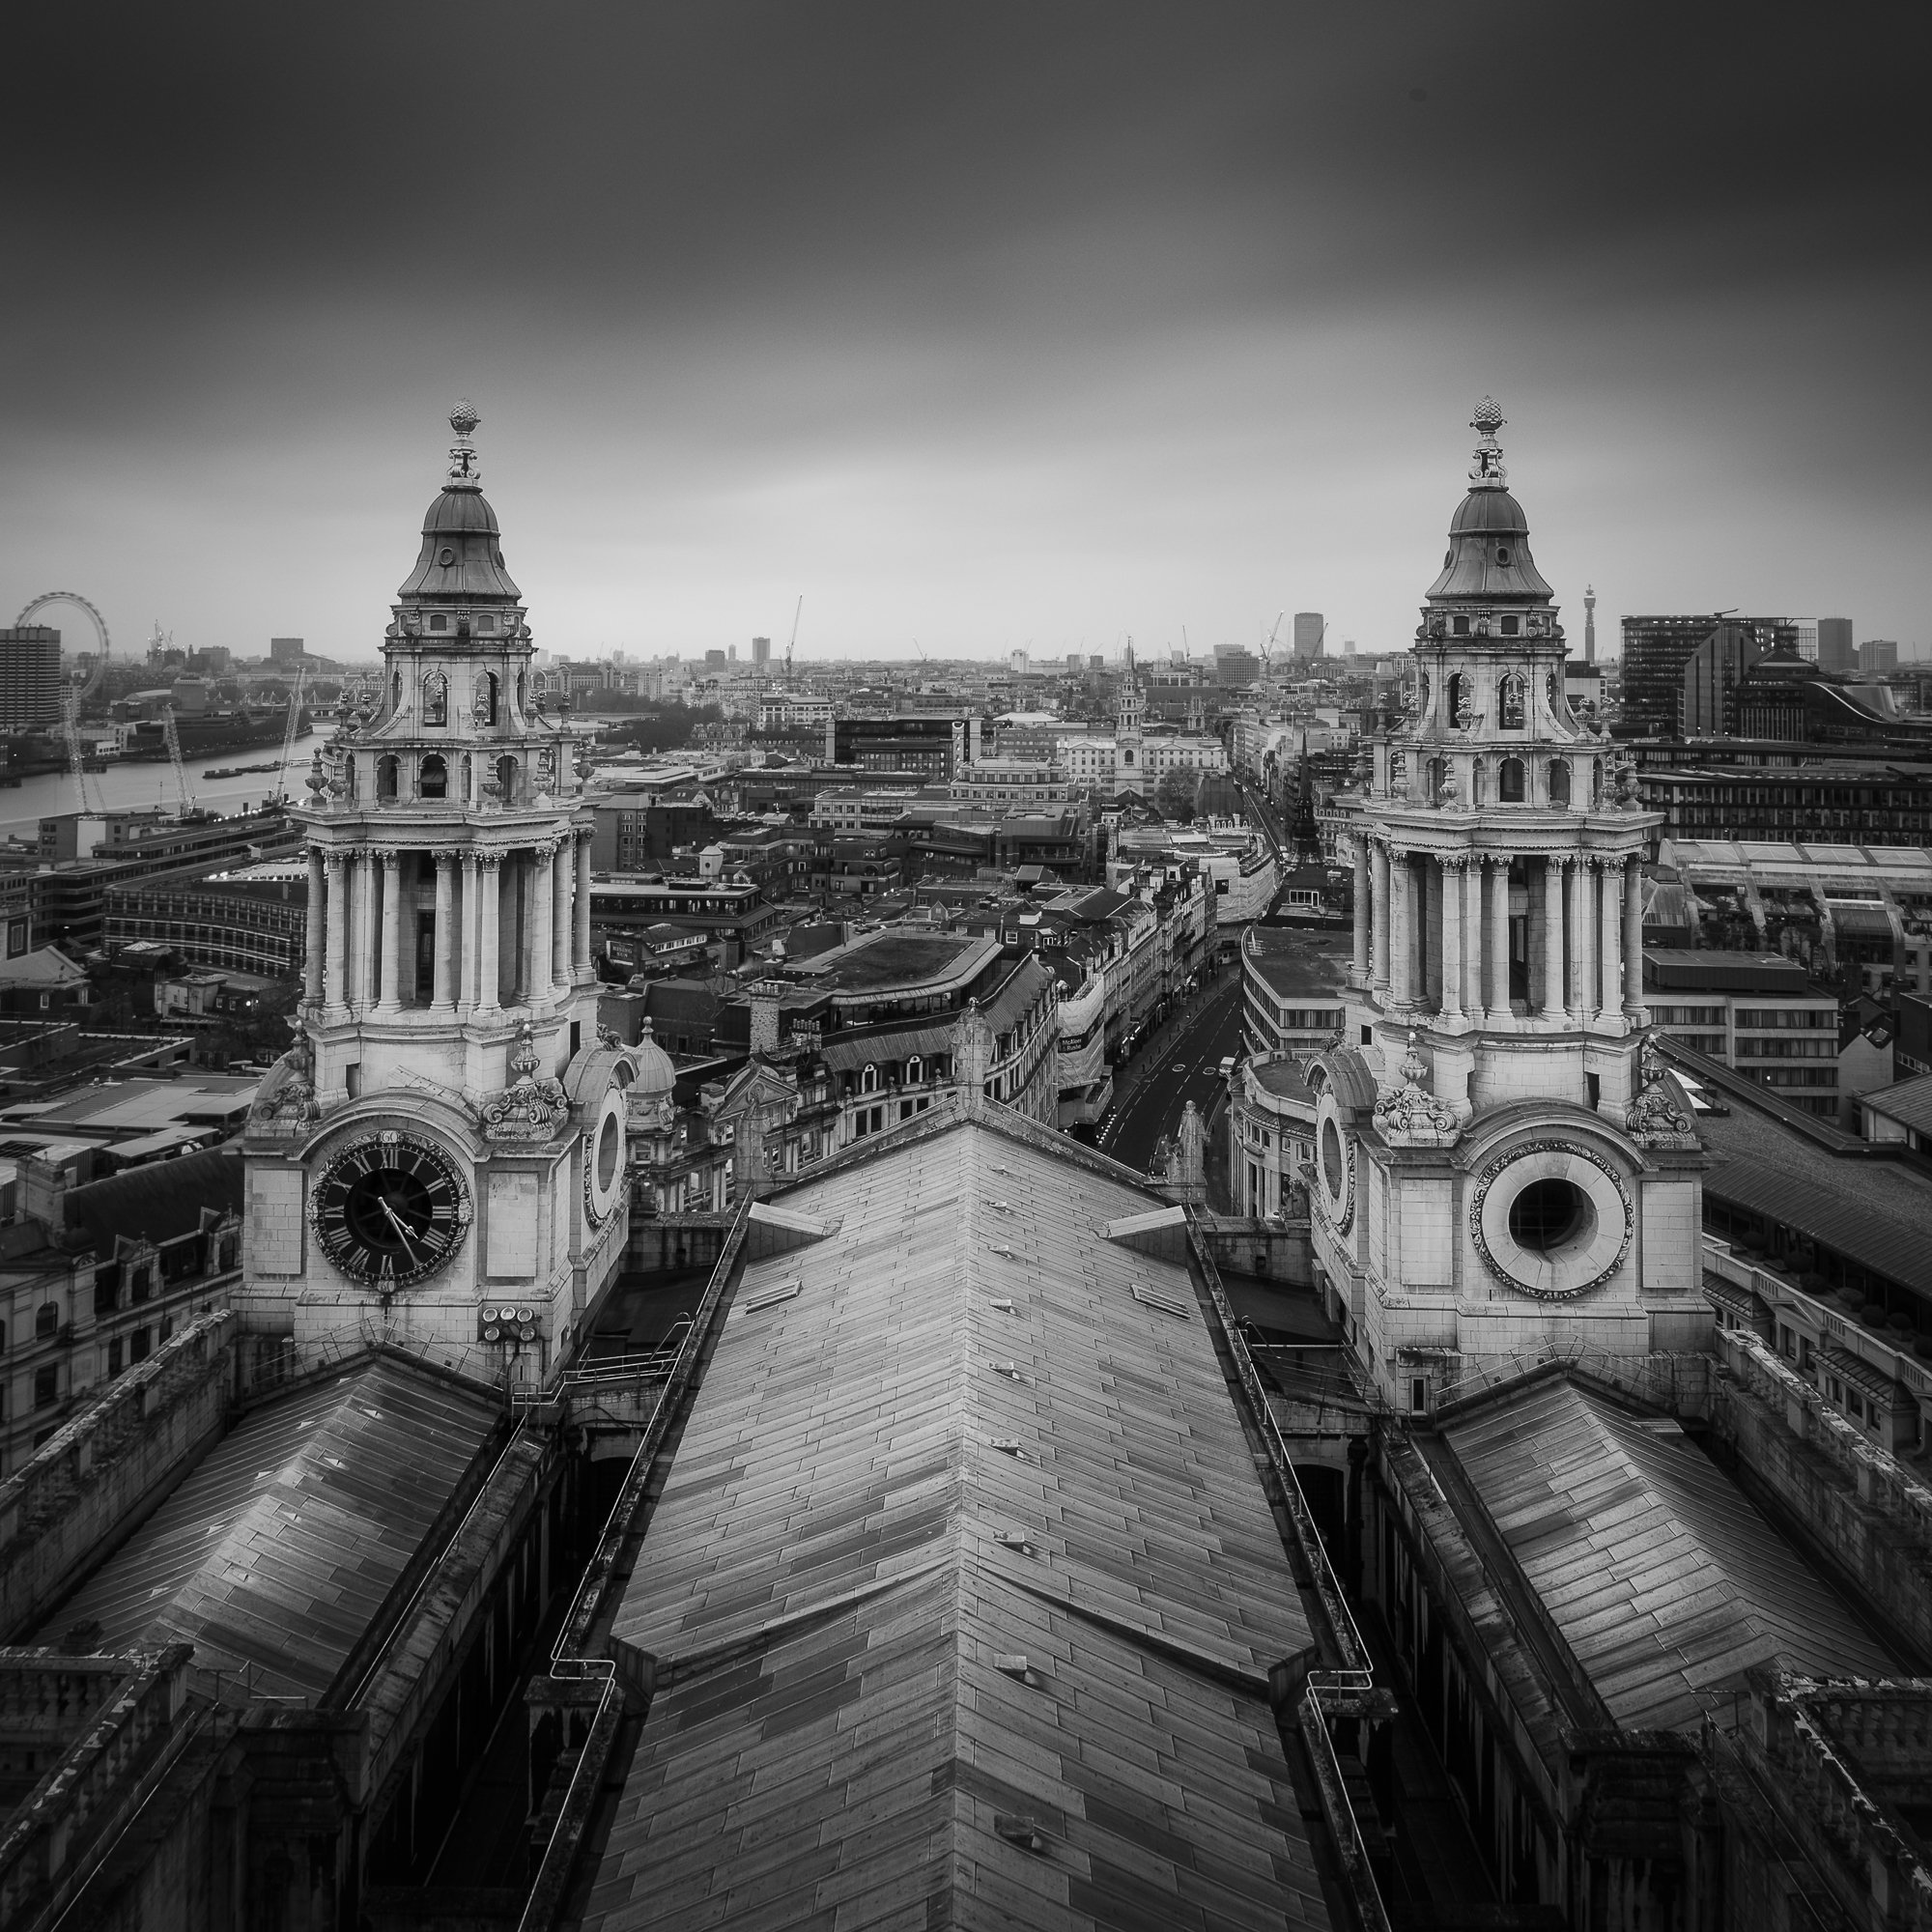
The last point I’ll make about photographing London at different times of the year is where the sun rises and sets. You should get to know what scenes work best at specific times of year to capture the best photos. The photo above taken from the Horizon 22 viewing platform is a good example as in the summer months, the son would be setting way off to the right and this view looking towards The Shard with the sun setting just off to the right would not be possible.
Ok, so this panoramic photo I took of Canary Wharf from across the Thames is proof that we still get some cloudless skies in the winter and the fact that the skies over London are always grey is a bit of a myth really.
The Winter Landscape
This winter, I didn’t get out into the landscape of woodlands as much as usual. Instead, I spent more time photographing London, taking photos for my Timeless City project. I guess some things always have to give.
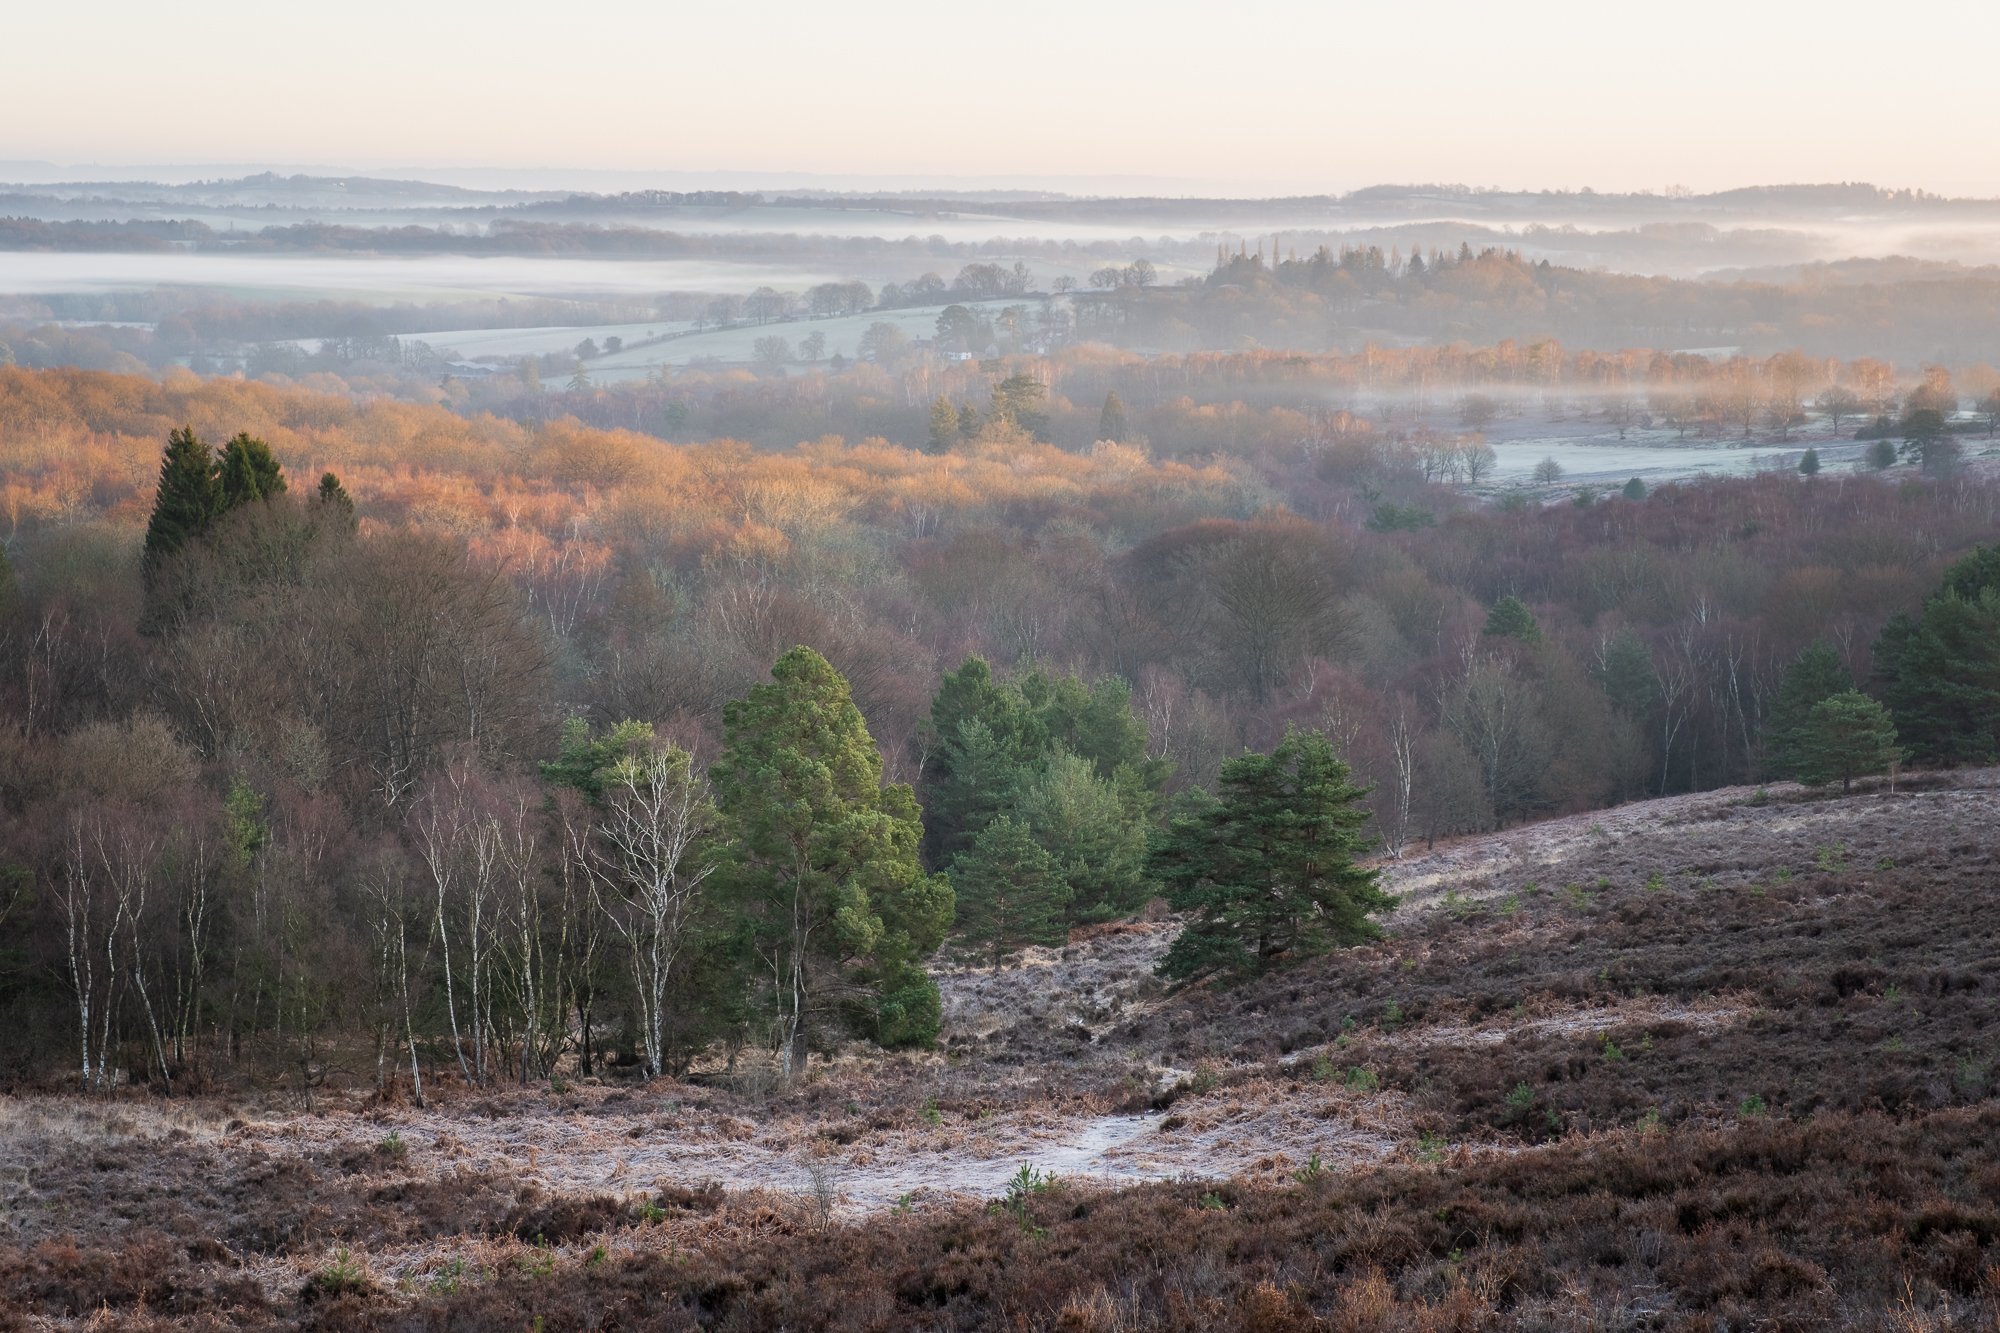
I did, however, venture out into the wintry landscape a few times and have shared some of the photos I took along the way. All the photos in the landscape section of this post were taken during a handful of trips to a local forest in East Sussex. This is my go-to for woodland photography, but with lots of open heathland and the odd lookout point, it’s also great for a bit of landscape photography.
I’m really pleased with these close-up icy scenes I found next to a small waterfall in the forest. I took three compositions of the ice, and with lots of relative depth, each one needed to be photo stacked to get the image sharp from front to back. I’m really happy with the resulting triptych below.
I’ve also posted a photo I took of the wider scene underneath, and the small patch of ice on the bottom right of the frame is where I took these close-up images of the ice so you can see how tight I needed to get.
Photographing the woodland
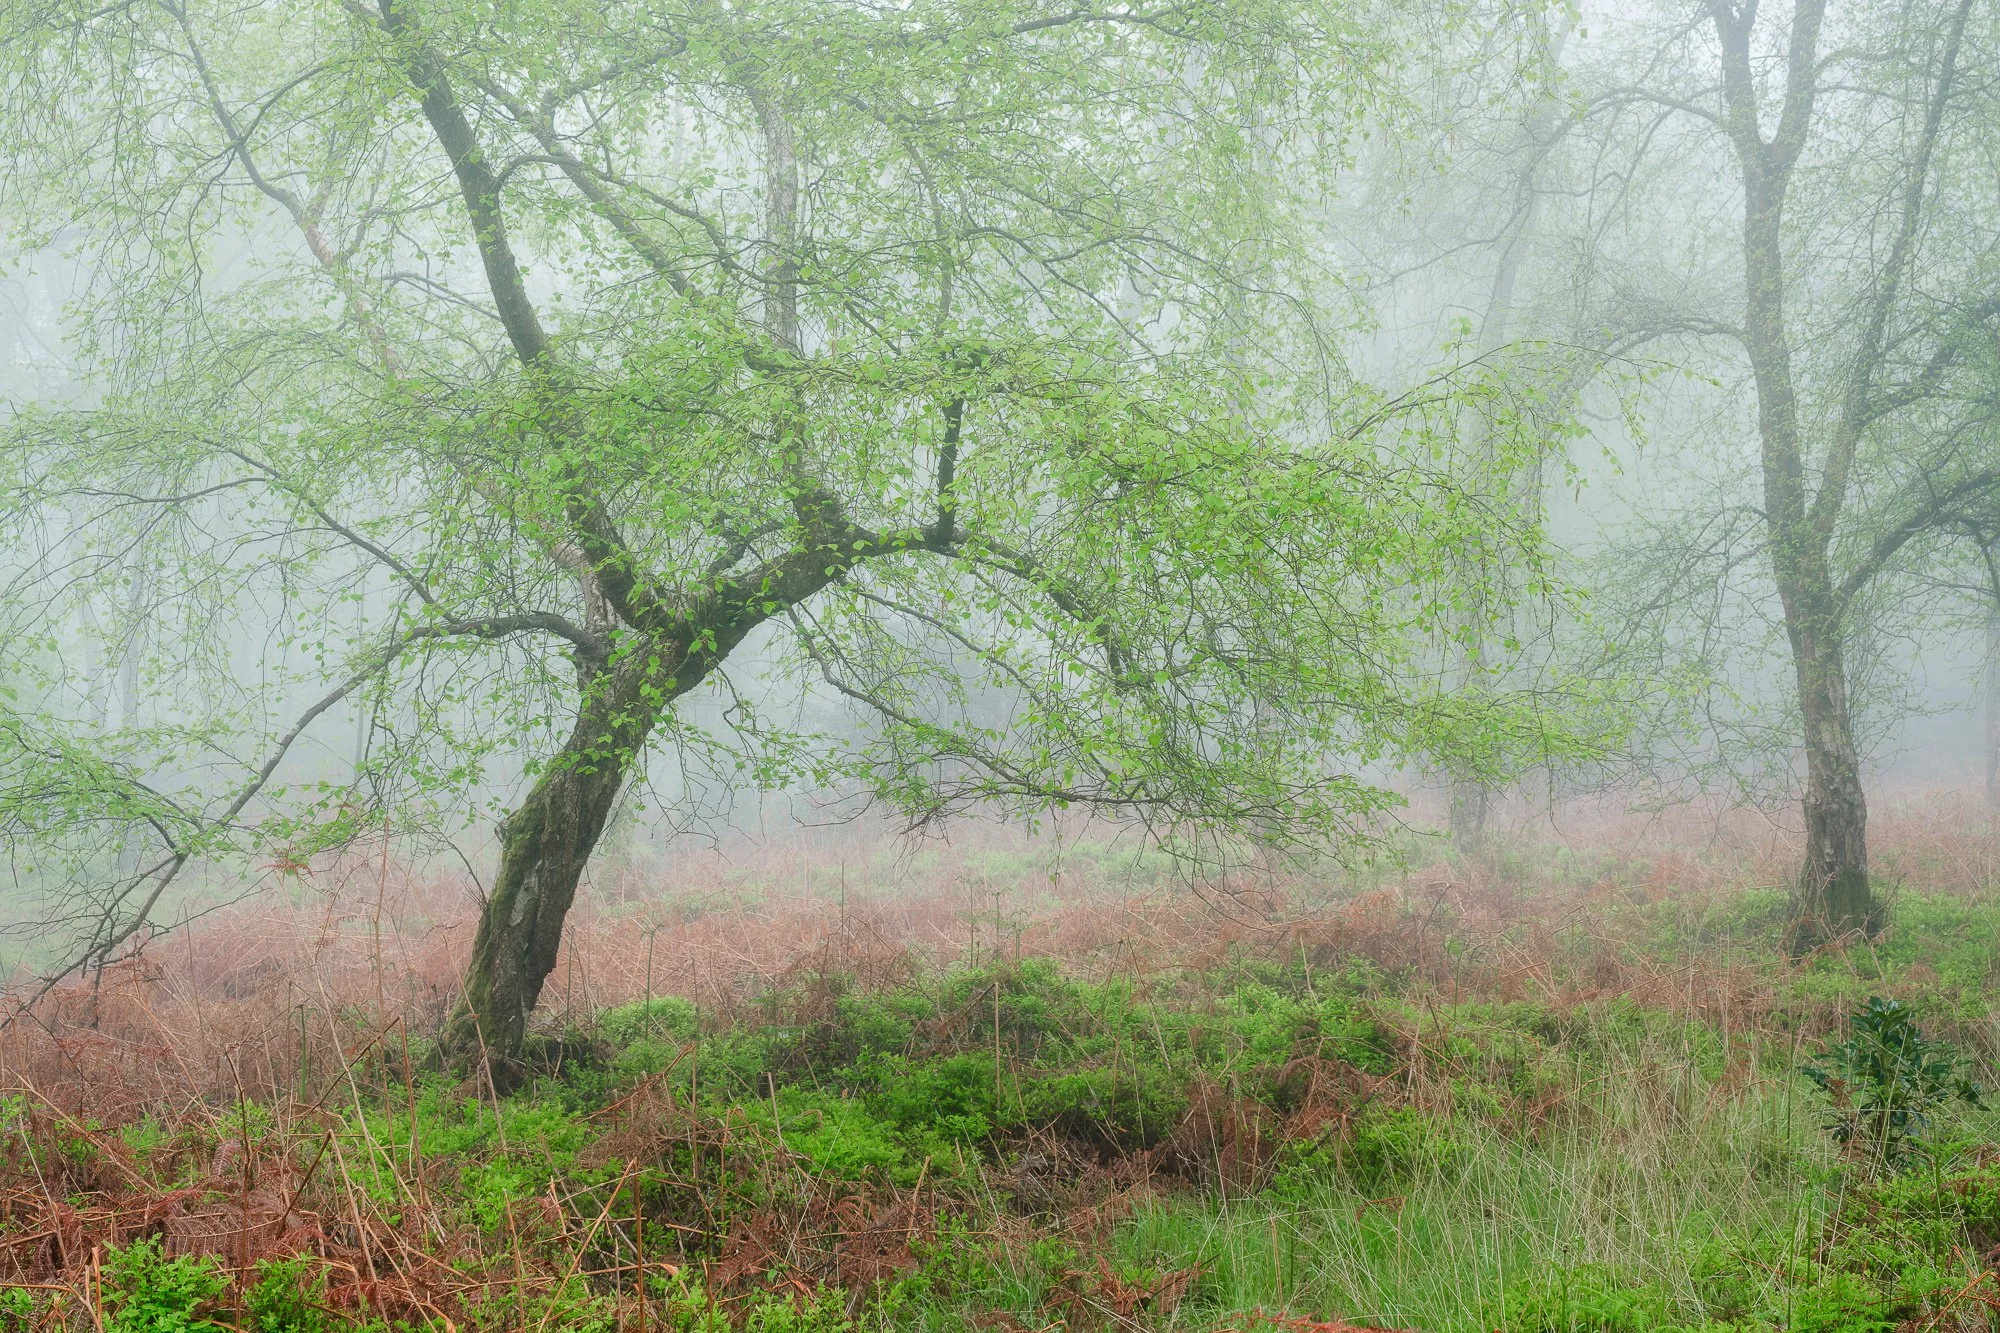
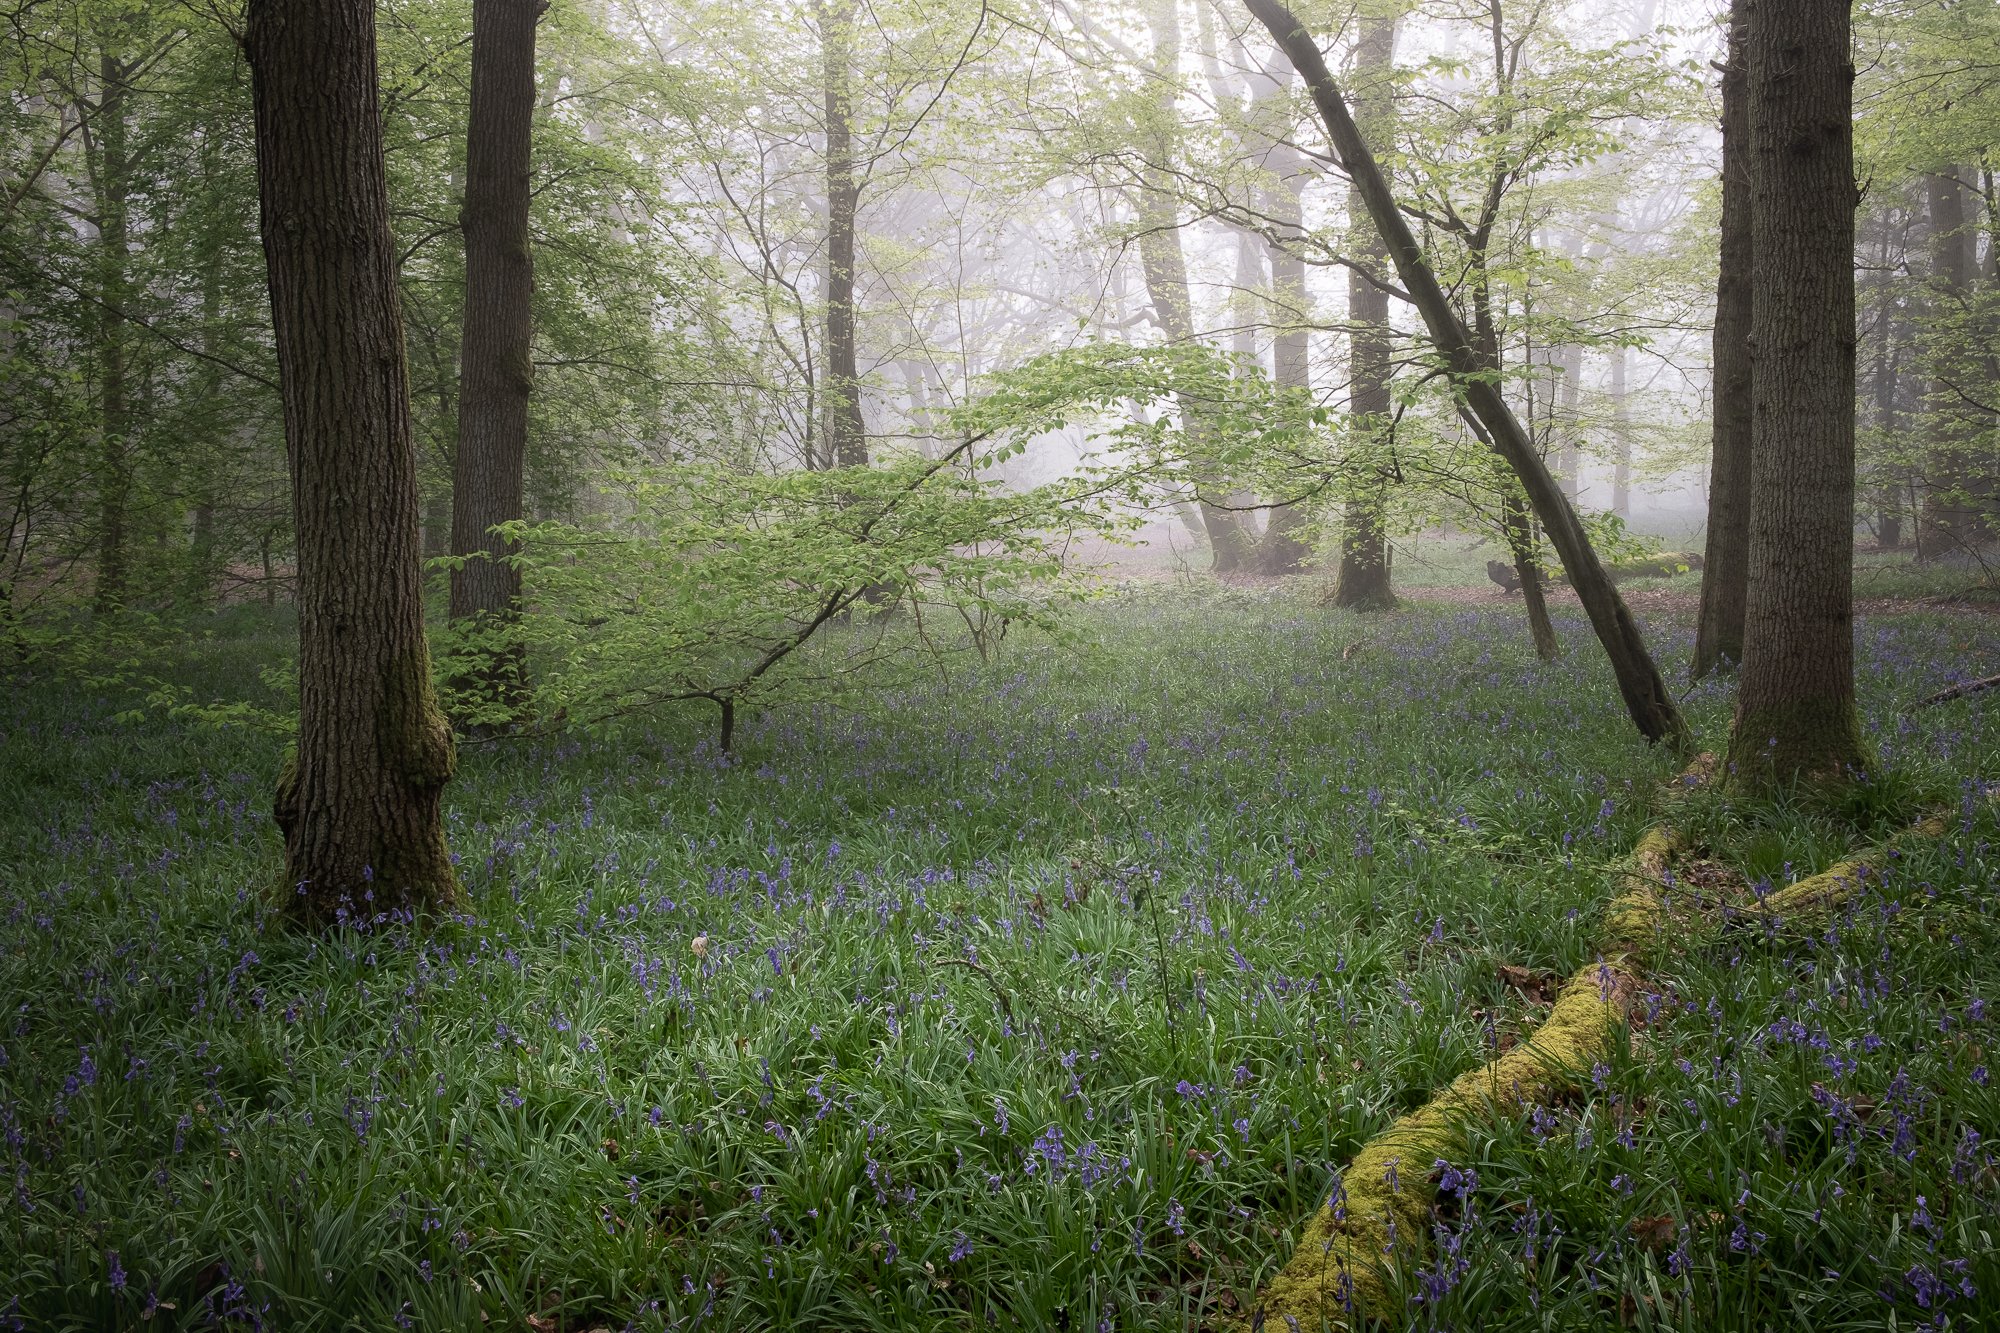
Along with some misty woodland adventures I had during the winter months, I also took this first group of four photos shown below. Sometimes, the eye sees what the eye sees, and on this cold but mistless morning, I was drawn to the stronger shapes created by some of the more prominent trees in the scenes I came across.
For these to work, I had to find a strong woodland subject with some character, set against thicker foliage to help remove background distractions, and with the ambient light being dull and gloomy, the resulting collection of photos all have a dark, moody feel to them.
A trip to the East Sussex Coast
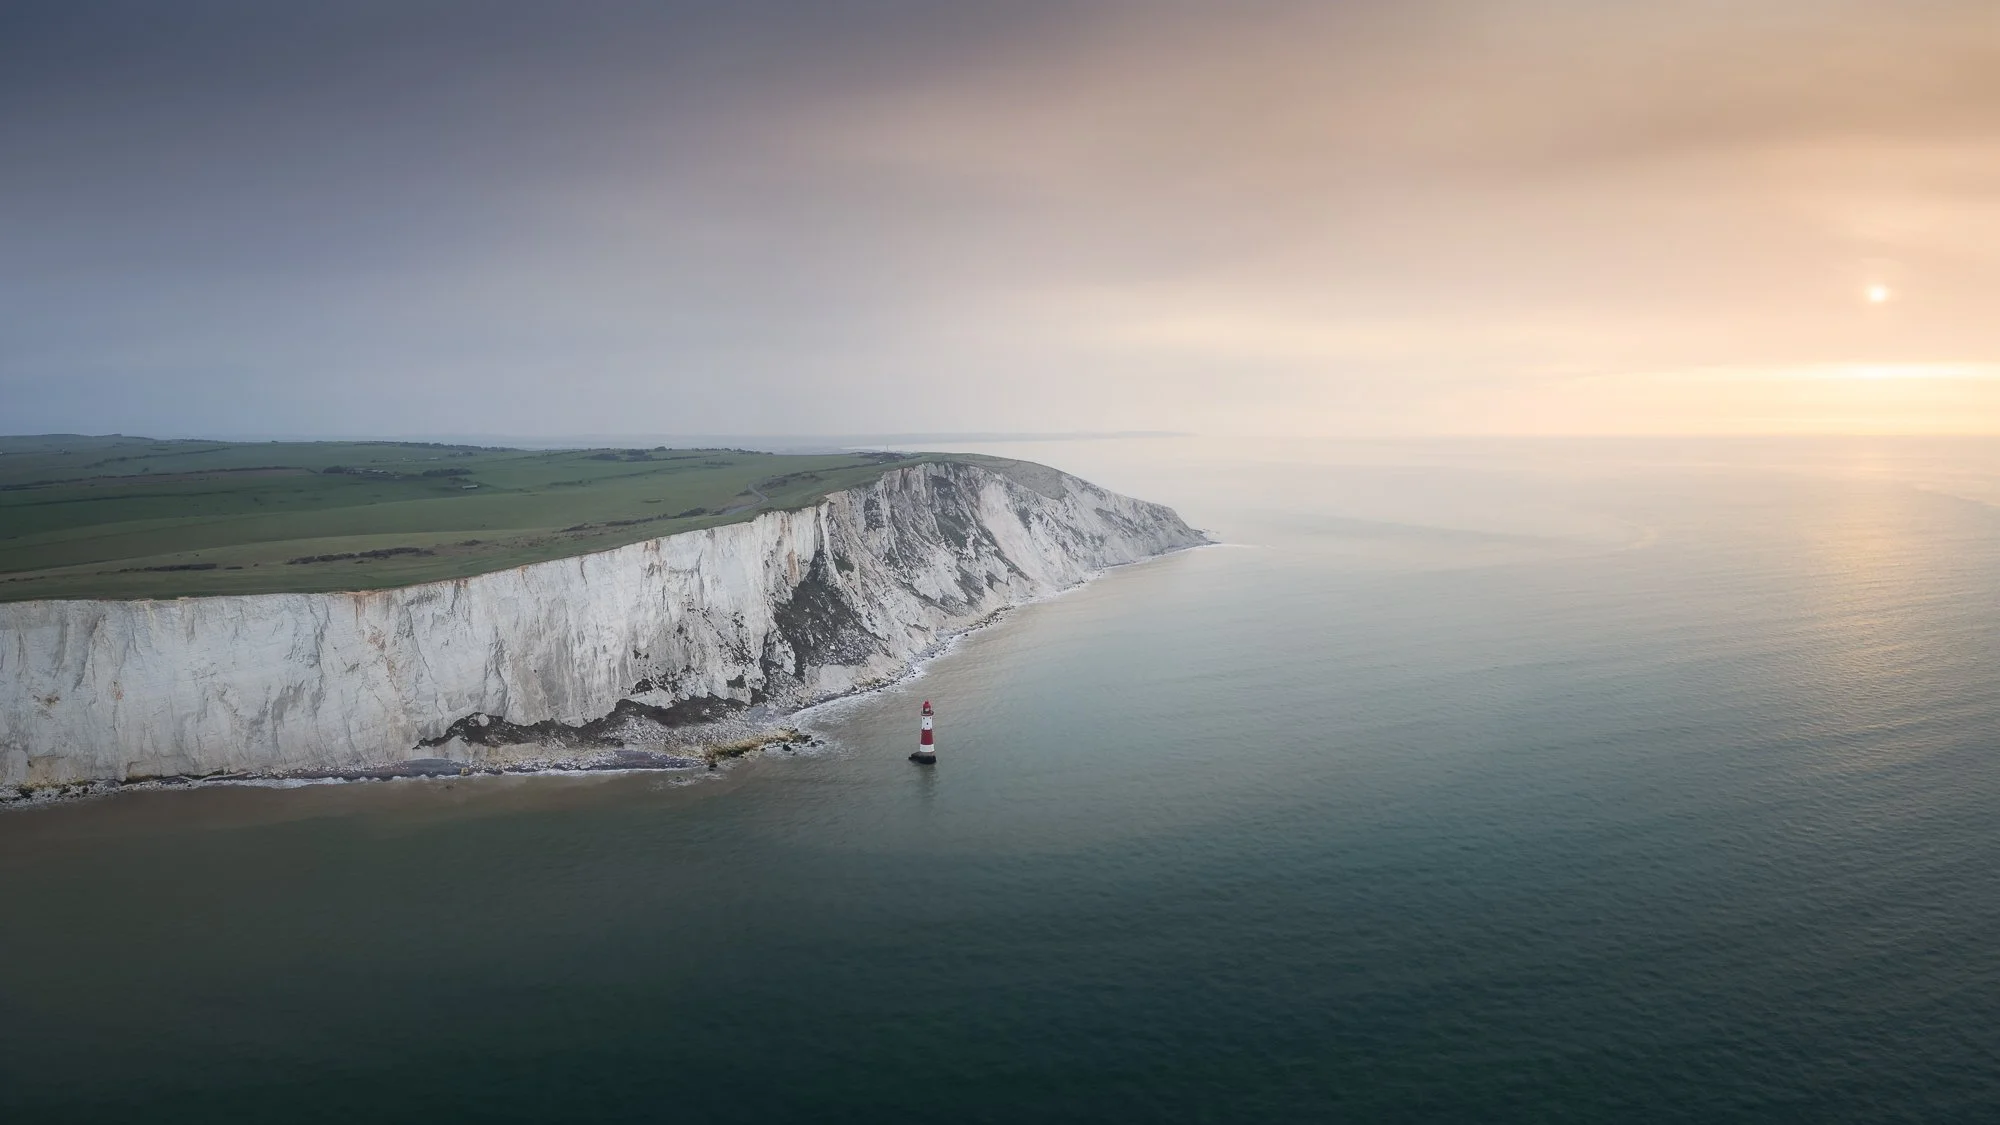
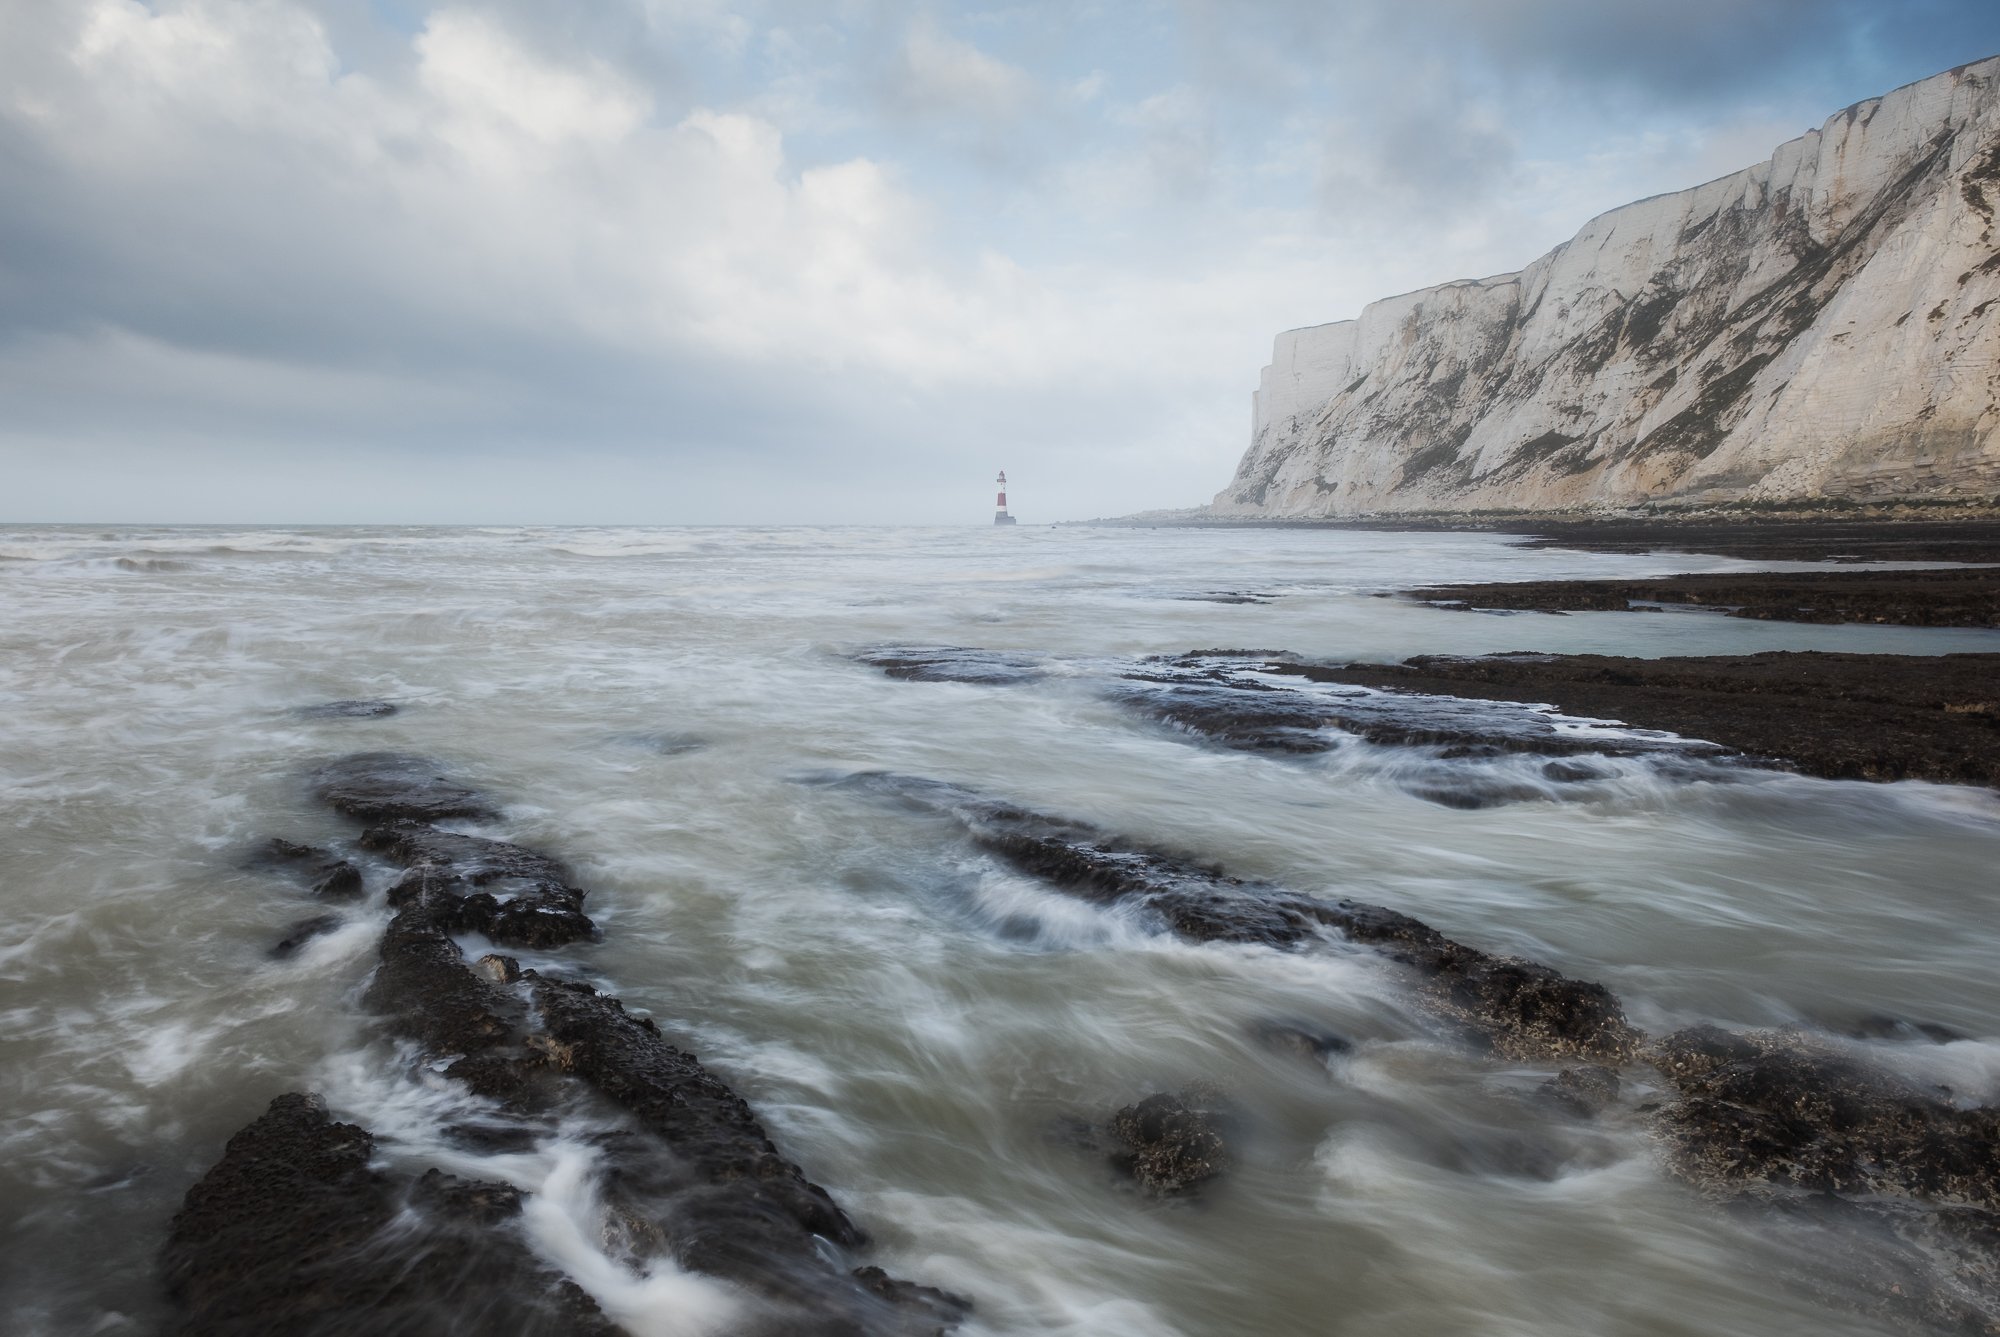
Finally, a trip to the seaside. I decided to head down to the coast on a chilly February afternoon to revisit my favourite lighthouse at Beachy Head, followed by a few hours in Eastbourne to photograph some of the starling murmuration around the pier.
Once the sun had just about set and the starlings safely nested under the pier, I took this last picture of what I think is the most picturesque pier along the Sussex Coast. I like the soft, blue tones across the scene, but that subtle belt of colour in the sky adds a touch of interest and is a welcome addition.
With the winter months behind me, it’s time to look forward to spring and the colour it brings to the landscape. I’ve got a few adventures planned and some new ideas for projects that will help me focus on photographing my local landscape more this year. Time will tell if that all works out as planned but if it does, you’ll see those photos here first.
As I mentioned before, feel free to drop a comment below as it’s always good to hear your thoughts about the pictures I take and how they might resonate with you.
Until next time,
Trevor
Creating my limited edition Timeless City prints of London
Take a peak into the process I follow when choosing, printing and sending my limited edition, Timeless City, fine art prints of London.
Taking photos can be such a creative and fulfilling process and after capturing that epic vista at sunset or carefully crafted cityscape scene, for me, viewing work on a screen does not compare to the impact I get from holding a fine-art print in my hand or seeing it mounted, framed and hanging on the wall. A physical print can bring a photo to life and transport the viewer to another time and place, evoking all kinds of emotions and memories.
With so many photos observed on social media for just a few seconds before the inevitable swipe of the screen, the physical print invites viewers to slow down and engage deeply with the work. It’s a more intentional way of experiencing photography. As Ansel Adams famously said, "The negative is the equivalent of the composer's score, and the print is the performance.” Maybe, for the modern age, you could replace the negative with the digital raw, but you get the point.
Printing my Timeless City, black and white photos of London
When my Timeless City project started to gain a little momentum and a body of work was forming, I thought about ways I could transport the photos I’ve taken from the screen into print and one of the options I’ve decided to pursue is to offer fine-art prints for those who follow the project to own.
I wrote this blog post to accompany the new print store for two reasons.
To share the attention to detail and craftsmanship that goes into producing my high-quality, archival fine-art prints.
To help photographers who are starting their own printing journey by outlining my process.
Choosing the photos for the limited edition prints
Choosing the photos I want to include in a limited edition collection is an important and (to me at least) difficult decision. On the one hand, I’m including what I subjectively consider some of my very best work, which I hope will also appeal to a potential print-buying audience. On the other hand, I have to be comfortable with the fact that those images will be limited in number and once finished, never printed in the same way again.
Once shortlisted and to ensure quality, I printed the images at their intended sizes—7x7” and 10x10”. I printed the shortlisted photos at this early stage because I’m aware that not all images translate well from screen to paper, and this step helps eliminate any that don’t quite hit the bar. This step also helped me narrow the selection to an initial 12 prints I wanted to start with.
Choosing the right paper to print my photos
There are several things to consider when printing images and paper choice is arguably the most important decision I needed to make. In my mind, I have a particular look I want to achieve, one that I feel suits the work best and here’s a brief breakdown of the process I went through when choosing the right paper for this project.
Paper Size: I want the finished work to have a more intimate look and feel. There’s a quiet subtlety to my black and white photos of London and I don’t want the prints to overwhelm the space they are displayed. I think a smaller picture with a wide mount and subtle frame suits the work better. The other benefit of printing the photos in 7”x7” and 10”10” is that I can print, sign and send the work directly, meaning I can control the entire printing process and ensure a high degree of quality control.
Paper Type: By paper type, I mean choosing between normal, photo-quality paper or acid-free, archival paper. For limited-edition, fine-art prints that will appeal to both casual buyers who appreciate my work and the serious print collector, I feel there is only one option for this project and that is acid-free, archival paper.
Paper Finish: When testing the different papers from my preferred manufacturer (Fotospeed), I found they had a range of colour temperatures and finishes, from smooth to textured, from matt to glossy and from warm to cool. I already knew I wanted a cooler, non-textured, semi-gloss finish so I purchased a test pack of papers with various options that aligned with what I wanted and got busy testing.
After extensive testing and lots of printer ink used, I found Fotospeed’s Platinum Baryta 300gsm the best paper for the job. I love how my black-and-white cityscape work looks and with a throwback to the dark room look Baryta paper provides, there is a classic, even ‘timeless’ look to the final print. Here’s a description of the paper I pulled directly from Fotospeed’s website:
Platinum Baryta 300 is 100% acid-free, Fine Art paper with a smooth unglazed gloss surface. A natural white base and state of the art micro-porous ink receiving layer delivers a high D-MAX (2.99) and wide colour gamut. Platinum Baryta 300 reveals delicate highlights and smooth transitions to shadows for both colour and B&W printing. The paper is approved by the Fine Art Trade Guild and when used in conjunction with pigment inks will ensure a print life of more than 85 years.
The process I follow for printing my Timeless City photos
As I mentioned at the start of this post, the experience of viewing pictures on screen doesn’t come close to the feeling of holding a print in your hand, but it doesn’t stop there. To get the very best print possible, a few things need to be done to adapt the image so that how it looks on screen is as close as possible to how it looks on paper.
Preparing the image file for printing
There is a big difference between viewing an image on a backlit monitor to an image on paper with only reflective light available. Ultimately this means that if I don’t tweak the image first, it will likely print dark, soft and lack contrast. So these are the main things I change for each image before printing.
I will normally boost the brightness by half a stop or more, increase contrast, and sharpen the image. Alongside these standard tweaks, I will often selectively dodge and burn (decrease or increase brightness) in specific places to ensure those areas retain detail and contrast once on paper.
Although Platinum Baryta 300gsm is on the whiter end of the fine art paper spectrum, it still prints a little warm for the look I am after, so for every photo, I adjust the white balance slightly to cool the image down meaning the printed image will appear more neutral and not to warm. This is purely to taste and not a necessary step for everyone.
Using the correct printer settings
When sending the image to the printer, certain settings must be used. I won’t list them all, but two points I feel are incredibly important to get right are using the right profile for the paper and printer combination and setting the right paper type in the printer settings.
Using the correct ICC Profile: As I mentioned before, my paper is manufactured by Fotospeed and they provide standard ICC profiles (and instructions) for all papers when printed on a Canon or Epsom printer. All I had to do was download the right profile, install it and select that profile in the print options.
Setting the paper type: The second setting I always check is choosing the right paper type from within my Canon printer’s settings. Again, Fotospeed provides a handy table on their website which matches their paper to the options available in the printer settings. For example, to get the best results when printing on Platinum Baryta, I need to select “Photo Paper Pro Lustre” from the Canon printer settings. Without setting this, I won’t get the final look I want.
Hard-proofing to make sure the print looks right
With the image prepared and printer settings set, the only real way to know I’ve made the right choices is to start printing. This is called hard proofing (or hard-copy proof) and will typically consist of smaller versions of the image or just small cropped sections at 100%. This initial method helps to get a good idea of the tones, luminance and quality while preserving paper and ink.
Creating my Artist’s proof
With the smaller or partial version looking right, the last stage in the proofing process is to print the image on the right paper, at the final 7x7'“ and 10x10” sizes. Different photographers and artists will have various ways as to how they manage and even sell their artist proofs as they’re not included in the count of limited editions sold, but if you want to read a bit more on the Artist’s Proof, you can start here at Wikipedia.
Signing and certifying my limited edition prints of London
All of my limited edition prints are signed and numbered on the white border, underneath the picture. I sign close enough to the picture so that the collector can choose to show or hide my signature when the print is mounted and framed. With the Platinum Baryta being a semi-glossy paper, I need to sign with ink as a pencil won’t work and my pen of choice right now is the Faber-Castell Pitt Artist Pen Fineliner XS India ink pen. Whatever the pen you choose, the most important thing about choosing one to sign archival prints is that they should be waterproof, permanent, acid-free and pH neutral.
If selling my prints as limited editions is to be successful, I have to instil confidence in the buyer that the print run is truly limited and I will only sell the number of copies of a given print I say I will. Once advertised and the first in a limited edition run is sold, there is no going back and nor should there be. This is where the certificate of authenticity (COA) comes in. Alongside proving the work’s provenance and authenticity, the COA is my signed contract to the buyer on which I certify the image is a genuine limited edition.
The certificate I provide with every print includes the following information;
Logo and title
Statement of authenticity
Name of the print and edition number
Date the photo was taken and printed
Dimensions of the print and image of the artwork
Medium the image is printed on
My signature and date the certificate was signed
How I pack and ship my limited edition, fine art prints
As I researched how to package and send my prints, I had four key objectives.
Secure: The way I package the prints must be tough and secure as I don’t want the print to be damaged during transit.
Sustainable and environmentally friendly: The materials used to manufacture the packaging should be sustainably sourced with minimal plastic used, and fully recyclable.
Archival: To ensure longevity, any materials that come in contact with the print must be acid-free and pH-neutral.
Presentable: I want the end-to-end experience of buying a print to be one of quality and attention to detail, and that starts with how the print is received and opened so, alongside being secure and sustainable, the packaging has to look presentable too.
So with these four objectives in mind, here’s a quick breakdown of some of the key materials I use to package and ship my print:
Black presentation box: The presentation box I use looks good, keeps the print secure and is environmentally friendly. The boxes I use are biodegradable, made from recycled materials, sustainably sourced and fully recyclable. In addition, the A4-sized box I use is compostable.
Glassine Envelope: Each print is placed in an envelope before it goes into the presentation box. I opted for Glassine envelopes as they are recyclable, compostable, biodegradable and manufactured with renewable materials. Anything that comes in contact with the print must be archival, so the glassine envelope is also acid-free and pH-neutral.
It’s important to be as transparent as possible when discussing sustainability so it should be said that the manufacturing process of glassine envelopes is quite resource-intensive but this will be minimal compared to similar petrochemical & fossil-fuel-based materials such as plastic.
White card and envelope: I use a white card to print the certificate of authenticity and place it in a white envelope. I use a white card sheet to add rigidity to the print while in the glassine envelope. The card and envelopes I use are made from 100% recycled materials.
Mailing bags: Having had many deliveries left on my doorstep, exposed to the elements, I do not want to risk the same happening to one of my prints without being adequately protected, so unfortunately this is where I feel I am forced to use plastic packaging (for now at least). Although far from ideal, I have ensured the mailing bags I use are made from fully recycled plastic and code 4 LDPE, meaning they can be recycled using most standard domestic services. I will continue to seek alternatives and update the post when I have one. All suggestions are gratefully received.
Final thoughts
Hopefully, that provides a useful insight into the process and equipment I use when producing my limited-edition, fine art prints.
Whether you're a collector considering purchasing my work or a fellow photographer beginning your fine-art printing journey, I hope this article helps you appreciate the craftsmanship behind each print I make. If you have any questions about my Timeless City project, feel free to reach out to me via my contact page and if you are interested in owning your own limited edition print of London, visit my Timeless City store using the button below.
Until next time.
Trevor
New Photos | Autumn 2024
A collection of photos taken during Autumn 2024.
This is now the fourth instalment of my “New Photos” series, a project conceived to ensure my photography is seen on my website and in my newsletter before being shared on social media. These aren’t portfolios showcasing my very best work, but more a snapshot of the share-worthy photos I made during those three months and if, during that time I manage to take just one or two portfolio images then I consider that a bonus.
Below are the previous three instalments of my “New Photos” series.
September to November 2024 - Autumn 2024 collection.
One thing you might notice in this edition is just how few traditionally wide landscape photos I took during the autumn. For various reasons back in 2023, I didn’t have the time I wanted to photograph the changing colours in my local forest, so in 2024, I made a concerted effort to spend more of my photography time there and as a result, I had less time to photograph what would be considered traditional landscapes.
(You can click on the smaller photos to see a larger version)
Apart from the photo of Brighton’s West Pier below and London’s cityscapes further down, the only shareworthy landscape images I photographed were taken from the same spot. This viewpoint overlooks part of my local forest and is one I visit often before venturing off amongst the trees to photograph the woodland.
Landscape Photography
I’ve spoken before about the West Pier along England’s south coast in Brighton and how I visit from time to time to photograph this composition, capturing its skeletal remains as it slowly gets taken by the sea. On this particular morning in early autumn, conditions weren’t great and I had no light to speak of, but I kept this photo because of the additional context it provided. The water was clear and for the first time in countless visits, I could see the scattered pieces of metal that had fallen into the sea when the pier collapsed, adding to the story of this cursed seaside structure.
Cityscape photography in London
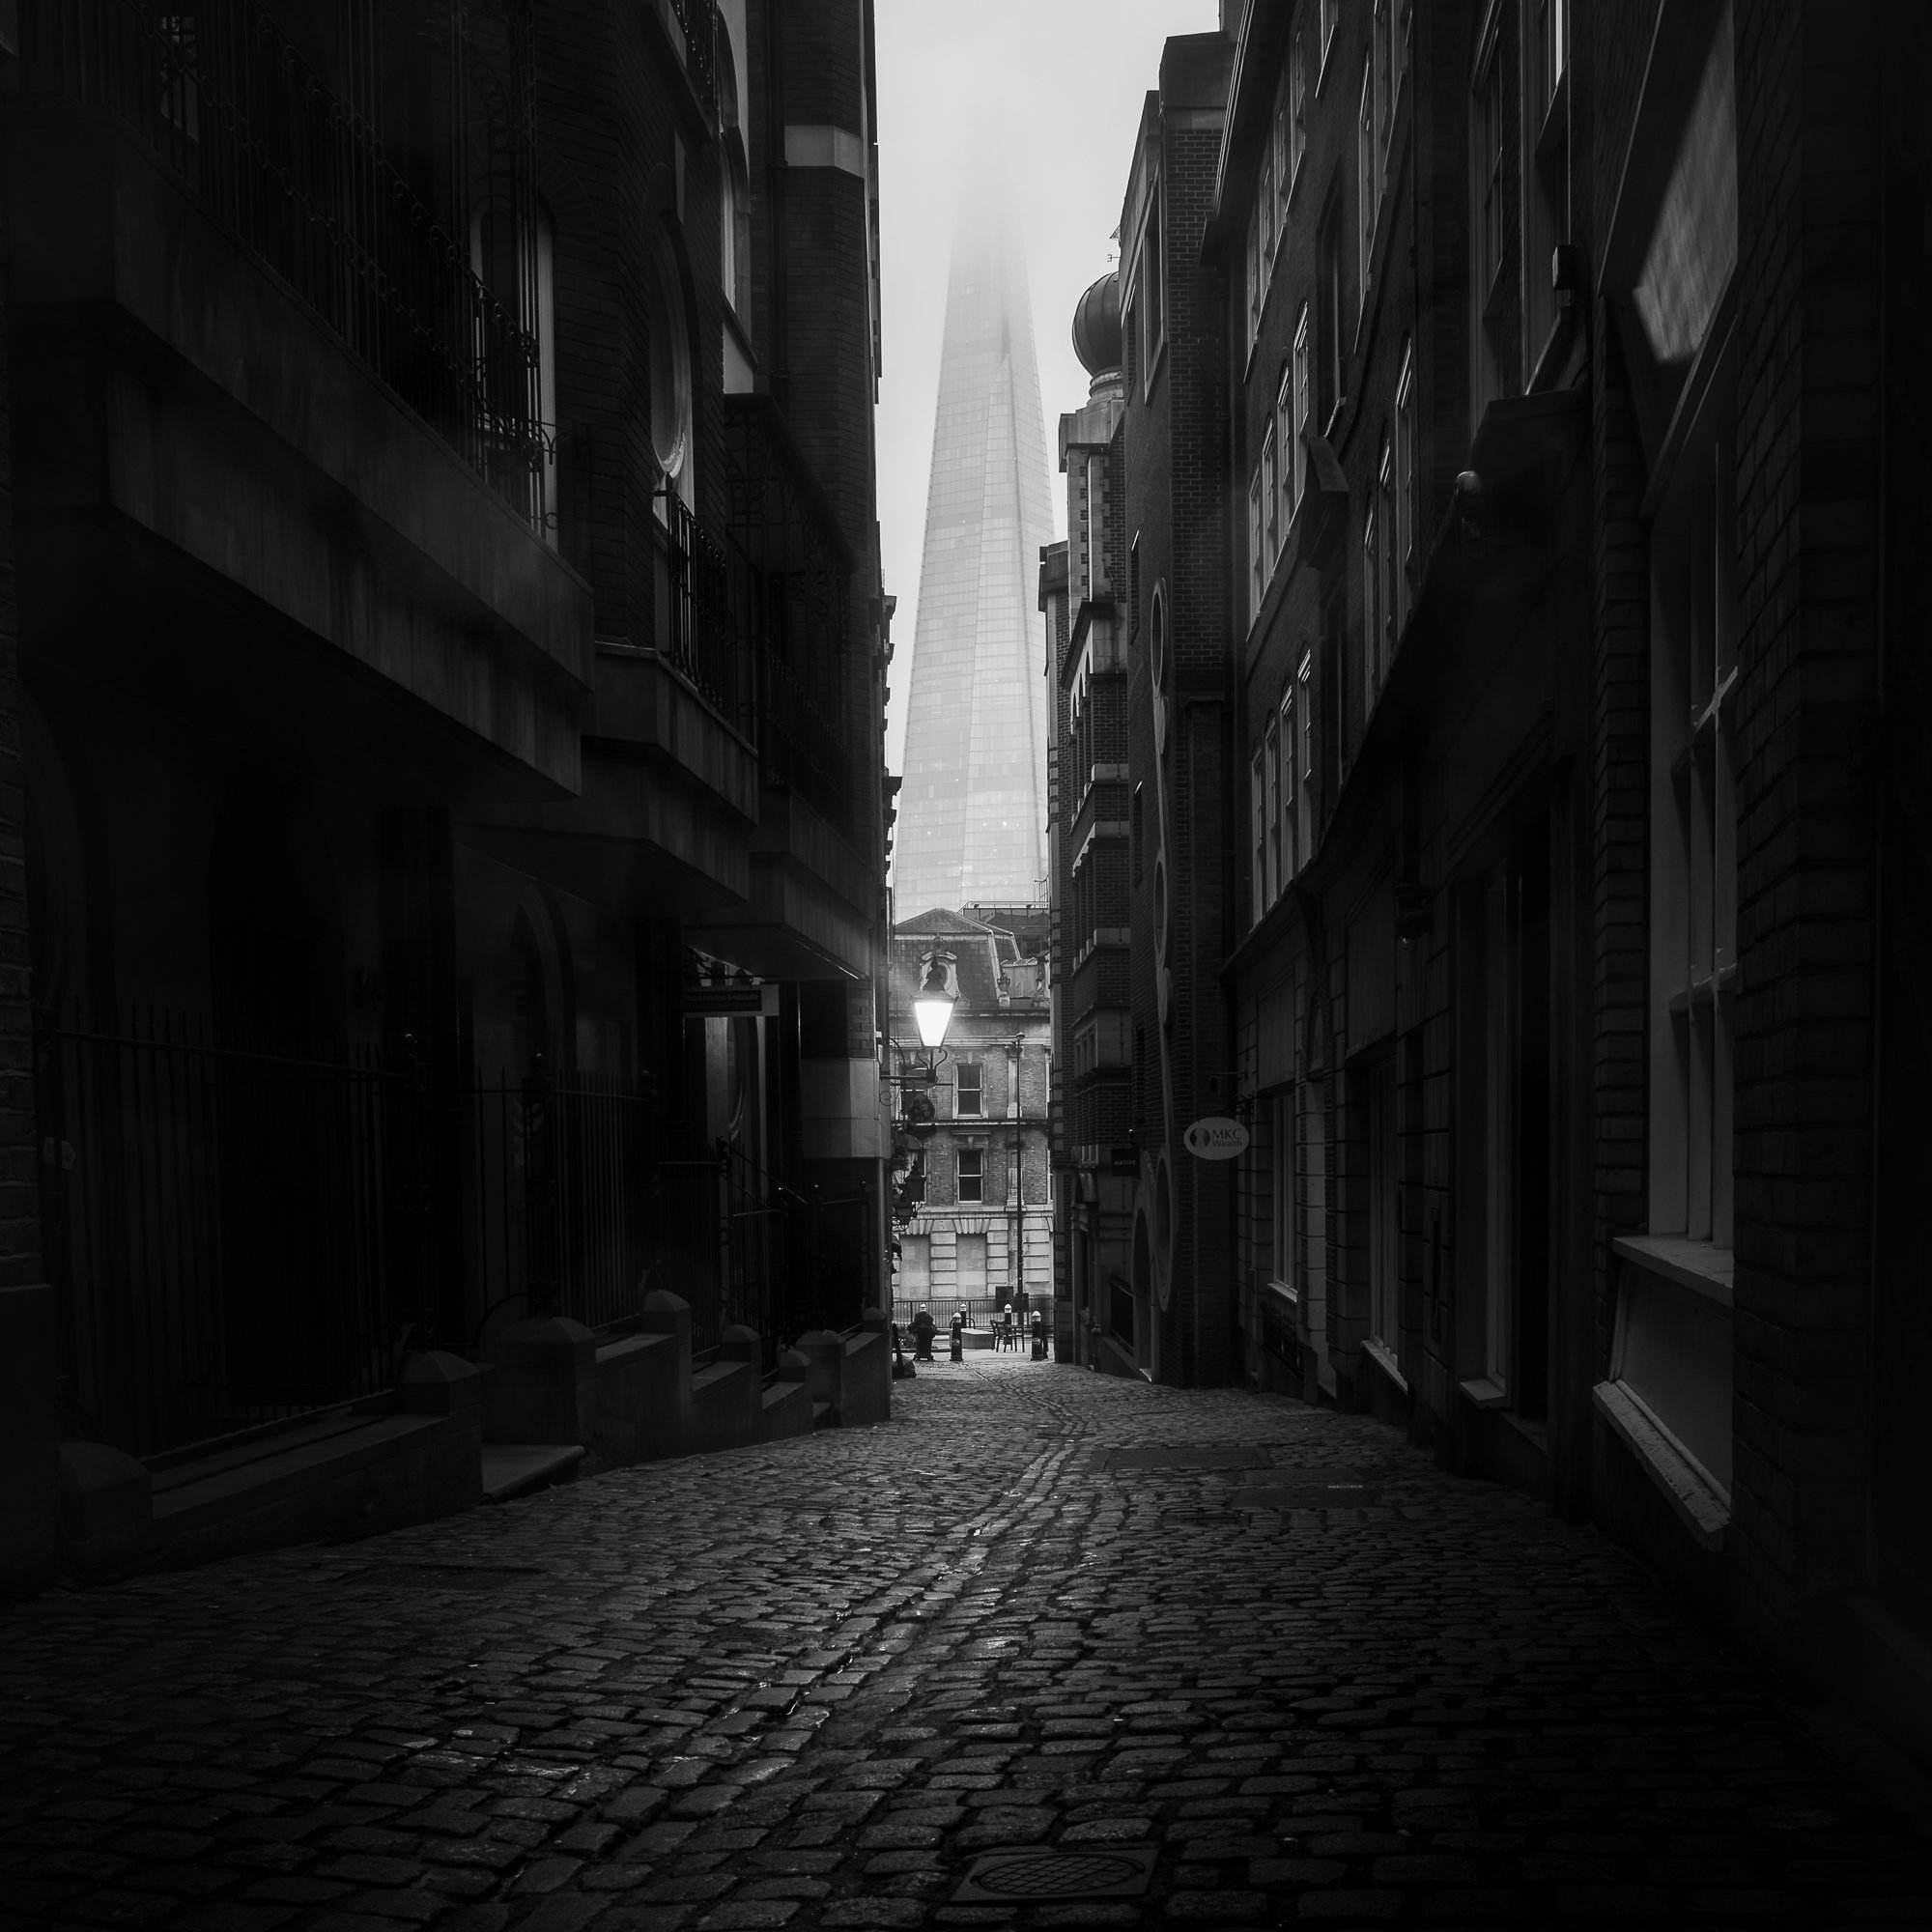
These days, nearly all the time I have to photograph London is spent creating work for my Timeless City project. I tend not to share those photos here as I’m still building that body of work, adapting and learning as I go, but every so often, I’ll take a picture I feel should also be processed in colour. Alongside this, I feel that my shift to taking more black-and-white cityscape photos is now starting to influence my colour work, (for the better I hope). My colour photos are more muted with less busy compositions and a simpler colour pallet.
Photographing an autumnal woodland
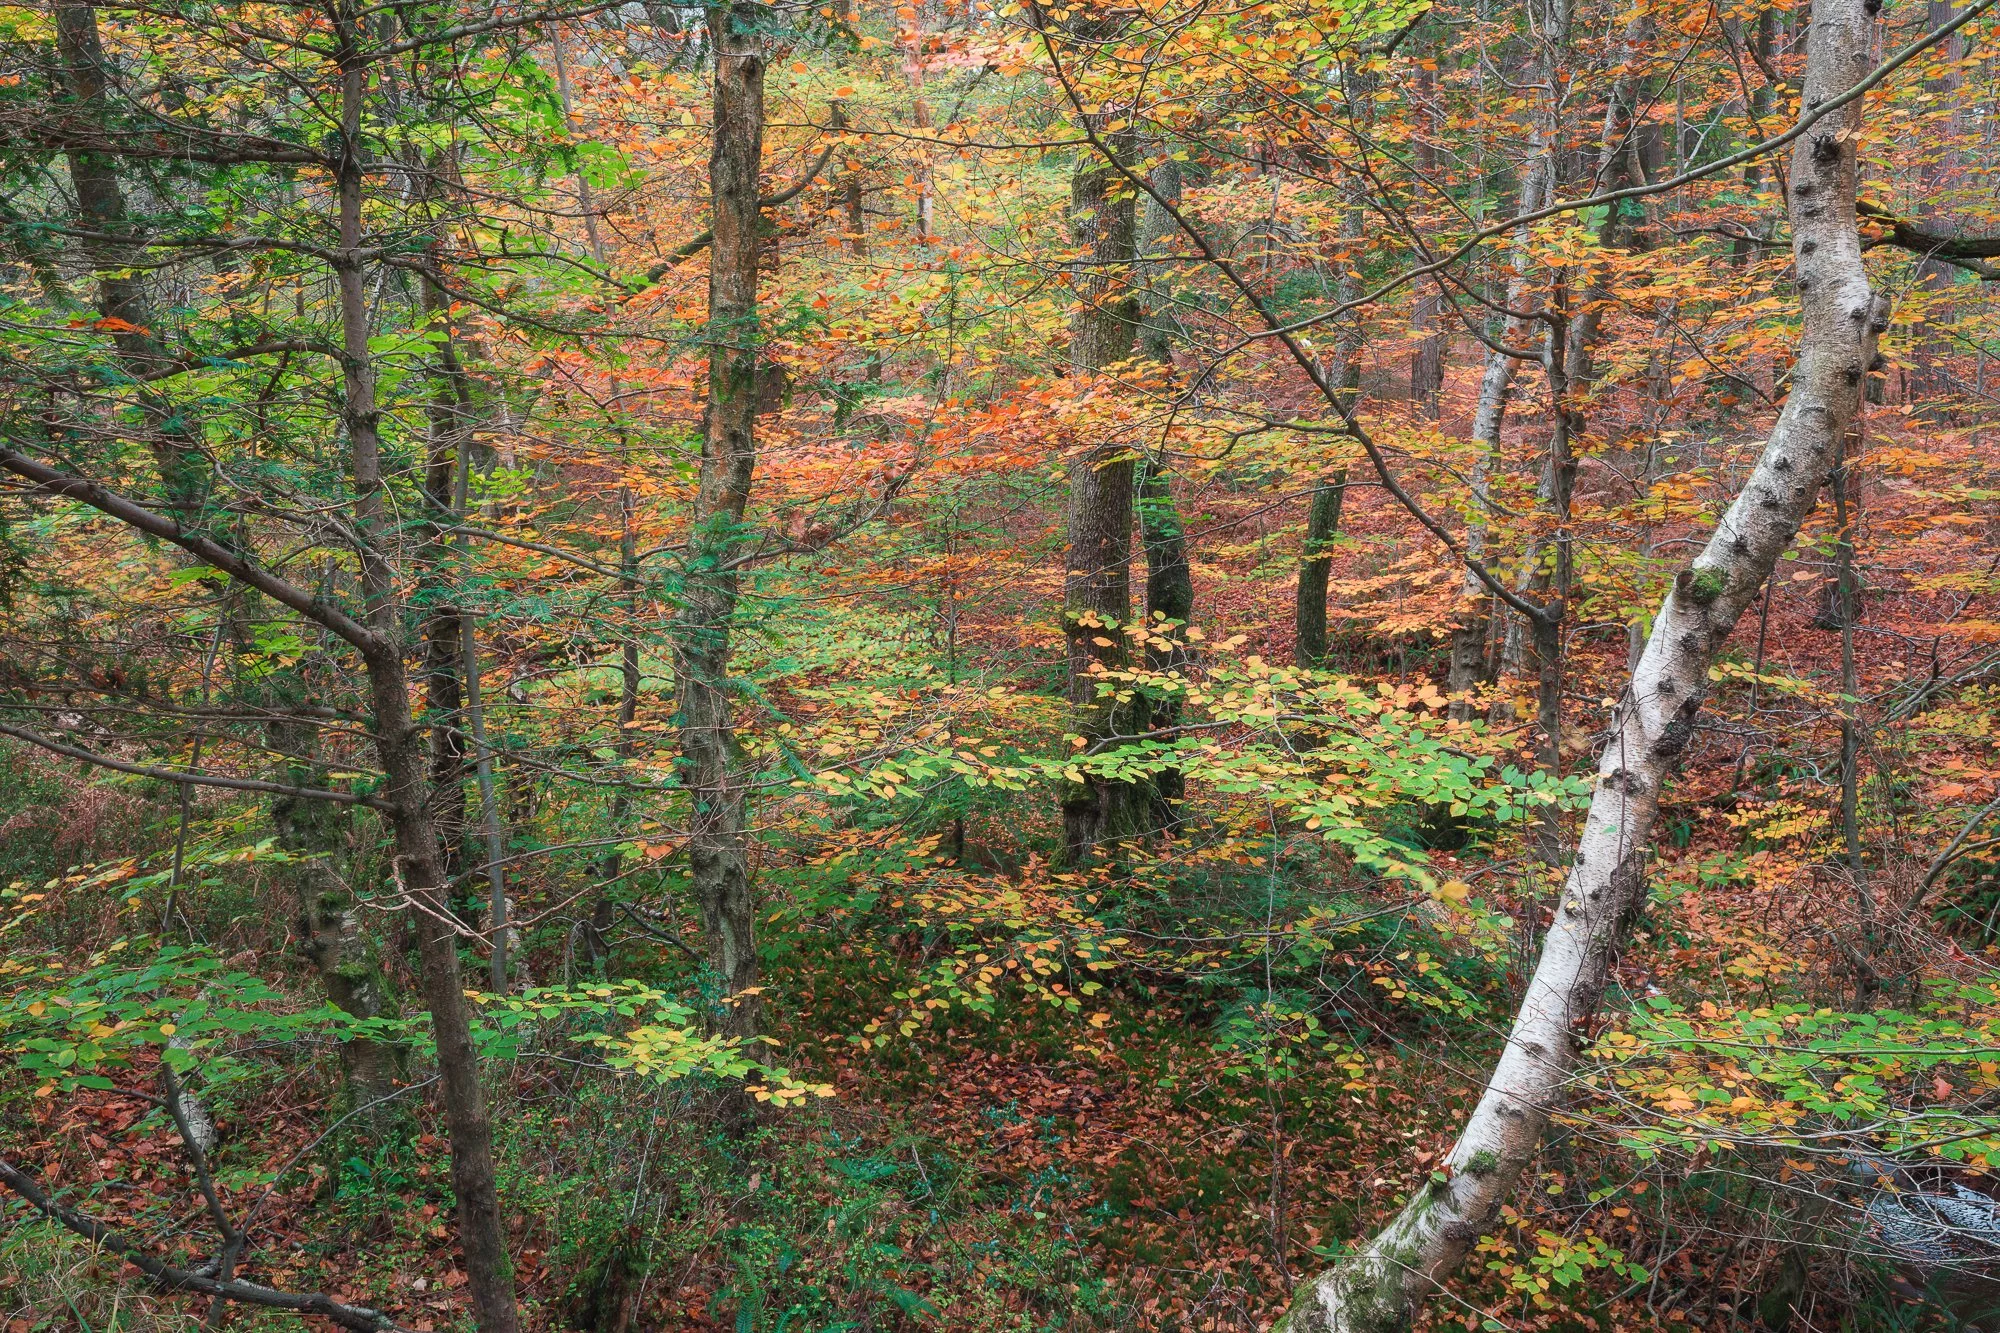
As mentioned above, I spent a lot more time this year amongst the trees, photographing the colours as they changed from deep, late summer greens to vibrant oranges, yellows and finally the dull browns of late autumn. My ability to look closer at the woodland has slowly improved and as such I thoroughly enjoyed my time last year, stretching myself photographically, and finding new, intimate compositions while revisiting some old favourites along the way.
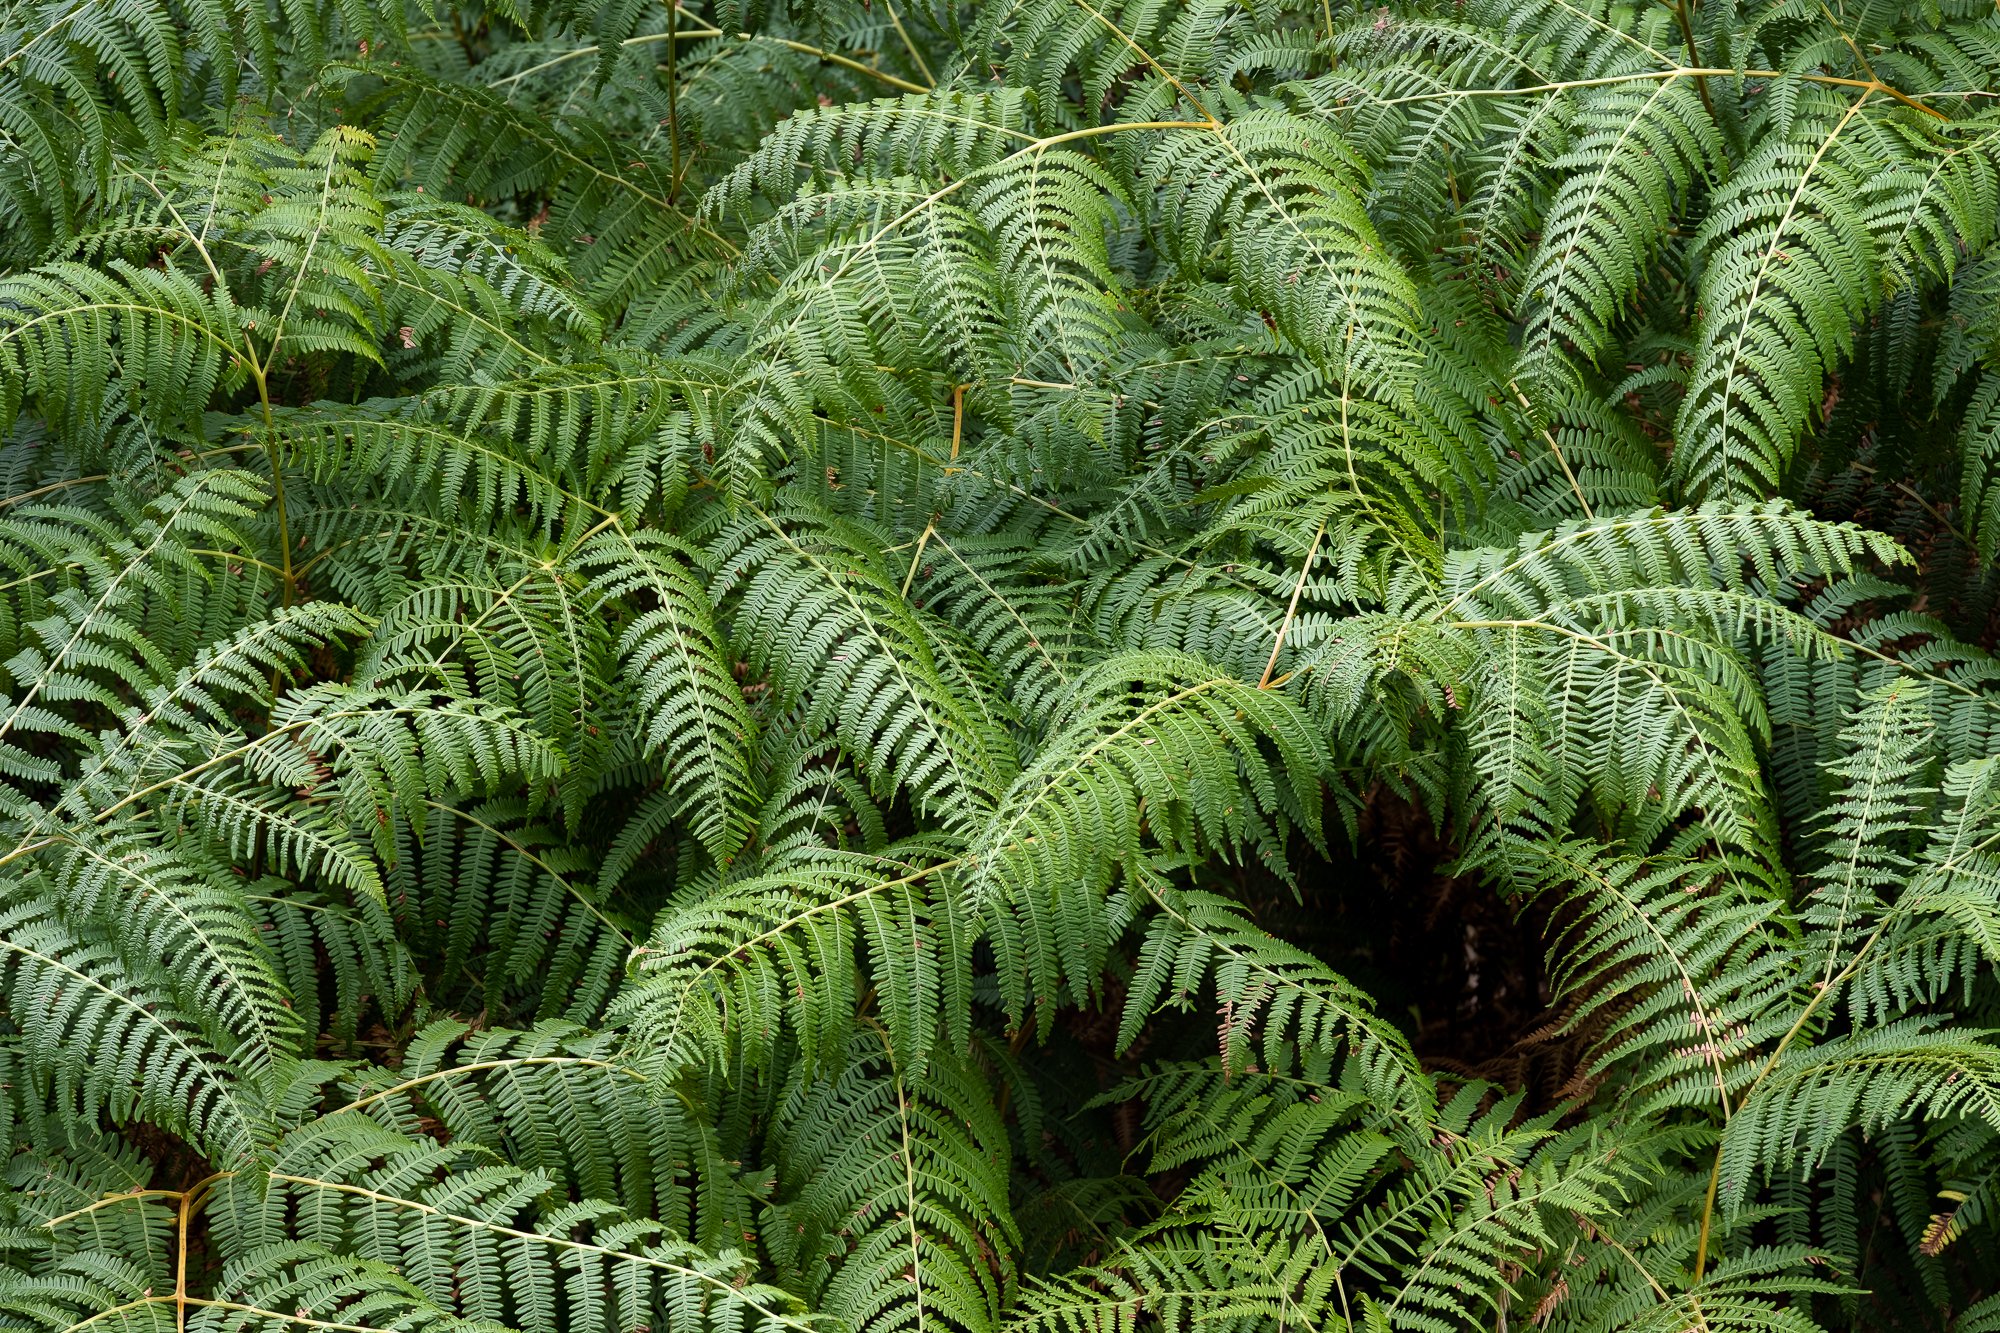
Although I’m generally happy with the photos I took of the Autumnal woodland in 2024, particularly the tighter, intimate compositions, I still feel I lack the vision and awareness to spot the small scenes around my feet and as a result, I don’t take anywhere near as many photos of small scenes as I would like. I did manage to take a few, however. The green fern at the beginning of autumn and bookending the season, a collection of frosty fallen leaves towards the end of November.
Photographing the northern lights in Sussex
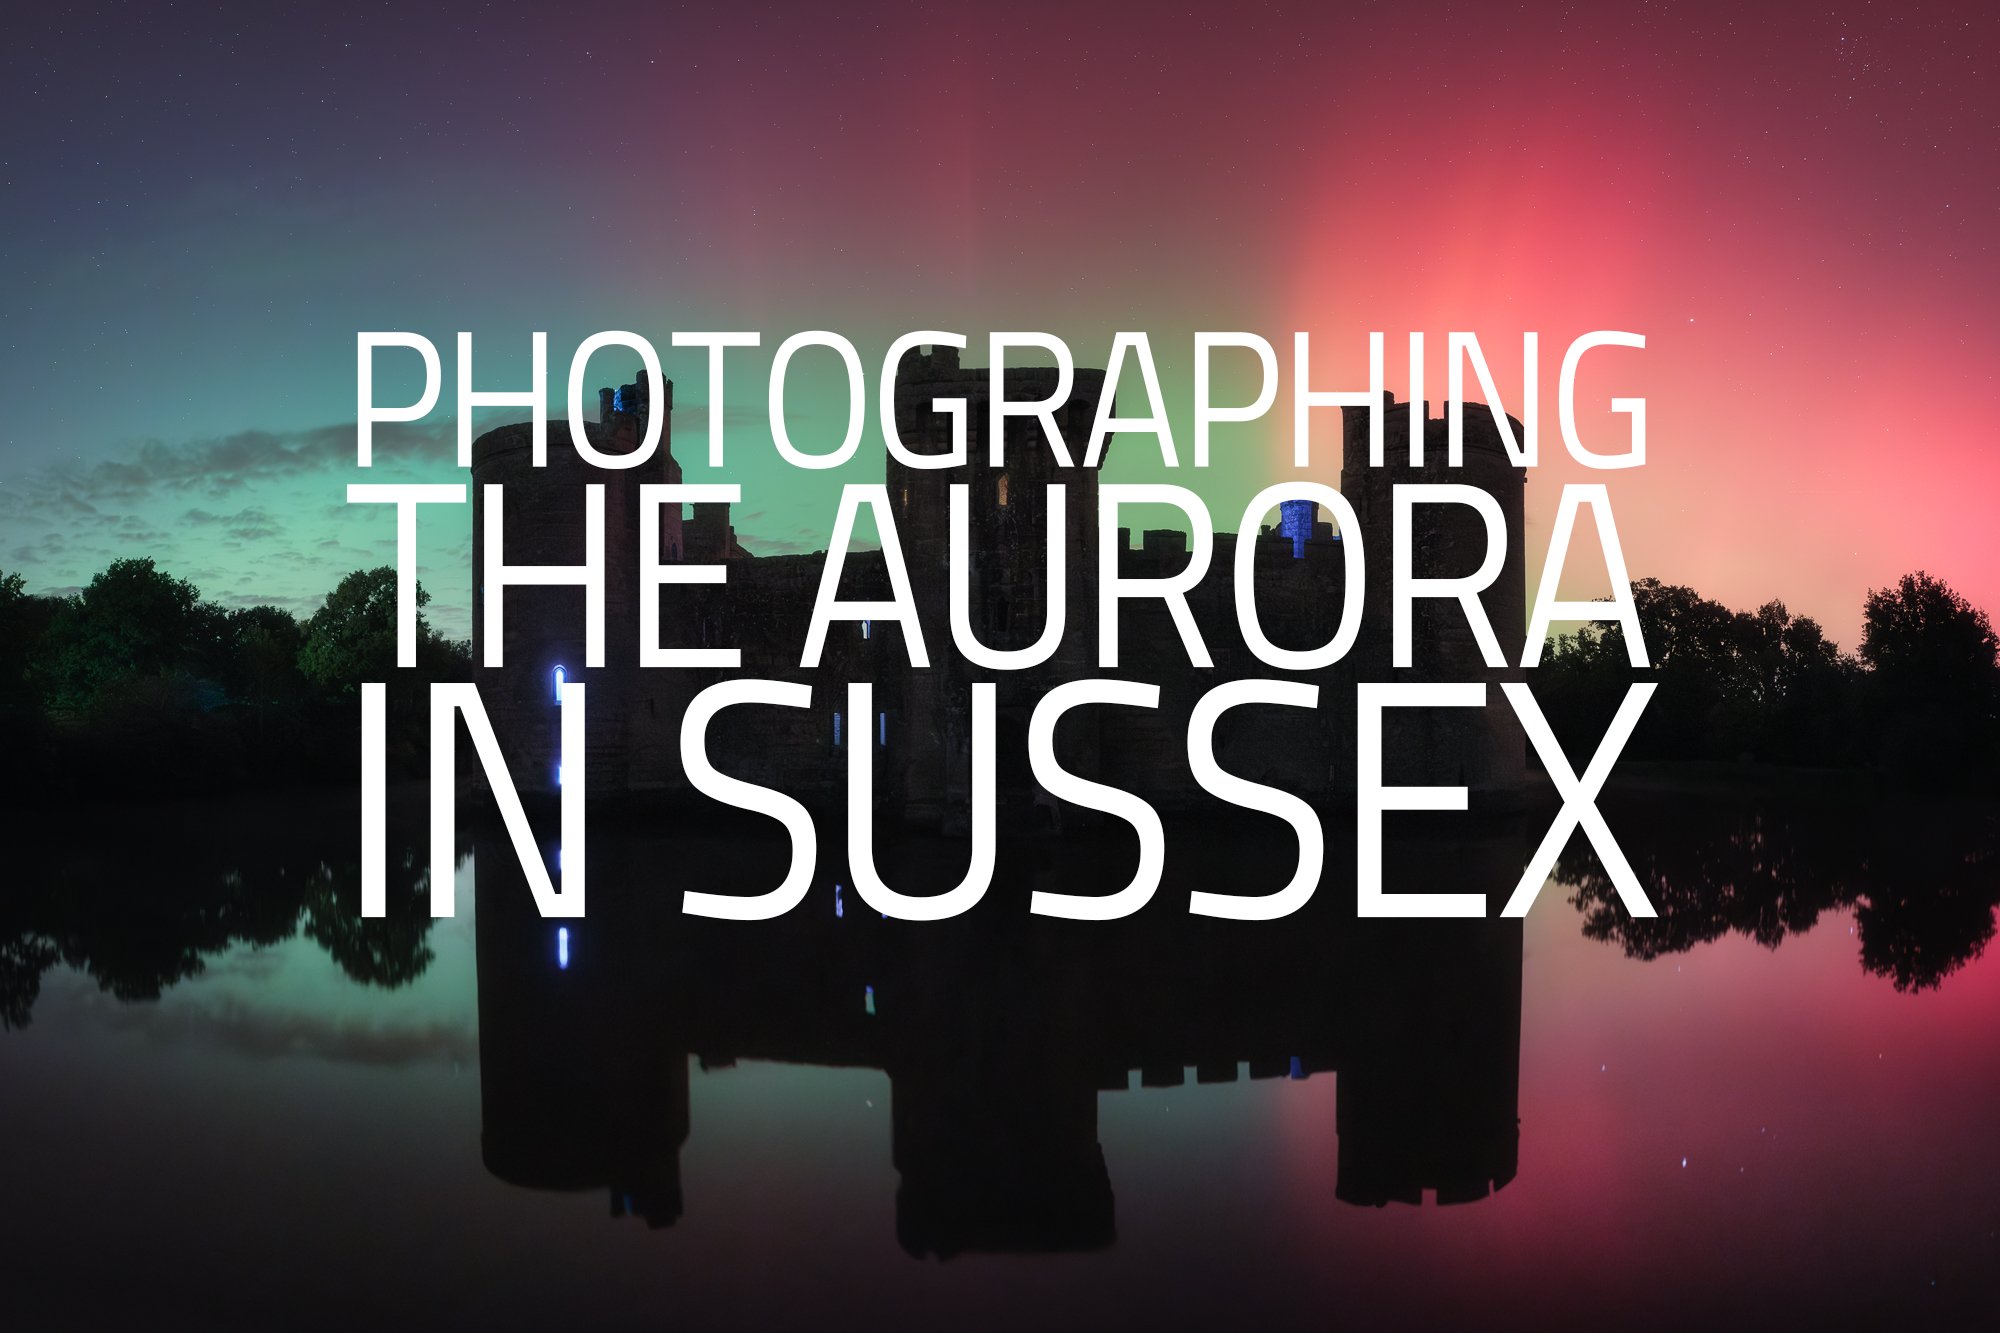
As I left work one evening in October, the socials were ablaze with aurora alerts for the south of England and having missed the opportunity to photograph the northern lights back in May, I quickly decided to head out of the city and into Sussex to try to capture them. I wrote more about this amazing evening of photography in the blog post below.
Photographing the Brecon Beacons in Late Autumn
In mid-November, I made a late dash to the Brecon Beacons to photograph the waterfalls. Being so late in the season, nearly all the leaves had fallen, leaving very little foliage on the trees, but I dug deep, got creative and came away with a handful of photos I liked.
Wow, that’s over 40 photos I’ve shared from my photo outings in Autumn. I’m pretty happy with that. As always, feel free to message me or leave a comment with any questions or feedback you may have.
Until next time,
Trevor
Outdoor Photogrphy Magazine Feature
I was featured in a recent edition of Outdoor Photography magazine. Read the article here.
After a very generous recommendation from the talented Vanda Ralevska, I was recently (and very kindly) asked by writer and author, Nick Smith, to be interviewed for a multi-page feature in the UK’s Outdoor Photography Magazine. We met one afternoon in London and talked about all things photography such as how I got started, why I enjoy photographing the London cityscape and the synergies between cityscape and woodland photography.
I was also given a PDF copy to share with viewers of my website. If you have a few minutes, I welcome you to have a read and as always, feel free to post any questions or feedback in the comments below.
Alternatively, you can read the article using this embedded version or download it directly here.
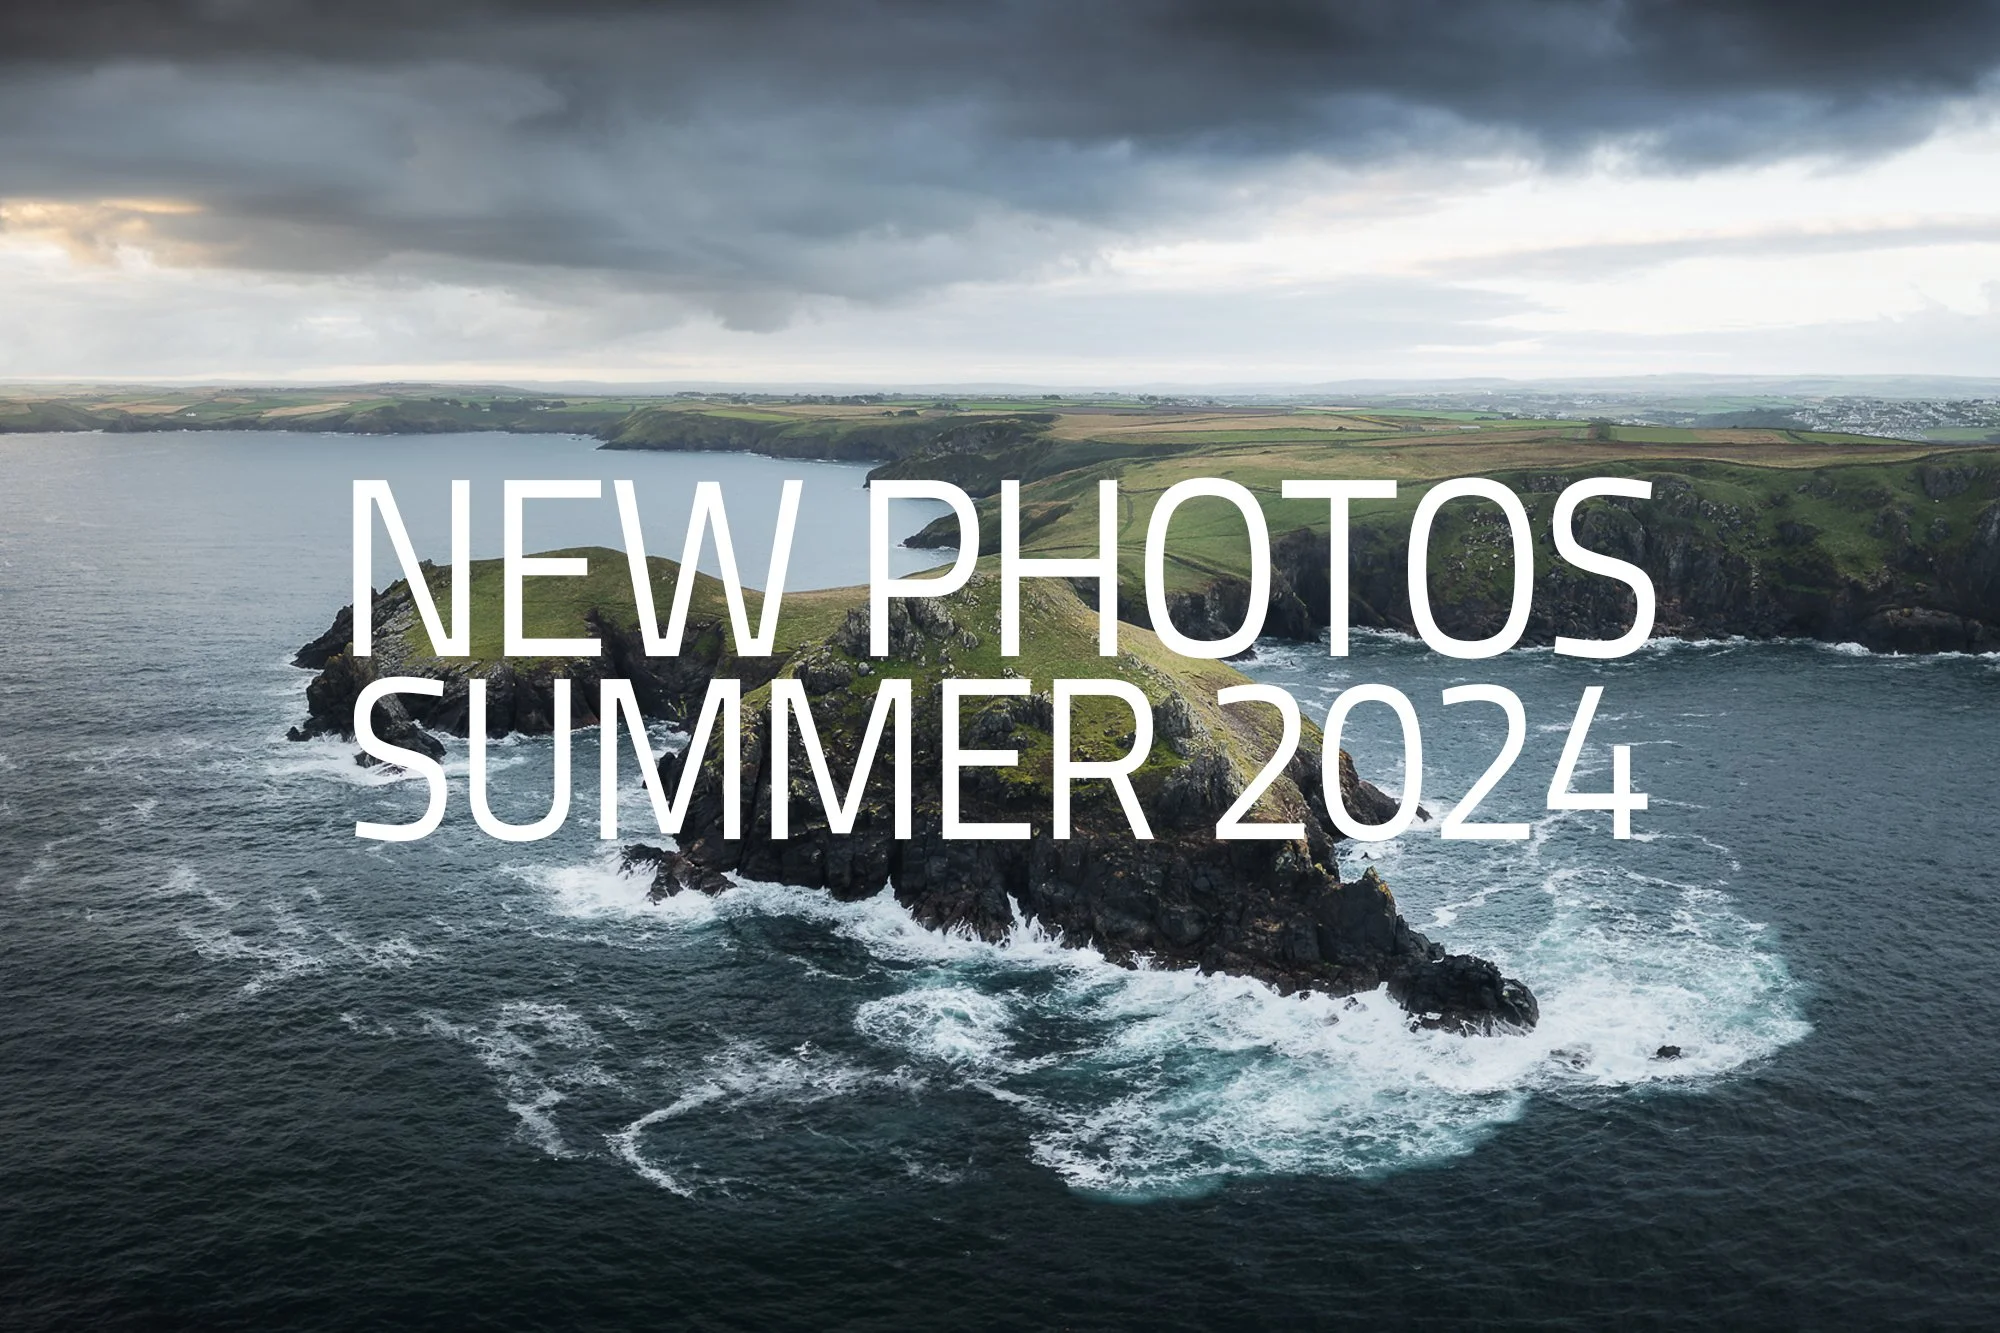
New Photos | Summer 2024
A collection of photos taken during Summer 2024.
Like many landscape photographers, I struggle to take photos in the summer. I prefer to take my photos during the calmer, relaxing sunrise hours meaning some ridiculously early mornings which, along with the green, monotone colours summer provides, can take their toll on my enthusiasm to get up and head out in the morning. This year’s summer months may have been the most challenging yet. Of course, I know that with fuller foliage and the right conditions, the woodland can look incredibly beautiful. Still, throughout June, July and August, I felt I was constantly battling a general lack of motivation and my desire to find some of those early morning summer scenes I knew were out there.
The desire to head out and enjoy the summer woodland in the morning did win out a few times, and I was able to take a few new photos while revisiting some old friends.
Alongside some summertime woodland photography, I’ve also shared a few pictures I took while in Cornwall, London and the Sussex landscape.
June to August 2024 - Summer 2024 collection.
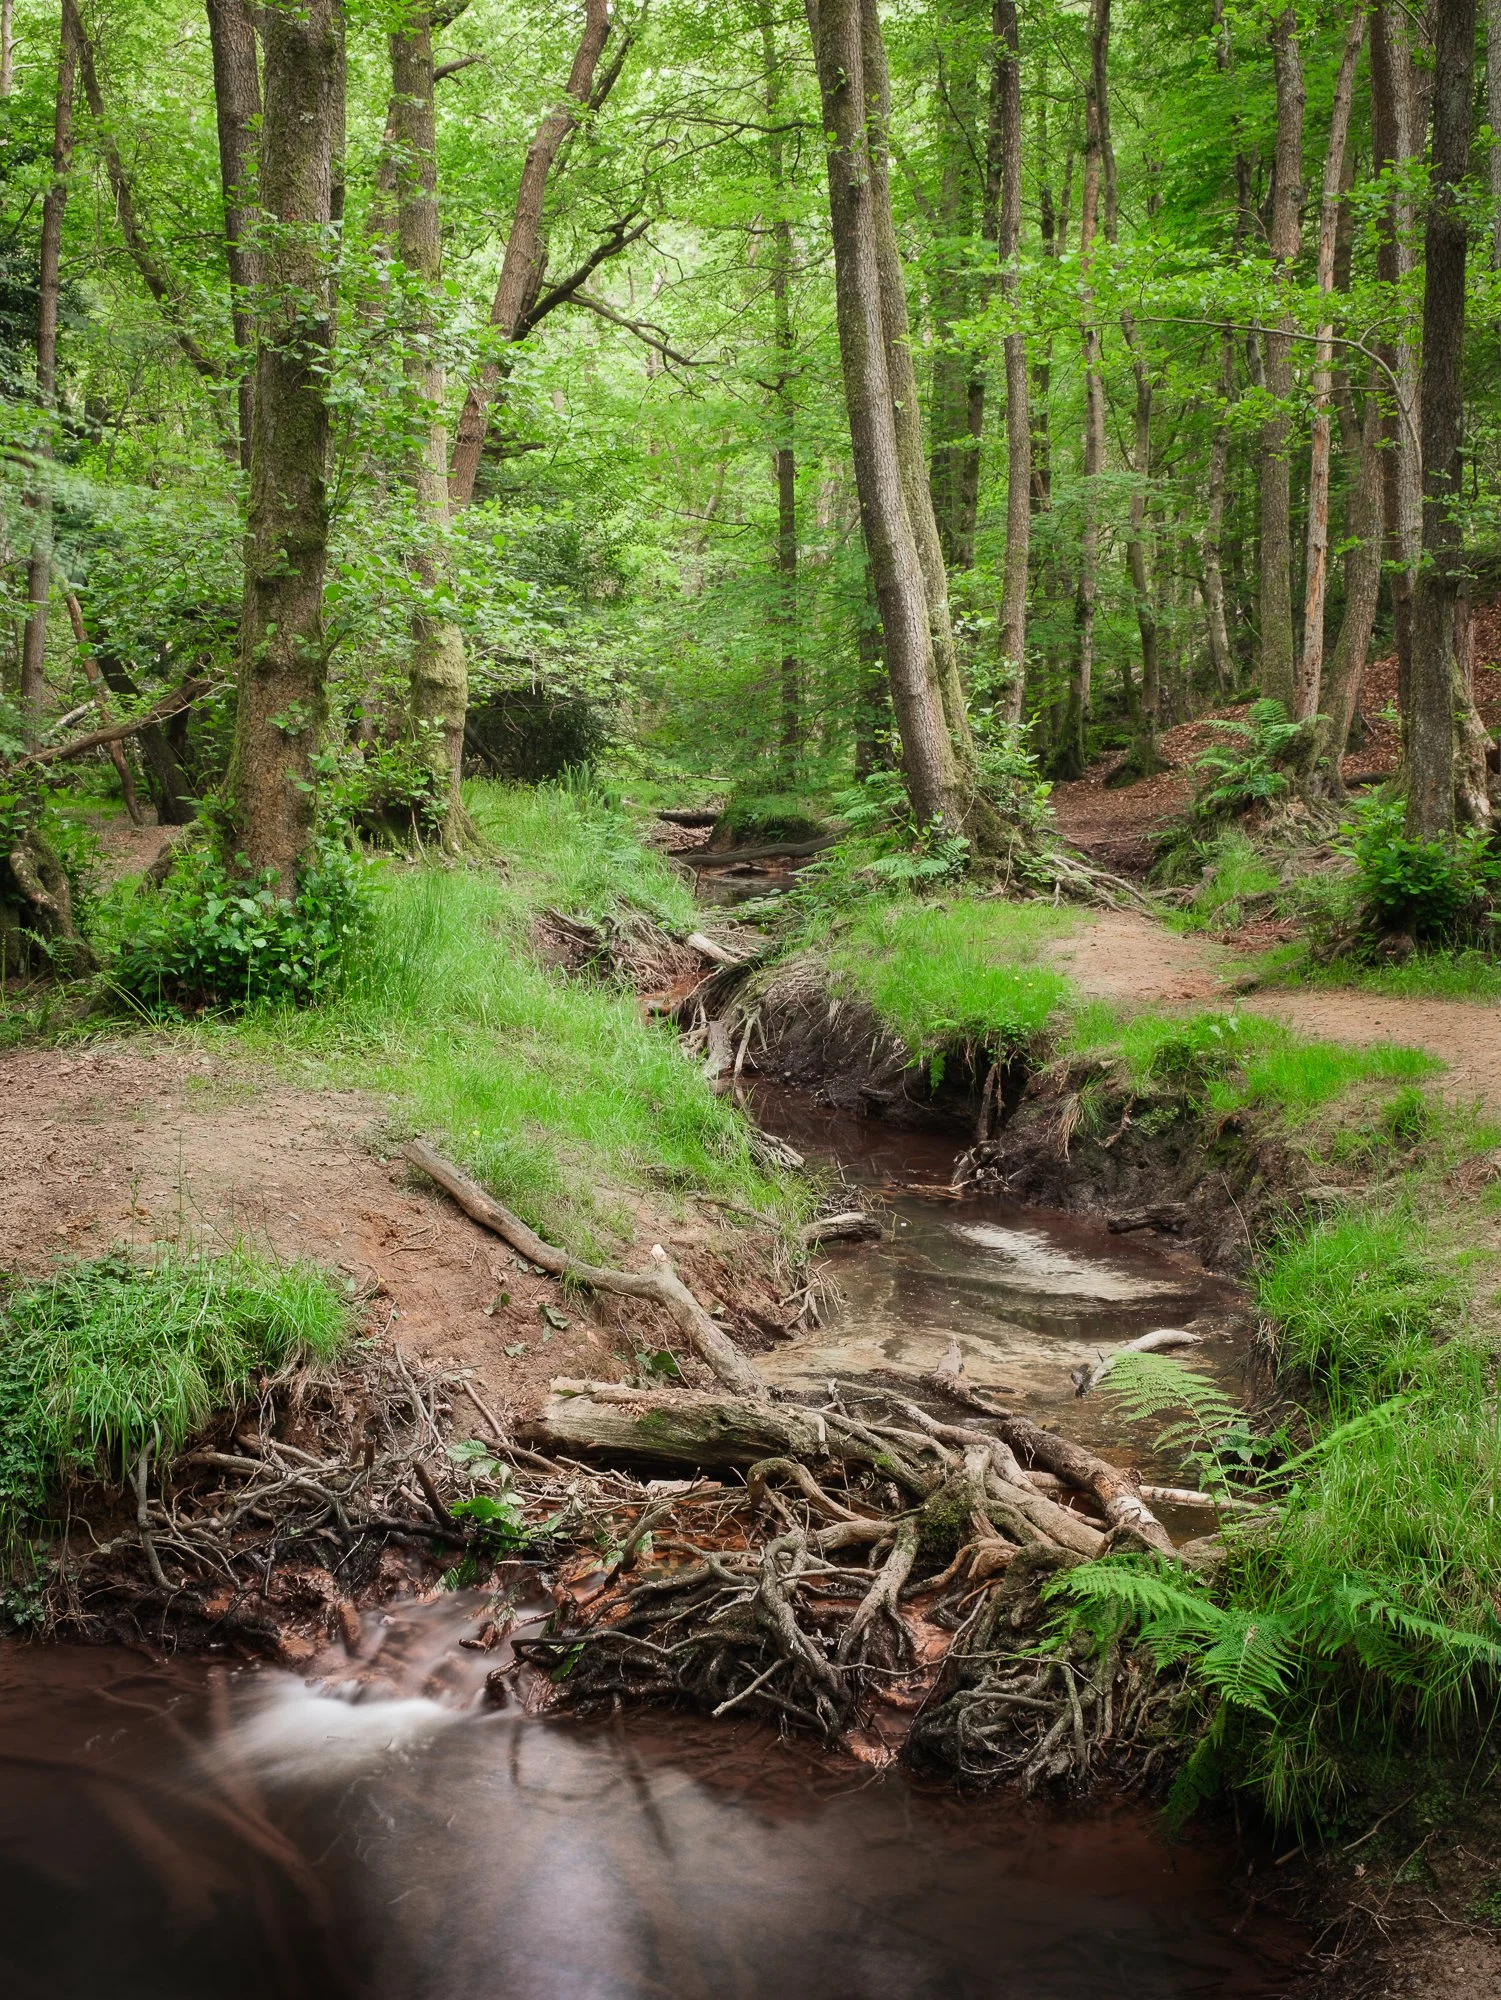
Below is the first of three collections I’ve shared from my woodland adventures in this post. This collection was taken early in the summer when the woodlands were still awash with bright, vivid green tones.
(You can click in the smaller photos to see a larger version)
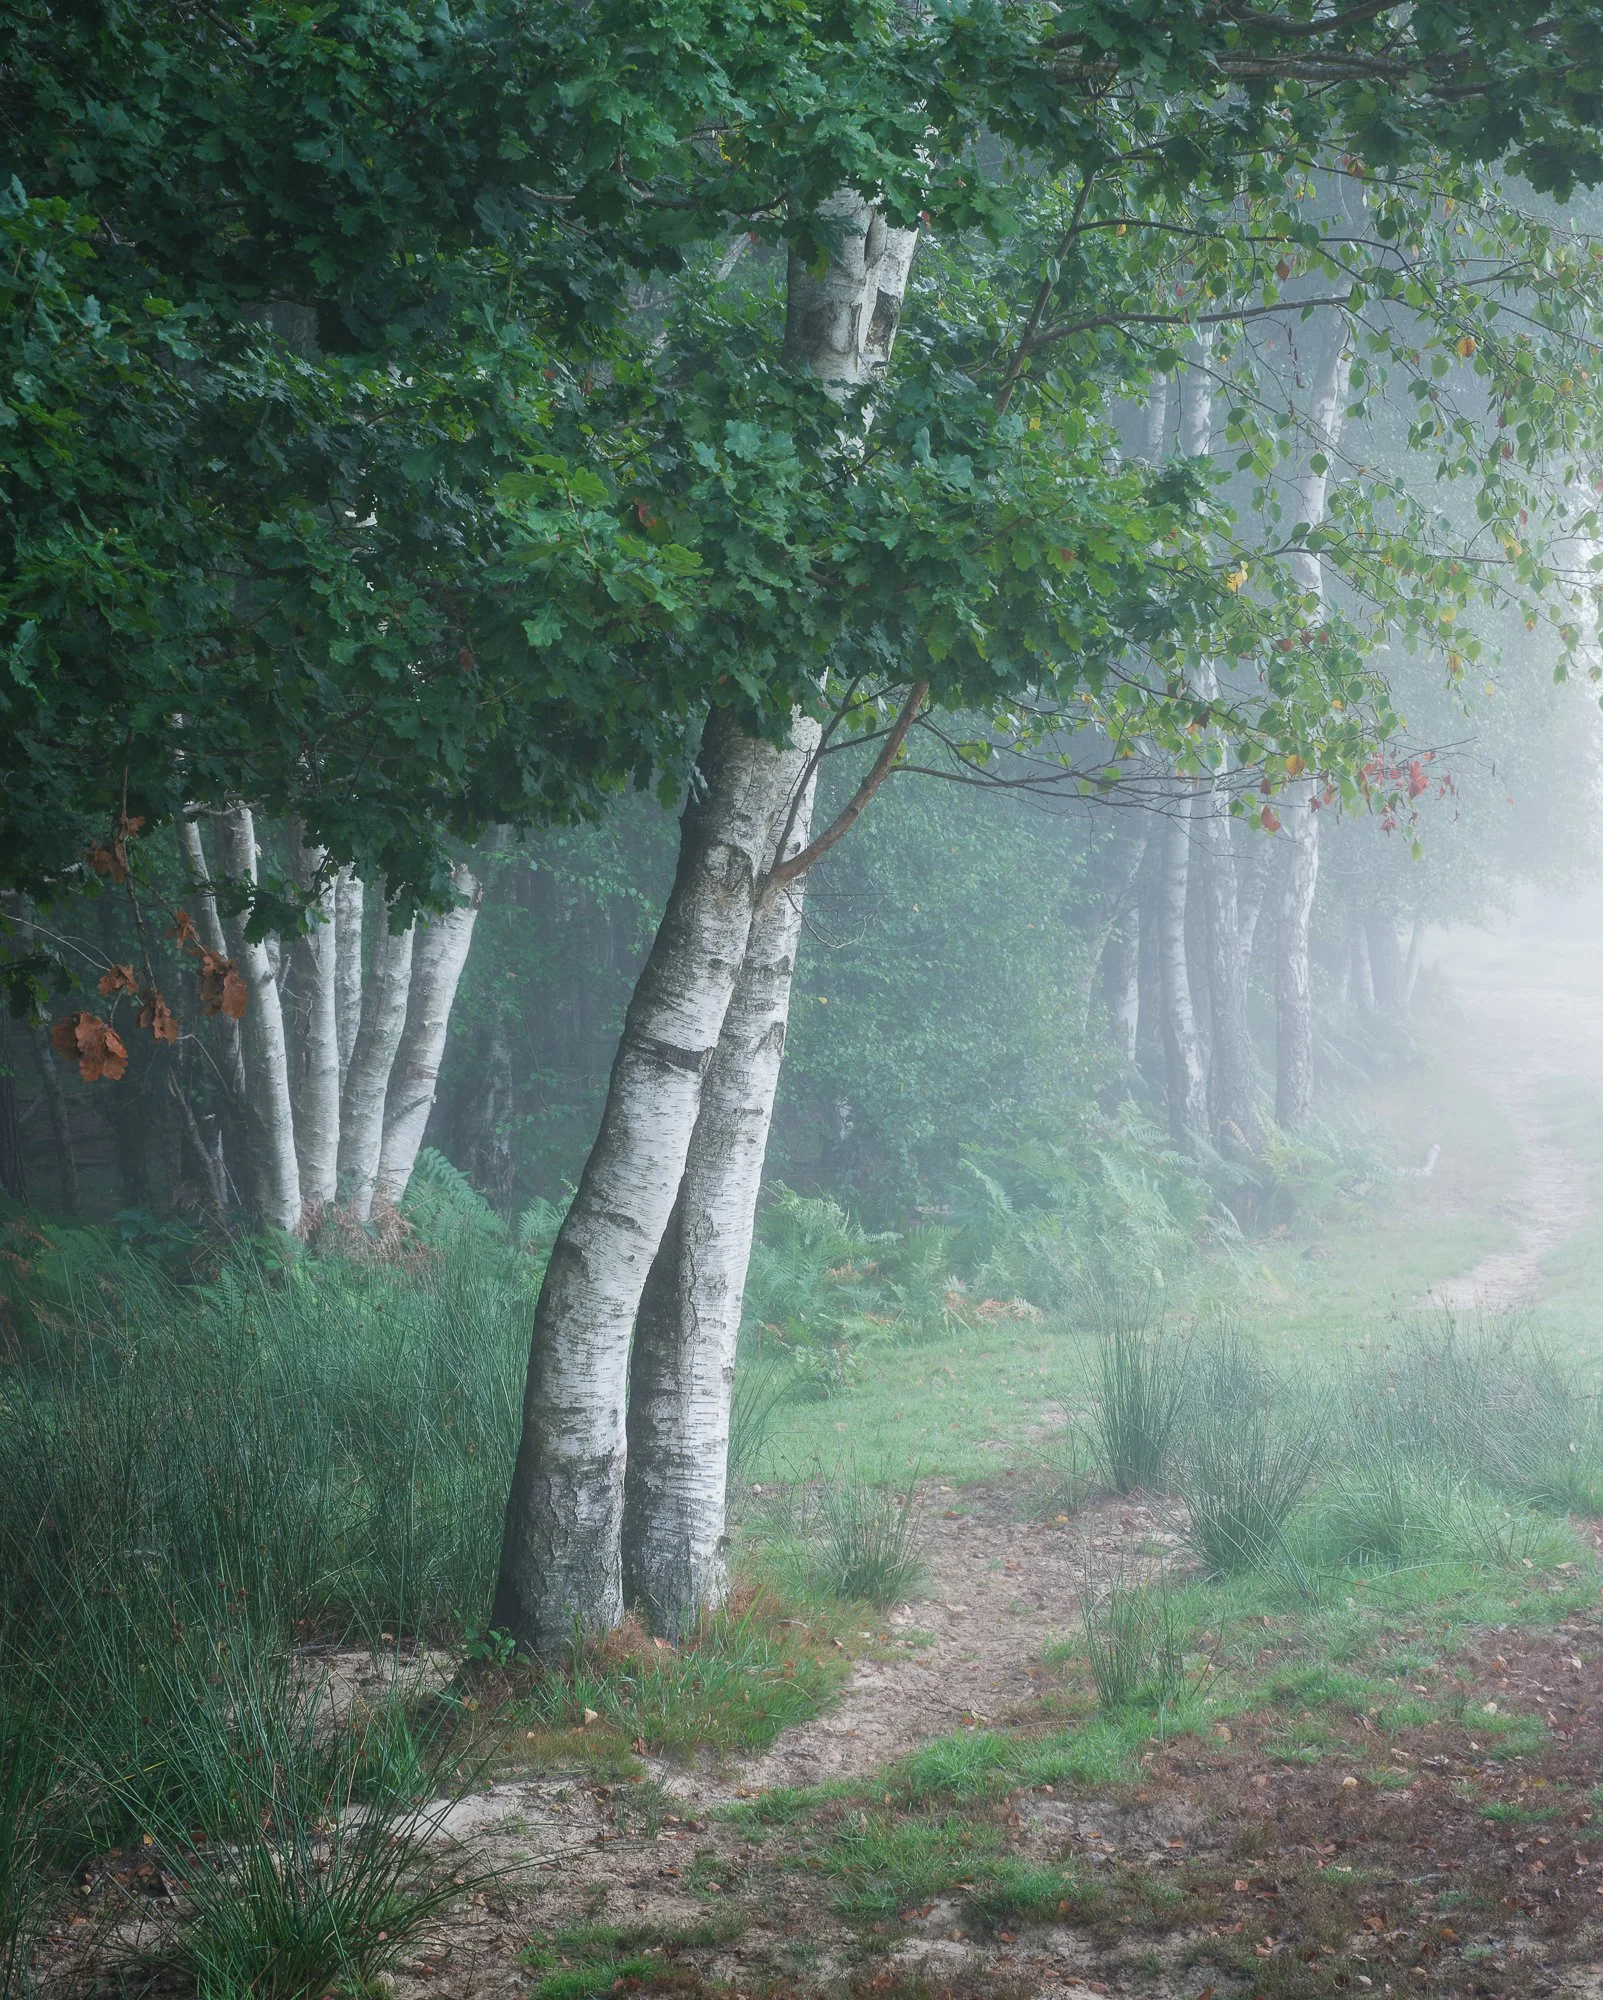
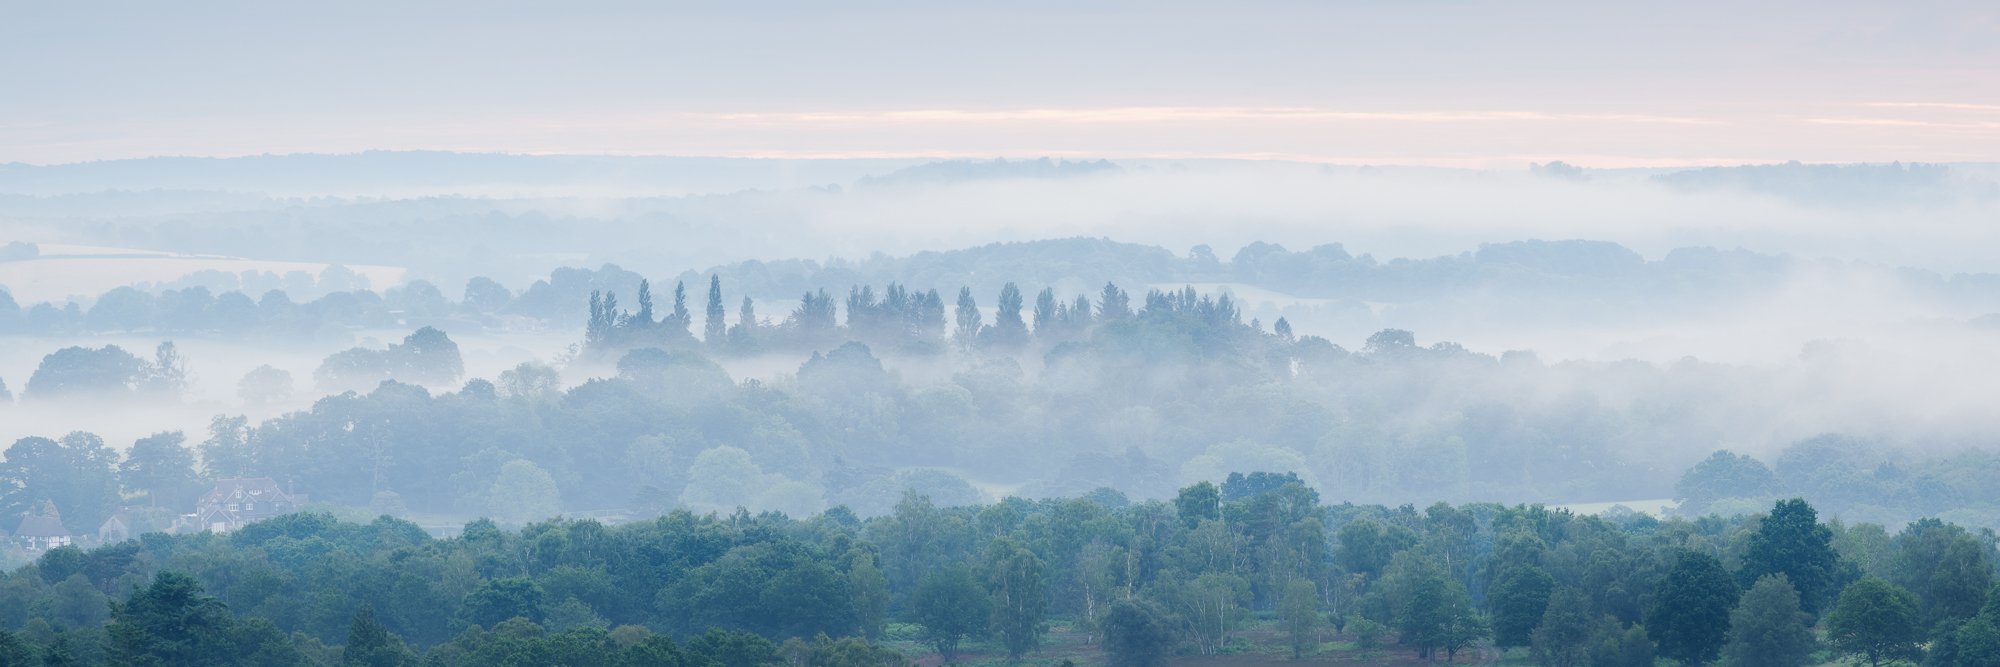
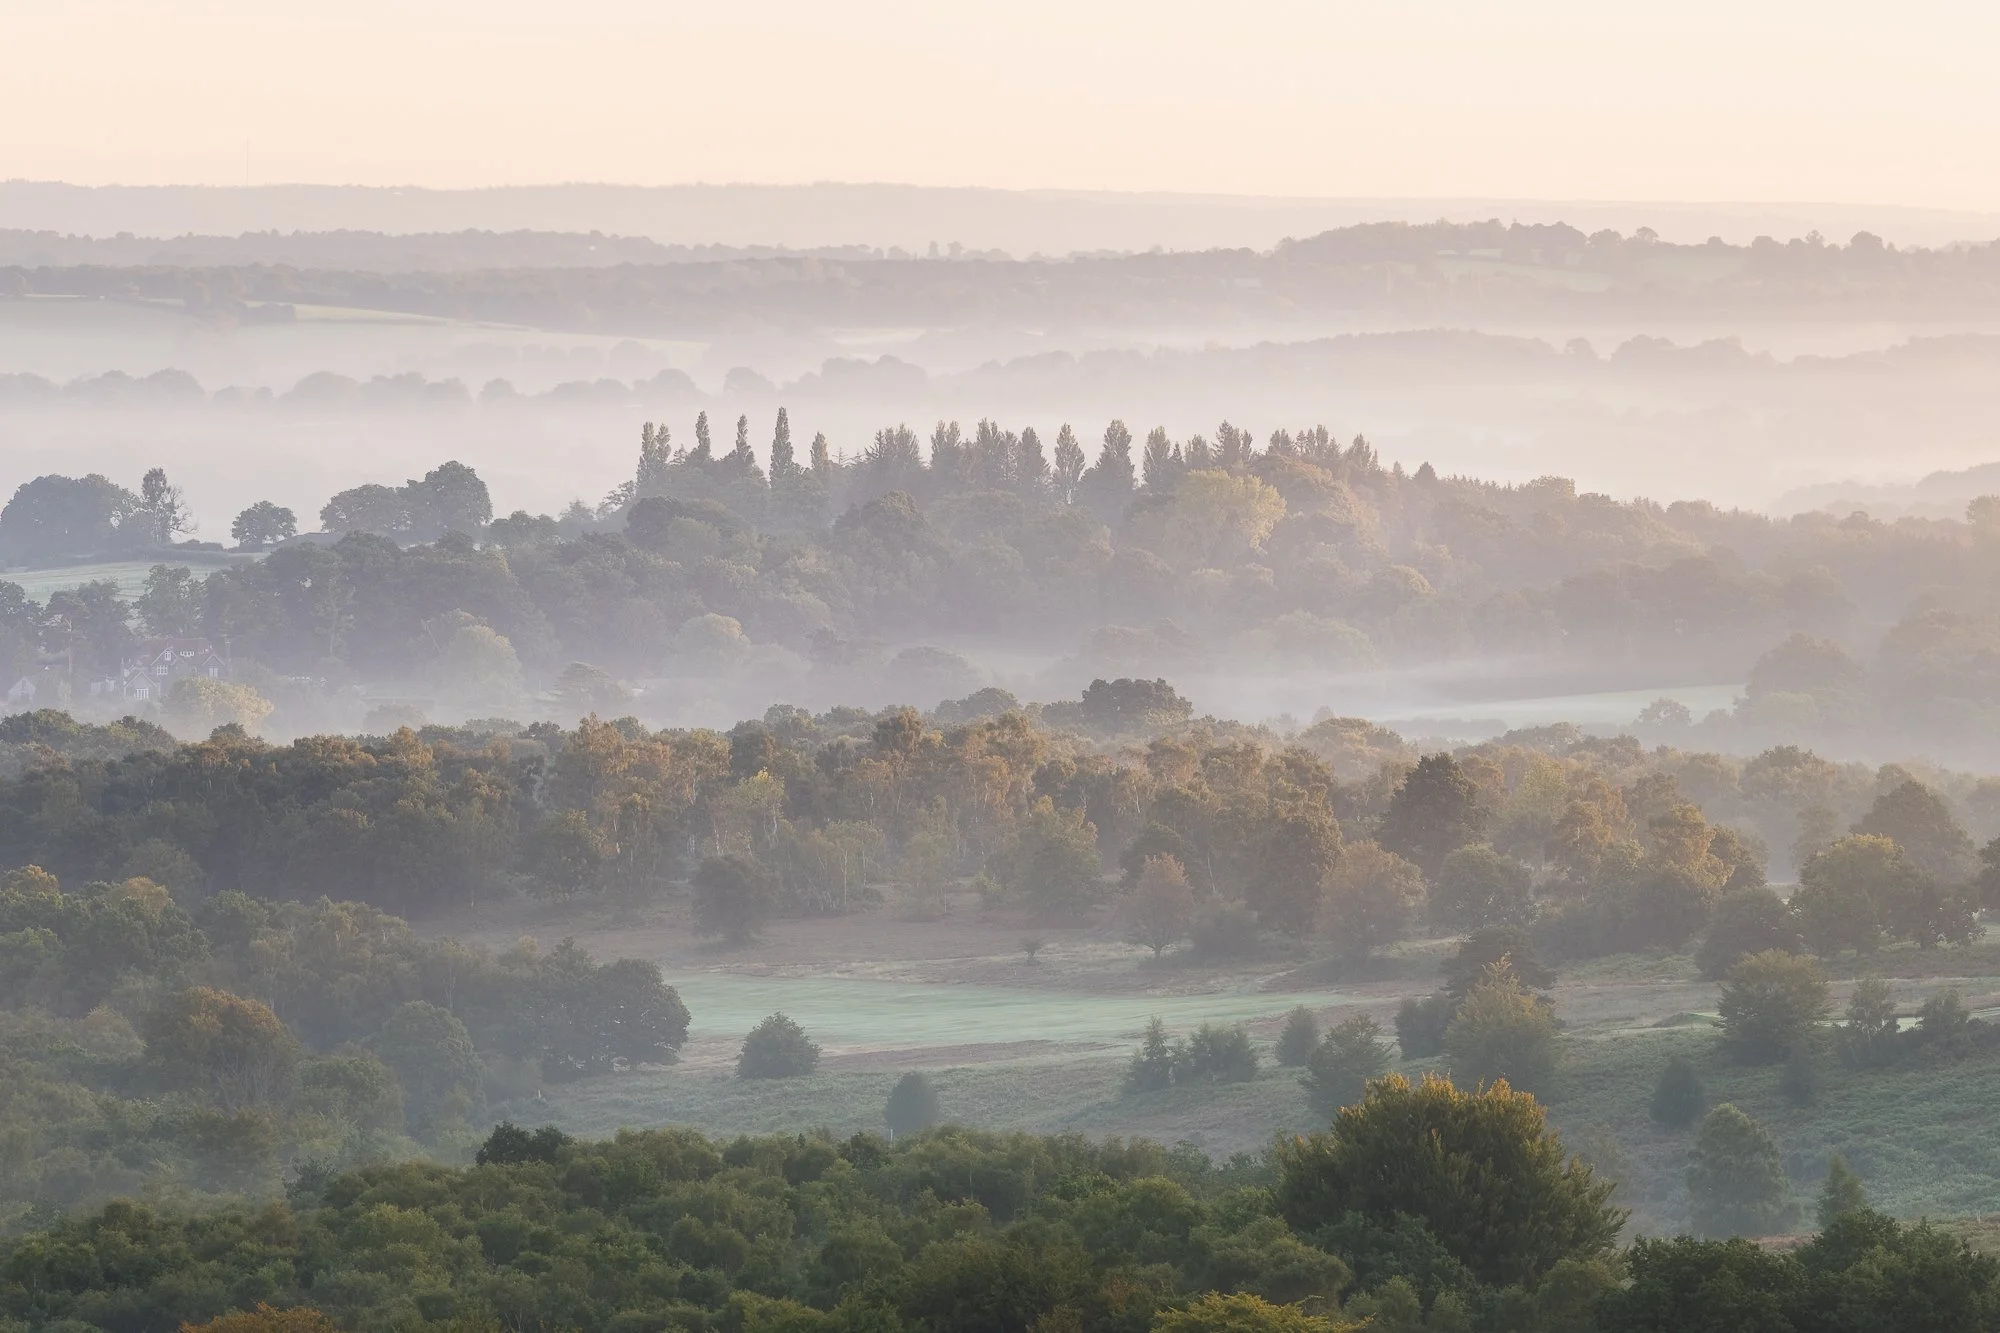
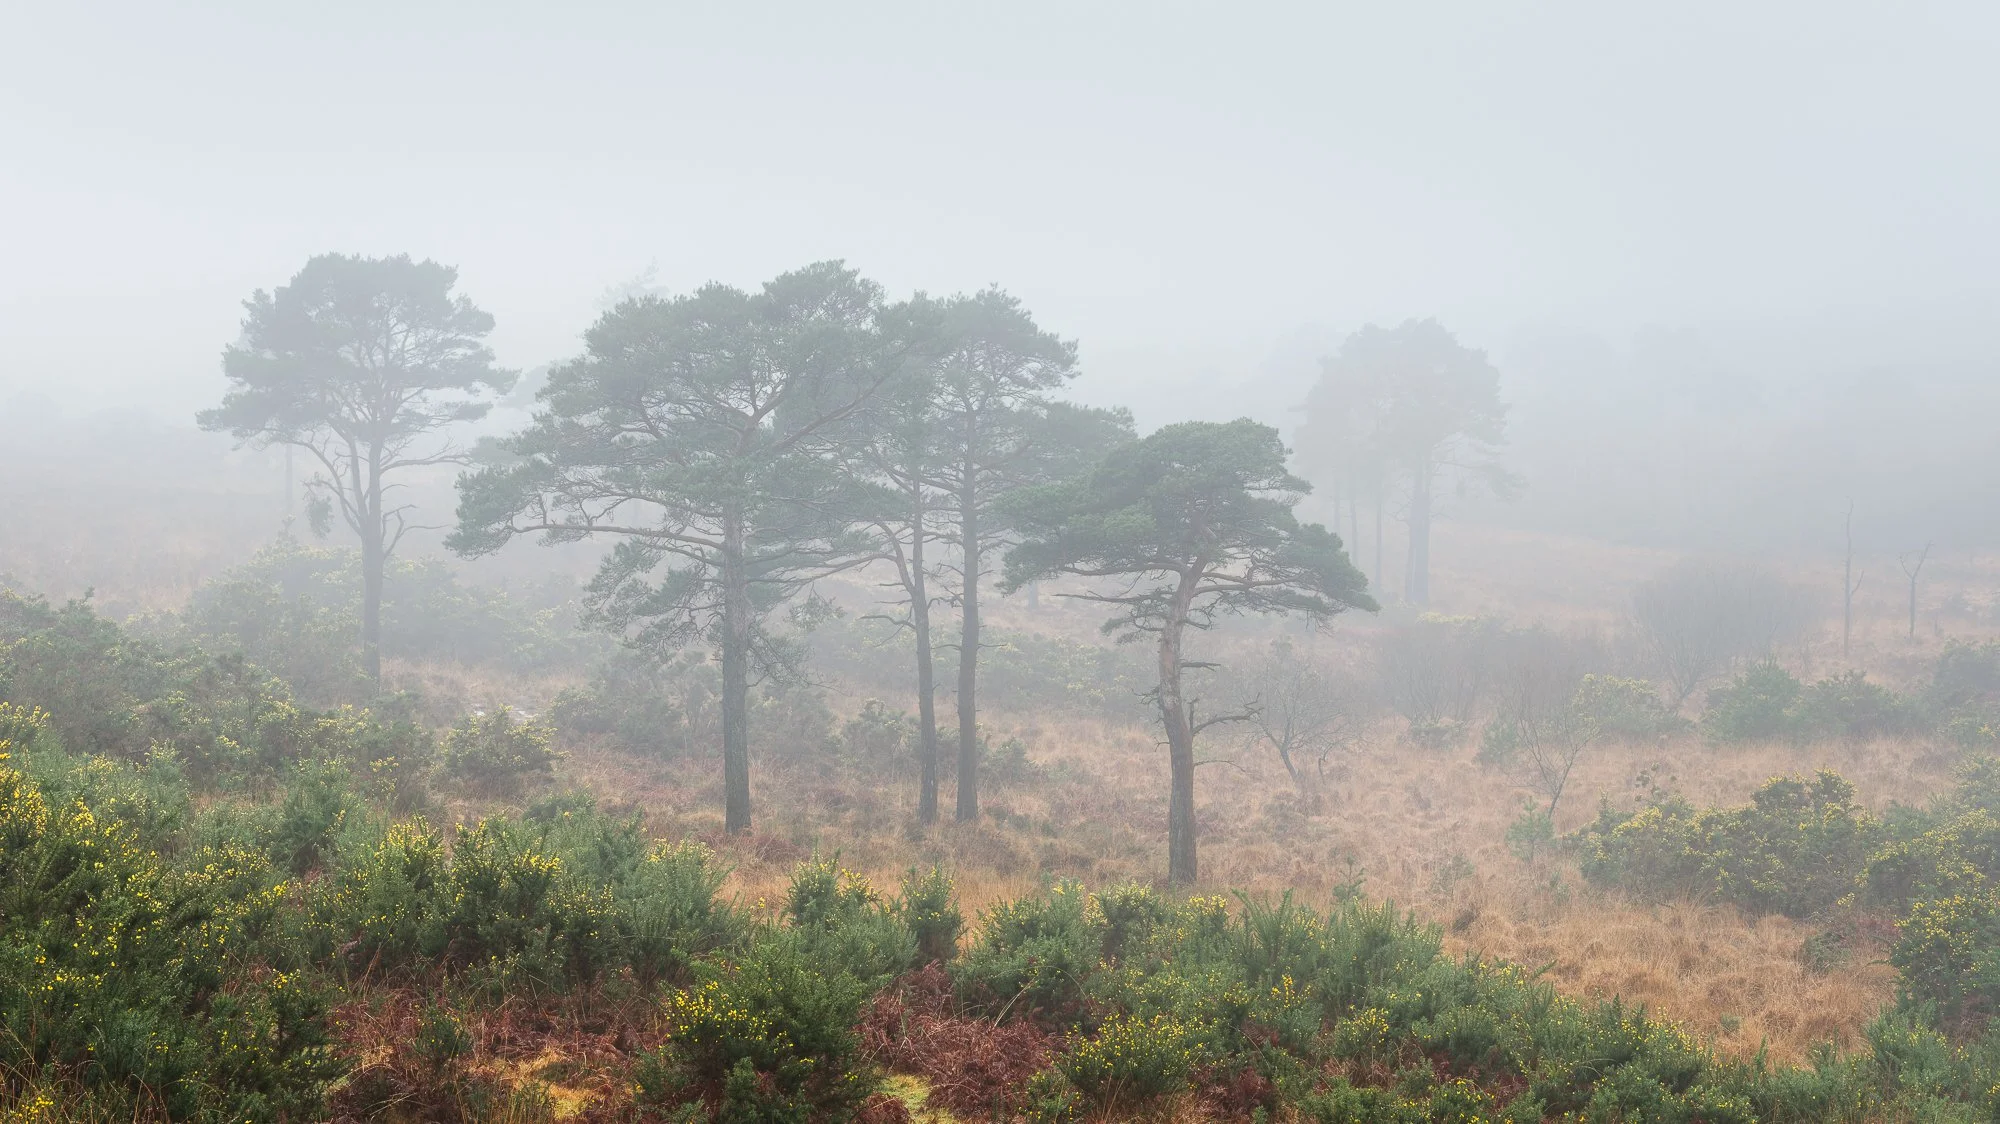
Next up, I’ve shared some photos I took at my local forest towards the end of June. My local forest is largely made up of open heathland and every now and then, when the conditions are right, I can be greeted with some fantastic foggy conditions such as those I photographed below.
After I spent some time taking photos of London’s rooftops from the Garden at 120 back in July, I made my way down to Tower Bridge and experienced some of the best light I’d ever seen as the sun set across the city. I remember the weather couldn’t make its mind up. One minute it was sunny, the next it was raining and just as the sun set, the entire sky erupted in fiery reds, and I just happened to be at one of my favourite Thameside viewpoints to witness it.
Towards the end of summer, I was yet again blessed with some fantastic foggy conditions in my local forest. This time around the fog was thick enough to penetrate the woodland, so I left the open heathland and ventured in to seek out compositions amongst the trees.
In August. I spent a week in North Cornwall with my family and although this wasn’t a dedicated photography trip, I did manage to head out a few times on my own with my camera to take a few pictures. My first stop was The Rumps where I took a mixture of photos, both with my main camera at ground level and from above by sending my drone up and out to sea, pointing it back towards the coast.
Although happy with the photos I took from the ground, I love the photos I took with the drone. I’ve never seen The Rumps from this angle and with the waves crashing along the coast and dark clouds above, the resulting photos were packed full of drama and mood.
I visited a few other spots during the week, including Bedruthan and Trebarwith Beach. From here, I ended up taking a few black and white photos as I wanted to try something a little different (for me) and the rough, foamy water created some interesting contrast and dynamism in the pictures. With my recent fondness for the square crop, I decided to use it here to add a little consistency to the final set.
As I was staying only a few minutes down the road in Tintagel, I couldn’t leave without paying a visit to this well-known viewpoint in Boscastle. It was a cloudy morning and there was no chance of any sunrise colour but that didn’t put me off at all. With the heather in full bloom, it made up for the lack of colour in the sky and I spent a fantastic few hours photographing this fantastic coastal view.
The last photo of Cornwall below is a top-down drone photo I took at Bossiney Cove. A cute little beach just a few minutes’ drive from Tintagel.
Finishing off this collection of photos I took during the summer months are these more traditional landscape photos taken while out and about in Sussex. All of these landscapes are familiar to me, but all show off the vibrant colour summer can provide.
Until next time,
Trevor
The square photo format
In this article, I delve into the square aspect ratio and explore the benefits it brings to my photography.
When I first embarked on my Timeless City photography project, I quickly decided that along with being black and white, all of the photos in the series would be presented as squares. Although I’m still certain this was the right thing to do, it was a snap decision at the time as I wanted to instil some consistency in how the work would be presented and avoid a mix of different aspect ratios.
If you want to learn a little more about why I started this Timeless City project, check out Timeless City: An Introduction.
Alongside the consistency aspect, I strongly believed that applying constraints to how my work is produced would encourage me to think (and in this case see) differently. I’ve been shooting with a 3:2 aspect ratio for years, and up until recently, I would only occasionally change this after the shoot, back in post. So, seeing and composing a square frame has forced me to think deeply about my compositional habits.
One final thought on composition: I believe there are no rigid rules in photography. You’ll hear about techniques like using the rule of thirds or leading lines, and while these can be valuable tools for learning, they should serve more as guides than strict rules. Whether you choose to follow or ignore them is entirely up to you, because ultimately, you're the one pressing the shutter. If your approach works and the image resonates, then you've succeeded in capturing something uniquely yours.
But why did I choose the square for this project?
I’ve been wanting to write this article for a while; not just to explain my decision to use the square crop, but also to help me better understand why I’m so drawn to it. As I mentioned earlier, choosing the square format was an instinctive decision that felt right for the project as a whole. However, it was only afterwards that I began to reflect on what it adds to each individual image. Ultimately, no matter how the work is presented, it's the strength of the photos themselves that will define the overall success of the project.
The points below are based on a combination of studying the photos I’ve taken for this project and researching the compositional techniques used by photographers I admire. While much of this may have been discussed before, I wanted to write this article as a way to process and understand it through my own work. These are my personal, evolving opinions, and I welcome you to share your own thoughts on the square crop in the comments at the end of the article.
With all that being said, let’s dive in.
The square creates a classic, timeless look to my photos
I want to start with this point because I feel it’s less about composition and more about style, yet it’s a key reason I chose the square format for this project. In a world dominated by 3:2 and 4:3 aspect ratios, I associate the square format with classic medium format cameras like the Rolleiflex or Hasselblad, used by legendary photographers of the past. To me, the square frame evokes a vintage, nostalgic feel. While I’m photographing the contemporary world and can’t (nor do I want to) eliminate all signs of modernity, I believe the square format helps them subtly fade into the background, if only a little, to help achieve a more timeless look.
Placing the subject anywhere in the frame with a square photo
One thing I quickly noticed when composing photos with a square crop is that I could place the subject almost anywhere in the frame without it feeling unbalanced. The square format offers more freedom, as traditional compositional guides seem to carry less weight. Whether I position the subject near the centre or closer to the edge, the image still feels balanced. This flexibility allows me to be more creative and simply have more fun when taking my photos.
A neutral shape which encourages the viewer to look around the image
Lacking a dominant direction, the square photo offers equal visual weight on all sides, encouraging the viewer to look around the frame as opposed to looking side to side or up and down. The symmetry helps prevent the viewer from feeling pulled in a particular direction, encouraging a more immersive exploration of the entire frame. This balanced approach prevents the eye from being directed by dominant shapes or lines, fostering a more comprehensive and immersive exploration of all elements within the image.
Square photos can often convey a sense of calm
Building on the point I made earlier about the square format lacking a dominant direction, I’ve noticed that square photos, both my own and those of other photographers, often convey a sense of calm. I touched on this in my project introduction, referencing the work of the great Michael Kenna and how his use of the square format contributes to the zen-like quality present in much of his photography.
Without the horizontal or vertical bias of a rectangular frame, the square format introduces a sense of stability and harmony. In the chaotic and busy environments I photograph, particularly in my London cityscape work, the square composition helps create a more peaceful, uncluttered feeling.
The square can enhance geometric shapes
Although visual tension in a photo can be a positive thing, it can sometimes detract from the feeling I’m trying to create with my images and when including strong geometric shapes in my photos like in those below, the neutrality of the square crop helps them to feel more centred and balanced within the frame.
Embrace the use of negative space and minimalism with square photos
I’ve already spoken about how the square can convey a sense of calm, but this also goes for instilling a minimalistic feeling in the photos by introducing a more balanced composition. Without the directional bias a rectangle brings to the image, it helps to make every element in the frame, including negative space, equally important, creating a harmonious visual experience.
A square photo can enhance diagonal lines
When I want to introduce visual tension in my photos, I often incorporate diagonal lines into the composition. The inherent stability of the square frame, with its equal sides, contrasts perfectly with the dynamic energy of diagonals. These lines not only add depth but also guide the viewer's eye through the image, creating a more engaging and visually compelling experience.
Symmetry with the square photo
With all sides being equal, the square aspect ratio is ideal for symmetrical compositions. It enhances both vertical and horizontal symmetry, creating a balanced frame that doesn’t favour one direction over the other. This allows symmetrical scenes to shine, amplifying their sense of order and precision. The square format also reinforces simplicity and calm, as the symmetry within the image offers a clean and visually satisfying composition. From architecture to reflections, the square format beautifully highlights the inherent harmony of symmetrical subjects.
A frame within the frame is enhanced with a square crop
I love incorporating frames within my compositions, particularly with a 1:1 aspect ratio. The equal dimensions allow the frame to be uniformly sized on all sides, enhancing the balance of the composition. This uniformity not only creates a sense of harmony but also contributes to the quieter, more relaxed atmosphere I try to portray in my work.
That being said, using frames within the frame doesn’t necessarily require a symmetrical composition. As I mentioned earlier, the square format offers compositional freedom, allowing you to place the subject or the frame itself off-centre. You can also experiment with the dynamic energy that diagonal lines can bring into the image, adding visual interest and movement while still maintaining balance.
Taking square photos and my thoughts about cropping
Before concluding this article, I want to discuss how I compose and capture square photos while out in the field. My Fujifilm XT5 allows me to set a 1:1 aspect ratio directly in-camera, and unlike some other brands, this setting is non-destructive, meaning I can adjust or remove the crop during post-production. Surprisingly, some cameras permanently discard the cropped-out portions of an image, so if that’s the case for you, consider adding compositional grid lines to your camera's display to guide your framing and apply the crop later when editing in your chosen software.
And please! Do not let anyone tell you cropping photos is bad. That’s just ridiculous. There is no right or wrong with photography.
This small study into square format photography and the compositional benefits it can bring has been a great opportunity to dive a little deeper into the work I’ve been creating and I hope that this newfound awareness of the impact a square crop can have on my pictures will help me in my continuous drive to develop my photographic eye. As I mentioned before, please feel free to leave any comments, sharing your own thoughts on the square photo below.
Until next time.
Trevor
My Favourite Photography YouTube Channels in 2024
An updated list of my most watched photography-related YouTube channels.
YouTube is fantastic. It was and remains a game-changer for those with something to say, wanting to pass on knowledge or simply showcase their creations, and as a free resource to learn or be inspired from, there’s not much better out there. The thing is, for all the good it provides, you sometimes have to wade through a lot of average, or even poor content to find it and having done a lot of that work already, I’ve cultivated a healthy list of photography-related YouTube channels. So, to help those also looking for good, high-quality content, I’ve created a list of the channels I enjoy the most. These are the channels that when a new video is released, go straight into my watch list, which is the best endorsement I can provide them.
Back in 2020, I posted a blog listing my Top 10 Landscape Photography YouTube channels and given a few years have passed, I thought I would post an updated list, but this time, I’ve decided not to limit it to landscape photography specifically, but to also include some other of my favourite photography related channels. The point is that although I might consider myself more of a landscape photographer, my interest in the craft spans many genres and regardless of the equipment used or the subject being photographed, I can learn or gain inspiration from pretty much anywhere.
The list is a little longer than my previous post in 2020, so I grouped a few of them by themes. You can jump directly to the list you want to browse by clicking the links below.
Contents
Before diving in, do remember to balance watching videos about photography with actually going out and practising it yourself. Try to use the videos you watch to inspire and motivate you and not replace your creative outlet entirely.
In the field photography YouTube channels
This list of channels features photographers who typically create their videos while taking photos in the field. I love that I can be instantly transported anywhere in the world and learn from the photographers who took the time to video and share their adventures with us.
Simon Baxter
Simon Baxter has been an inspiration to me since I started to take woodland photography more seriously. I have watched his channel for many years now and he really is the master of seeking out woodland compositions. He takes the time to get to know the environment he photographs and expertly walks you through the compositions he frames, helping you to make sense of the naturally chaotic environment the woodland can be.
Fototripper
Fototripper is a channel run by Gavin Hardcastle, a landscape photographer from the UK, now living in Canada. Gavin is a great landscape photographer, an excellent teacher, and a really funny guy. If you want a great mix of landscape photography and comedy, this is the channel for you.
Thomas Heaton
Thomas should not need any introduction. He’s a bit of a superstar amongst the YouTube landscape photography community and for good reason. He has a huge following, an honest and unpretentious manner, and makes fantastic videos from all over the world. Thomas seems to be able to find a photo out of nothing and even on those rare occasions when he can’t, he is content to go home empty-handed due to his “good shot or not shot” approach.
Courtney Victoria
Courtney Victoria spends a lot of time her time photographing the British woodland. A very capable photographer who likes to get nice and close, capturing the smaller scenes she finds there. If you’re not a fan of small woodland scenes, fear not, you will be a fan of Courtney’s woodland jigs. Check her videos to see what I mean.
Nigel Danson
Nigel is one of the best landscape photography teachers on YouTube. His videos provide a great mix of on-location photography and studio-based talks and tuition. He is particularly good at examining and critiquing his own work so others can learn the same lessons he does.
Andy Mumford
Apart from being a fellow Fujifilm shooter (I know, it’s not all about the gear.. blah blah), Andy is an incredibly talented travel and landscape photographer. Andy frequently visits the Dolomites and his photos and videos created there are both engaging and always polished. Andy doesn’t make videos as regularly as others but when he does, they go straight onto my watch list.
Alex Nail
Alex is full-time landscape photographer known for his mountain and wilderness images. You will typically see Alex photographing the landscape during longer trips and expeditions, so he may not upload every week, but when he does, the work he creates is usually pretty epic and worth waiting for.
James Popsys
What I like about James Popsys is how encourages his viewers to think differently, resist the conventional and just have fun with the camera. We landscape photographers will typically shiver at the thought of photographing a scene with a blown-out sky, but James certainly doesn’t and prefers a more high-key look to photos he takes, typically of landscapes influenced by humans. If you like interesting and entertaining YouTube videos (and a bit of gear talk), this is the channel for you.
Mali Davies Photography
What to say about Mali? An open, friendly creative Yorkshireman. Be it exploring the British countryside or pounding the city streets, whatever the subject, Mali’s photography and videos are really engaging, and his work is always top-notch. Well worth a watch. “Sithee”!
Michael Shainblum
A landscape photographer based in California. Michael produces some of the most stunning and original landscape photography out there. He has a calm, relaxing tone to his film making and comfortable photographing a wide range of subjects, from the wide, epic vista, down to close-up macro subjects. A must subscribe.
Simon Booth
If you like small-scene and intimate photography, Simon’s channel is for you. Simon’s knowledge of the environment he photographs is unrivalled in my opinion and along with some beautiful close-up work, his videos are full of educational titbits about the subjects he photographs.
AOWS
A channel by Spanish-American, black-and-white landscape photographer Adrian Vila. I’ve not historically taken a lot of black and white photos, but it is something I’ve started to do more of recently and I’ve become a big fan of Adrian’s mono work. He has a distinctive approach to the way he shoots and edits his work and I’ve spent many an hour following Adrian’s journeys around Europe and America, often sleeping in the back of his car as he searches for the next subject to photograph.
Nick Page
If I had to describe Nick’s landscape photography in one word, I think I would choose “EPIC”. Nick is an incredibly relatable and down-to-earth character and I thoroughly enjoy is “in the field” videos which usually result in yet another incredible landscape photo.
Photography online
Probably one of the most polished, photography shows on YouTube hosted by Ruth Taylor, Marcus McAdam along with the rest of the Photography Online Team. This no-nonsense show is packed full of useful information with features covering a breadth of topics including film, nature and landscape photography.
Murray Livingston
I haven’t followed Murray Livingston’s work for too long, but in that short time, I’ve started to really enjoy his photography and videos. Originally from South Africa and now residing in Scotland, Murray’s videos are quiet and contemplative, and his landscape photography is of an incredibly high quality.
Alan Schaller
Up until now, the YouTube channels I’ve listed have been broadly landscape photography-based, but I think it’s important to mix things up and be inspired by work from outside of your general wheelhouse. You can usually find Alan Schaller walking the streets of London taking incredible black and white street photos of the people and places he comes across and by having a slightly eccentric nature, it makes for some entertaining videos.
First Man Photography
First Man Photography is a channel hosted by Adam Karnacz; a landscape photographer based in Yorkshire. Besides being a talented photographer, Adam will frequently go above and beyond to bring his audience more interesting videos, for example, taking a printer up a mountain to take, edit and print a photo while on location. First Man Photography has been around for nearly 10 years, so I’d be surprised if you’ve not come across him yet, but for the one or two who haven’t, I recommend taking a look.
Adam Gibbs
Although Adam is originally from the UK, he has lived in Canada for a few decades and along with some regular travel further afield, he spends much of his time driving his small camper van to remote locations across Canada to photograph the landscape. Whether taking photos of wide vistas or small, intimate patterns in the rock, Adam’s work is typically subtle and calming and his videos have a similar feel (unless he gets together with Gavin Hardcastle, that is).
YouTube channels featuring film photographers
Although some of the photographers I’ve already mentioned will occasionally use film cameras, I decided to create a separate list of channels I follow where film cameras are their tools of trade. All of the channels that focus on film photography I follow have a familiar calm, quiet, methodical theme running through them, so if you’re looking to strip away some of the technology used in modern photography and get back to basics, these channels are well worth a look.
Ben Horne
If you are after a pure photography experience, look no further than Ben Horne. He shoots wilderness photography on large-format film at places like Zion and Death Valley National Park. Ben will regularly head out on a trip (usually four times a year) and document his journey as he seeks new and different compositions of the places he is already familiar with. After the trip Ben will release a series of videos from the trip, finishing up with an image review where he shares his thoughts about the pictures he took.
Kyle McDougall
Kyle McDougall's channel focuses on film photography, creative exploration, and personal growth through the many projects he undertakes. He clearly and articulately explains his thought process and reasoning for the trips he takes, projects he undertakes and gear he uses. Like the other film channels I watch, Kyle’s videos are incredibly relaxing and informative and even though I’ve not dabbled in film photography myself (yet), it hasn’t stopped me from learning a great deal from this channel.
Nick Carver
I’ve followed Nick Carver’s photographer for just a couple of years after Thomas Heaton mentioned him on one of his videos. Nick is an American film photographer, often found by the side of the road photographing former Taco Bell restaurants. Whether it’s an urban location or the middle of a desert, Nick is happy to make a project out of almost any subject and alongside his presenting style, having such an open mind to what makes a good photo is why I’m eager to watch his videos when a new one drops.
Jess Hobbs
Based in Montreal, Jess Hobs shoots predominantly with film, typically taking pictures of the natural spaces around her. There’s not been a video for a few months, and although I wouldn’t normally include dormant channels on this list, long pauses in video releases are not unusual for her and I think Jess’s videos good enough to stay subscribed for when the next one drops.
Chris Darnell
Chris Darnell is an American landscape photographer who takes his pictures on both film and digital cameras. Spending much of his time seeking fresh compositions in America’s western national parks such as Zion and Bryce Canyon, Chris uses large and medium format cameras, communicating his creative thought process as he goes.
Studio-based and interview-style photography YouTube channels
Here you will find some of the channels I regularly watch that are typically filmed indoors. Some might be a group video with standard webcams, others are filmed in a formal, studio setting but regardless of their style or equipment used, they are all great channels in their own right.
Glyn Dewis
I first came across Glyn Lewis when he presented the “He shoots, he draws” podcast with Dave Clayton a few years ago and continued to follow him as his YouTube channel started to gain a lot more traction. Here he interviews various people from the creative industry from photographers to animators who openly share a wealth of knowledge they’ve gained throughout their careers. For a one-man band, it’s a pretty slick show and if like me, you just love to hear the stories of anyone involved in a creativity, then this is a podcast well worth a look.
Brews n' Views
What’s not to like about a channel about photography and beer? Brews n’ Views has been going for about a year now and is essentially a few good friends who all enjoy an IPA (or five) and getting together to chat photography. The videos usually start with a quick chat about the beers they’ve brought, followed by presenting the work of guest photographers or those they’ve come across online. Some of the videos can be a little on the long side (2-3 hours!!) but it’s still a great way to see work from photographers you might never come across otherwise.
The Photography Pubcast
Like the Brews n’ Views channel I just mentioned, The Photography Pubcast follows a similar theme but is hosted by a few good friends mostly dotted around the UK, having a light-hearted chat about pretty much anything (with a bit of photography thrown in here and there). There are a few funny characters, with plenty of friendly banter and without too much in the way of photos being shown on screen, it’s the kind of video you can have on in the background while doing a bit of editing yourself.
Matt Payne
Matt Payne is a photographer based in Colorado and alongside being an experienced landscape and nature photographer himself, he has been interviewing other people from the photographic world since 2017. Originally an audio-only series, Matt started to film his conversations a little later and now boasts an impressive library of interviews spanning many photographic genres.
The Art of Photography
Ted Forbes and his Art of Photography channel should need no introduction. Ted has been presenting on his channel for years and if you’re looking for photobook hints, tips and inspiration, this is the channel for you. Ted gets sent a ton of photobooks from his viewers and regularly showcases them on his channel, offering subtle but constructive feedback as and when needed.
Sean Tucker
Photographically, I would say Sean is best known as a street and portrait photographer, but his videos are much more than that. Focusing on photography, creativity, and personal growth, Sean offers thoughtful tutorials and insights on photography techniques, gear, and editing while also delving into the deeper, philosophical aspects of being a creative person. A great channel for tackling self-doubt and seeking purpose in your work.
So, there’s my list of some of my favourite photography-related YouTube videos. I’m currently subscribed to around 160 YouTube channels and although many are now inactive, I still skip far more videos than I watch, but having a good selection of channels allows me to watch just the very best shows that peak my interest, so you can’t have too many in my opinion. With that in mind, please feel free to share your favourite channels in the comments.
New Photos | Spring 2024
A collection of photos taken during spring 2024.
In early 2024, I decided that those who visit my website, read my blog or subscribe to my newsletter should be the first to see my most recent work. I want to ensure that those who actively follow my work can see my latest photos here, presented in a way I want them to be seen. I’ll be releasing new collections as and when I finish editing them and with so many of my photos taken in the woodland, a seasonal release schedule seems to make the most sense to me. This approach may not be limited to just seasonal collections as I will still post new photos with my “On-Location” stories or project-specific collections but, the important point is that they will be seen here or in my newsletter first.
I speak about it a bit more in the first Winter 2023 collection.
March to May 2024 - Spring 2024 collection.
Spring got off to an incredibly slow start in the woodland this year. It seemed to take an age for the new growth to appear and with so many cold, wet and windy days we had, I was eager to say goodbye to the bare, dormant woodlands and hello to fresh leaves and vibrant spring colour.
I’ve grouped the woodland collections below into three, each representing the different stages of springtime in my local woodlands. Many of the subjects are repeated but look distinctively different thanks to the changes introduced as spring took hold.
The first few images were taken in March when the woodland still had a wintery look and feel to it. There were early signs of growth around, but the trees and understory were predominantly bare.
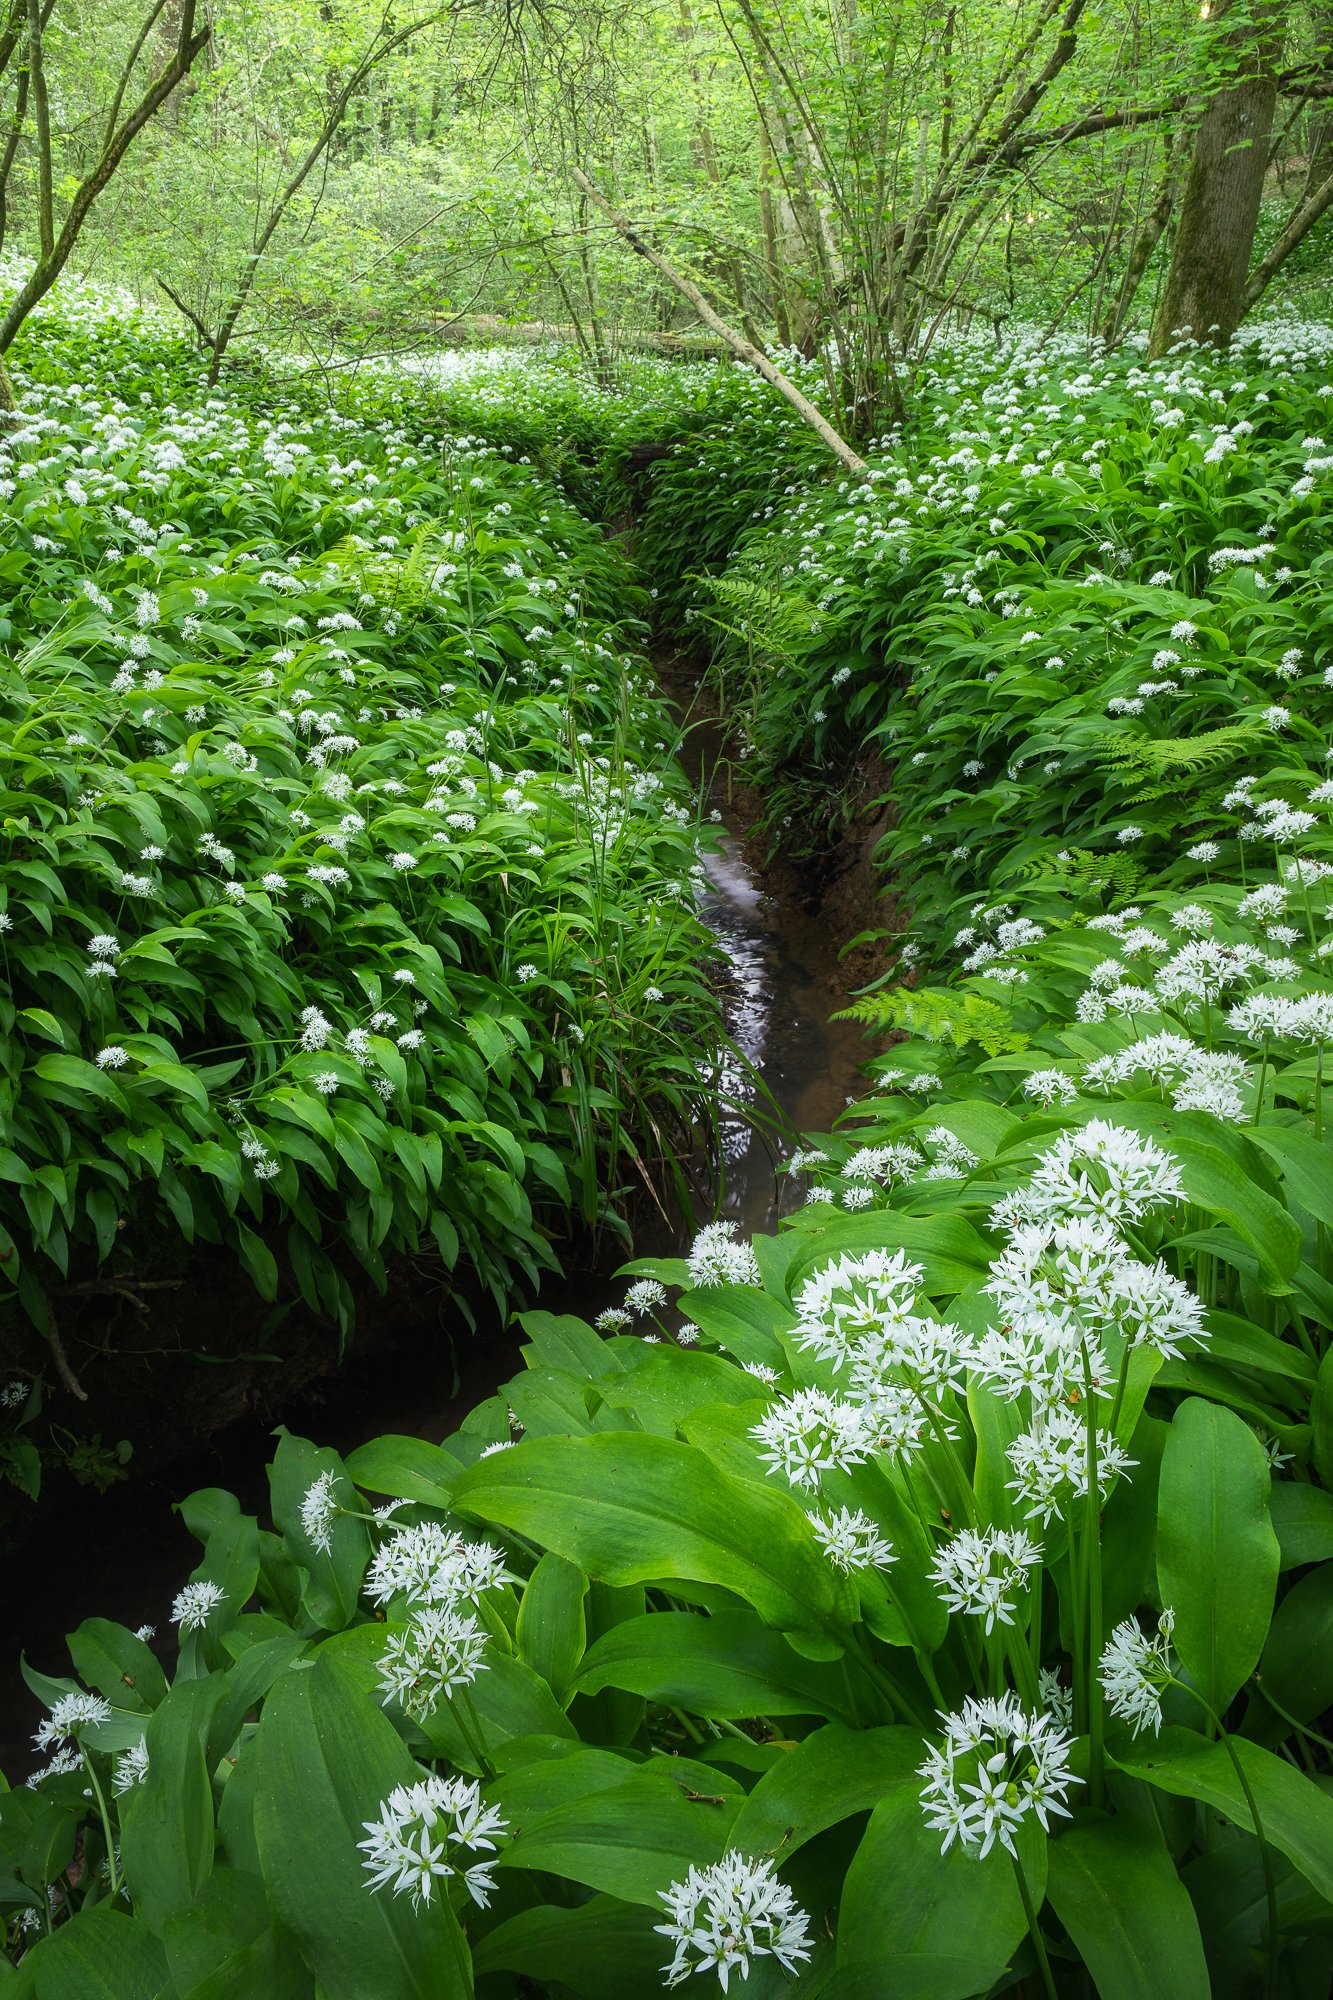
I revisited the woodland again in April and the new growth was well on its way. The forest floor had come to life with new grass, fern shoots and a scattering of bluebells.
Finally, in May, the woodland was much fuller and was awash with vibrant lime greens. Along with finding a few new compositions, I also revisited many of my regular subjects as I find it interesting to document them as they change throughout the year.
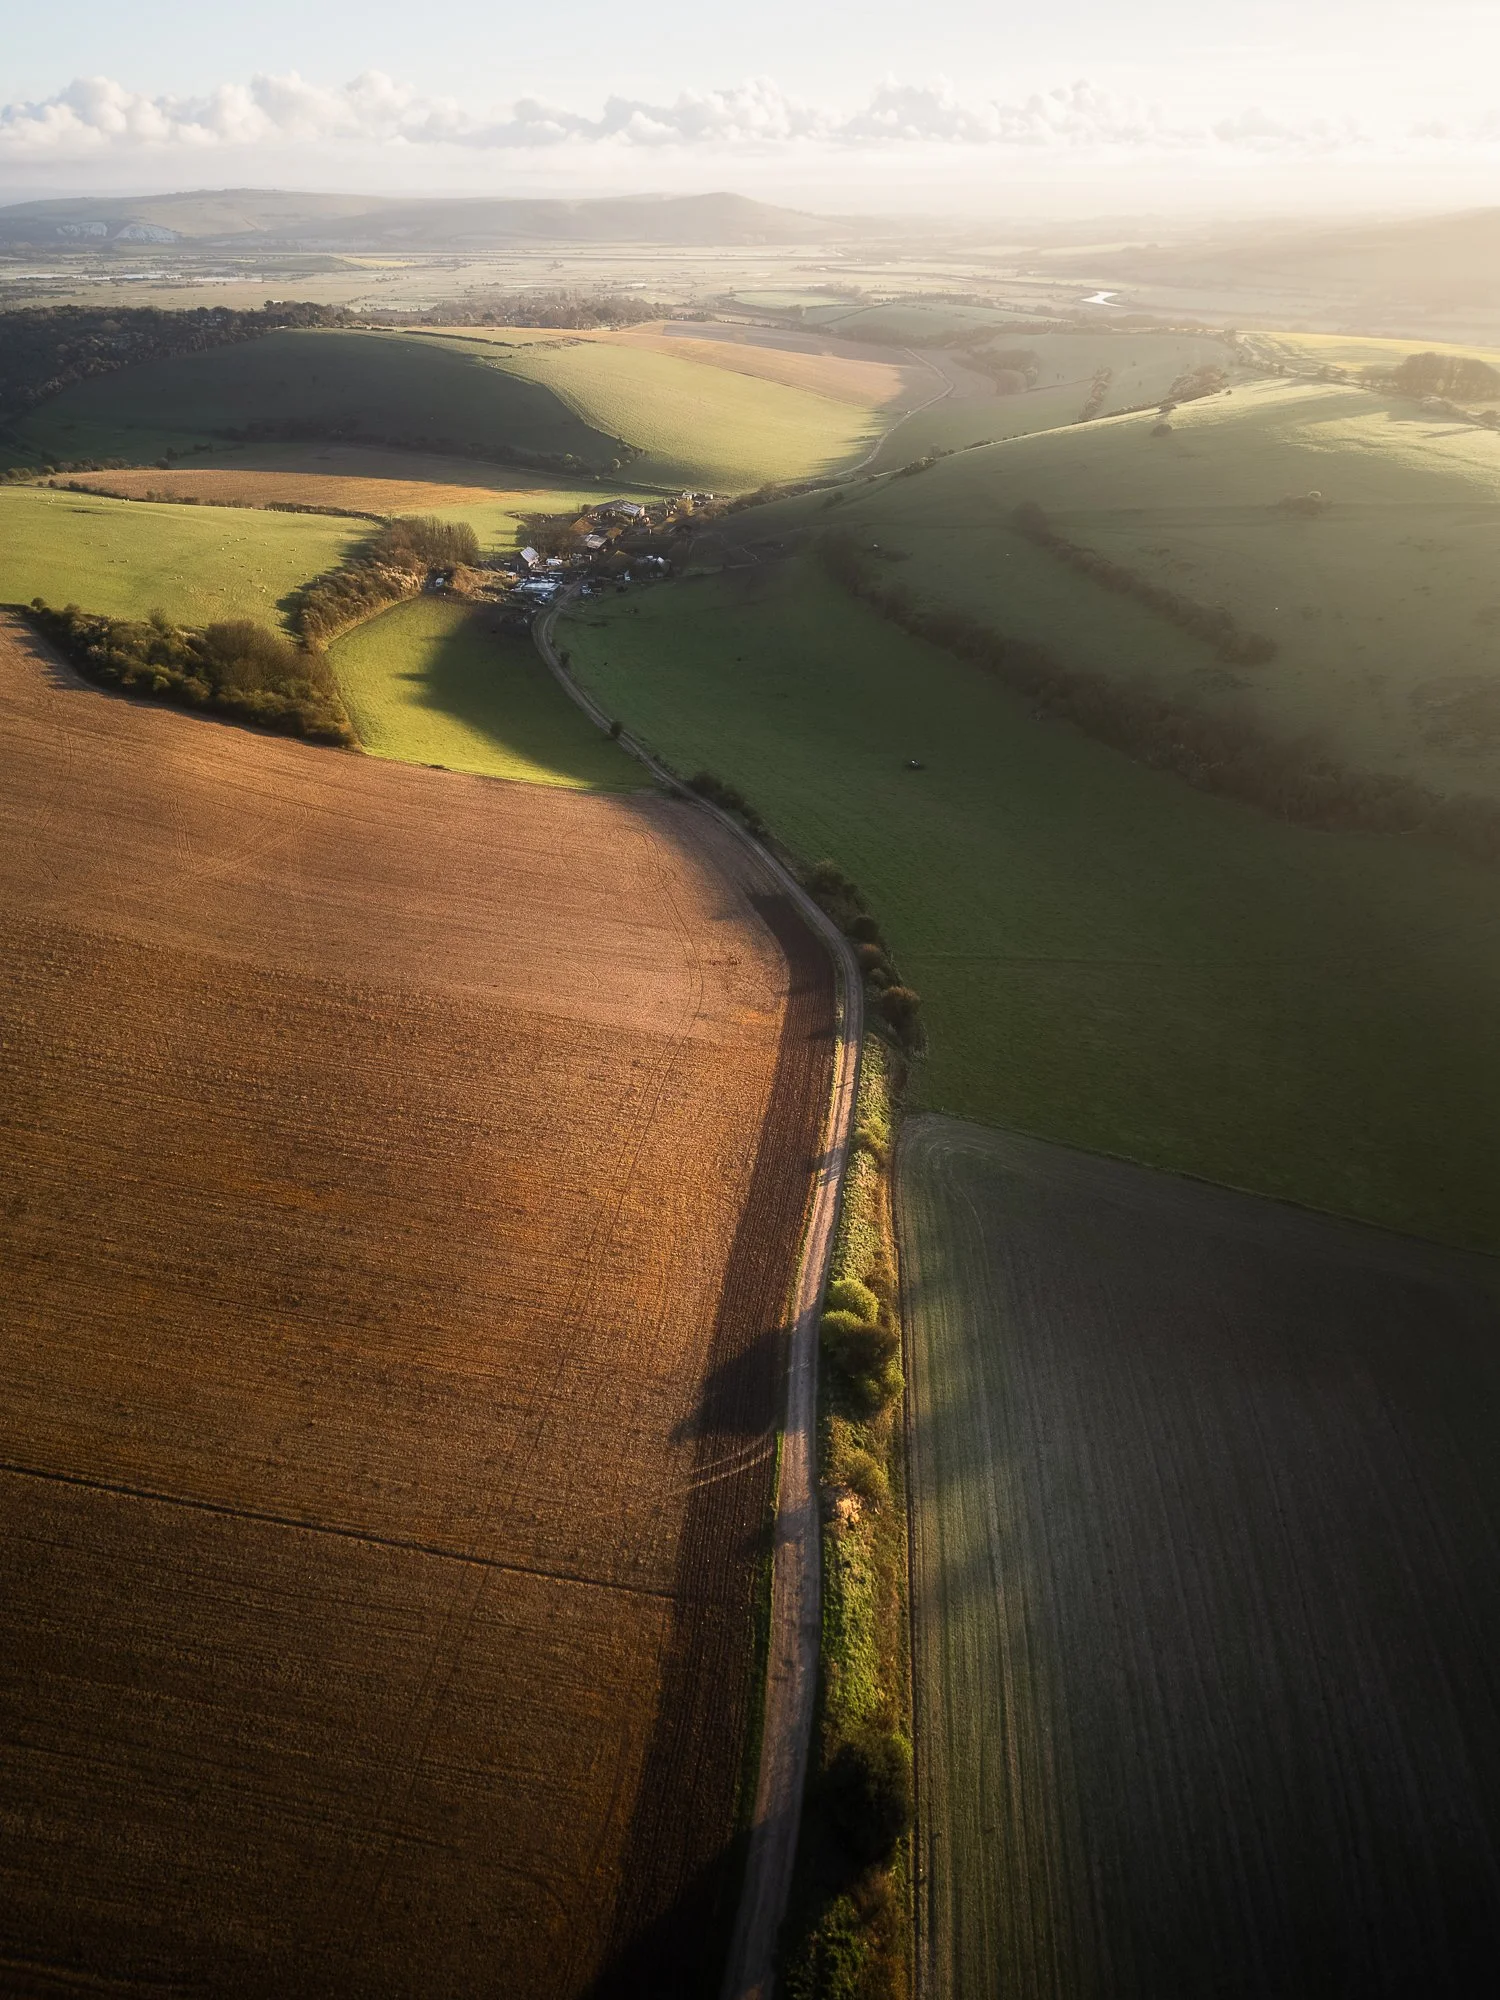
Although I don’t send my drone up nearly as much as I should, I did take a few aerial images during my time visiting and photographing the South Downs National Park.
Apart from a few trees here and there, it’s difficult to get a sense of spring in my cityscape photos of London, especially with the cooler tones I tend to lean towards in my photos. Still, this image collection was taken between March and May this year. I can never get bored of exploring this fantastic city I’m lucky enough to live close to and even though it’s such a popular place to photograph, now and then, I find a new composition I’ve not seen before.
Finally, at the very end of May, I spent a week in Snowdonia and although not a dedicated photography trip, I did allocate a few hours here and there to get out with my camera for some landscape photography. I published an on-location blog post featuring more of the photos I took.
Until next time.
Trevor
Manfrotto Befree Advanced tripod review
A landscape photographer’s review of the Manfrotto Befree Advanced Twist Carbon tripod.
As with the perfect camera bag, the perfect tripod is like the holy grail to us landscape photographers. No matter how many we buy, there is always some kind of compromise when it comes to weight, stability, hight, features, etc. As soon as I realised that there was no single tripod for all occasions, it became clear that just like the camera bag, I might need one specifically designed for the type of photography I intend to do.
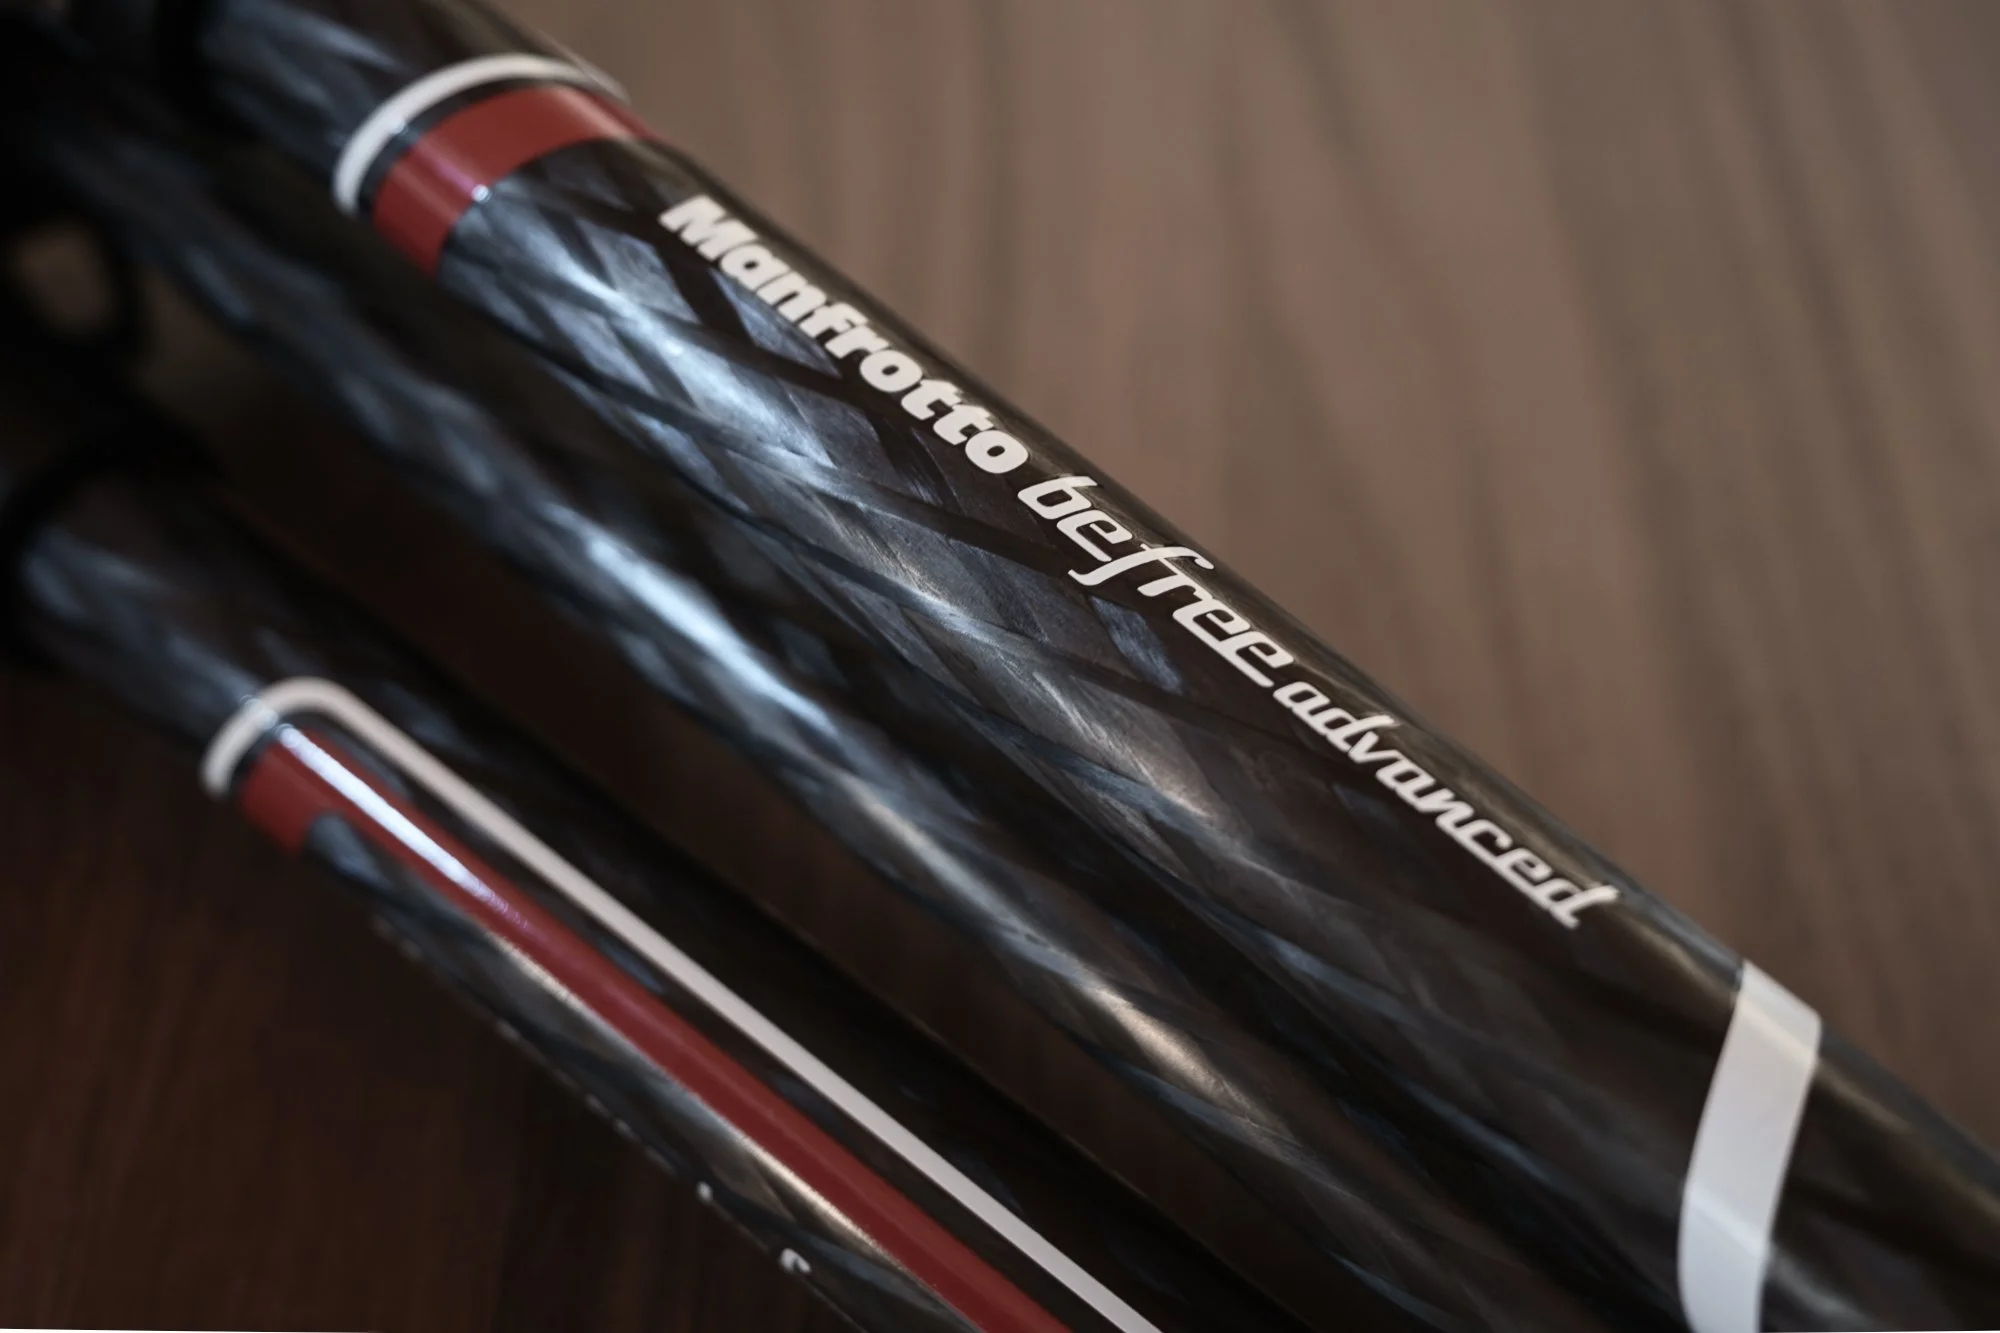
Although I’m pretty happy with my bigger, heavier tripod I use for landscape photography (see my latest camera gear post here), for a few reasons, I’ve never really been fully content with any of the smaller, lightweight tripods I’ve owned. So, when Manfrotto reached out and asked me to review their Befree Advanced Twist Carbon tripod (MKBFRTC4-BH), I decided to take them up on their offer.
To clarify and be completely transparent, Manfrotto sent me this tripod for free in return for sharing my thoughts, but I’m under no obligation to say only positive things. I would not have accepted the offer if there was any expectation of me to be anything but honest and fair.
One final point before we get stuck in. This is not a scientific review but merely my thoughts and opinion about what I need from a tripod and how the Befree Advanced performed after spending some time with it while taking photos in the field. Other photographers may have different priorities and expectations regarding what they need from a tripod, and I always suggest doing your own research before deciding.
I don’t often travel with a tripod but one of the main reasons I need a smaller, lightweight tripod is for my photography in London. I spend a lot of time photographing the cityscape and carrying a large, heavy tripod around the city isn’t practical at all. So, to give this tripod a proper test out in the field, I brought it along on one of my London photography trips to take a few long exposure images for my black and white Timeless City project.
Befree Advanced twist carbon tripod specifications
Before we start, I’ll quickly list the technical specs from the Manfrotto website. I won’t list everything, but I have included the specs important to me and what I am looking for as a landscape photographer.
Maximum and minimum height
When it comes to design, the maximum and minimum height of a tripod is incredibly important to me when photographing in and around London. Where tripods are allowed, I still need to be mindful of other people and I’m often looking for ways to use the tripod for stability but remain out of the way as best I can. To avoid the tripod using too much floor space, I will often avoid extending the legs and rest it on a wall. In this scenario, the walls can often be narrow meaning I can’t lower the tripod too much by spreading its legs. With the Manfrotto Befree Advanced having a minimum height of 41cm, it means I can place the tripod on a wall without it being too high to use comfortably.
On the other hand, the maximum height is equally important, not because it has to be as high as possible but because it must strike the right balance. When using a lightweight tripod, I’m not looking for the highest possible vantage point, I’m looking to ensure I can extend the tripod high enough to be comfortable for me but not so high that I’m carrying access weight or bulk to achieve a height I don’t really need. The Befree Advanced strikes the right balance for me. I’m not a tall person but with only a slight upward tilt of my rear screen, I can comfortably use the tripod at its maximum height of 127cm (without the centre collum extended).
Weight and stability
At only 1.25 kg (head included) the Befree Advanced is light enough to hook to my camera bag and carry around comfortably all day, but without the weight, I was a little concerned it might not be stable enough when photographing in windy conditions.
While out in London testing the tripod, I stopped along the River Thames to take a long exposure photo of the O2 Arena (formally the Millennium Dome). The wind had picked up, making shake-free long-exposure photos a little tricky. So, this was a good opportunity to test the tripod’s stability. The wind was too strong for me to get sharp photos with the centre collum extended and to be fair, most tripods would have struggled in those conditions but keeping the centre column retracted (as I normally do), my long-exposure photos were perfectly sharp.
So overall, from a stability point of view, it performed well considering how light it is which is a big tick in the box for this tripod.
Opening and closing the tripod
It’s important to me that my tripods open and close with minimum effort and fuss and the Manfrotto Befree Advanced Twist Carbon Fiber tripod has a quick and comfortable twist lock mechanism which works well. It feels smooth, does not require too much effort and I could extend or close the tripod quickly and easily.
My only concern and recommendation for improvement here is that to extend the lower/smaller leg section, I had to untwist the lock and then pull on the rubber feet to extend the leg. Not a huge issue but the rubber feet don’t feel particularly solid and they do twist quite easily. So over time, I feel I could end up loosening or even pulling one of them out completely. I would prefer something a little more solid to grip as I pull the lower leg out and I feel the rubber feet could be better engineered so as not to give the impression I might eventually lose one.
It’s a small area for improvement in an overall positive experience with the twist lock leg mechanism.
Ball head and RC2 mount
Starting with the ball head, I was quite happy with how well this performed. In the description on Manfrotto’s website, they clearly state that this tripod is well-suited for mirrorless cameras, and I think that’s a fair statement. The Advanced 494 aluminium Centre Ball Head might not necessarily support a heavier SLR or medium format body and lens combo, but it’s clear to me that this is not the tripod for those photographers. This tripod is perfect for mirrorless cameras and supports my Fujifilm XT5 and lens with ease.
There are three knobs to use for adjusting the ball head. First, a panoramic knob which allows the head to pan 360 degrees while keeping the horizon flat. Although this is a feature I use often when taking panoramic landscape images, I haven’t taken any with this tripod yet, but I still used it to adjust my composition and it worked absolutely
fine.
The other two knobs are situated together with the smaller friction knob situated inside the main sphere lock. Ball heads can be tricky to use when trying to carefully fine-tune a composition by a millimetre here or there, but by including a separate friction lock, Manfrotto has made the life of a landscape photographer much easier. The main sphere lock felt solid and held the camera in place comfortably. I had no concerns and would trust my camera gear to stay put when the ball head is locked.
A small concern is the plastic used for the ball head knobs. I appreciate Manfrotto's need to find ways to keep weight down, but I’ve had plastic ball head knobs fail on me in the past so I’m hyper-sensitive to the materials used. Also, the plastic feel isn’t particularly comfortable to use and makes using the tripod feel a little on the cheap side. It’s far from the most expensive tripod out there and it certainly doesn’t position itself as such but for a £279 tripod, a small rubber grip on the ball head knobs would go a long way to improving the way it feels to use.
The Befree Advanced twist carbon tripod comes with Manfrotto’s RC2 quick-release plate system. The quick-release system works well and with the camera mounted, the camera felt safe and secure.
Like many landscape photographers who use a tripod, I have always used an Arca-Swiss tripod mount and along with that, I use an L-bracket to help me quickly switch between portrait and landscape orientation. This is where things got a little tricky with the RC2 system as it wasn’t compatible with my Arca-Swiss L-bracket and at time of writing, Manfrotto doesn’t seem to offer an L-bracket that works with their RC2 quick-release system.
The good news is Manfrotto offer a solution to my problem with their Arca-type compatible Top Lock Travel Quick Release Adaptor, the bad news is that anyone looking to use an Arca-Swiss L-bracket with this tripod will need to pay an additional £37 to buy the adapter. The adapter worked exactly as expected and once mounted, I had no issues integrating the tripod into my usual workflow.
So, at least Manfrotto has a solution and although I’m coming at this from a landscape photographer’s point of view, I do think it would make sense that Manfrotto included this adapter with the tripod or even offered the Arca-Swiss compatible head as an option when purchasing the Befree Advanced Twist.
Overall, the Manfrotto Befree Advanced twist carbon tripod feels good to use and performs very well. Any complaints or concerns I have are a bit nitpicky and easily solved in a future revision.
Below are two of the photos I took while out in London taking long-exposure, black-and-white photos using the Manfrotto Befree Advanced Twist Carbon tripod.
Would I recommend this tripod? Well, tripods are such a subjective bit of kit and what’s good for me might not be good for others. Having said that, if you want to travel light but still have a sturdy tripod on hand to take landscape, cityscape or travel photos, I recommend you take a good look at the Befree Advanced twist when choosing your next tripod. It may well be the tripod you’ve always needed.
I hope you found that useful and if you have any questions, leave a comment below or send me a message using the form on my contact page.
Until next time
Trevor
Why I chose the Fujifilm X-T50 as a second camera
Thinking about buying the Fujifilm X-T50? Read about why I decided to buy this camera to use alongside my XT5.
Those who have read some of my “What’s in my camera bag” posts over the years will know that I shoot with Fujifilm’s X-series cameras and since owning the XT2 back in 2017, I’ve always had a second, “backup” camera. This was particularly useful when towards the end of 2022, my XT2 decided to die while out taking photos in my local woodland. It had taken a few knocks and had a fall when my tripod tipped over shortly before, so I wasn’t shocked it happened. But with the XT5 about to be released, I decided against having it repaired and used my X-T30 camera for a month or two while waiting for the XT5 to be delivered.
The good news is that accidents and camera malfunctions are pretty rare, but having a backup camera for those just-in-case moments can mean that most of the time, it’s sat on a shelf, unused and depreciating.
So, how can I ensure I have a second camera, both as an adequate backup, and at the same time ensuring it gets used regularly? I could simply buy the same model again and rotate the cameras, knowing that they are both used half the time, reducing the normal wear and tear they typically get. That would work just fine, but can I take it a little further?
For all five generations of Fujifilm’s XT series cameras, they have had a philosophy to have a bigger, more robust flagship model (the XT1-5 range) and a smaller, less feature-rich range being the X-T10 to the newly released X-T50.
My lightweight camera gear from early 2023 featuring my backup Fujifilm X-T30
The key differences between the two are size, weight, construction (weather resistance), memory card slots and tweaks to the control/buttons. But what I particularly like about the smaller, lighter X-TXX range is that they use exactly the same sensor and image processor as their bigger brother.
My primary camera for landscape photography is a Fujifilm XT5
In late 2022, shortly after my XT2 failed, I ordered the newly announced Fujifilm XT5 to use as my primary landscape photography workhorse and after around 6 months of regular use, I wrote a review from the point of view of a landscape photographer. So, if you want to know more about that camera, click the thumbnail below.
Why I chose the Fujifilm X-T50 as a second camera
I chose to use the phrase “second camera” on purpose as I don’t like the idea of just having a backup camera (as I mentioned already). I wanted a second camera that has its own unique role to play, to contribute positively to the work I create while at the same time being a backup to the XT5. This is where the X-TXX range and more specifically the X-T50 comes in.
I wrote this article to not only explain why I decided to own both the XT5 and X-T50, but to also provide help to anyone considering buying one of them but needs help deciding which. I also acknowledge that this is not a scientific gear review, and everyone will have their own reasons and opinions for the gear they buy, and these are mine. If I make an error with any of the technical features and specifications, then feel free to correct me but if you don’t agree with some or all the points I make, well,… then,… that’s ok. We can agree to disagree there.
The Fujifilm X-T50 is smaller and lighter than the XT5
The Fujifilm X-T50 and XT5 side by side
I spend a lot of my time walking the streets of London and even more so while I create work for my Timeless City project and when carrying a camera in your hand or around your neck for a few hours at a time, keeping the weight down is important. When I’m not lugging so much weight around with me (like I might on a landscape or woodland photography shoot), it feels more freeing, and I can manoeuvre faster to find those more interesting compositions by crouching low or climbing to get a higher vantage point.
Same sensor, same image processor, same quality
When selecting a camera from other brands, you often have to choose between the latest sensor in their flagship models or previous generation sensors with their lower-end models. In essence, the more you spend, the higher quality imaging capabilities. This seems pretty fair, but Fujifilm does it a little differently. For both their flagship XTX and less expensive X-TXX models, they have always used their latest sensor and image processor.
With the same 40.2MP sensor in each, I never have to compromise on image quality or resolution when deciding what camera to use for a given situation. This also applies to when I might have to use the X-T50 as a backup camera both exclusively or alongside the XT5. In truth, if they didn’t have the same sensor, I might have just bought another XT5 and rotated between them. So, this was a key point in my final decision.
The X-T50 uses the same X-mount lenses as the Fujifilm XT5
The advantage of a second camera being the same brand as my primary camera is that they use the same X-mount lens system. This means I can use any lens I own with both cameras and equally as important, I only have to invest in one set of lenses for all of my photography endeavours.
My current collection of Fujifilm x-mount lenses
The X-T50 now has in-body stabilisation
As I mentioned, the smaller and lighter body helps when using the camera in hand-held situations such as when photographing in the city, travelling and photographing my family. On top of the form factor, Fujifilm have now found a way to add up to 7-stops of in-body stabilisation (IBIS) which means sharper hand-held photos in low light situations.
Familiar Menus, design and button layout
A back of the camera shot of the Fujifilm X-T50’s menu system and buttons
I know I’m not alone when I say that I do not like replacing my cameras and will only do so if there is an obvious advantage to doing so, as even the slightest of changes between camera generations means there is some level of adapting to new button layouts or features. What Fujifilm do well is keep their camera designs and menus incredibly consistent and although there is always some level of adapting when picking up a new Fujifilm camera, it is kept to a minimum.
So, when I pick up either my XT5 or X-T50, I know I won’t have to spend any time relearning how to dial in my settings for any given shooting situation.
The X-T50 is a fun camera to use
I’m not sure if it’s psychological or not but with it being bigger, heavier and more robust, I see my XT5 as the workhorse in my kit. It’s my serious camera, one I use for my slower, more considered landscape photography work. On the other hand, I see the X-T50 (and previous generations I’ve owned) as the fun, everyday camera. It’s a strange thing to say on one hand, as the X-T50 is just as capable in terms of image quality as its bigger brother but whatever the reason, I just find it more fun to use.
The downsides of choosing the X-T50
It’s not all a bed of roses as from a landscape photography point of view, the Fujifilm XT5 is still a superior camera compared to the X-T50. So, what features and capabilities am I giving up? To clarify, these are not criticisms of the X-T50 as I researched the features in detail before I bought it and knew what I would be giving up. This is more to help those undecided and looking for a comparison between the Fujifilm XT5 and X-T50.
The X-T50 is not weather-resistant
Having a weather-sealed camera is a must for any serious landscape photographer as some of the best photos can be taken during inclement weather and I certainly considered the X-T50’s lack of weather resistance when making my decision to buy this camera. The weather-sealed XT5 is still my go-to camera for my landscape photography outings, so for those times I’m standing there in the rain taking photos, I will have that camera with me. If the XT5 is temporarily out of action and I need to rely on the X-T50 for landscape photography, for the odd time it might be raining, I will have both my ThinkTank rain cover and an umbrella with me just in case.
The Fujifilm X-T50 uses the smaller NP-W126S batteries
The NP-126S battery used in the Fujifilm X-T50
This means I have to buy and maintain 2 different sets of batteries. That’s not such a big issue for me as I already had a couple from when I owned the X-T30 but to some, it might be something to consider. Also, the battery is smaller and has less capacity than the NP-W235 used in the XT5. Sure, that might mean fewer images per charge but there is no way the camera would be as small if it was designed to use a bigger battery. So, I think Fujifilm made the right call there.
The X-T50 only has one memory card slot
The Fujifilm XT5 has dual memory card slots and I’ve configured the camera to write new images to both cards, meaning if one were to fail before I get around to backing them up, I still have all the images safe and sound on the other card. With only one memory card slot in the X-T50, I need to be mindful of how a card failure could result in the loss of images and if I were taking photos for a paid job or at a location I know I can’t return too, then I would be using my XT5 anyway. For the typical situations where I use the X-T50 and in the unlikely event my memory card was to fail before backing up the images, it would certainly be frustrating but not the end of the world.
Hopefully, you found that comparison and some of my rationale for buying the X-T50 useful. As I mentioned, this kind of article is quite subjective, with no right or wrong reasons for deciding what camera gear one decides to buy. The most important thing in my opinion is that we all make the most informed decisions we can as the investment we make in camera gear can be significant and the least we can do is help each other to make the right decision.
Until next time.
Trevor
How to get sharp photos when using a telephoto lens
My top tips for capturing sharp photos with a telephoto lens. Learn to avoid camera shake, use a tripod, and perfect focusing techniques for clear landscape shots
I receive many questions related to all sorts of photographic topics and when I’m asked the same question multiple times, it makes more sense for me to write a quick blog post and point people here when it comes up.
As the title suggests, this post is about how to get the sharpest photos possible when using a telephoto lens. Easier said than done on a telephoto lens as when zoomed in, even the smallest of movements are exaggerated and with a smaller depth of field, getting acceptably sharp photos can be tricky.
In this article, I’ll list some of the main causes of camera shake or out of focus photos and make some suggestions as to how you can overcome these challenges and get the tack-sharp photos you set out to take.
Fujifilm XT5 | XF70-300mm | 300mm | 1/100th Second | f/11 | ISO125
Blurry vs. out-of-focus photos. An important distinction.
Before I dive into it, I think it’s worth explaining what the difference is between blurry and out of focus photos as they are different, but it can be easy to confuse the two.
Out of focus simply means that the subject you intend to be in focus is not. Also sometimes called “missing focus”. You won’t get ghosting caused by camera or subject movement, instead, the subject will appear soft and lack clarity. Even when focus is missed, it’s rare that an entire image will be out of focus, particularly when taking landscape photos as we tend to use smaller apertures and have a larger depth of field. One way to check if you have missed focus is to scan the rest of the image to check if any of it is sharp. If objects in front of your subject are sharp, you’ve focused too close and when areas behind the subject are sharp, the focus is too far back.
Blurry photos are usually the result of camera or subject movement and the shutter speed not being fast enough to freeze it. The telltale sign that a photo is blurry caused by camera shake, is that it will be across the entire image and look more like ghosting than just soft. Alternatively, if the subject moves, this usually looks like camera shake, but only to specific parts of the image.
Fujifilm XT5 | XF50-140mm | 140mm | 1/8th Second | f/9 | ISO125
Tips for avoiding camera shake when using a telephoto lens
Small vibrations caused by subtle movements of the camera or lens is a common reason why photos can lack sharpness. As I mentioned, even the smallest vibrations are exaggerated when using a telephoto lens, making it even more important to ensure the camera stays completely still at the critical moment the image is taken. Here are a few tips or techniques to help avoid camera shake when using a telephoto lens.
Use a tripod
It's obvious for good reason. Having a solid base for your camera to rest will help ensure your images are free from movement, particularly in low-light situations. As a landscape photographer, I spend a lot of my time taking photos in low-light situations and having a tripod allows me to use the most optimal camera settings while still getting pin-sharp photos.
Fujifilm XT5 | XF50-140mm | 140mm | 1/20th Second | f/9 | ISO125
Use the built-in timer
You might not realise it, but pressing the shutter will move the camera and once pressed, it usually needs a second or two to settle before the photo is taken. This is why, in most situations when taking landscape photos, I use the built-in timer set to 2 seconds. When I fire the shutter, I will have a 2-second delay before the image is taken which is usually enough time for the camera to stop moving. If I’m zoomed in at 200-300mm, I might even use a 10-second timer to allow the camera even more time to settle.
Use a remote cable release or a mobile app
The problem when using a built-in timer to delay the shutter is that critical moments such as photographing wildlife in the landscape or waves crashing on the rocks can be easily missed. In those situations, you will want to take the photo at the precise moment you click the shutter, but how do you do this without re-introducing camera shake? For these situations, you can use a remote cable release. These are essentially a cable with a shutter button at the end, which will plug into your camera and allow you to take the photo at the precise moment you want without touching the camera at all.
Remote cable releases are incredibly useful but for those without one, then most modern cameras come with an accompanying smartphone app. These apps will typically connect wirelessly to the camera (using Bluetooth or Wi-Fi) and have a built-in shutter button. Working in the same way as the remote cable release, they will allow you to take the photo at the precise moment you want to but once again, without touching the camera directly and avoiding any of the resulting camera shake usually introduced when firing the shutter.
Fujifilm X-T30 | XF50-140mm | 140mm | 1/60th Second | f/8 | ISO160
Use OIS or IBIS
Not all situations will lend themselves to using a tripod, they can add some weight to your gear and some landscape photographers will avoid using one as they feel tripods “root” them to spot and prefer to take photos hand-held. There are of course certain poses to adopt when taking photos hand-held which limit the amount you move when pressing the shutter, but with the introduction of OIS (optical image stabilisation in the lens) or IBIS (in body image stabilisation) in modern cameras, this has made it even easier for photographers to avoid the impact of camera shake in their photos. So, in almost all cases, if you don’t use a tripod and have these features, they will go a long way to helping to avoid blurry photos.
Use a lens collar
Most higher-end telephoto lenses come with a lens collar which allow you to mount the camera and lens combo onto a tripod underneath the lens. With a more balanced setup, it will inevitably be more stable, and this will minimise the amount of camera or lens movement while taking the photo. The issue with less expensive/lighter telephoto lenses is that not only are they less likely to come with a lens collar, but they can often extend as they zoom, making them more sensitive to vibrations as well as pushing the centre of gravity further and further away from the tripod.
You can buy after-market lens collars that fit most telephoto lenses, so if this is something you suffer with, it’s worth considering, but the main reason I mention this is that it happened to me and it took me a while to release that the reason my photos were soft was down to the instability of the lens as it extended out while I zoomed.
Fujifilm XT5 | XF50-140mm | 124mm | 1/15th Second | f/10 | ISO400
Avoid the lens hood in high winds
Lens hoods are great to help keep rain and glare from ruining your photos but that extra bulk can come at a cost when using telephoto lenses. Apart from adding further weight to the end of the lens, potentially destabilising it, they can also act as a sail when it’s windy. The bigger the lens hood, the more it can be affected by the wind, making it almost impossible to avoid vibrations at the end of the lens. So, my advice is to use them only if you absolutely have too, particularly in high wind and if you do, try to use some of the other tips in this post such as increasing your shutter speed if you can.
Use the electronic shutter
I remember the time when I was out taking photos and no matter what I did, I could not work out why my photos were soft. There was no wind, I was using a remote cable release, and my shutter speeds weren’t too long. I was scratching my head for a while before I realised it was the movement of the mechanical shutter causing small vibrations while the image was taken. When I changed the shutter to electronic, my photos were sharp again. Ever since that time, I exclusively shoot with an electronic shutter and having given it some thought, I can’t think of one reason why, for my photography specifically, I would ever need to use a mechanical shutter. It’s been three or four years since I stopped using a mechanical shutter and I have not once had a reason to switch back.
With modern cameras doing away with the mechanical shutter altogether, I guess I was just a bit ahead of my time!
Freeze the subject by using a fast shutter speed
Sometimes it won’t be camera shake causing a blurry image, instead, it could be subjects within the scene that are moving. Typically for me, this might be branches or leaves moving in the wind while photographing the woodland and this is where shutter speed becomes critical when trying to freeze moving subjects in the frame.
This section touches on something most photographers should know, and that’s the exposure triangle. Shutter speed, ISO and aperture; changing any of these settings will affect the exposure and can be used to your advantage when using a higher shutter speed while still letting in enough light onto the sensor to obtain the exposure you desire. I won’t deep-dive into the exposure triangle here, but if you’re reading this and you’re not familiar with it, I encourage you to add it to your list of things to look into.
Like many of the suggestions in this article, it’s worth noting that these can be used no matter what lens you use.
Fujifilm X-T30 | XF50-140mm | 140mm | 0.5 Seconds | f/7.1 | ISO160
Increase the ISO to ensure the fastest possible shutter speed
In days gone by, you would be forgiven for being reluctant to increase your ISO due to the noise it could generate in the image, but times have changed, and modern cameras manage noise so much better than they used to. My advice is to be more confident in increasing the ISO to help you achieve a faster shutter speed as a photo with a little noise can still be used whereas a blurry photo usually cannot.
Not only are modern cameras far better at minimising noise at higher ISOs, but software makers have also introduced more advanced tools to reduce or even remove the noise from your photos in post-production. So, even if your camera does struggle in high ISO, low-light situations, the image can likely be cleaned up back in post-production.
Fujifilm X-T30 | XF50-140mm | 140mm | 1/6th Second | f/8 | ISO160
Use a wide aperture to let in more light
Like increasing the ISO, increasing the aperture by using a lower f-number can also help achieve sharper images when the subject is moving. With a wider aperture, more light can reach the sensor, resulting in faster shutter speeds to achieve the correct exposure.
There are, however, things you need to be aware of when choosing to use a wide aperture to achieve a faster shutter speed. First off, the more you open the aperture, the shallower the depth of field will be. The depth of field is the area between the nearest and furthest points in the image that are acceptably sharp and the wider the aperture, the narrower that area gets. In landscape photography, the depth of field is typically a creative choice, so using the aperture to achieve a faster shutter can be useful depending on the look you are trying to achieve.
Secondly, another consideration when using a larger aperture is that most lenses will suffer from some degree of edge softness when at their widest due to optical aberrations. Granted, modern lenses suffer to a lesser degree and the higher-end lenses with superior construction less so, however, most photographers will experience this at some point when taking photos when using a wide aperture.
The important point to note here is that to freeze a moving subject, a faster shutter speed is needed, and you should be aware of how the ISO and aperture can help achieve this, but at the same time, be mindful of how changing these can affect the look of the resulting image.
Fujifilm XT5 | XF70-300mm | 300mm | 1/320th Second | f/6.4 | ISO125
Avoid missing focus when using a telephoto lens
Getting sharp images isn’t just about freezing the subject or avoiding camera shake, it’s also about ensuring parts of the image you wish to be sharp are in focus. I talked about the differences between motion blur and an image being soft before and this section of the post provides a few tips to help avoid missing focus when taking a photo.
Use a smaller aperture to increase your depth of field
OK, I know I’ve already talked about using a wide aperture to help get sharp photos but bear with me while I expand a little. I explained before that although using a wider aperture will let more light in, allowing you to use a faster shutter speed, there is a potential downside, that being a shallower depth of field, resulting in less of the photo being acceptably sharp.
It’s probably a good point to note at this stage that although the “depth-of-field” and the “focal plane” are similar, there is a subtle but important difference. The focal plane is the area of the scene in front of the lens where the sharpest focus is achieved. Depth-of-field is the area in front and behind the focal plane that is considered acceptably sharp and the smaller the aperture, the deeper this area of acceptable sharpness is.
So, if the light levels are good and you can achieve the shutter speed you desire while still using a smaller aperture, this will mean more of the image will appear in focus and acceptably sharp.
On top of a larger depth of field, a smaller aperture can limit or even eliminate the edge softness when using wider apertures, again, helping to achieve sharper photos.
Fujifilm XT5 | XF50-140mm | 98mm | 1/60th Second | f/8 | ISO125
Check and then re-check your focus
I’ve been caught out by my cameras a few times in the past by relying solely on auto-focus but since adopting my current workflow when out taking photos, thankfully the days of missing focus are behind me.
Firstly, I assigned the autofocus function to another button on the back of my camera and then switched the camera to manual focus. This means the camera will no longer try to focus when the shutter button is pressed. This is often called “back button focus” or BBF and most cameras will have this option available.
With BBF enabled, I have the best of both worlds where I can manually focus and take the image, knowing the shutter button won’t try to refocus for me as well as having the option to autofocus as and when I need by pressing the assigned button on the back of the camera. It also means that when photographing a scene as the light changes, I can get my focus right and then fire the shutter as many times as I like, knowing the focus will remain locked on throughout.
When I feel I have the photo I’m after, the first thing I will do is zoom in on the back of my camera to check it is sharp. Even using the method I outlined above; things can still go wrong. If you come away from a shoot and you find you’ve missed focus, you can’t typically recover from that so do whatever it takes to make sure you know the image is sharp before you leave.
Fujifilm XT5 | XF50-140mm | 140mm | 1/5th Second | f/8 | ISO125
If you’re struggling with focus, particularly when using a telephoto lens then I hope this article goes someway to help you get consistently sharp photos and if you have any suggestions or techniques others might find useful, feel free to leave them on the comments.
Until next time
Trevor.
New Photos | Winter 2023
A collection of photos taken during winter 2023.
One of the many things I ponder regarding my photography is how to publish my work. How do I avoid randomly sharing photos on social media and be more deliberate with the work I release? How can I ensure that those who actively follow my work can see my latest photos presented in the way I want them to be seen? With social media algorithms deciding what photos of mine are seen by those who follow me, how do ensure those who want to see my new work actually can?
I applaud those who can shoot, edit and post photos in a day or two, but I don’t work that way and there are obvious ups and downs to that approach too. It can be weeks or even months before I finish processing some of my photos as I like to take my time, sit on them for a while and be in the right frame of mind to edit. This is particularly true for the more complex images, those I have to work a bit harder to pull the potential out from, to match what I remember witnessing as I stood there in the field taking the photo.
So, I’ve decided that those who visit my website, read my blog or subscribe to my newsletter should be the first to see my most recent work. I want to release new collections as and when I finish editing them and with so many of my photos taken in the woodland, a seasonal release schedule seems to make the most sense to me. This approach may not be limited to just seasonal collections as I will still post new photos with my “On-Location” stories or project-specific collections but, the important point is that they will be seen here or on my newsletter first.
It’s about taking the pressure off and being more deliberate. I’m not concerned about a strict release date or how many photos will make up a collection and I won’t worry too much about them being portfolio-worthy either. True, some will end up in the portfolio galleries here on my website but for these collections, it’s simply about sharing some of my favourite photos I took during those 3 months.
This approach to releasing photos in batches or as collections is not new. I know of a few other photographers who do the same and little by little over the last few months, it’s something I’ve thought more seriously about. I have already shared one or two of the photos below but going forward, unless for a good reason, I will release photos on my website and newsletter before sharing elsewhere.
December 2023 to February 2024 - Winter 2023 collection.
Winter 2023 was the warmest, wettest and windiest winter I’ve witnessed in a long time, certainly since I’ve been taking photos. There was very little in the way of frost, let alone snow! During these darker months, I spent most of my time photographing my local woodland and found a few new, more intimate compositions. I do like to revisit woodland scenes I connect with and photograph them as they change throughout the year. So, you may see some of these again in future collections.
Alongside my woodland work, I ventured into the landscape to photograph a few more recognisable spots in London, around Sussex and across to Snowdonia. Although my style is constantly changing and woodland photography is quickly becoming my most photographed subject, I still enjoy photographing a wide vista or iconic subject.
Tips for Photographing the Woodland in Spring
In this article, I share some of my favourite tips for photographing the woodland in spring.
I think I’m starting to sound like a scratched record as I’ve said it so many times over the last few weeks, but I’ll say it one more time; thank goodness winter is coming to an end! It has been the worst winter for woodland photography since I first started to point my lens towards the trees. I prefer calm, relaxed conditions when I photograph the woodland and the high winds and relentless rain has meant I’ve lacked the motivation to pick up my camera and head to the woodlands over the last couple of months. Now winter is finally coming to an end and with spring just around the corner, I’m now looking forward and planning for another season of fresh green leaves and colourful carpets of woodland flowers.
So, in a bid to share some of the lessons I’ve learned over the last few years, I’ve listed a few tips that I feel can help anyone trying to get the most from their springtime woodland photography.
Get to know the woodland you plan to photograph
Starting with the big one. Scouting! This, in my opinion, is the most important thing any photographer can do when looking to photograph a spring woodland. Knowing where those colourful wildflowers will appear and having some compositions in mind means that when the time comes and conditions are right, you can head to the woodland prepared with some ideas as to what to photograph.
It’s worth noting that when all the fresh flowers and leaves appear, the woodland transforms and can look very different compared to its lifeless, wintry self. So, although it’s great to head into the woodland with some previously scouted compositions in mind, be prepared to change things up if the shot you planned is no longer on.
2. Be prepared to revisit your chosen woodlands
The thing about the woodland in spring is that it’s not always easy to tell when the colour will appear. It can happen in just a matter of days. So, when you’ve found the areas of woodland you plan to focus your attention on, be prepared to revisit a few times so you catch the growth at the perfect time. For this reason, it’s also worth thinking about trying to find local woodlands to photograph, that way you can keep a closer eye on how things are progressing.
Below are three photos of the same scene spanning just two weeks. Look how fast the woodland bloomed into life.
3. Embrace the woodland’s natural disorder
When I first started woodland photography, the number one springtime photo I wanted to take was the iconic uncluttered carpet of bluebells surrounding a bunch of perfectly straight beach trees. For some, it’s the holy grail of springtime woodland photography. Fast forward a few years, and as my woodland photography has progressed, I’ve learned to embrace the clutter and am now much happier seeking compositional order in a natural disorder. I am immeasurably more satisfied when I find a composition I like after working harder on the arrangement.
4. Learn to spot the telltale signs of a misty morning
Like 99% of all other woodland photographers, I love a misty woodland. Along with removing distracting backgrounds and defusing the light, having mist or fog while photographing the woodland can add atmosphere and a sense of mystery to the images.
Although it is never foolproof, it helps if you can identify the telltale signs of a foggy morning when checking your favourite weather app the night before a shoot. In a nutshell, the chances of encountering a misty forest significantly increase when there is little or no wind, humidity is in the high 90s, and the dew point matches the temperature. The weather being the weather means that even when all the signs are there, it doesn’t always work out the way you plan.
5. No mist, no problem
The thing about foggy or misty conditions is that even when all the signs are there, more often than not, it doesn’t happen. So, my advice to anyone photographing woodland is to embrace the woodland whatever the conditions.
Misty mornings aside, my ideal conditions for photographing woodland is in soft, defused light. Personally, I struggle when the light is strong and direct but the great thing about living in the UK is that there are plenty of cloudy days and even when the sun is out, it typically won’t be long before a cloud floats in and tempers the harsh light.
Another challenge when photographing woodland is that it can be quite dark and if there is any sky visible between the trees, it will likely be the brightest thing in the shot and appear very distracting. In foggy conditions, this is less of a problem as the light will be defused but when it’s clear, I will typically find a composition without any sky, using the thicker foliage or the undulations in the landscape as a backdrop to the image.
6. Use a polarising filter to give the colours a bit of punch
If like me, you enjoy photographing the woodland early in the morning or in damp, rainy conditions, you will almost certainly come across wet, reflective leaves in your scene. Reflective light can be very distracting in your woodland photos. This is where a circular polarising filter (CPL) can come to the rescue. A CPL filter works by blocking the reflective light from entering your lens, which means less glare and more punchy colours in your woodland images. This effect is practically impossible to replicate when processing your photos back at the computer, so, to get the very best quality pictures in these conditions, it’s definitely worth mounting a CPL onto the end of your lens.
Just a word of caution. A common mistake many photographers make is to automatically turn the CPL all the way; removing all reflective light from the image. This can result in flat, highly saturated pictures. My advice is to rotate the filter back and forth until there is a good balance between eliminating the distracting reflections and retaining some of the life in the scene. Taking it one step further, photograph the scene with and without the filter mounted so you can choose the picture you like best later.
7. Photograph the small scenes
When the woodland comes alive with new growth in spring, there can be an abundance of smaller scenes to photograph and one thing I’ve been trying to do more often is to get much closer and photograph the finer details. With so much texture and patterns on offer, once you get the camera up close to these smaller scenes, you will be able to tap into a wealth of photographic opportunities and although getting down that low can often be a little tough on the back, by slowing down and taking your time to compose the image properly, you will undoubtedly capture some beautiful, intimate woodland photos.
At the time of writing, I don’t own a macro lens as I don’t want to carry yet another piece of camera gear. Instead, I invested just a few pounds in a set of extension tubes which I mount between my camera and the lens. These allow me to focus much closer for a fraction of the price (they cost me about £30). Extension tubes may not be as good as a high-quality macro lens, and you typically lose a stop of light when using them, but they are the next best thing in my opinion and incredibly handy for the odd occasion where you want to get a little closer to your subject.
8. Embrace the vibrant greens
Photographing the plethora of beautiful colours can be a wonderful experience, however as quickly as they appear, they will be gone again, and you will be left with an abundance of vibrant green tones across the woodland. I love to include those fresh leaves in my images, but having a single colour across the entire frame can result in an image that lacks interest or dynamism. One approach I take to make more interesting photos is to use the strong lines created by the trees to break up the colour and add structure to the composition. This is the approach I took for the photos below and they remain some of my favourite springtime woodland photos I’ve taken.
9. Leave no trace
Over the last few years, so many people have rediscovered the beauty of their local woodlands, and I love to promote the benefits of woodland photography, but all this footfall is having a big impact on these important natural spaces. That’s why, through effective education and following a few simple principles, these popular places can still be visited and enjoyed, but remain protected for future generations to experience.
Our actions directly impact these natural spaces, and one key example is the English Bluebell. Bluebells are a protected species in the UK and picking or digging them up is illegal, but not many people know just how fragile they are. Bluebells can take years to recover from the damage caused by people trampling over them just to take a selfie, and if their leaves are crushed, they can be weakened (as they can no longer photosynthesis). This can all be avoided if everyone sticks to the woodland pathways.
Nature First is just one of many organisations trying to help us woodland photographers to keep these natural spaces safe and they have a few simple principles to follow. By doing so, we can all do our part to preserve our beautiful woodlands.
Prioritize the well-being of nature over photography.
Educate yourself about the places you photograph.
Reflect on the possible impact of your actions.
Use discretion if sharing locations.
Know and follow rules and regulations.
Always follow Leave No Trace principles and strive to leave places better than you found them.
Actively promote and educate others about these principles.
I hope you found that somewhat useful and if you’re looking for some more woodland photography-related articles to read, check out these three I’ve posted below.
Until next time.
Trevor
My Camera Gear for Landscape Photography in 2024
This post provides a look inside my camera bag and lists the gear I use for landscape photography in 2024.
Does camera gear really matter when taking landscape photos? Well, this may seem somewhat controversial to some, but yeah, I actually think it does. Sure, it’s not the be-all and end-all when it comes to taking photos, as most modern cameras are pretty decent at that, but I believe a camera and lens system is a subjective choice based on the photographer’s specific needs and priorities. Being happy with the size, weight, ergonomics, functionality, menu system, lens choices and features is, in my opinion, very important as it can remove much of the friction from the picture-taking process, leaving the photographer to focus on the creative side of photography.
I’ve been using Fujifilm’s X series for around 8 years now and am still very happy with the choice I made way back in 2016. Having used the system for so long, I know the camera inside out and love the fact that while out in the field, I can manage all my settings without going near a menu. That and the balance between size, weight and features means that this system still works best for me.
Here’s a rundown of the photography gear I use when out taking landscape photos in 2024.
My landscape photography gear
Fujifilm Camera and Lenses
XT5 camera: With a weather-resistant shell, dual card slots, 40 megapixels and tons of other useful features, this is a great camera for landscape photography. If you want to read more about how well the camera performs from a landscape photographer’s perspective, you can read my review of it here.
XF16-55 F2.8 standard zoom lens: Although I still have the very capable XF18-55mm, in 2022, I decided to upgrade to the XF16-55 F2.8 as I wanted all my main landscape gear to be weather sealed. The improved optics is a nice bonus, but the extra weight most certainly isn’t.
XF50-140mm F2.8 telephoto lens: For the same reasons I upgraded my standard zoom, I also traded in my XF55-200mm lens for the even heavier but weather-sealed XF50-140 F2.8.
XF10-24mm IOS WR wide-angle lens: New to 2024 is this wide-angle lens. I used to own the original non-weather-sealed version but decided to sell it as I wasn’t using it often enough, but in 2023, I felt not having the ability to go as wide as 10mm limiting in certain situations and with the release of the newer, weather-sealed version of the 10-24mm lens, I decided to buy it once again.
XF70-300mm IOS WR telephoto lens: Like with the wide-angle lens, I felt at times when out in the landscape, the 50-140mm lens lacked the extra reach I needed. So, instead of buying a teleconverter as I had originally planned, I opted for the 70-300mm instead. I’ve not had this lens too long, so the jury is still out but after using it just a few times, so far so good.
DJI Mini 3 Pro drone
In 2022, after what seemed like an eternity of indecision, I finally took the plunge and purchased my first drone. For a few reasons, I opted for the DJI Mini 3 Pro. Having owned it for a while now, and given most of the blogs and YouTube videos out there talk about the video side of things, I wrote a few blog posts about using the DJI Mini 3 Pro specifically for landscape photography.
Filters and accessories
Kase Wolverine magnetic filters: I used to carry larger, square slide-in filters and would spend time fiddling with step-up rings for the different lenses and the holder before being able to slide in the filter I intended to use. That all changed when I got the Kase Wolverine filters. No more fuss! Snap the filter onto the lens and get shooting. In the pouch, I have a CPL, a 3-stop, 6-stop and 10-stop filter. I wrote more about my experiences with these filters in a previous blog post here: Kase Magnetic Filters | A Landscape Photographers Review.
Benro Mach3 TMA37AL tripod: After using my previous tripod for several years, I was after something a little sturdier and a little taller without relying on a less stable centre column. After much research and getting a few recommendations, I eventually opted for the Benro Mach3TMA37AL.
Benro Gd3Wh geared tripod head: For years I’d been happy to use a ball head on my tripod but when I started taking woodland photos, the lack of precision and having to compensate for further movement while making small adjustments with the tripod head began to frustrate me a lot. I invested in this Benro geared head and although it has a bit more bulk, it has solved this problem for me completely.
Spare batteries: The Fujifilm NP-W235 used in the XT4 and XT5 is so much better than the last generation of batteries and I can shoot for much longer on a single charge.
Memory cards: You can’t have too many memory cards. I still prefer to use Sandisk as they have been bulletproof for me so far, but I know there are other brands, just as capable out there.
3 Legged Thing L-bracket: Used to quickly switch from landscape to portrait orientation when using my tripod.
3 Legged Thing Toolz: A handy tool to tighten tripod legs, remove L-brackets, etc.
Headtorch: Not much to say about this one, other than it is bright, light, waterproof and rechargeable. It cost about £15 and lights my path on those dark treks before or after a shoot.
Camera Bag
If you don’t own a load of camera bags, can you even call yourself a landscape photographer? Jokes aside, I’m still using the Vanguard VEO Active 46 as my primary means to carry my landscape photography gear around. For the features I wanted, the size, weight and price, it ticks all the boxes for me.
Going forward, I have half an eye on what Fujifilm plan for the X-T30 II replacement in 2024 as I may decide to buy a backup camera. I’m also contemplating the XF16-80mm F4 lens to complement the XF70-300mm and use them both for trips where I need to keep my camera bag weight down.
As with all my blog posts, if you have any comments or questions, feel free to drop a comment below.
Until next time.
Trevor
Timeless City | An Introduction
An introduction to my Timeless City project. In this post, I provide a bit of background and answer a few questions such as why I take photos of London, why I chose this style for the photos and what the future might hold for the project.
London is my local city. It’s the closest city to where I grew up, a place I’ve worked for quite a few years and ever since I first picked up a camera and started taking photography more seriously, it’s a city I have spent countless hours photographing.
Why London?
Growing up in the suburbs, I didn’t visit London often as a child, when I did, it was usually a family day out or a school trip to some of the tourist hotspots such as the Tower of London or Trafalgar Square. I remember walking around the city, dwarfed by the buildings around me, in awe of the many different styles of architecture I saw. The hustle and bustle, the noise, and so many people; it was a different world to the one I was used to. This was all decades ago, when there were just a handful of buildings taller than St Paul’s Cathedral and over on the Isle of Dogs stood a solitary One Canada Square. How times have changed.
Fast forward a few years and long before I’d taken up photography, I took a job which involved travelling to London almost every day and getting to know the city much better. My work took me all over London and this is when I first started to build my own, personal connection with the city.
In 2016, photography started to evolve from an occasional hobby, photographing a bit of everything, to the passion it is for me today. After a few years of working closer to home, I was back in London most days and naturally drawn to landscape photography and given the connection I’d already built with the city, it made sense that I would feel more compelled to point my lens at London’s incredible cityscape.
Since then, I’ve spent an untold number of hours across countless visits to the city walking the streets, seeking out new compositions and like all landscape photographers, hoping for perfect conditions in a bid to take that perfect image, knowing full well that such a thing doesn’t exist.
I chose to use “Timeless” in the title because from the subject to processing style, I felt it represented a few of the important ingredients that make up this project.
London as we know it has existed for around 2000 years, from a time when Londinium was the size of Hyde Park to the megacity it is today. Throughout all that time, architectural styles have inevitably evolved, from the medieval Tower of London, English Baroque such as St Paul’s Cathedral through to post-war brutalist and the contemporary 21st-century style with plenty of glass being used today.
London’s iconic cityscape is still represented by all of these architectural styles, and this is why timeless doesn’t mean a city that never changes, embodying just a single point in history. To me, it means a city that represents all times, a place consistently evolving over hundreds of years to a point where all of the significant architectural ages London existed through are represented across its skyline. With both old and new coexisting side by side, I wanted to capture a sense of that in my work.
Although the need to develop and evolve with the times has contributed to London’s ever-changing cityscape, this somewhat mishmash of styles has by no means been solely by design. Through the many turmoils the city has faced, such as the great fire or the blitz, London has been forced to rebuild significant parts of the city over the centuries, and one of the challenges I relish is to seek out ways to represent London in my photography and how it’s many structures stand together side by side in what I can only describe as a chaotic harmony.
The goal here isn’t to produce an “old and new” series of photos and even though most of the photos I take will include more than one architectural style in the frame. The goal is to document London’s cityscape across the entire body of work from high up in the rooftops with views stretching for miles, to closer, more intimate photos where scale can be represented better by including a subject in the composition.
At the time of writing this post, the earliest photo I have included in this project was taken in 2018, which, in the grand scheme of time, isn’t very long at all, but still long enough for many changes to take shape across London’s cityscape between then and now. The rate at which new buildings are being erected, particularly in the financial districts is accelerating and as I continue to take new photos, I will be inadvertently documenting these changes as they happen. If this ends up being a very long-term project, I think it will be good to look back at how the cityscape used to look years before.
Why this aesthetic?
Something important to mention about this work is that it is intended to be more of an artistic project than a documentary one, and every photo is taken with the full intention of being edited in post-production. This will include converting the raw files to black and white (more on that later) and alongside some usual tonal and contrast adjustments, I use plenty of selective dodging and burning to achieve the final look.
I still, however, have my own views about authenticity and how I edit my images. I never swap out the sky and never add something that wasn’t in the scene at the time the picture was taken. I might clone out the odd distraction if I feel it is taking away from the aesthetic, but these are typically transient elements such as rubbish in the foreground, old chewing gum on the pavement or the odd crane in the background. I want the viewer to be confident that if they were standing next to me as the shot was taken, they would have observed the same scene I show in my final image.
Alongside those adjustments, if the dynamic range is too much or I want to illuminate certain moving elements in the scene, I will blend images. I will only do this if there is just a very short time between frames and the camera has not been moved.
Sometimes reality doesn’t quite behave as we want, and we need to find our own limit as to what we are willing to do to get the final image. There is no right or wrong answer here, but I do believe in being upfront and honest about how the photo was created. You should stand by your work and not purposely mislead the viewer.
Getting back to the point about this being more of an artistic project than a “straight out of the camera” documentary, I wanted to give the finished photos a timeless look and feel.
I felt to represent the work as a single body, I had to ensure the final look was as consistent as it could be and given the ever-changing conditions, the many different styles of architecture and the multitude of colour in the scenes I photograph, removing colour and producing only black and white work seemed the right choice.
Of course, I still love colour photography and still produce most of my landscape work this way. So, once the project was starting to take shape and I ventured out into London to deliberately take photos for this black and white project, I learned very quickly that I would have to think and see differently. I had to remove colour from being a compositional element and focus only on shape, form and light. I feel, however, that it was a necessary step to make, as in addition to a more consistent look, black and white photography has a timeless feel about it, as the process does not age the photos and although I have no intention of doing so, they are free from a style that represents any contemporary trend in my work.
Another creative decision I made for this project was to use the square format for all finished photos, and like my decision to only process the images in black and white, there are several reasons for this. The first and most obvious reason for the square is that by having a single aspect ratio for all photos, it helps when trying to obtain a consistent look across the entire body of work.
Additionally, using a square crop has other compositional advantages. For instance, it can help when placing the subject in the centre of the image. I tend to do this quite often and the square crop, with all sides equal, can further emphasise that symmetry in the frame.
For a landscape photographer, the square format may appear more restrictive than the traditional 3:2 or 4:3 aspect ratios, but that’s not the case at all. I feel I have more freedom when composing a photo as the traditional “rules” carry less weight. Having equal sides seems to reduce the need to compensate when composing the image. I’m able to place the subject close to the middle or nearer to the edge of the frame without feeling the picture lacks balance.
Michael Kenna’s work is frequently referred to as being “zen-like” and although I’m sure this has a lot to do with his photographic style and technique he uses, I think that his use of the square format and the compositional freedom it provides has a little something to do with it too.
What’s next?
It’s early days and way too soon to know where this project will go. For now, I’m enjoying heading out with my camera and shooting new images for the collection alongside my traditional landscape work.
I’m still tweaking and refining as I go and allowing the project to develop as the body of work builds.
Along with a spin-off Instagram account dedicated to the project here: https://instagram.com/_timeless.city_, I wanted to give the project a permanent home, so I created this project page. I plan to update the page now and then with newly released photos and if I publish any more “behind the lens” or general blog articles related to the project, I’ll also post them there.
I’ve started to think about how I might present the images and at the moment, I have a few themes such as views from the rooftops or from along the Thames. There are, however, other images creeping into the collection that don’t fit a specific theme just yet and as long as they align with the spirit of the project, I’m quite happy to let them lead me somewhere new.
To get the very best experience of one’s work, I truly believe photography should be printed so I will of course be printing this work. To start it will be printed just for me, but in time I would love to turn this project into a series of zines or maybe even one day, a coffee table book. Thats a little way off yet but certainly something I would like to aim for.
That’s it for this project intro. Hopefully, you found that useful, but as ever, if you have any questions and want to know more about the process or ideas for future blog posts, just drop them in the comments below.
Until next time.
Trevor
How I Process My Landscape Photos Taken with the DJI Mini 3 Pro
In this article, I share my processing steps to create the best quality landscape photos with my DJI Mini 3 Pro.
When I first decided to buy a drone to use for landscape photography, I had to consider the pros and cons of each model available at the time. For example, the larger Mavic models typically have a more capable camera, but the smaller, sub 250g Mini models have fewer restrictions on where they can be flown. After weighing up the pros and cons, I eventually chose the DJI Mini 3 Pro. I’ve already published a post covering my thoughts on this drone, and you can read a full review from a landscape photographer’s perspective here: DJI Mini 3 Pro | A Landscape Photographer’s Review.
Following on from the review I wrote about this drone, I published a second post demonstrating the different camera settings I use while out taking landscape photos with the Mini 3 Pro. DJI Mini 3 pro Camera Settings for Landscape Photography.
You can find both of my previous DJI Mini 3 Pro blog posts below:
So, given that I’ve written a review of the Mini 3 Pro and published a blog post detailing the settings I use to take landscape photos, what’s this blog post all about then? When I published my previous post, I had a few messages asking for a bit more detail as to how I process the Mini 3 Pro raw files and although there are countless different approaches one can take, I decided to write this post detailing the steps I took from raw to final edit using a photo I took recently in low light conditions.
Before I start, I wanted to make two points. Firstly, this post is aimed at those wanting to get their files ready to be printed. The techniques I use to sharpen and overcome noise in the image aren’t really going to benefit you if you plan to just share your drone photos on social media.
The second point to make is that both this and the camera settings for landscape photography post above applies to those using the DJI Mini 3, Mini 3 Pro and the recently released Mini 4 Pro. Features may vary from model to model, but overall, their capabilities are very similar when it comes to taking landscape photos.
Step 1: Taking the photo in the field
Let’s start with the original raw files I took in the field. This is Arundel Castle located in West Sussex and after sunset came and went without much fanfare, I decided to hang back just a bit longer to take a photo during blue hour. It’ll not win any awards but with the low light conditions, I figured this image was a good candidate to use for this processing blog post.
Raw files as shown in Adobe Lightroom. DJI Mini 3 Pro | 24mm Pano | 1/6th and 1/3rd Second | f/1.7 | ISO100
In terms of camera settings, I used the 48mp setting in PRO mode when taking this photo to get the highest resolution. I knew from previous experience that there would be some noise in the files, so I decided to take two pictures, manually adjusting the shutter speed for each. The first image was exposed for the castle at 1/6th of a second, and the other was exposed for the sky at 1/3rd of a second.
Step 2: Increase detail and reduce noise in Adobe Lightroom
As I expected, there was some noise in the sky when viewing the raw file at 100%. So, before I merged the bracketed images, that noise needed to be dealt with. Even though I can see the noise at 100% here on my screen, I’m not too sure how well that comes across on yours, so here’s a 100% and 200% crop demonstrating the noise I can see in the sky. I know the 200% crop isn’t representative in the real world but it’s just to help visualise the noise. If you still can’t see it, you’ll just have to trust me that it is there.
There seems to be a plethora of noise reduction software hitting the market recently and among those, Adobe released its own AI Denoise feature in Lightroom and Camera Raw. Having tried some of the other tools available, in my opinion, Adobe’s AI Denoise is as good as, if not better than many of the other options out there. Plus, its baked into Lightroom making for an easier workflow.
AI denoise is a part of Adobe’s Enhance feature (located in the Photo menu along the top). Along with denoising an image, it also improves raw files by enhancing the details and reducing artefacts. It can, however, only be used with raw images so needs to be applied before using the Photomerge-HDR function in the next section.
To remain consistent across both the under and over-exposed raw files, I ran them both through the Enhance feature, being careful not to add too much noise reduction as overuse can have unintended consequences.
Below is a side-by-side comparison of the original and enhanced files. With any hope, you will be able to see the refined edges and enhanced definition on the right-hand side.
Step 3: Merging the bracketed image files in Adobe Lightroom
With the two new DNG files created by the Enhance feature, I selected them both and used the Photomerge-HDR option in the Photo menu (or via a right-click on the photo). I typically use the settings you see below and once finished, a new HDR DNG file is created. This new file will have less noise in the shadow areas and more detail that can be recovered in the brighter areas, resulting in a cleaner, editable image.
Step 4: Editing the image in Adobe Lightroom
Now, with the image file prepared, it’s time to edit.
This post isn’t a tutorial as to how best to edit a photo as everyone’s style will be different. However, what I have highlighted below is the Detail panel showing that I have applied minimal sharpening in Lightroom and for the small amount that is applied, I have increased the masking to ensure it only applies to the areas of high contrast such as the castle edges, excluding large parts of the image such as the sky.
Step 5: Sharpening in Adobe Photoshop
A note on sharpening. Opinions vary as to when to apply it. During the edit or only when the file is being outputted for a particular use case such as web, socials or print. This is just my approach, and I don’t for one minute suggest it is right for everyone. I will typically add some sharpening when editing, call it a “base sharpening” if you will. This is typically fine for all of my online needs but If I feel I need to add any more sharpening for print, I will do so when preparing the file before sending it to the printer.
Not being a big fan of how Lightroom sharpens my raw files, I apply just a small amount of sharpening using the Details panel before I finish it off properly in Photoshop. For this, I use the High Pass filter. It’s a great tool to detect the edges (or high contrast areas) in a frame, which, when combined with a contrast-boosting blending mode applied to those edges, sharpens the photo without affecting the areas with less contrast, such as the sky.
First up, create a duplicate layer and then, from the menu, select Filter - Other - High Pass. Here, you will decide how much sharpening you want to add by adjusting the Radius amount. Choosing the right number depends on the resolution of the file and how much sharpening you want to add. Typically, I stick between 1-2 pixels at this stage with the view that I can add more later if needed. If you start to see colour artefacts in the preview, you’ve probably taken it way too far. Experiment with the radius yourself to get the effect you like. Once I’m happy with the thickness of the edges detected by the High Pass filter, I then hit OK.
Next, I use the Overlay blending mode for the same layer. This blending mode will hide the grey areas and add contrast to the edges highlighted by the High Pass filter, resulting in a clean, sharper file. Hopefully, you can see the effect by comparing the before and after images in the screengrab below.
The final image, ready to print
After a few Photoshop tweaks that include the spot healing brush to remove a few distracting lights and a final 3:2 crop back in Adobe Lightroom, here is the final photo with more clarity and less noise than before.
As with all processing methods, this approach, which works for me, may not work for everyone, but in some way or another, I will use some or all of these steps when processing my drone photos.
Having said all of that, the proof is in the pudding, so, next up, I plan to print this and a few other photos I’ve taken with my drone to see how the quality holds up at different sizes. If I can find a way to communicate that process in this blog format, I’ll post a follow-up article on that soon.
I hope you found this article useful, and if you have any tips or tricks or can suggest any improvements to my workflow, feel free to leave a comment below.
Until next time.
Trevor
My Favourite Landscape Photos from 2023
I look back at the landscape photos I took in 2023, choose a few favourites and think about what I want to achieve in 2024.
I probably start these yearly posts the same way each time but the reason for me to write them never changes. I enjoy these annual retrospectives as they give me a reason to look back at the last 12 months, enjoy some of the photos and relive some of the adventures I had with my camera in tow.
Have you ever listened to some music and it transported you back to a time and a place where you first heard it? You could have been on a big night out with friends, at home on the sofa with someone special or even in the car driving to work. However momentous or mundane the setting, there is now a connection in your mind between that song and the time or place you heard it. That’s what photography does for me. I look back at these photos and yeah, it’s great to have something nice to look at, but adding the recollection of that time I was stood in the woodland, first thing in the morning with the surrounding mist deadening all sound but the birdsong above me, or standing at the edge of a frozen lake in Snowdonia with distant mountains in front of me and the sun just rising, illuminating the peaks. That is something else altogether. However much I feel that photography is a way to express myself artistically, they are all connections to a time and place where I felt the moment was special enough to capture and keep forever.
So, to sum up, I get as much, if not more joy from writing these yearly posts than anyone might get from reading them.
The Woodland
I think 2023 was the first year since photographing landscapes that I spent more time capturing the woodland than the grand landscape. I really have put a shift in. I’ve made so many early morning trips into my local forest this year and between all that effort, practice and getting to know the woodland properly, I feel my woodland photography has progressed significantly in 2023.
Fujifilm XT5 | XF16-55mm | 23mm | 0.8 Seconds | f/10 | ISO400
Fujifilm XT5 | XF16-55mm | 26mm | 0.5 Seconds | f/7.1 | ISO125
Fujifilm XT5 | XF16-55mm | 35mm | 1/10th Second | f/7.1 | ISO400
Fujifilm XT5 | XF16-55mm | 34mm | 1/3rd Second | f/8 | ISO125
This year, I started to think about how so many of my photos never see the light of day and decided that I wanted to release more of these photos in the form of on-location blog posts. They’re not supposed to be too overwhelming, but just enough to feature the handful of photos I might take on a successful photography outing. Here are a couple of blog posts I wrote about my trips into the woodland.
London’s Cityscape
I was quite productive when photographing London in 2023, but not in my usual way. Ordinarily, I seek the wider, epic cityscape with dramatic clouds or vivid colours in the sky. This year was a bit different as I’ve not taken as many of what some might call my traditional style of cityscape photo. So, why was it productive if I didn’t take as many of my usual cityscape photos? Check out the section towards the end of this post featuring my Timeless City project.
I still managed, however, to bag a few keepers on my many outings into the Big Smoke and I’ve shared some of my favourites below.
Fujifilm XT5 | XF16-55mm | 16mm | 1/13th Second | f/8 | ISO125
Fujifilm XT5 | XF10-24mm | 10mm | 1/40th Second | f/11 | ISO125
Fujifilm XT5 | XF16-55mm | 16mm | 1/1000th Second | f/6.4 | ISO125
Fujifilm XT5 | XF10-24mm | 10mm | 1/100th Second | f/4 | ISO125
Fujifilm XT5 | XF16-55mm | 16mm | 2.5 Seconds | f/13 | ISO125
The Landscape
I always like to share some of the traditional landscape photos I took during the previous 12 months, but this past year, I struggled a little. With the shift to taking more woodland photos and recently feeling a little uninspired by my local landscape, I didn’t make as many trips and subsequently as many landscape photos as I normally do.
I did take a few worth sharing though, often revisiting some of my regular locations in the area to document how they have changed over time or through the different seasons. It’s something I do more and more these days. When I get to a location I like, I will revisit it time and again to try to improve on the photos I’ve taken before, or like I have been doing with the view of the low-lying woodland below, taking photos throughout the year as a mini seasonal project.
Fujifilm XT5 | XF16-55mm | 16mm | 0.4 Seconds | f/11 | ISO125
Fujifilm XT5 | XF16-55mm | 35mm | 1/10th Second | f/6.4 | ISO400
Fujifilm XT5 | XF50-140mm | 56mm | 1/10th Second | f/9 | ISO125
Fujifilm XT5 | XF50-140mm | 140mm | 1/80th Second | f/8 | ISO125
The Small Scenes
I thoroughly enjoy photographing small scenes like this and in 2023, I managed to take a handful of photos I like, some I’ve shared below.
I do, however, feel I lost my way a little when photographing the small scenes over the last 12 months. I believe that to photograph the details around me, I need to practice seeing them, looking down more often at what’s around my feet and working harder to notice nature’s textures and patterns that surround me every day. I just don’t think I did enough of that. It’s not about the number of photos I took, more that if I’m tuned in better to the details, I will spot them more often instead of just walking by. Something for me to work on in 2024.
Fujifilm XT5 | XF50-140mm | 140mm | 1/8th Second | f/9 | ISO125
Fujifilm XT5 | XF50-140mm | 134mm | 1/15th Second | f/9 | ISO125
Fujifilm XT5 | XF16-55mm | 55mm | 0.6 Seconds | f/8 | ISO125
Fujifilm XT5 | XF50-140mm | 140mm | 1/25th Second | f/2.8 | ISO125
The Drone
I have thoroughly enjoyed taking landscape photos with my done this year, but having only owned one since late 2022, it became apparent quickly that taking landscape photos with a drone was going to take a different approach altogether. There was quite a learning curve involved. With so much time spent photographing woodlands, not many of my dedicated landscape photography outings allowed for drone photography, but when they did, I took the opportunity and ended up with a handful of photos I particularly like.
If there’s one thing I want to take more photos with in 2024, it’s my drone, so I’ll be working hard to achieve that over the next 12 months.
DJI Mini 3 Pro | 24mm (effective) | 1/8000th Second | f/1.7 | ISO100
DJI Mini 3 Pro | 24mm (effective) | 1/30th Second | f/1.7 | ISO100
DJI Mini 3 Pro | 24mm Pano | 0.4 Seconds | f/1.7 | ISO100
Photographing Wales
With some beautiful woodland, rolling hills and chalk-lined coastlines, the Southeast of England has a lot to offer the landscape photographer, but what we don’t have is mountains and waterfalls and those lucky sods in Wales have ample amounts of both. So, over the last few years, I’ve been making multiple photography trips to both the Brecon Beacons and Snowdonia National Parks to get my fix of a more rugged landscape.
Since these were dedicated photography trips, I also wrote a couple of On Location blog posts that include more of the photos I took and some behind-the-lens stories. Select one of the thumbnails below to jump straight to that blog post.
A Landscape Photography Trip to Snowdonia
In January 2023, I spent a couple of days photographing a very wintry-looking Snowdonia. Barely scratching the surface, it was my first dedicated photography trip to this stunning location, learning lots along the way and getting to know the area as best I could in the short time I had. With any hope, the more times I visit, the better my photos will be, but as I just mentioned, this being my first trip dedicated to landscape photography, I’m still pleased with the photos I took.
Fujifilm XT5 | XF16-55mm | 18mm | 2 Seconds | f/8 | ISO125
Fujifilm XT5 | XF16-55mm | 16mm | 1/4th Second | f/5 | ISO125
Fujifilm XT5 | XF50-140mm | 54mm | 1/200th Second | f/9 | ISO200
Fujifilm XT5 | XF16-55mm | 16mm | 13 Seconds | f/8 | ISO200
Photographing Waterfall Country
Along with Snowdonia in January, I also took a trip to the Brecon Beacons National Park in October. Given the time of year, I was hoping for a little more colour on the trees, but the leaves were still predominantly green. Still, I made the best of it, taking some photos I was happy with, and I mentally clocked that to get the best colour, it will have to be an early-mid November trip next time.
Fujifilm XT5 | XF10-24mm | 14mm | 0.5 Seconds | f/9 | ISO125
Fujifilm XT5 | XF10-24mm | 10mm | 1/6th Second | f/8 | ISO125
Fujifilm XT5 | XF10-24mm | 10mm | 1/5th Second | f/7.1 | ISO400
Fujifilm XT5 | XF10-24mm | 15mm | 50 Seconds | f/10 | ISO125
Timeless City
I started the Timeless City project this year and was excited about it from the first photo I processed. I’ve been documenting London with my camera for a few years, making countless trips into the city and I feel I have finally found a way that allows me to share the photography as a cohesive body of work.
I deliberately used the word timeless as it represents so much about the project. The years I’ve been and will continue to photograph this great city, the way the old and new architectural styles sit side by side, and the aesthetic of the final image I create with the square crop and monochrome processing. All of it matters and represents something in the project.
I know the project has a way to go yet, not only in terms of the images I take but what it means and how it might develop. For now, I’m just excited to let it flow and see where it takes me.
Looking forward
As I mentioned at the start of this post, I usually spend a little time looking forward and thinking about what I want to achieve in the coming 12 months. Rightly or wrongly, these aspirations are relatively fluid as time is always limited and priorities can change. However, right here, right now, I’ve listed a few things I would like to achieve or make progress on in 2024.
Be it the woodland, cityscapes or small scenes, continue to be curious and inspired by the landscape.
Take more trips and make more memories to look back on in 12 months.
Be more consistent with both my blog and newsletter.
Publish my first book/zine and with hope, sell one or two.
Develop my Timeless City project further. Write about it, give it a dedicated space on my website, promote it and continue to build the work in preparation for something more in the future.
Print my photos more often.
Take photos with my drone more often.
Complete some of my seasonal woodland/landscape series.
There you go. That’s this year’s retrospective done and dusted. All that’s left to do is thank everyone who has supported me and my work this past year and I wish you all a happy and successful 2024.
Until next year.
Trevor
DJI Mini 3 Pro Camera Settings for Landscape Photography
In this article, I share the camera settings I use to take the best quality landscape photos with my DJI Mini 3 Pro.
I’ve had quite a few questions, both in the comments or sent via email since I posted my 6-month review of the DJI Mini 3 Pro for landscape photography, and one question that has been asked a few times is how I find the image quality, particularly when it comes to editing the raw files. The DJI Mini 3 Pro is a very capable drone. When looking to fly almost anywhere (flight restrictions aside) by staying under the 250g weight limit, you will do well to find a more capable drone on the market today.
DJI Mavic Mini 3 | 24mm (effective) | 1/30th Second | f/1.7 | ISO100
That being said, there is no getting around the fact that the image sensor used in the Mini 3 Pro’s camera is a little on the small side. With smaller pixels and a lower resolution compared to some of the larger drones on the market, getting the very best image quality will require you to take advantage of all of the settings and features available. In this article, I will share some tips and tricks I’ve picked up over time so you can take the best aerial landscape photos possible with the DJI Mini 3 Pro.
One final point before we jump in. This article has been written with a specific focus on photos and contains my personal opinion based on my own experience capturing and editing photos taken with the Mini 3 Pro. I won’t be covering other topics in this post such as the best video settings or even flying modes. I’ll save those topics for someone else.
Set the photo mode to PRO
Like most traditional cameras, the Mini 3 Pro has both auto and pro (manual) camera modes. For those that may be apprehensive about switching their camera away from auto mode, it really isn’t as scary as you may think and making the switch provides you full control of the shutter speed, white balance and ISO settings. Having the PRO picture mode enabled will open up more possibilities to ensure the image looks the way you want, and the great thing is, the real-time feedback you get on the screen will help ensure you don’t under/over-expose your photos. Many of the settings I mention in the post rely on PRO mode being activated, so, in my opinion, this should be one of the first things you do when you’ve mastered flying your drone and want to take better photos.
To switch from AUTO to PRO mode, simply tap the AUTO icon located in the bottom right-hand side of the screen. You will know you are shooting in PRO mode as the icon will change and more settings will appear.
Shoot in J+R (JPEG+RAW)
Most people who take digital photos will be familiar with a JPG or JPEG file as it’s by far the most used image format out there. But what is a raw file? Think of it as a digital negative. It’s a lossless picture format that contains all the image data captured by the drone’s camera, without any editing or adjustments and although not for everyone, shooting stills as raw images really is the best way to ensure all of that image data is retained.
When taking JPGs, the camera’s processor will apply the default picture profile settings and discard all other data no longer used. The file size is smaller and if that’s all you need, that’s great. But if wanting to maintain full control of the final look of the image and plan to import the photos into your chosen editing software, then choosing to shoot raw is the better choice.
It’s worth noting that the Mini 3 Pro doesn’t have a raw-only mode, so whatever format you choose, you will still have a JPG copy saved onto your card. That can be useful for the times you just want to quickly grab an image from the memory card to share, bypassing the editing stage altogether. It really is the best of both worlds.
You can shoot in JPEG+RAW in either AUTO or PRO modes. To change from jpg to raw, tap the word JPEG in the bottom right-hand corner of the screen, and depending on whether you are in PRO or AUTO mode you will need to select either J+RAW or J+R.
Keep your ISO as low as possible
The native ISO for taking photos with the Mini 3 Pro is 100, and although raising your ISO can be incredibly useful when the ambient light is too low to take a sharp photo, it will negatively affect picture quality. The higher the ISO, the more digital noise and artefacts will be introduced to your images, and yes, a sharper, noisier image is better than a blurry one in nearly all cases, to keep my images as clean as possible, I will only raise my ISO as a last resort.
If you are in a situation where a higher ISO is needed and PRO mode is enabled, simply tap the ISO icon located at the bottom right of the screen and slide the dial until you have the exposure you need.
Enable the Histogram and Overexposure Warning
Unlike traditional photography where you and the camera typically have the same view of the subject, taking photos with a drone means relying far more heavily on what you can see on the screen. So, in my opinion, the more info it provides, the more likely you will take a high-quality, well-exposed photo and that’s why I keep the histogram and Overexposure Warning enabled when taking pictures with the Mini 3 Pro.
I won’t dig too deep into what a histogram is, but in short, it is a graph that visually represents how much light, mid or dark tones are in the photo. The shape of the graph will depend on the type of photo being taken but the thing to watch out for is when the graph data starts to touch and overlap with the far left or right-hand side. Typically, this is called clipping and means you’re losing image details in the shadows or highlights which might not be recoverable later in post-processing.
The Overexposure Warning feature is a little easier to explain. All this really does is highlight parts of the image that are overexposed with black and white moving lines. To some, this might be a bit too distracting, but I use the same option on my main Fujifilm camera and find it a useful feature to enable to prevent overexposing parts of the image.
To enable one or both features, select the three dots on the top-right of the screen to open the main menu. From here, select the Camera settings sub-menu and scroll down. Here you will see both options with a toggle switch to enable or disable the feature.
Shoot to the right
This suggestion requires the histogram to be enabled, so check out the previous point to see how this is done.
Typically, the more light collected onto the sensor when exposing an image, the higher the quality, because less noise and artefacts will be present in the resulting photo. So, one technique to try is to overexpose an image by a stop or two where the histogram will be heavier weighted towards the right. This is where the term “Shoot to the right” or STTR comes from and is commonplace in traditional landscape photography.
Shooting to the right should be practised with a degree of caution. For example, slowing down the shutter speed risks adding motion blur to an image and if not careful, you can also end up pushing it too far and clipping the highlights. Shooting to the right along with AEB being enabled (see the next tip) can help get around these issues.
Use AEB mode when shooting in high dynamic range situations
AEB stands for Auto Exposure Bracketing and is a super useful feature enabling you to capture varying exposures of the same scene, all with a single press of the shutter button. It works by taking a base exposure using the settings you have already chosen, then taking either one or two extra photos on either side, increasing or decreasing the exposure by a stop each time. This results in 3 or 5 separate images which can be merged in your chosen image editor later.
DJI Mavic Mini 3 | 24mm (effective) | 1/2500th Second | f/1.7 | ISO100
As I mentioned at the beginning of this article, the DJI Mini 3 Pro has a smaller sensor, with smaller pixels compared to the higher end/bigger drone models, meaning it will have more difficulty properly exposing a photo in high dynamic range scenes. So, to make sure I gather as much image detail in the highlights and shadows as possible, I will take 5 bracketed images of a given scene 90% of the time. Not all photos will need to be bracketed, but the file sizes are relatively small and, in my opinion, the benefits significantly out way the minimal drawbacks.
To enable AEB when in photo mode, select the icon just above the screen’s shutter button, select Photo, then AEB, then select whether you want to take three or five bracketed images. Select the AEB icon above the shutter once more to close the menu.
Capture a panoramic image for maximum resolution
The native image resolution for the Mini 3 Pro is 12MP which, by modern standards is on the lower side and if you plan to print your photos, then a great way to boost your resolution is to take multiple images and stitch them together in post. There are actually a few ways to achieve this.
First up, there are the built-in Pano options. If there is plenty of light and the dynamic range isn’t too high, then using one of the built-in pano modes is a great option as the drone will take care of panning and picture taking. All you need to do is set your exposure settings and press the shutter button.
I used the built-in Pano mode when I created the picture below.
DJI Mavic Mini 3 | 24mm (effective) | 1/2000th Second | f/1.7 | ISO100 - Wide Pano Mode
When shooting in jpeg+raw, the drone will automatically stitch the JPEG image and place the individual raw files in their own sub-folder on your memory card, ready to be imported and merged into your chosen software later.
To access the built-in pano modes, choose the icon above the screen’s shutter button and when the menu opens, scroll down and select Pano. Here you can select from the different panorama options which are Sphere, 180°, Wide Angle, and Vertical. I won’t go into all the various options here but for a traditional panorama, you would select the wide option. In this mode, the Mini 3 Pro will take a grid of 9 photos automatically.
The built-in pano modes are incredibly useful but to retain more control of the final image, I prefer to take the individual photos manually, like I would when taking traditional landscape photos with my main camera. My typical approach would be to switch the camera to portrait mode (a welcome feature introduced in the Mini 3 Pro) as this provides more vertical resolution without the need to tilt the camera up or down, thus avoiding any unnecessary distortion which would need to be dealt with in post. I will then pan horizontally, taking individual photos as I go, overlapping by 30-50% and leaving a little room on either side for cropping.
DJI Mavic Mini 3 | 24mm (effective) | 1/5th Second | f/1.7 | ISO100
Create a manual pano with AEB for maximum dynamic range and resolution
This is the number one reason why I like to create my panoramas manually. For reasons only known to DJI, the Mini 3 Pro does not have the ability to take AEB images in pano mode. Maybe it will be introduced later but this seems an obvious feature to add with a firmware update. So, for now, I manually combine the two by taking a manual panorama with the 5-image AEB mode enabled. The resulting images will have the highest (native) resolution with the most image detail and the highest dynamic range.
I will then import them into Adobe Lightroom (my chosen image editing software) and with all the raw images highlighted, I select Photo - Photo Merge - HDR Panorama from the main menu.
With the sun setting behind the mountains, I needed all the dynamic range available to avoid blowing out the sky when creating the panorama below.
DJI Mavic Mini 3 | 24mm (effective) | 1/6400th Second | f/1.7 | ISO100
Use the 48-megapixel mode, (but do so with some caution)
The Mini 3 Pro comes with a high-resolution stills mode, allowing you to take photos at 4x the resolution compared to the base 12-megapixel option. In the right conditions, using the 48MP mode can help when you might want to crop the image later or print your photos even bigger.
Sounds too good to be true, right? Well, maybe. Although the native resolution is 12MP, to achieve a 48MP image, the Mini 3 Pro’s camera has a type of filter (called a quad bayer filter) which, splits each of the 12MP into four, resulting in the 48 megapixels mentioned. The issue is that smaller pixels capture less light and can result in noisier, lower-quality images. If the conditions are good for photography and there is plenty of light, the 48MP images can look really good, but when conditions are less than ideal, the images can leave a lot to be desired. That’s certainly my experience, anyway.
My usual workflow when taking stills with the Mini 3 Pro is to hedge my bets and capture a native 12MP image with AEB first and then a 48MP version which I can then compare and decide on the best one to edit later in Lightroom.
To enable the 48MP stills mode, simply select the icon above the screen’s shutter button, from there select Photo then to the right, select 48 PM.
It’s probably worth mentioning that using the base 12MP stills mode and taking a panorama can result in high-resolution, less noisy images too, but it will be a wider aspect, requiring the drone to be closer to the given subject. There is no right or wrong here, just different options suitable for different situations.
Set your white balance to manual
There are a couple of reasons why you might consider manually setting your white balance while out taking photos with the Mini 3 Pro. If you’re taking single, raw photos, then it’s not such an important topic as the white balance can be changed later in post. But if taking JPEGs, the white balance is baked into the image at the time it is taken, so getting it right while out with the drone is much more important.
Secondly, and the main reason I set the white balance manually is to keep all images completely consistent when taking panoramic images. As you pan the camera around, the changes in the scene being photographed might lead to changes in the white balance which can add more work when trying to seamlessly stitch the photos together later.
I tend to keep the WB at about 5300-5500 on brighter days and a little higher when there is more cloud around but typically, I will judge each situation individually. To manually set the white balance, you need to be in PRO photo mode. On the bottom right corner of the screen, there will be a square with WB and a Kelvin number next to it. This number is the numerical value the white balance will be set to. Select the WB icon and a familiar box will pop up. At the top, if the white balance is set to automatic, the box with Auto will be highlighted in yellow. If so, tap that and then use the slider to scroll through the numbers to your desired white balance value.
BONUS TIP: Fix it in post!
Ok, I hear you. We all want to take the very best photos while out in the field but sometimes you will reach the limit of what the Mini 3 Pro camera is capable of and have noisy photos. Luckily, we seem to be in a bit of a boom when it comes to software-based noise reduction. Amongst others, DxO, Topaz and not Adobe have all recently released updated software with some impressive noise-reduction features. So, even if you use all the suggestions I have listed in this article and still end up with noise or artefacts in your photos, try running them through one of these applications as it might save the day.
Printing your photos taken with the DJI Mini 3 Pro
If you regularly visit my website, you will know that I am a big believer in the printed image. Be it a single print, a photo book or wall art, the physical, tangible print is a far better way to view and experience a photo compared to a screen. With this in mind, I recently printed some of the drone photos I’ve taken over the last year to get a better idea of how they look in the flesh.
I printed a selection of my photos, taken using many of the techniques I mention above at both A4 and A3 sizes, and although it’s impossible to demonstrate here, I have to say, they look pretty good. Nice and sharp and with little to no noise. If you’ve taken some photos with the Mini 3 Pro and are on the fence when it comes to printing your photos, then my advice is to power up that printer or choose a good lab and get some printed. You won’t regret it!
DJI Mavic Mini 3 | 24mm (effective) | 1/30th Second | f/1.7 | ISO100
So, there you have it. If you follow some or all of these suggestions, you will take the very best landscape pictures possible from the DJI Mini 3 Pro and if you have any suggestions I might have missed, feel free to leave a comment below.
Until next time,
Trevor
Fujifilm XT5 | A Landscape Photographer’s Review
My review of the Fujifilm XT5 from the perspective of a landscape photographer after 6 months of owning and using it in the field. How good is the new 40MP sensor? How is the image quality? Have a read and find out what I think.
Towards the end of 2022, while out in the field on a shoot, the screen on my Fujifilm XT2 started to flicker uncontrollably and after a few minutes of strange behaviour, it turned itself off and however much I tried, I couldn’t get it to turn on again. It seemed after 5 faithful years of service, the XT2 was dead. So, I had a decision to make. Do I fix it? Or do I invest in a new camera body? When it comes to cameras and lenses, unless there is a particular problem I need to solve, I never chase the latest gear.
I much prefer familiarity over shiny and new. If my camera does the job for me and I know it’s strengths and weaknesses (they all have them), I tend to stick with it.
After 5 solid years of use, I decided it was time to say goodbye to the XT2 and hello to the newly released XT5. Before buying the XT5, I briefly considered the recently released XH2 but decided against it as I wanted to stick with the familiar dials and ergonomics of the XT range.
Having now used the camera for 6 months and along with a few of the photos I’ve taken with it, I wanted to share some of my thoughts and opinions on the Fujifilm XT5 from a landscape photographer’s point of view. As with my other gear reviews, this will be far from scientific (a simple Google search will provide you with those). I won’t talk about every new and improved feature this camera offers, these are my personal observations and opinions based on how I use the camera in the field and other people’s experiences may differ from mine.
What’s in my camera bag?
Before we get into the XT5, I wanted to mention what gear I currently carry with me while taking landscape photos. More specifically, the lenses I use with my XT5 on a day-to-day basis.
At the moment, I am quite happy carrying just 2 lenses, the XF16-55 f2.8 standard zoom and the XF50-140 f2.8 telephoto. These are red badge lenses so considered the best quality in the XF lens lineup and give me an effective focal range of 16 to 140mm (24mm to 200mm in 35mm terms) which is fine for 95% of the photos I take. That being said, with constant f2.8 apertures, they may be better quality but they’re also a lot heavier than Fujifilm’s variable aperture lenses. Worth thinking about if weight is a priority.
You may have also noticed the DJI Mini 3 Pro which I also reviewed from the perspective of a Landscape Photographer. You can read about that here.
For more details about all the gear I carry in 2023, pop over to my latest “Whats in my camera bag” blog post.
Is the Fujifilm XT5 bigger and heavier than its predecessors?
Well, yes and no. It would have been fair to assume that the XT5 wouldn’t be immune to the current trend that sees mirrorless cameras getting bigger over time and yes, compared to the XT2 (133 x 92 x 49mm, 507g) the XT5 (130 x 91 x 64mm, 557g) is slightly bigger and heavier, but Fujifilm has, to their credit, shaved off a little size and weight compared to the XT4.
However, in real terms, these numbers don’t really mean a lot to me. A few mm here, a few grams there won’t make a huge difference and although its important camera manufacturers keep the size and weight of their respective systems in check, it’s probably easier to say that the XT5 is around the same size as those before it. That’s a good thing.
Fujifilm XT5 | XF16-55mm | 16mm | 1/100th Second | f/5 | ISO125
I spend a lot of time hiking up hills, exploring woodland or even as per the picture of London above, climbing the 528 steps to the top of St Paul’s Cathedral. So, what’s even more important to me is that I choose to shoot with a smaller, lighter system compared to the full frame and medium format systems. Using an APS-C system allows me to carry the XT5 along with 2 heavier, flagship lenses and still have a lighter camera bag compared to other full-frame or medium format systems.
How good is the XT5 build quality and weather sealing?
Landscape photographers need to be able to shoot in almost any condition and in all but the most extreme weather, should be able to do so without the need of additional rain covers and shower caps. The Fujifilm XT5 has a weather-sealed body and when coupled with a weather-resistant lens such as my XF16-55mm or XF55-140mm, I’m able to shoot in most conditions. In the 6 months I’ve been using this camera, I’ve shot in many a wet and rainy woodland, the wintry mountains of Snowdonia and some stormy weather by the coast and so far, so good.
Fujifilm XT5 | XF16-55mm | 18mm | 2 Seconds | f/8 | ISO125
That’s all well and good but there have been questions raised about the amount of plastic used in the construction of the XT5 compared to previous models making it look and feel a little cheaper. I guess if being particularly pernickety, it probably does a little but in the 6 months since buying the camera, I’ve literally given it zero thought. In all fairness, Fujifilm makes no claims that the camera is fully waterproof and certainly doesn’t provide an IP rating. So, although I would happily shoot during an average rain shower, I would stop short of exposing it to a prolonged torrential downpour.
What about the XT5’s physical dials, dual memory card slots and tilting screen?
Although I already had dual memory cards, physical dials and a 3-way tilting LCD on the XT2, I now consider these a must when picking a camera to use for landscape photography.
Coming from the world of IT, I know too well how technology should not be relied upon, however robust it might seem. The last thing I want is for a whole day of shooting to be lost because my only memory card suffered a failure at the wrong time. This is why I’ve configured the XT5 to write my raw files to both cards simultaneously, creating an instant backup while out in the field.
Fujifilm XT5 | XF16-55mm | 16mm | 1 Second | f/8 | ISO125
Next up, those physical dials. For me, these were a game changer. Apart from the warm fuzzy feeling of nostalgia I get when using them, being able to fine-tune my exposure by feel, without a menu in sight makes life so much easier when out taking photos. This is especially true in the winter when using gloves or when the camera is low down to the ground like it was when photographing the Sussex coast as pictured above, which can make accessing menu buttons trickier.
Talking of having the camera low to the ground. As a landscape photographer, this will often be the case and having a tilting screen means I don’t have to be down there too. Whether I’m shooting in landscape or portrait mode, the 3-way tilting LCD means the screen will tilt in my direction whatever its position.
Fujifilm XT5 | XF16-55mm | 55mm | 1/10th Second | f/11 | ISO125
How good is the battery life on the XT5?
With the larger W235 battery used in the XT5 compared to the smaller X126s I was using in the XT2, for me at least, battery life has improved dramatically. A game changer in fact. This was my main gripe with the XT2 as I was constantly having to change out dead batteries midway through a shoot.
The extra battery life really came into its own during the 48 hours I spent in a wintry Snowdonia. The temperature during the day barely made it above freezing and being so cold will reduce the amount of charge the battery will hold, but irrespective of this, I was still able to shoot from sunrise to sunset on a single charge.
Fujifilm XT5 | XF50-140mm | 69mm | 1/2 Second | f/9 | ISO125
Even if upgrading from the XT4 which also uses the W235, Fujifilm still claims an improved battery over its predecessor due to the reduced power consumption of the X-processor 5. So, I think it safe to say that Fujifilm has made a big step forward in battery performance since introducing the larger W235 into their recent flagship cameras.
Is the XT5’s 40-megapixel sensor worth the upgrade?
Fujifilm announced their 40.2MP sensor a long time before it was released and the prospect of having the extra resolution was exciting, opening new possibilities for cropping in post or bigger prints. I was, however, slightly concerned about how cramming more pixels onto the same size sensor would affect image quality and, if it would result in noisier pictures.
Fujifilm XT5 | XF16-55mm | 55mm | 1.3 Seconds | f/6.4 | ISO125
I’m pleased to report that I’ve not found the pictures I’ve taken so far to have any more noise than I was used to with the XT2. That was a big surprise and a welcome one at that! Don’t get me wrong, Do I still see noise in some of my images? Of course. There will always be situations where the light levels are such that avoiding noise altogether is impossible, but overall and in my own unscientific way of pixel peeping, I don’t see any negative impact of those smaller pixels all bunched up together on this new X-Trans CMOS 5 HR sensor.
One thing that I was hoping for and something Fujifilm appear to have delivered is improved dynamic range performance. Again, not something one expects when increasing pixel density but given this sensor is a few generations newer than what I was using, I was very much hoping for this to be the case. I did a little research on this topic and for sure, many out there say the dynamic range has gone backwards slightly and still not as good as the XH2 which uses the same sensor but from my own real-world usage, the dynamic range has definitely improved for me. Sure, it’s still not up there with the full-frame and medium format systems (pesky laws of physics), but what I can say is that with my woodland photography, where high dynamic range scenes are commonplace, I’ve not had to bracket my images nearly as much as I used to. Saving me time during editing and saving space on my hard drive too!
Talking of hard drive space, with the increased resolution comes increased file sizes so if you’re tight on raw file storage space, consider shooting with the compressed raw enabled on the camera or prepare to invest in bigger hard drives.
Fujifilm XT5 | XF50-140mm | 140mm | 1/50th Second | f/7.1 | ISO125
Is the Pixel-Shift on the XT5 worth all the hype?
Remembering this article is about sharing my experience, I’m going to say no……for now.
Pixel Shift, which can be enabled in the menu, is where the camera will take 20 separate photos, shifting the sensor by half a pixel each time and by using a separate software on your computer, you can merge the photos together to create a huge 160MP image.
Taking landscape photos can often mean a static scene where 20 separate photos won’t capture any movement but add in some waves along the coast or some subtle breaths of wind in the woodland and suddenly things start to get a little trickier. I’ve used this feature a few times to see how well it works and if you have a static scene and need that extra resolution, then having this option available is great, but, given the extra disk space needed and the time it takes to merge them together in post-processing, it’s not something I think I will use very often personally.
Fujifilm XT5 | XF16-55mm | 53mm | 1/40th Second | f/8 | ISO125
What about the Fujifilm XT5’s improved autofocus?
This is where things went a little awry for me. Fujifilm boast that due to the higher pixel count in the XT5, the number of phase detection pixels also increases resulting in an improved AF-S focusing accuracy when taking landscape photos.
With the XT2, I preferred to use back button focus when taking landscape photos. When composing an image and selecting the autofocus area, the XT2 locked in nearly all cases without issue, and I only really needed to switch to manual focus in trickier, low-light situations. I didn’t really give it much thought as it just worked.
Fast forward to getting the XT5 out in the field and after setting the camera up to work in the same way, things were a lot different. When pressing the back-button focus, the XT5 was missing focus almost 50% of the time. It was incredibly frustrating and after a little research it seemed I wasn’t the only one to notice how poor the autofocus was on this camera.
Fujifilm XT5 | XF50-140mm | 66mm | 0.4 Seconds | f/9 | ISO125
With zero trust in the autofocus, I switched to manual focus 100% of the time which, although not the end of the world, did slow down my workflow a little.
This went on for about three or four months and although I’ve not seen anything specifically from Fujifilm on the subject, since applying the firmware updates released since, the issue has improved somewhat. I still refuse to default back to my previous workflow as my trust in the autofocus hasn’t been restored but when using features like focus bracketing, which depends on autofocus, I do have a little more confidence that the results will be sharp.
Again, this was my personal experience and there are built-in tools that can help your focusing workflow such as focus peaking, but for me, a quick zoom-in and out again to check the image sharpness works just as well.
Update: I wrote this post just before firmware v2.0 was released, which included some significant focus improvements for the XT5. Since applying this and subsequent lens updates, the camera has had far fewer issues with autofocus.
Does Adobe Lightroom play nice with the XT5 RAF files?
I’ve used Lightroom (Classic) to edit my raw files for many years, long before I swapped to Fujifilm in 2016 and I think it’s fair to say, Lightroom has not always played nice with Fuji raw files - worms anyone? If you know, you know. These days, life is a lot easier when it comes to editing Fujifilm RAF files in Lightroom, either Adobe has improved the compatibility, or I’ve just learned to avoid the pitfalls as I run through my usual workflow (step away from the sharpening slider). In truth, it’s probably a bit of both.
One approach I use is not to apply any sharpening in Lightroom and instead, when I want to prepare for print or screen, I export to Photoshop and use the High Pass filter on a separate layer (between one and two pixels radius) and the Overlay blending mode, masking in the areas I want to be sharpened. A method I still do today and works best for me.
Fujifilm XT5 | XF50-140mm | 140mm | 1/8th Second | f/9 | ISO125
There are, however, still times I feel Lightroom doesn’t render my raw file with the amount of detail I know the file contains. I’ve heard many times that other editing software is more sympathetic to the Fujifilm raw files, but I really don’t want to learn another software. Instead, for those times I need a little more detail I use a plug-in called DXO Pure Raw. I don’t run every picture I take through the software as I prefer some to be a little softer or painterly but when a bit more detail is called for, it seems to do the job nicely.
Conclusion
I’ve written a lot about the features and benefits of using the XT5 for landscape photography and there are many great features I decided not to talk about such as the 7-stops of IBIS, improved video modes, subject detection and white balance driven by AI (whatever that means) but in truth, my needs are quite basic meaning I probably only use about 10% of the camera’s features for my landscape photography and it would be wrong for me to review those I haven’t used extensively.
So, would I recommend this camera to other landscape photographers? The simple answer is yes. If size and weight is important to you, the XT5, with its fantastic image quality, intuitive ergonomics, weather sealing and much-improved battery life, packs a real punch.
I hope you found that useful and enjoyed some of the photos I shared. If you have anything to add such as any points I missed or questions about the camera, please leave a comment below or contact me directly here.
Until next time
Trevor
My Top 10 Tips for Woodland Photography
In this article, I list my 10 top tips for getting the very best woodland photos from when to shoot, how to eliminate distractions and what gear can help improve your images.
I’ve been taking photos of the landscape for a number of years now but more recently, I discovered the joy and subsequent benefits of woodland photography. Woodland photography is a beautiful and relaxing way to connect with nature while still allowing me to practice this creative craft I enjoy so much. It encourages me to explore and learn about the wildlife I see and offers a sense of peace and tranquillity, allowing me to escape life’s more hectic demands, even if it’s just for just a few hours.
During this time, I’ve made plenty of mistakes, learned lots of lessons and picked up new skills that have helped me take better woodland photos. So, this blog post is my attempt to share some of those lessons and provide a little inspiration to those who might not be quite as far along in their own woodland photography journey.
So here are my top 10 tips for woodland photography.
Fujifilm XT2 | XF10-24mm | 11mm | 1.5 Seconds | f/10 | ISO400
#1 Photograph the Seasons
There are so many reasons to pay attention to the way a woodland changes over the course of 12 months and being aware of these can open up so many creative possibilities when it comes to woodland photography. One popular example is to find a particular composition that works in all seasons and take the same picture in spring, summer, autumn and winter, creating a ‘through the seasons’ series. This might sound cliché, but some I’ve seen are simply amazing and it’s a useful little project that encourages you to go back to the same place to observe how it changes. To get the best photos, you might have to wait several years to get a portfolio image of a particular season but chasing that shot is part of the fun. I have a few on the go but haven’t quite made it to all four yet.
Alternatively, knowing how your local woodland changes through the year may also open up new photographic opportunities. There will be places that lack photographic allure in (let’s say) summer but come alive with opportunities at other times of the year. For instance, in my local woodland, there is a lot of fern growth which means parts of the forest are completely cut off in the summer months but from late autumn to late spring, those areas of woodland are easier to explore with the camera.
Another example is the bluebell picture below. Of course, bluebells in spring are beautiful in their own right but in this particular location, the woodland floor is typically messy with fallen branches and patchy plant life, but, for a few weeks each year, the bluebells completely cover the messy floor resulting in a much cleaner photo.
#2 Photograph the woodland whatever the weather
While perfectly defused golden hour lighting can create beautiful woodland photos, don't be put off by cloudy, or even rainy days with less inspiring light. I for one love to head out into the woodland while the sun is obscured as the softer, diffused light of an overcast day can result in quieter, lower contrast images, helping to create a moody and ethereal feel to your photos.
Even if the sky is blue and there is high contrast, midday light to contend with, don’t let that stop you. Personally, I struggle in such situations but when I do find the light too bright and distracting for my usual style of woodland photography, I will change tact and more often than not, point my camera down towards the ground and seek out small scenes with interesting patterns and details hiding in the shadows and away from those pesky specular highlights. More on that in the next tip!
Fujifilm XT2 | XF55-200mm | 55mm | 1/8th Second | f/9 | ISO250
#3 Point your camera towards the floor
Getting into the habit of taking pictures of the woodland floor is something I’m still getting to grips with. It took a while for me to move away from the traditional “landscape” style photo and start paying attention to the smaller shapes and textures hiding amongst the undergrowth, but once I did, I never looked back. A year or so into my woodland photography experience, I started heading out into the forest just to see what small scenes I can photograph, completely ignoring the wider landscape photos I usually look for.
With so much texture and pattern on offer, once you get the camera up close to these smaller scenes, you will be able to tap into a wealth of photographic opportunities and although getting down that low can often be a little tough on the back, by slowing down and taking your time to compose the image properly, you will undoubtedly capture some beautiful, intimate woodland photos.
#4 Look out for mist and fog in the woodland
Although it should never be considered the be-all and end-all of woodland photography, I think it’s safe to say that the majority of woodland photographers prefer to shoot in misty/foggy conditions, and for good reason. A scene full of branches and leaves can be a cluttered, messy affair and one of the challenges with woodland photography is simplifying the composition. This is where a foggy woodland comes into its own as not only can a fog add depth and atmosphere to a scene, but it can also help declutter the composition, providing a sense of space and room for the subject to breathe.
#5 Avoid a distracting sky
Unless you are blessed with the defused light of a foggy woodland, there’s a good chance that by including the sky in your woodland photos, you will be left with some distracting highlights around the top of the frame. With the lower light levels under the trees and the bright sky, the dynamic range will be extreme enough to push the limits of most modern cameras. So, what to do if you come across this situation yourself?
Avoiding the sky completely in your woodland photos can be tricky, but one option to avoid it is to shoot from an elevated position. Keeping the camera pointing slightly downhill can cut some or all of the brighter sky out of the frame. Alternatively, if there is space to do so, try stepping back away from the scene and then use a telephoto lens to zoom back in to better isolate your subject.
Lastly, choose a time of year when there are plenty of leaves on the trees. Like with the picture below, during the warmer months, the woodland will be much fuller and as a result, a lot less sky will be included in your compositions.
Fujifilm XT2 | XF55-200mm | 55mm | 1.4 Seconds | f/13 | ISO200
#6 Pack a circular polariser to give your photos some punch
If like me, you enjoy photographing the woodland early in the morning or in damp conditions, you will almost certainly come across wet, reflective leaves in your scene. Reflective light can be pretty distracting in your woodland photos which is why I recommend packing a circular polariser (CPL) filter in your camera bag. A CPL filter works by blocking the reflective light from entering your lens which means less glare and more punchy colours in your woodland images. This effect is practically impossible to replicate in post, so, to get the very best quality pictures in these conditions, it’s definitely worth mounting a CPL onto the end of your lens.
Just a word of caution. A common mistake many photographers make is to automatically turn the CPL all the way; removing all reflective light from the image. This can result in flat, highly saturated pictures. My advice is to rotate the filter back and forward until there is a good balance between eliminating the distracting reflections and retaining some of the life in the scene.
Fujifilm XT2 | XF18-55mm | 29mm | 2 Seconds | f/10 | ISO200
#7 Remember, the woodland is always changing
These two images below were taken in separate woodlands and are among my favourite woodland photos I’ve taken. I’m so happy I found and photographed them when I did because they now look very different as they were both devastated by stormy weather in early 2022.
So, tip number seven is to not take the apparent static nature of woodland for granted. If you find a location worth photographing and conditions are not quite right at the time, don’t wait too long to return. Through the hand of man, or mother nature herself, it can change literally overnight and like in my case, a couple of locations I planned to return to look completely different now.
Fujifilm XT2 | XF18-55mm | 31mm | 0.6 Seconds | f/9 | ISO200
Fujifilm XT2 | XF18-55mm | 29mm | 1/6th Second | f/8 | ISO200
#8 Get to know your local woodlands
This may seem similar to shooting the seasons or observing the changes in your woodland but getting to know your local woodland goes a lot deeper than that. If you speak to any experienced woodland photographer and they will tell you that knowing a location intimately is by far the best way of getting the best woodland photos.
When heading to new locations or those you can’t visit as often as you like, luck can play a huge part in taking portfolio-worthy pictures as you might not get the best light, or you might not know the best time of day/year to photograph that particular location. Having a local woodland only a short walk or drive from where you live means you remove the need for some of that luck as you can keep returning until the conditions are right. If you live close enough, you can afford to be reactive to the weather conditions and as soon as the fog comes in, you can grab the camera and head out!
Taking it one step further, having the ability to return again and again means the pressure to get a portfolio image on any given trip is removed, meaning you can relax more as you wander the woodland. This will help you slow down and get under the skin of the woodland, helping you fully engage your mind and in turn, spot compositions you might have otherwise walked straight past.
The below four pictures were all taken from the same woodland only 5 minutes’ drive from where I live.
#9 Try different focal lengths
Depending on the subject you are trying to shoot, experimenting with different focal lengths can transform the look and feel of the photos you take.
A wide-angle lens can help you include more of the scene and capture the grandeur of the woodland you’re in, enabling you to include more compositional elements such as an interesting foreground or more dramatic lead-in lines. As appose to using a wide-angle, the telephoto lends itself to seeking out more intimate details, helping you to eliminate distractions and focus on the shapes, colours and texture the woodland offers. As I mentioned in tip #5, when you have a bright distracting sky, this is where a telephoto focal length can save the day.
Play around with different lenses to see which ones work best for the photos you want to take.
#10 Leave no trace
The enthusiasm for the natural landscape is on the rise, particularly since the pandemic as so many people have re-discovered the beauty of their local woodlands. But all this footfall is having a big impact on these important natural spaces. That’s why, through effective education and following a few simple principles, these popular places can still be visited and enjoyed, but remain protected for future generations to experience.
I’ve shared the bluebells photo below as this is a good example of how our actions directly impact these natural spaces. The bluebell is actually a protected species in the UK and picking or digging them up is illegal but not many people know just how fragile they really are. Bluebells can take years to recover from the damage caused by people trampling over them just to take a selfie, and if their leaves are crushed they can be weakened (as they can no longer photosynthesis). This can all be avoided if everyone sticks to the woodland pathways.
Nature First is just one of many organisations trying to help us woodland photographers to keep these natural spaces safe and they have a few simple principles to follow. By doing so, we can all do our part to preserve our beautiful woodlands.
Prioritize the well-being of nature over photography.
Educate yourself about the places you photograph.
Reflect on the possible impact of your actions.
Use discretion if sharing locations.
Know and follow rules and regulations.
Always follow Leave No Trace principles and strive to leave places better than you found them.
Actively promote and educate others about these principles.
Fujifilm XT2 | XF55-200mm | 67mm | 1/13th Second | f/9 | ISO200
There you have it, with a few simple techniques and ideas, you can take your own woodland photography to the next level.
I hope this blog post will help anyone that might be lacking some inspiration and the motivation to get out there and take amazing photos of our beautiful, wooded areas. if you have any more tips you want to share, feel free to leave them in the comments below.
Until next time
Trevor


