BLOG ARCHIVE
On The Canals | Weekly Photo #2
We spent three incredibly relaxing days navigating our narrow boat along the Grand Union Canal with some friends and family and I managed to grab a few minutes here and there to take a couple of photos along the way.
This week’s photo was taken while on a family trip along the Grand Union Canal which runs between Birmingham and London. We spent three incredibly relaxing days navigating our narrow boat along the waterways and although this was not a photography trip, I couldn’t resist peeling off for a few minutes here and there and capturing a few shots of the canal.
Fujifilm X-T30 | XF18-55mm | 55mm | 1/250th second | f/5 | ISO500
As this wasn’t a photography trip and space is a little tight on these narrow boats I took just a single camera and lens combo with me. I took the Fujifilm X-T30 and the incredibly versatile XF18-55mm lens. I even considered just taking the 35mmF2 prime lens but not having hired a narrow boat before, I wasn’t sure if the single focal length would be a little too limiting. I made the right choice.
The great thing about having the newer X-T30 is the extra resolution. On top of using all of the 55mm focal length I had available, it still needed a bit of cropping too but the final image is still 18MP and plenty large enough to print.
If you are looking for a relaxing trip and fancy exploring the British countryside, then do consider a canal holiday. It was fantastic.
This post is featured in my Weekly Photo series where I post a new photo every Monday. To have this delivered directly to your inbox, you can subscribe to the mailing list here.
On Location Photographing the Golden Hour in London
I recently took a walk along the River Thames, London with my Fujifilm XT2 and XF18-55mm lens starting at the London Eye to the Tate Modern and across the river, finishing at St Paul’s Cathedral. Along the way, trying to embrace the strong sunlight and deep shadows while capturing a mix of street and architecture photos.
“Light makes photography. Embrace light. Admire it. Love it. But above all, know light. Know it for all you are worth, and you will know the key to photography.”
This well-known quote increasingly resonates with me and I will be the first to admit, that I have a long way to go before I have mastered the art of seeing light…but I’m getting there. Not so long ago, it would have been rare to catch me without a tripod as I took photos in London. My eye was fixed on the city’s skyline or architecture which to a large degree still is but I when capturing a cityscape, the wide vistas rely heavily on an interesting sky with great light and with all of the planning in the world, once set up ready to take the shot, I have to wait for the light to find me. Sometimes it all comes together but more often than not, I am left without an image.
Back in 2018, I started a project called London Chrome. This project continues today and was started to help me develop my photographic craft by wandering the streets, unchained from a tripod helping me to develop my eye for shapes, composition and light with a degree of success.
These days, as I wander the city, camera in hand looking for compositions, I am now using light as a part of the composition much more effectively, embracing dark shadows while attempting to balance the composition with both the subject and light.
A few weeks ago, during a bright sunny morning, I took a walk along the River in London with my Fujifilm XT2 and XF18-55mm lens starting at the London Eye, crossing the river at the Tate Modern and finishing at St Paul’s Cathedral. Along the way I tried to take advantage of the strong sunlight and deep shadows while capturing a mix of street and architecture photos. In terms of mastering the light, I think I still have a long way to go but I’m comfortable with that. Mastering photography is a journey, probably a life long one and once that reality hits, the pressure to capture a winner every time is lifted. I’m really enjoying this phase of my photographic journey, embracing new challenges and seeing where it takes me.
If you ever feel wanting for some creative inspiration, maybe down in a photographic rut, then I urge you to change things up, take on a challenge or start a new personal project and just see what happens. Exploring the unknown can be quite liberating.
I will leave you with a few of my photos from my photo-walk along the River Thames.
Fujifilm XT2 | XF18-55mm | 18mm | 1/110th second | f/8 | ISO200
Fujifilm XT2 | XF18-55mm | 18mm | 1/150th second | f/9 | ISO200
Fujifilm XT2 | XF18-55mm | 55mm | 1/220th second | f/9 | ISO200
Fujifilm XT2 | XF18-55mm | 18mm | 1/400th second | f/9 | ISO200
Fujifilm XT2 | XF18-55mm | 18mm | 1/350th second | f/7.1 | ISO200
Fujifilm XT2 | XF18-55mm | 18mm | 1/1250th second | f/8 | ISO200
Fujifilm XT2 | XF18-55mm | 55mm | 1/1800th second | f/4 | ISO200
Fujifilm XT2 | XF18-55mm | 55mm | 1/340th second | f/4 | ISO200
Fujifilm XT2 | XF10-24mm | 10mm | 1/125th second | f/8 | ISO200
Fujifilm XT2 | XF10-24mm | 14mm | 1/250th second | f/8 | ISO200
Fujifilm XT2 | XF10-24mm | 14mm | 1/420th second | f/8 | ISO200
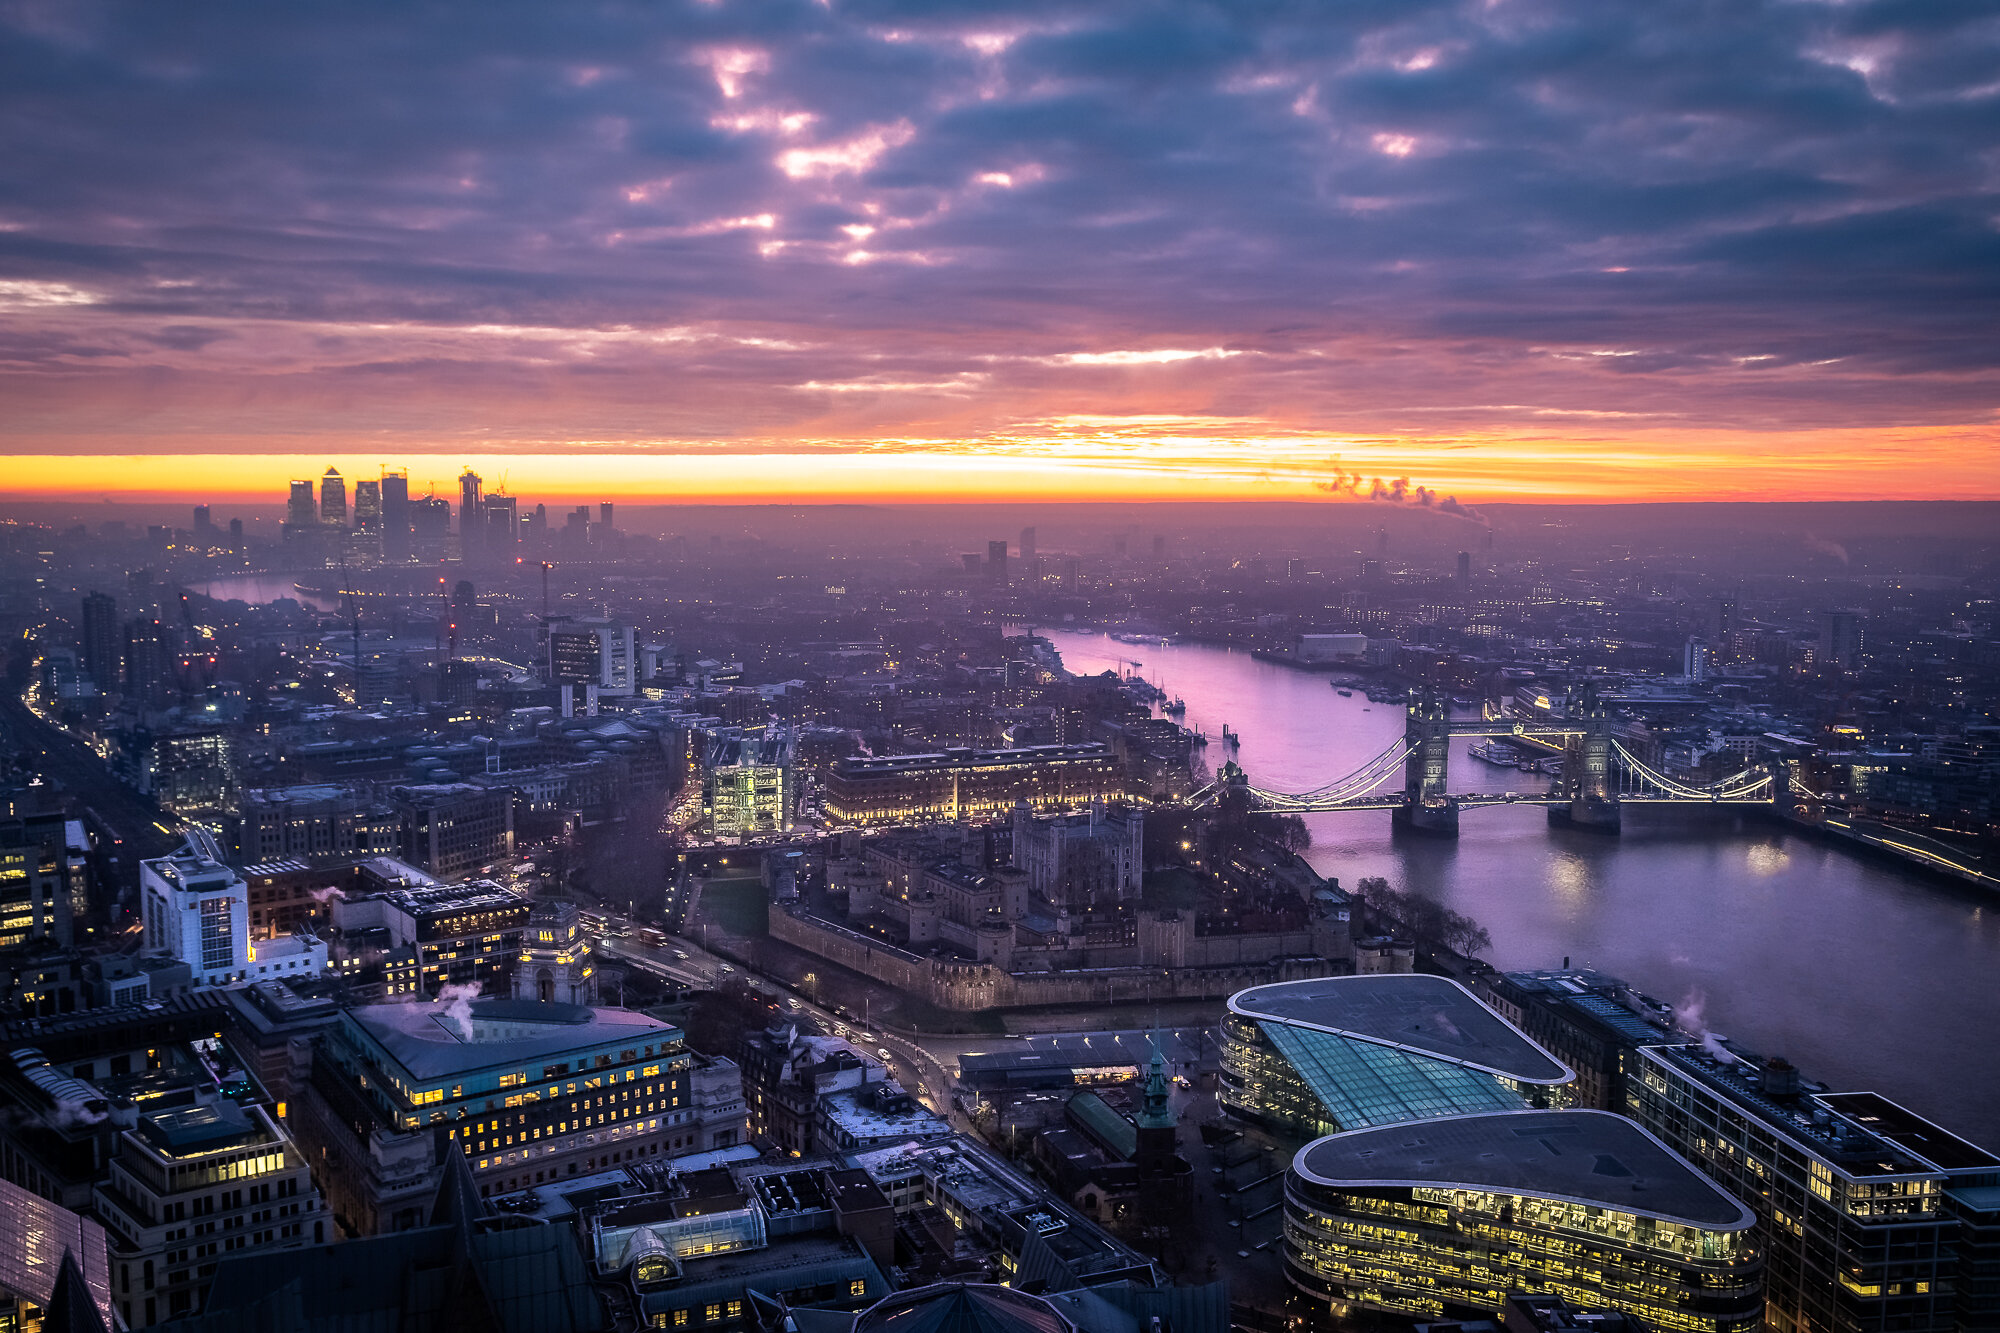
Sunrise in London | Weekly Photo #1
These are the photos that make getting up early and travelling, bleary-eyed into London worth it. This is one of my favourite photos I took in 2018 of, in my opinion, one of the best views in London so what better photo to start my new Weekly Photo series with.
Introducing My Weekly Photo Series
This is my first post in a new weekly photo series. It came about as I had been contemplating for some time about how I want to share my photos, both on my website and social media going forward. These days, probably since Instagram gained popularity, photography seems to be all about quantity, with quality often taking a back seat. I know this is the reality of now but I don’t want my photography to be dictated by how many images I can post in a day. I want to use these platforms to share my best photos, discuss the techniques I used, share information and engage with like minded people. I’m not saying that I don’t care if my photos gain recognition. Of course I do. Most artists, whatever their field, love to see their work being viewed by others, but I want the photography and story telling to be my priority.
I still plan to share a couple of longer articles each month but with a weekly photo series, I can focus on 52 of my favourite photos each year. Kind of like a 52-week challenge but with a mix of new and favourite pictures from my archive with a paragraph or two to accompany the image.
With the introduction done, let’s get to my first photo in the series.
Sunrise in London
Fujifilm X-T10 | XF35mmF2 | 35mm | 1/20,000 second | f/2 | ISO200
These are the photos that make getting up early and travelling, bleary eyed into London worth it. This is one of my favourite photos I took in 2018 of, in my opinion one of the best views in London so what better photo to start my new Weekly Photo series with.
This was the very first photo I took while out on a photo walk in London last September. Every time I leave from the train station and cross London Bridge from the south, I love the way this famous scene, which I have captured many times slowly appears to my right.
This isn’t a very original composition, so why do I like this photo so much? Well, apart from it being an iconic view of London, readers of my blog will know how I love to capture a bit of tranquillity in London’s cityscape and I certainly get that feeling in this photo. The cooler, hazy light is contrasted nicely with the strong highlights from the rising sun hitting the scene side-on which also provides a sense of depth in the image.
I captured this photo with my now, retired Fujifilm X-T10 and XF35mmF2 lens. Although I have since upgraded the X-T10 to the X-T30, this combination features in my ultra light-weight kit as mentioned in this “What’s in my camera bag 2019”.
This post is featured in my Weekly Photo series where I post a new photo every Monday. To have this delivered directly to your inbox, you can subscribe to the mailing list here.
My Top 5 Long Exposure Locations in London
I’m going to show you what I think are 5 of London’s top spots along the River Thames to take long-exposure cityscape photos of some of the city’s most iconic views.
I’m a big fan of long exposure photography. I love the way long exposure photography blends all of the elements, such as light and colour together in a single image. Colours tend to be softer, distractions removed and overall, I have a cleaner, less cluttered composition. This is especially true when applying the technique to my London cityscape photography. If capturing wide vistas of London’s skyline from the River Thames, it can end up a rather cluttered image. The fast-flowing river, the many, many people that walk along the banks and some of the less attractive or ill-fitting architecture can all add a sense of chaos and noise to the final image. By rendering the river silky smooth, removing all of the people and softening the sky, I find long exposure photography adds balance and focus to the final image.
“What makes photography a strange invention is that its primary raw materials are light and time.”
I previously wrote a more detailed article about why I take Long Exposures and what it brings to both the colour and composition of my images. You can find the post here: SLOWING TIME: WHY THE LONG EXPOSURE?
In this post, I’m going to show you 5 of my top spots along the River Thames that are ideal locations to capture long exposure photos of London’s iconic views. I will attempt to cover some of the more practical information such as how to get there and when to visit. It’s probably worth noting at this point that the list below is far from exhaustive. There are many other great locations along the river or elsewhere in the city to take long exposure photos but as mentioned, these are some of my top locations which I want to share with you.
In this post, I won’t talk too much about the technique or equipment I use but if you are interested in this, take a look at a previous article I wrote which covers my 10 step approach to taking long exposure photos: HOW I TAKE LONG EXPOSURE PICTURES.
One last thing to add before we jump in to the 5 locations is that all 5 are tripod friendly. Tripods are a key component when taking long exposure photos as the camera has to be absolutely still and like most cities, there are many privately owned areas with strict rules around tripod use but for all of these locations, you should have no problem with tripod police spoiling your fun.
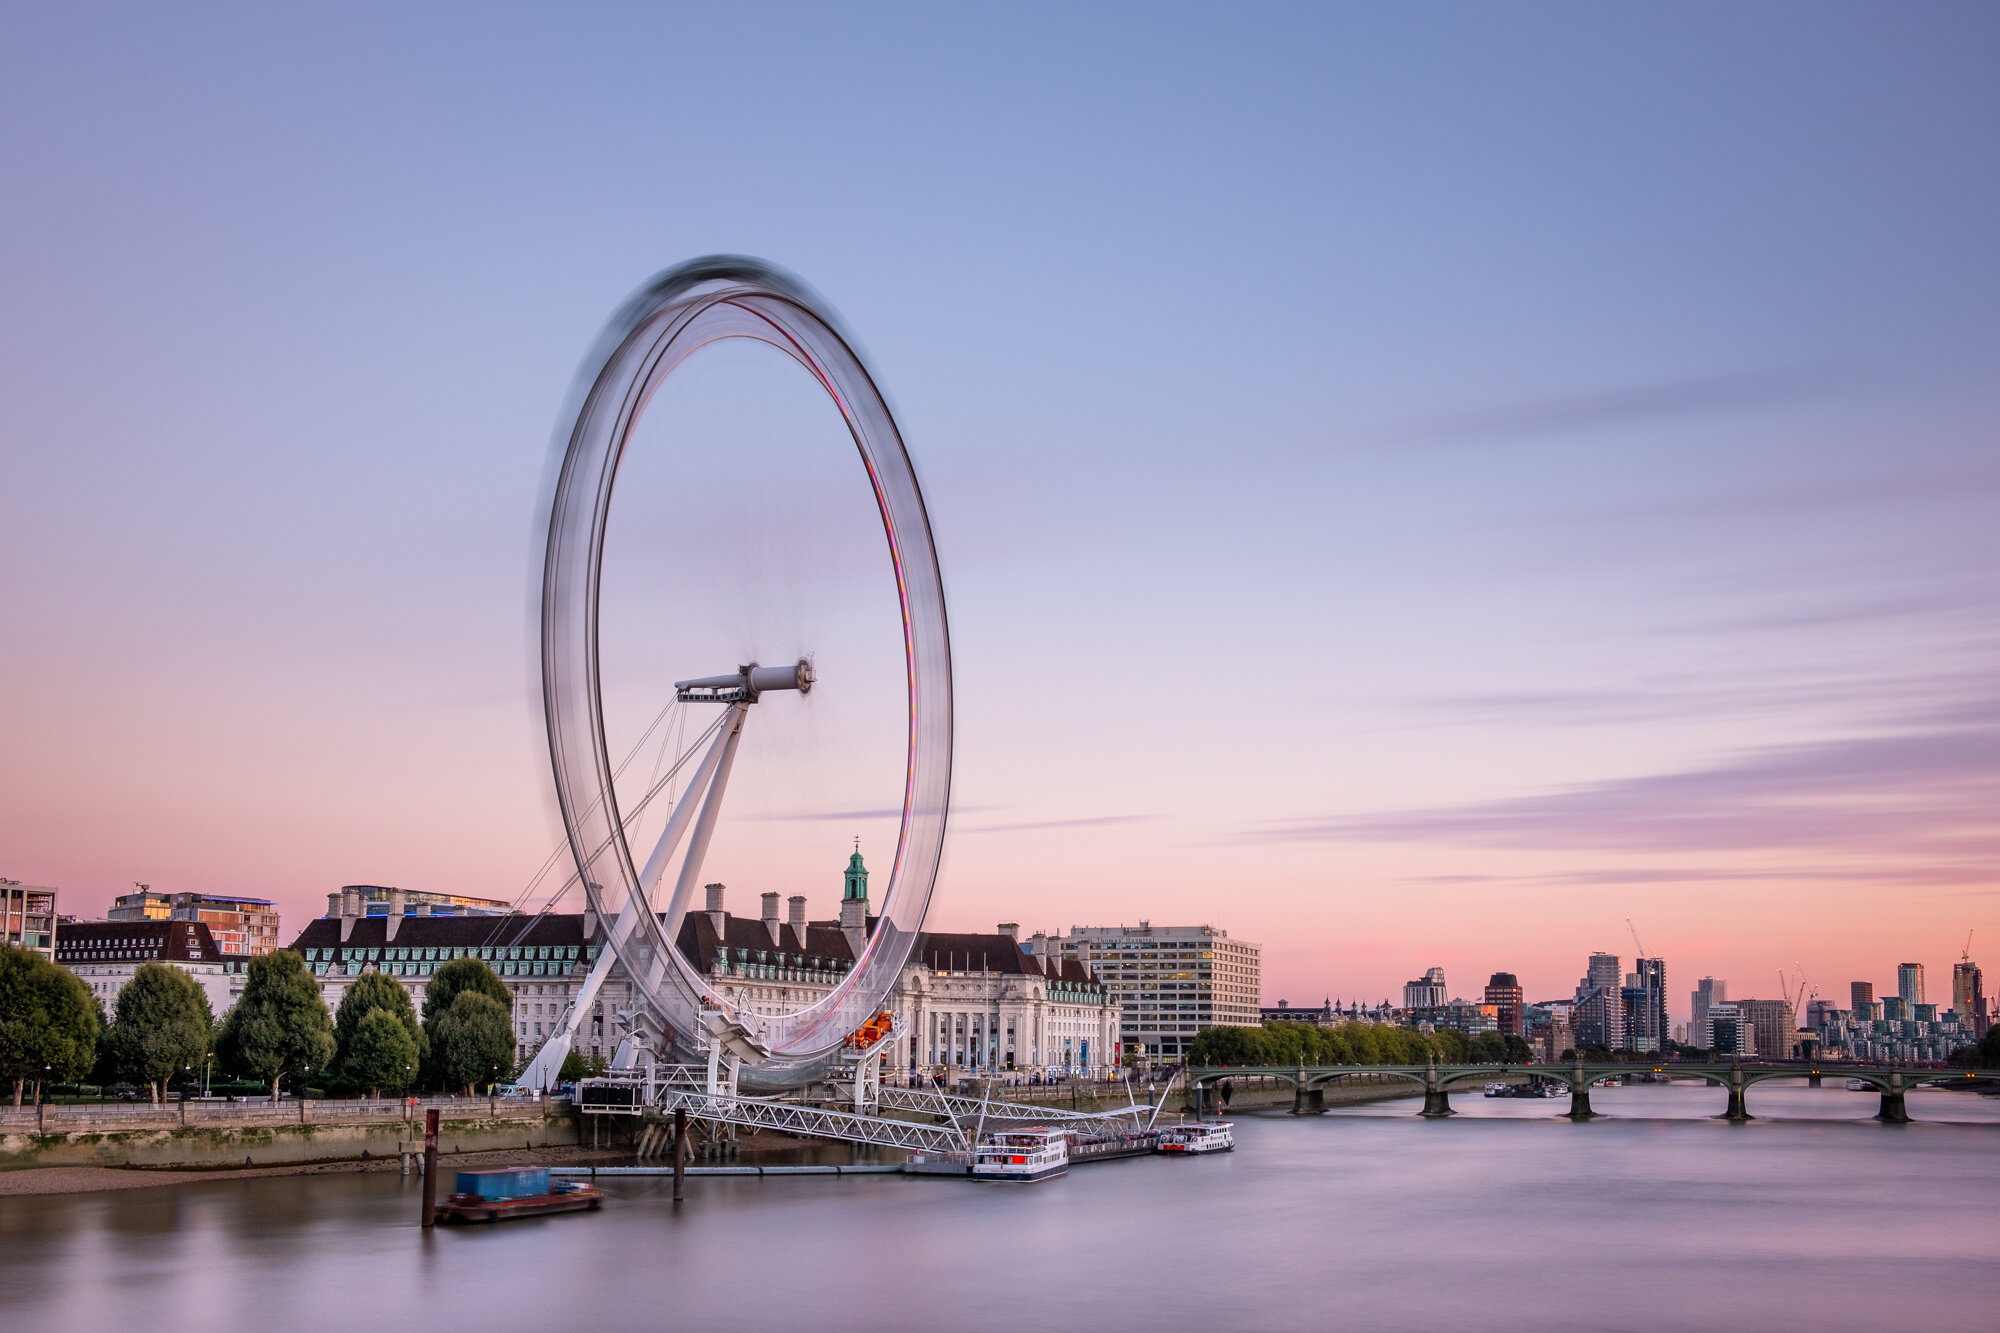
The London Eye from The Golden Jubilee Bridge
Fujifilm XT2 | XF18-55mm | 24mm | 121 seconds | f/10 | ISO200
Travelling West to East along the River Thames, we will start at the London Eye. The London Eye itself is probably the best landmark in London to capture with Long Exposure photography as the spinning wheel adds a great sense of motion and interest in the sky, especially when the sky is clear as in the photo here. There are a handful of great locations to capture the London eye such as from Westminster Bridge in the distance, directly from the front or behind the wheel but for long exposure compositions, this is my favourite.
Top tip: Opening times for the London Eye vary throughout the year so if you want to get the movement like that shown in the photo below you should ensure you plan the shoot while the London Eye is open.
Getting Here:
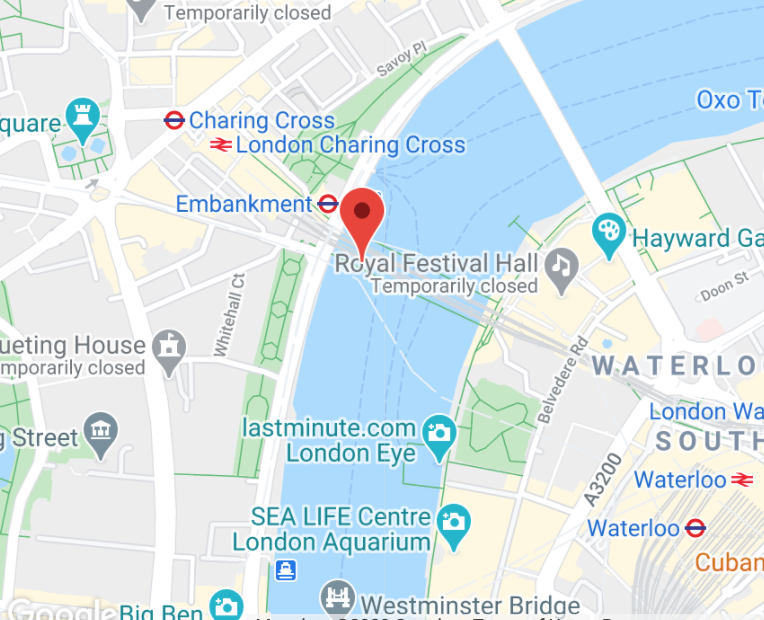
The nearest tube station is Embankment which is along the Circle and District lines. When existing the station, head towards the riverside and under Hungerford Bridge and up the stairs onto the southern Golden Jubilee Bridge.
Click here to open location on Google Maps
When To Visit:
The London Eye itself faces west so straight at the setting sun. This means during the golden hour and sunset, you can get some great light. You can still get some great shots of the London Eye at sunrise but I find it best to avoid the months Between September and March as the sun rises behind the London Eye which can cause issues getting a correctly exposed image. Oh, and you have to get up super early!
Westminster from Waterloo Bridge
Fujifilm X-T10 | XF18-55mm | 23mm | 58 seconds | f/11 | ISO200
Over the years, I have walked across Waterloo Bridge many times and love this view towards the west, but before I started taking long exposure photos, I never really captured a photo of it I particularly like. How does it go again? “A good view does not necessarily make a good photo?”
Usually, there’s a lot going on in this composition. With the rough waters, London Eye, people walking across the Golden Jubilee Bridge and along the Southbank, it’s hard to pick out the main focus points in the composition. By capturing the scene as a long exposure, some of these elements are removed from the composition leaving the rest of the image some room to breathe.
Getting Here:
There is a choice of tube stations for this location. Waterloo which is on the Jubilee Line or you have both Embankment or Temple to choose from on the Circle and District Lines.
Click here to open location on Google Maps
When To Visit:
To capture a good sunrise, the winter months are a great time to do so as the sun will light the scene from the left but I find the summer months the best time for capturing the evening light as the sun sets to the right of the scene, later in the evening meaning less river traffic to avoid in your photo and importantly, less people crossing the bridge as the path is a bit tight for space, leaving little room to set up the tripod safely.
If you’re interested as to how I edited the photo above, I wrote a post about the steps I took which you can find here: EDITING SUNSET AT THE SOUTH BANK
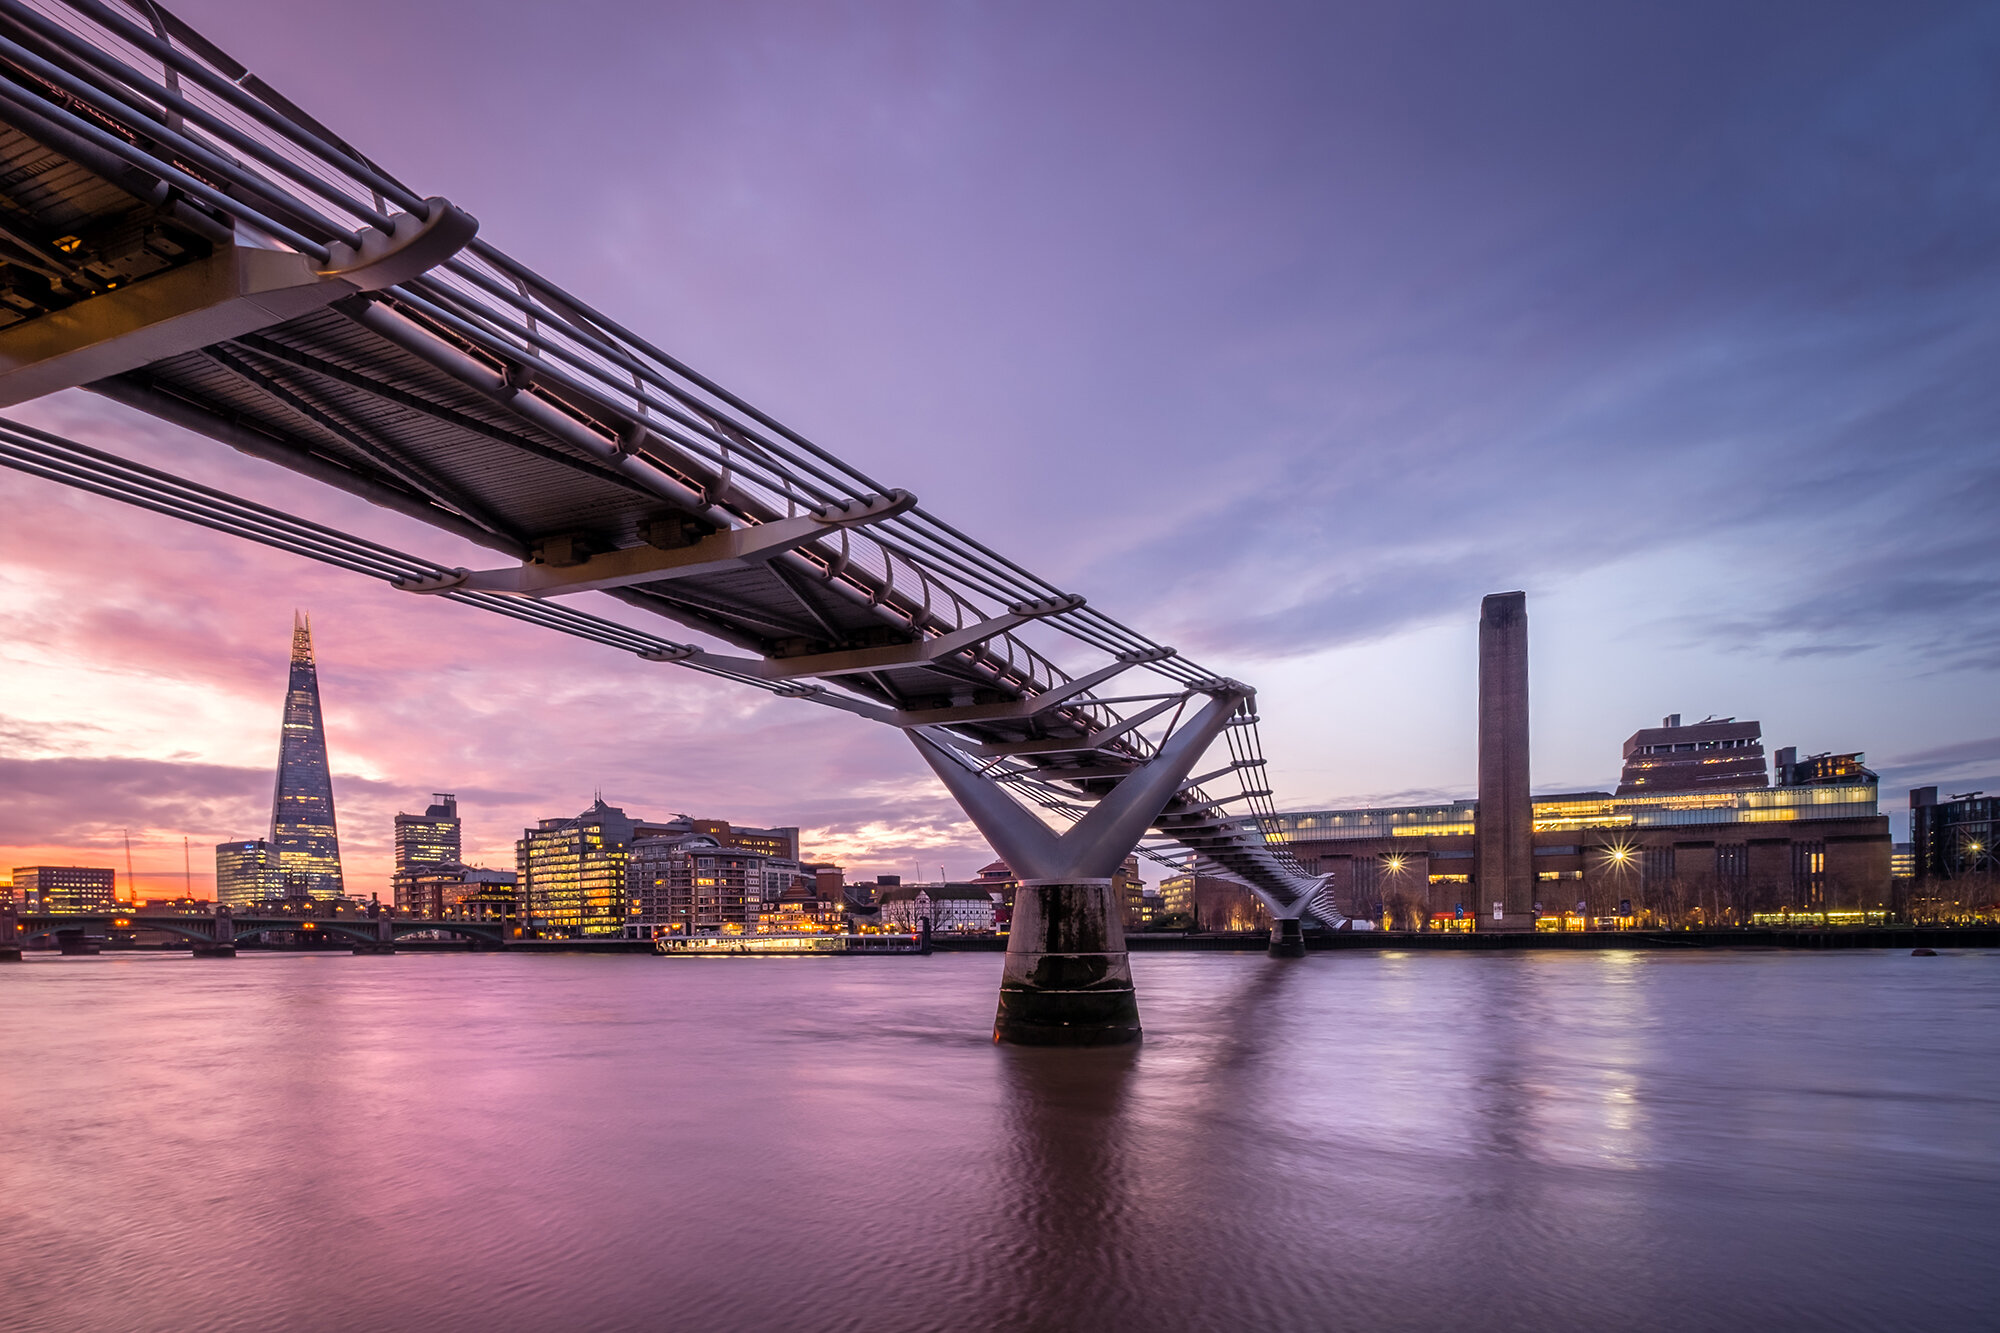
St Paul’s Cathedral and the Millennium Bridge
Fujifilm X-T2 | XF18-55mm | 25mm | 161 seconds | f/11 | ISO200
Continuing east along the river, the composition here is an incredibly popular one for good reason. The Millennium Bridge creates fantastic lead-in lines towards the world-famous St Paul’s Cathedral. The Millennium Bridge can be very busy at times and taking this photo with a standard exposure will capture all of those people compromising the strong, simple lines as you can see here but by using the long exposure technique, all of those people are rendered invisible in the final image simplifying the overall image.
Here you can see exactly the same photo taken with a 1/40s exposure showing people crossing the Millennium Bridge.
Getting Here:
This location is really easy to find. When I took this photo, I was situated right outside the front doors of the Tate Modern Museum on the south bank of the River Thames. Getting here is also super easy as there are many local stations such as London Bridge for National Rail, Jubilee and Northern Lines which are all located south of the river or on the north side you have Mansion House for the Circle or District Lines. You also have St Paul’s on the Circle Line. Head towards Tate Modern and you will find the spot right by the river.
Click here to open location on Google Maps
When To Visit:
Catching a good sunset or sunrise requires a bit of a late night or early morning as the summer months are best. During May to July, the sun rises in the north-east and sets in the north west. Facing north to take the photo, the sun is close by when the best light hits the cathedral. If you want to visit the area and have it all to yourself, then a summer sunrise, although incredibly early is the best option.
City Hall and the Shard from Tower Bridge
Fujifilm X-T2 | XF18-55mm | 18mm | 150 seconds | f/8 | ISO200
Looking west from Tower Bridge provides some great views of The Shard along with the striking architecture of More London and City Hall. Although they belong to different estates, the modern architecture of More London and The Shard complement each other nicely.
This view is another example of how using long exposure removes some of the distractions in an ordinarily busy scene to add calm and focus on the main subject. With the smooth water and softer clouds, the hard-chiselled lines such as those belonging to the Shard are enhanced leaving no doubt as to the main focal point in the composition.
Getting Here:
By far the easiest way to get to Tower Bridge is to take the short walk from either London Bridge (Jubilee Line, Northern Line or National Rail) or Tower Hill (Circle and District Lines). During the day and late into the evening, Tower bridge can be incredibly busy with tourists and commuters so, although tripods are allowed, there is a high risk of it being knocked or bumped. My advice is to keep the tripod retracted and take advantage of the deep walls around the towers to rest the tripod away from the foot traffic. Just be careful the camera is not knocked into the river!
Click here to open location on Google Maps
When To Visit:
As with Waterloo Bridge, if you want to capture a cracking sunset with a little less people around, I think the summer months are best. The sun sets just off to the right lights up the architecture beautifully and the later sunset means a little less foot traffic. As for sunrise, the winter months provide the best chance of great light in the clouds above the buildings as in December and January, the sun rises just off to the right of the scene.
Tower Bridge from the Girl and the Dolphin Fountain
Fujifilm X-T2 | XF10-24mm | 16mm | 150 seconds | f/11 | ISO200
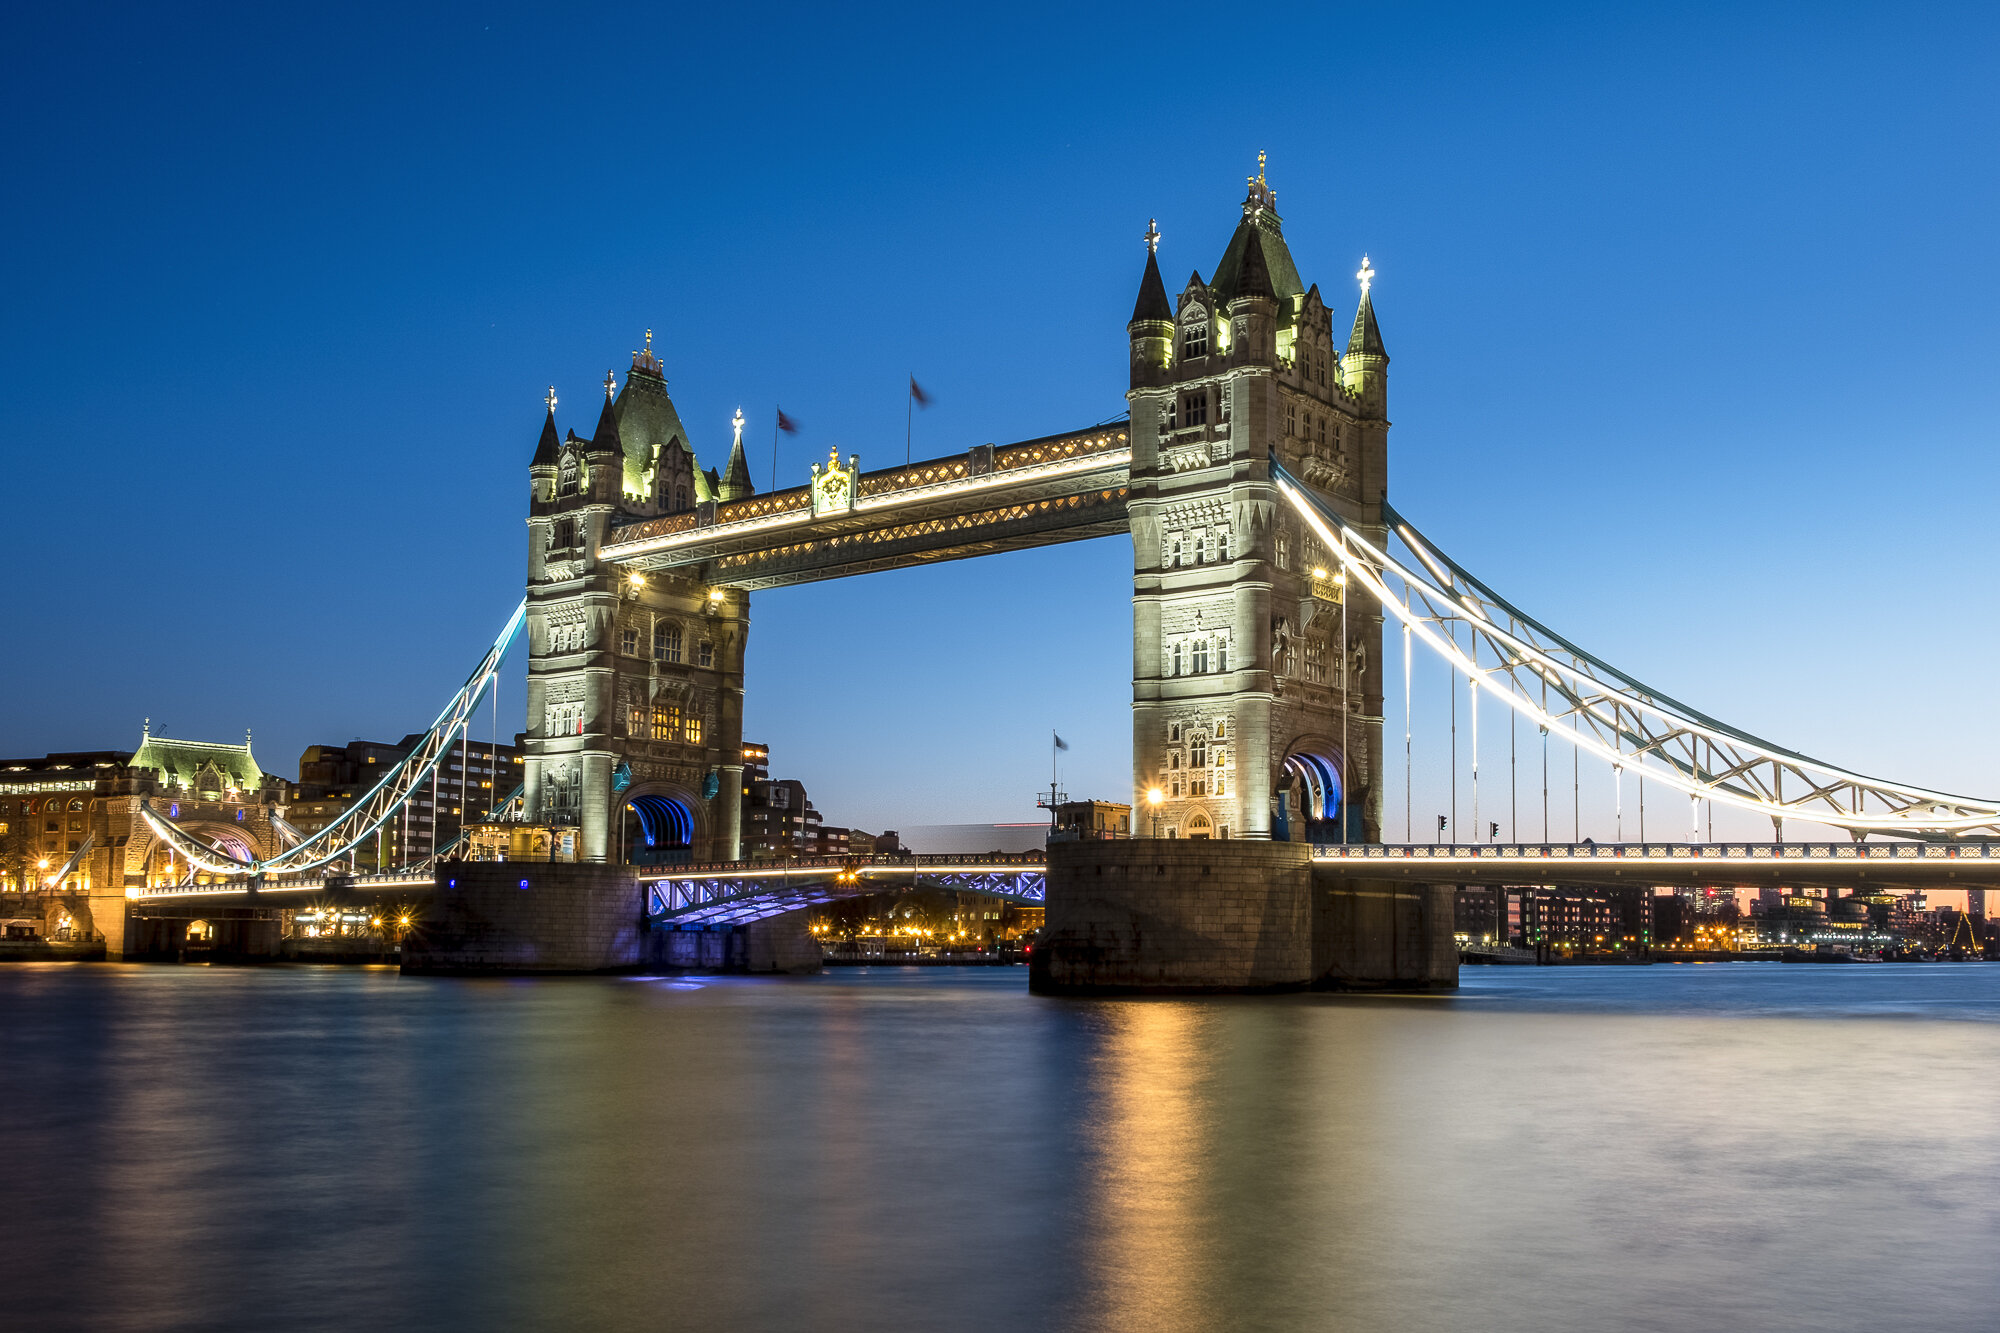
The last stop on this trip down the Thames is Tower Bridge. Tower Bridge is arguably one of the most instantly recognisable structures in the world. The twin towers are a fantastic subject for a long exposure photo and I think this location, with the fountain adding foreground interest, provides one of the best compositions of this iconic bridge.
Getting Here:
As with the location above, the easiest way to get to Tower Bridge is to arrive from either London Bridge (Jubilee Line, Northern Line or National Rail) or the now closer Tower Hill Station (Circle and District Lines). Once at Tower Bridge, the fountain is on the north side of the river right by to the stairs that lead to the bridge’s road level. You can’t miss it.
When To Visit:
You may have gathered from what you have read so far, I find the best light for a long exposure at sunrise or sunset and I find this location great for a sunset photo during the summer months. I’m not keen of having the sun set directly in the scene when taking long exposure photos as it creates too much contrast and can render the subject a silhouette. Having the light come in from the side or front of the subject creates a more balanced exposure and when an epic sunset takes place just outside the frame the best of the light is captured without fighting the dynamic range.
You may require a little patience when capturing this shot as this is the only location listed where people can literally walk in front of your camera. This is a popular spot for tourists capturing a look at Tower Bridge, usually standing for long enough to be rendered visible in your image, regardless of how long the exposure time is. If you want to avoid waiting for a suitable gap or even happy to risk not getting a clean shot at all, then a winter sunrise, all being well with the weather can provide a great shot with a lot less people around.
To capture a great long exposure sunset/sunrise photo of London, you are at the mercy of the weather to get that great light but one other important element that needs to be considered is the clouds. With a long exposure photo, the density and direction the clouds are moving can make or break the final photo. In terms of composition, if the clouds are moving directly away or towards the camera, they can create fantastic lead in lines. Even if the light doesn’t turn out great, if the clouds play their part, you can still walk away with a great long exposure image.
So, there you have it, 5 of my favourite spots to take long exposure photos along the River Thames in London. As I mentioned at the beginning of the post, there are many more spots around the city that are also great to capture but I personally feel that by incorporating the river adds great balance against the movement captured in the sky.
Feel free to leave a comment with your own suggestions for long exposure locations in London and further afield.
Until next time.
On Location Photographing Covent Garden
If you want to capture what are normally very busy tourist hotspots in London without all of the crowds of people, an early morning shoot is the best option and in this post I did just that and ventured out around Covent Garden with my wide-angle lens to capture this incredibly popular location.
I have often said that wandering any city early in the morning is hands-down the absolute best time to do so and London is no different. On this particular morning, I started at Trafalgar Square, on to Covent Garden then via Seven Dials, I finished my shoot in the trendy and colourful Neal’s Yard.
I set out with just my Fujifilm XT2 and XF10-24mm wide angle lens. Heading out with a single camera and lens combo is something I like to do often. Even if I have other lenses with me, I tend to stick with just one. Not because I’m lazy (which I can’t fully deny) but because after just a short time working with different compositions through the camera’s viewfinder, I find I start “seeing” the scene in that particular focal length allowing me to pick out subjects and compositions easier.
Trafalgar Square
I started the walk around a rather cold and cloudy Trafalgar Square. I wanted to capture some architecture but I then spotted some people walking in front of the National Portrait Gallery looking tiny compared to the museum building adding a fantastic sense of scale to the composition, I stood dead central on the stairs and waited for people to walk past. I reeled off about 5 different images and the shot below is probably my favourite.
It’s probably worth noting that adding people into my photographs is quite new to me and where previously, my approach would often involve a camera atop a tripod and using filters to remove people from my images, undertaking my London Chrome project has encouraged me to change and adapt and use new techniques such as this, which has almost certainly improved my photography.
For the second image below, I simply turned 180°, looking out across Trafalgar Square with Nelson’s Column perfectly central, splitting the image in two. As you can see, there is a hint of blue sky which gave me some renewed hope that I may get some good light a bit later.
Fujifilm XT2 | XF10-24mm | 10mm | 1/105th Sec | f/6.4 | ISO200
Fujifilm XT2 | XF10-24mm | 10mm | 1/140th Sec | f/6.4 | ISO200
Covent Garden
After finishing up at Trafalgar Square, I headed over to Covent Garden. If you have ever visited Covent Garden you will know how busy it gets there during the day. Being one of the most popular tourist attractions in London, capturing the area without the usual swarms of people can prove difficult but if you get there early enough and you have a much higher chance of doing so. The photos below were all taken before 8am on a Monday morning.
As I arrived at Covent Garden, the light started to improve so I wandered around the Market building seeking out different compositions.
Fujifilm XT2 | XF10-24mm | 10mm | 1/125th Sec | f/8 | ISO800
Fujifilm XT2 | XF10-24mm | 10mm | 1/125th Sec | f/8 | ISO400
As I wander around, photographing London, I often look back at the photos and wonder about their history such as how they were built or why they even exist and the Covent Garden Market building was no different. After a quick google search, I came across this article which talks about the history of the market and why this iconic London landmark was built.
Fujifilm XT2 | XF10-24mm | 16mm | 1/75th Sec | f/8 | ISO1600
I looked for different compositions such as the plants on a wooden cart below creating some foreground interest or as above with the symmetrical composition created by the walkway through the Market Building.
Fujifilm XT2 | XF10-24mm | 10mm | 1/125th Sec | f/8 | ISO640
Fujifilm XT2 | XF10-24mm | 24mm | 1/90th Sec | f/8 | ISO1600
Fujifilm XT2 | XF10-24mm | 10mm | 1/105th Sec | f/8 | ISO1600
Fujifilm XT2 | XF10-24mm | 24mm | 1/125th Sec | f/8 | ISO1250
Seven Dials and Neal’s Yard
As I wandered away from Covent Garden, the sky had cleared and the morning sun began to light up the surrounding buildings I found myself in the area of London called “Seven Dials”. This area, designed and built in the 1600’s is a road junction where 7 streets converge to a point. Interestingly, there is a column in the centre with only 6 sundials as the column was built before the seventh road was added to the plans at a later stage of construction.
I grabbed a quick photo of the Seven Dials junction before heading into Neal’s Yard.
Located between two of the roads that converge at Seven Dials, Neal’s Yard is accessed through a small alleyway between Short’s Gardens and Monmouth Street and is a colourful street with trendy wine bars and coffee shops.
Armed with the wide-angle lens and with the light now illuminating some of the architecture providing me some more contrast and colour, I snapped a few images of this vibrant little street.
Fujifilm XT2 | XF10-24mm | 22mm | 1/125th Sec | f/8 | ISO320
Fujifilm XT2 | XF10-24mm | 10mm | 1/125th Sec | f/8 | ISO500
Fujifilm XT2 | XF10-24mm | 10mm | 1/125th Sec | f/8 | ISO400
By the time I was finished, London was awake and I no longer felt I had this vast space to myself. With summer just around the corner, I am confident there will be many more sunny mornings to wander the streets capturing some of the colour that adorns this incredible city.
Until next time.
So Long Fujifilm X-T10 and Thanks For All The Photos
It seems a bit strange that I am writing a blog post about a camera, even more so about a camera I no longer plan on using but this little camera came along just at the right time and helped re-ignite my photography spark. Having now upgraded to a more recent model, I have decided to share a selection of photos I took with this cracking little Fujifilm camera.
In April 2016, I was a Nikon shooter. I had a Nikon D90 DSLR since 2011 and a D50 before that and for a long time, very happy. Yes, the camera was heavy and so were the lenses but at the time, I didn’t know any different. When I first got the D90, mirrorless cameras were in their infancy and lacked somewhat in image quality and performance. Back then, if you wanted a camera that was more capable than a point and shoot, then most chose a DSLR.
Fast forward to late 2015 and things weren’t going so well. I was in a bit of a photographic rut, feeling uninspired and a bit tired of lugging the long in the tooth D90 around. None of this was helping with my creativity and I was not enjoying my photography very much at all.
I needed a change.
Around the same time, the mirrorless market had been steadily growing. The cameras had come on leaps and bounds. They may not have been quite matching the performance and quality of the top end DSLRs but for the serious photography enthusiast, they were really, rather good.
Feeling frustrated photographically, open to change, I came across Fujifilm and their mirrorless camera line up. I have to admit, I knew almost nothing about Fujifilm cameras as at the time the market was still all about Nikon and Canon DSLRs and Sony Mirrorless but not being one to follow the crowd, the form factor and manual dials of the Fujifilm line-up turned my head and I started to look at these cameras more closely.
Introducing the Fujifilm X-T10
After researching the options, weighing up the pros and cons of each model in early 2016 I eventually settled on the X-T10 and XF18-55mm lens. I had heard nothing but good things about this combination and the X-T10 had all of the quality of the flagship XT1 but with only a few functional compromises and a lack of weather resistance, the smaller and lighter option won the day for me and full of excitement and anticipation, off I went to the store to pick up my new camera.
From my very first trip out with the X-T10, everything changed. I loved everything about this camera. It felt great to be able to adjust the shutter speed by twisting a dial or changing the aperture by twisting a mechanical ring on the lens.
With the mechanical knobs and dials, it felt like I was actually making a photo just like they did back in the film days. On top of that, the image quality was great, the camera bag was light and my creative spark was re-ignited!
Fujifilm X-T10 | XF18-55mm | 26mm | 14 Secs | f/18 | ISO200
The photo above was from my very first trip out with the camera along London’s Southbank in March 2016.
For the last 3 years, my enthusiasm to get out and take photos with this camera has not waned one bit. Being incredibly happy with the Fujifilm X system, in 2017 I decided to invest in the extremely capable XT2 which is a fantastic workhorse delivering fantastic pictures in any weather but throughout this entire time, the X-T10 has remained my favourite camera to take photos with. The camera would remain with me as I wandered the streets capturing London’s architecture or armed with a prime lens, out with the family documenting my children as they grow up.
Now fast forward to 2019, the camera has been released for 4 years which is a long time in the fast-moving camera market and the X-T10 was showing its age compared to the newer cameras being released and I knew the time would soon come for me to think about life after the X-T10. Don’t get me wrong, this camera is as good as the day it was released and a new camera model doesn’t render an older one bad. If money was a limiting factor, I would have no problems continuing to use the X-T10 for the foreseeable future as it still took great images but I was now open to something new.
But what camera could replace the X-T10? I didn’t want to change camera brands as I am heavily invested into Fujifilm and quite happy to remain in the family. The obvious choice was the X-T20 but as soon as I started to be open to investing in a new body, Fujifilm announced the X-T30. After looking at the improvements in image quality, resolution and focus speeds, I made up my mind and it was pre-ordered.
I’ve now had the X-T30 a few weeks and over the moon with my new camera but what about the X-T10? Well, that’s not going anywhere just yet. It’s not worth a great deal to sell and quite frankly I don’t want to part with it anyway. Feeling a tad sentimental about this small camera, I plan on keeping this camera for my daughters to use and with any luck, this camera may ignite a creative spark for a second time!
I had a rummage through my collection to leave you with a selection of photos taken with the X-T10 over the last few years.
So, as the title says, so long X-T10 and thanks for all of the photos.
Fujifilm X-T10 | XF18-55mm | 23mm | 58 Secs | f/11 | ISO200
Fujifilm X-T10 | XF10-24mm | 10mm | 0.9 Secs | f/13 | ISO200
Fujifilm X-T10 | XF18-55mm | 39mm | 58 Secs | f/13 | ISO200
Fujifilm X-T10 | XF18-55mm | 18mm | 140 Secs | f/9 | ISO200
Fujifilm X-T10 | XF18-55mm | 18mm | 90 Secs | f/16 | ISO200
Fujifilm X-T10 | XF18-55mm | 18mm | 4 Secs | f/9 | ISO200
Fujifilm X-T10 | XF18-55mm | 55mm | 1/250th Sec | f/5 | ISO200
Fujifilm X-T10 | XF18-55mm | 21mm | 1/125th Sec | f/7.1 | ISO1250
Fujifilm X-T10 | XF35mm F2 | 35mm | 1/180th Sec | f/5 | ISO200
Fujifilm X-T10 | XF35mm F2 | 35mm | 1/20,000 Secs | f/2 | ISO200
Fujifilm X-T10 | XF35mm F2 | 35mm | 1/50th Secs | f/5.6 | ISO1600
Fujifilm X-T10 | XF35mm F2 | 35mm | 1/125th Sec | f/14 | ISO200
Fujifilm X-T10 | XF18-55mm | 33mm | 1/300th Sec | f/4 | ISO200
Fujifilm X-T10 | XF10-24mm | 15mm | 30 Secs | f/16 | ISO200
Fujifilm X-T10 | XF18-55mm | 18mm | 3.2 Secs | f/10 | ISO200
Fujifilm X-T10 | XF18-55mm | 44mm | 1/350th Sec | f/8 | ISO200
Fujifilm X-T10 | XF18-55mm | 18mm | 1/60th Sec | f/22 | ISO320
Fujifilm X-T10 | XF18-55mm | 18mm | 480 Secs | f/8 | ISO200
Fujifilm X-T10 | XF10-24mm | 17mm | 14 Secs | f/7.1 | ISO200
Fujifilm X-T10 | XF55-200mm | 61mm | 8 Secs | f/8 | ISO200
Fujifilm X-T10 | XF18-55mm | 34mm | 6 Secs | f/8 | ISO200
How I took this long exposure photo for under £50
Who says long exposure photography needs to be expensive? If you’re looking to give this fantastic technique a try but not looking to invest too much money (just yet) then take a look at this post to see how I took this photo with under £50 of accessories.
Is long exposure Photography an expensive undertaking? Well it certainly can be. Over the years I have spent hundreds of pounds on filters, tripods and accessories in my pursuit of capturing long exposure photos of London’s cityscape.
Now, I accept that the title of this post is a tad misleading. It’s certainly correct that I captured the image below with under £50 worth of accessories but with one significant pre-requisite. The camera. This, you will need to have already, in particular, a camera that has full manual options.
This article won’t go too deep into how to take long exposure photos. If you want to read a 10 step guide to taking long exposure photos, see the following article on my blog: HOW I TAKE LONG EXPOSURE PHOTOS.
On a recent outing in London, I found myself in East London just before sunset. I was actually out testing my newly acquired Fujifilm X-T30 camera that at the time of writing has just been released and just as I crossed Tower Bridge I decided I would put the camera through its paces and capture a long exposure looking west towards The Shard.
Here is the photo I ended up taking. The long exposure gives the image a silky-smooth look and blends the colours of the sky nicely.
Fujifilm X-T30 | XF18-55mm | 18mm | 25 Secs | f/10 | ISO160
What equipment did I use to take this photo?
Apart from the camera itself, I used only two accessories to capture this image. A small table top tripod to keep the camera perfectly still and a 10-stop screw in neutral density filter to slow down the exposure.
Just a note. The equipment I use here is certainly not top of the range and you may well find even cheaper alternatives from places like China but I have been using both items listed below for some time and for the price, it is, in my opinion well worth the extra few pounds over cheaper unknown brands.
Read more about the kit I have in my bag here: WHAT'S IN MY CAMERA BAG? (2019 EDITION)
HOYA PROND1000 10 STOP ND Filter - £29.99
To slow down the light reaching the cameras sensor, and to essentially trick the camera into thinking the ambient light is lower than it really is, you need a Neutral Density Filter. This Hoya PROND1000 is a 10 stop filter meaning it reduces the light entering the lens by 10 stops. Filter kits from the likes of Lee or Formatt-Hitech can be hundreds of pounds whereas I brought this great little filter with a 58mm thread size for under £30.
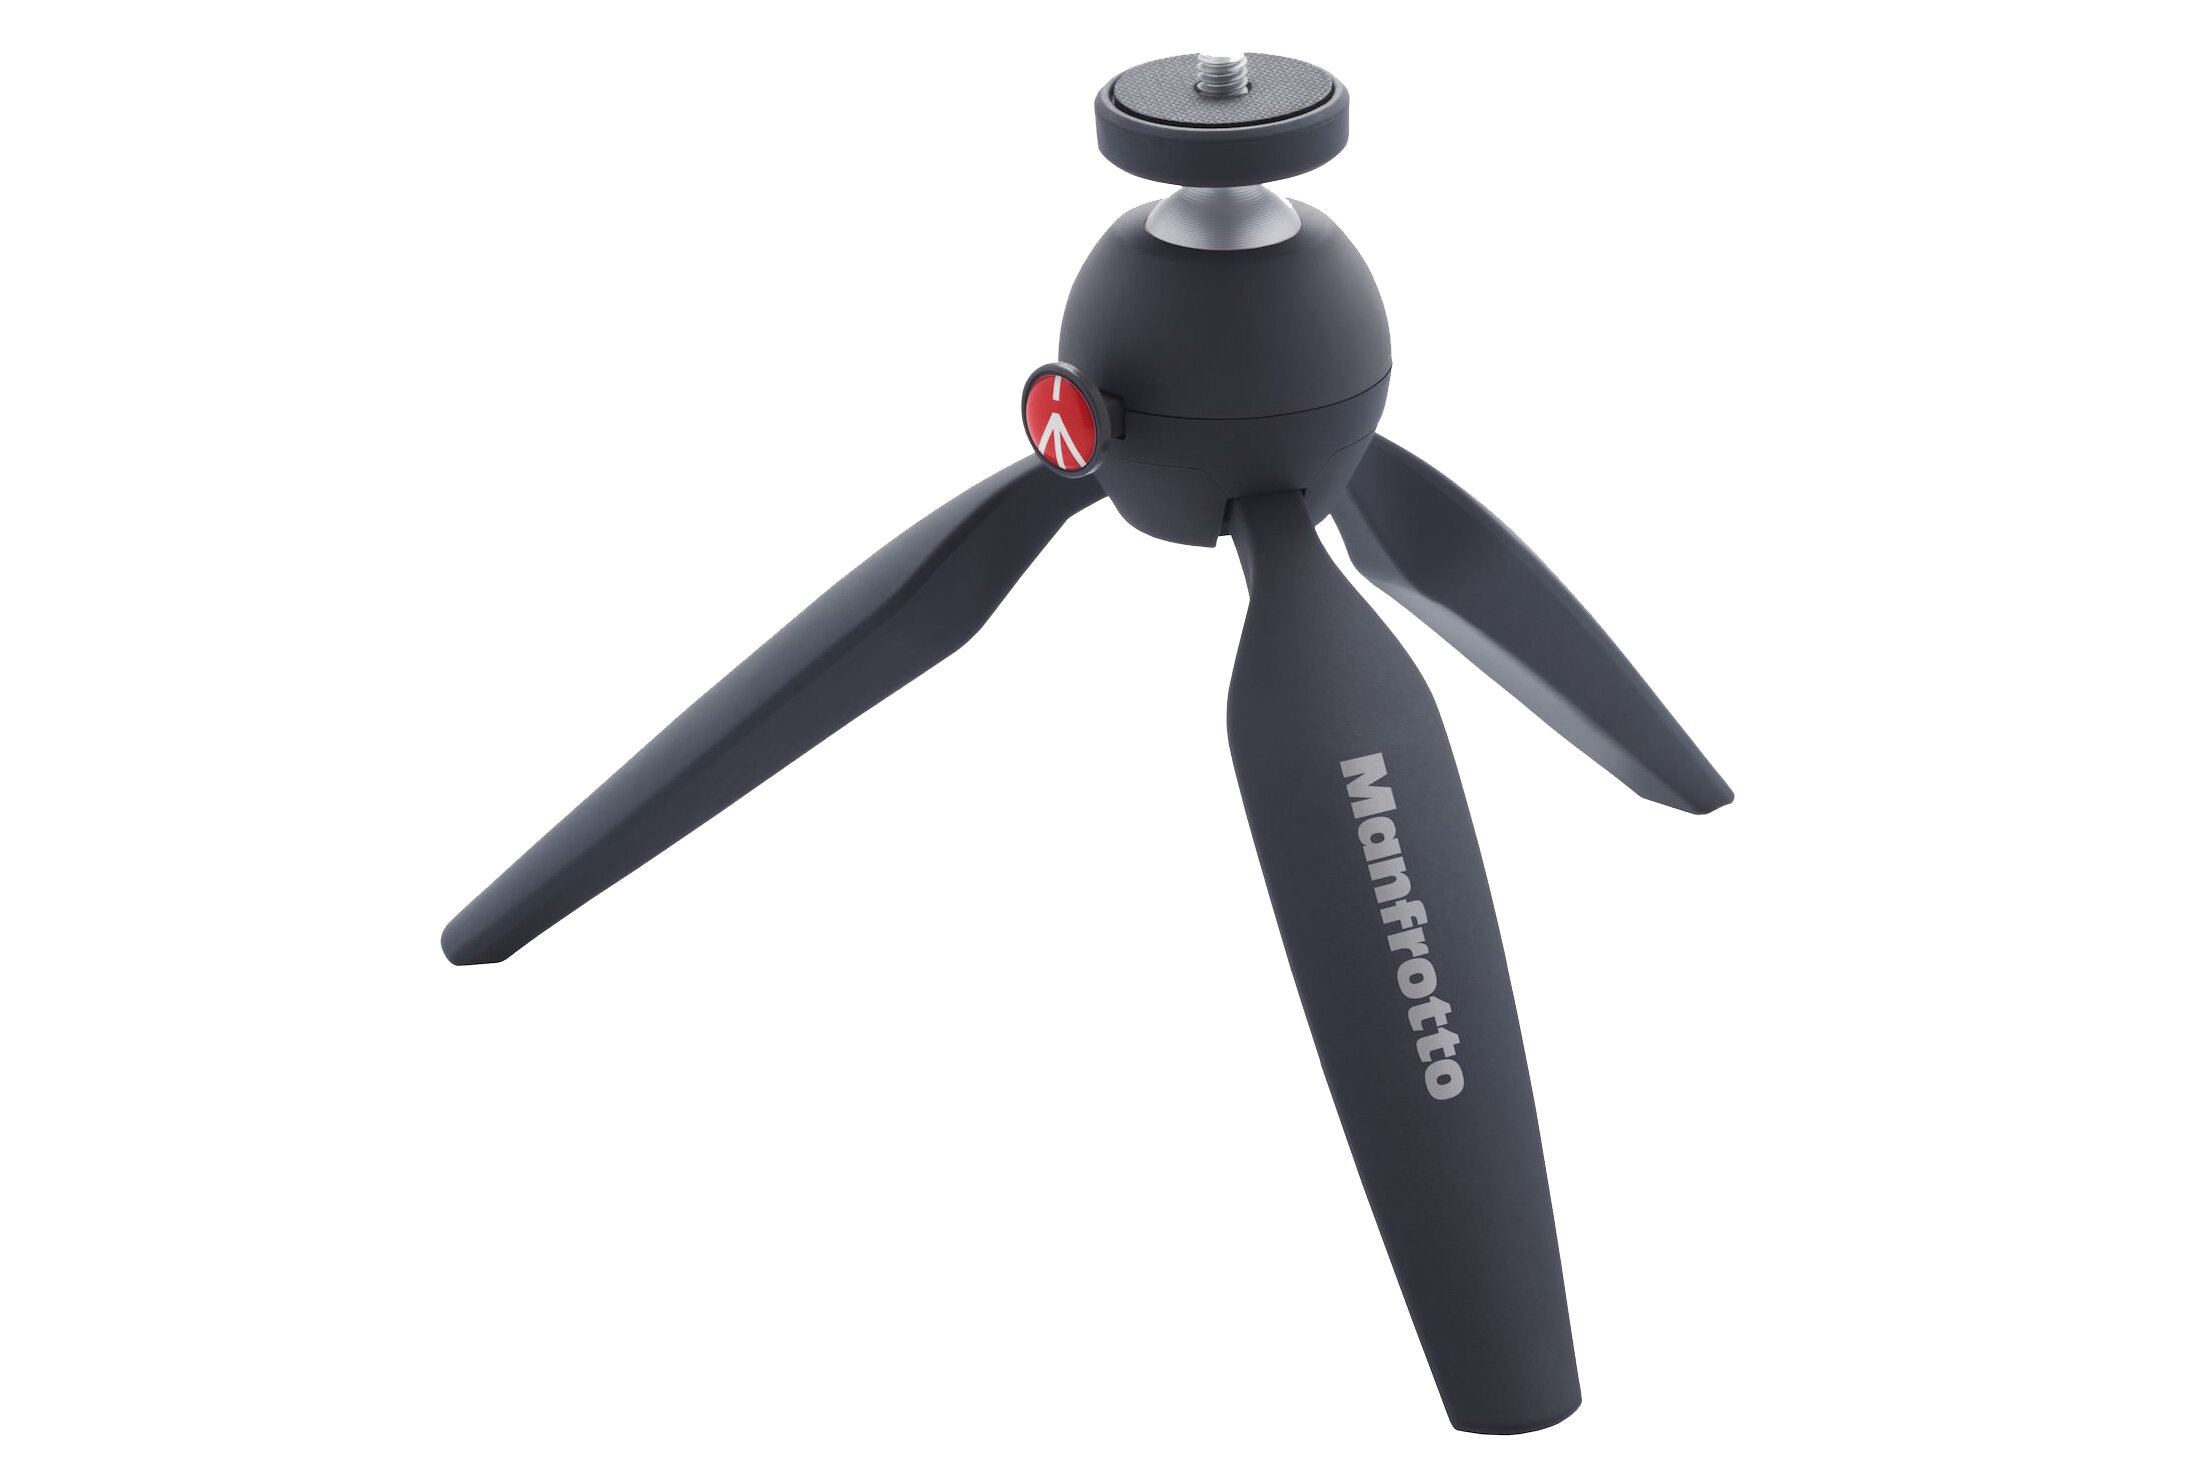
Manfrotto Pixi Tripod - £16.99
Now, I accept that in some ways, this is not the most versatile tripod. It’s size certainly has some limitations but this great little tripod is perfect to slip in any bag and as long as there is a ledge to perch on, this is strong and stable enough to support my Fujifilm X-T30 and attached lens.
Total Cost £46.98
So, looking west from Tower Bridge and with the camera perched nicely on the thick walls that flank each side of the bridge, I composed the image. I manually focused the camera, set my desired aperture and shutter speed and captured what I already think is one of my top photos of 2019.
There you have it. If you’re looking to give this fantastic technique a try but not looking to invest too much money (just yet), now you know how it can be achieved for under £50.
On Location Photographing the Garden at 120 in London
The Garden at 120 is a new rooftop terrace 15 stories up that opened in early 2019 offering new photographic opportunities of London’s skyline. I popped along one evening, just as the sun started to set and captured a few images for myself.
I recently wrote an article about a taking photos up at the Sky garden and how I wanted to get up high in London during 2019 and capture new views of the city so I was thrilled to hear of a new rooftop terrace opening up in the city and I had to pop by to take a look.
You can read the previous post I wrote about the Sky Garden here: PHOTOGRAPHING LONDON'S ROOFTOPS
Located on the 15th floor, just up the road from the Sky Garden is The Garden At 120 (Fenchurch Street). It was only open a couple of weeks at the time these photos were taken and although steadily growing in popularity there is still no need to book yet and you can just turn up at your leisure but his may well change so do check their website here.
I don’t always carry my larger camera (Fujifilm XT2) and lenses with me and on this particular day I had my ultra-light walk about kit which is my Fujifilm X-T10 and 35mm f2 lens so all of the photos below are taken with this set. See more about the gear I use in my post WHAT'S IN MY CAMERA BAG? (2019 EDITION). Although having only the 35mm lens limited me to one focal length, the wider f2 aperture was perfect to shoot through the glass as my focus was on the landscape beyond the glass and anything close to the lens was rendered invisible including any marks or dirt on the glass resulting in a cleaner image.
Enjoying the best light of the day and with the winter sun quickly setting, I wandered around taking in the 360° views and ended up capturing 3 or 4 compositions of the cityscape below. There are many more photos to take but I will have to pop back soon with my wide-angle and zoom lenses to get the best out of these.
Fujifilm X-T10 | XF35mm F2 | 35mm | 1/680th Sec | f/2 | ISO200
Fujifilm X-T10 | XF35mm F2 | 35mm | 1/1,500th Sec | f/2 | ISO200
Fujifilm X-T10 | XF35mm F2 | 35mm | 1/420th Sec | f/2 | ISO200
Fujifilm X-T10 | XF35mm F2 | 35mm | 1/1,000th Sec | f/2 | ISO200
Fujifilm X-T10 | XF35mm F2 | 35mm | 1/350th Sec | f/2 | ISO200
Fujifilm X-T10 | XF35mm F2 | 35mm | 1/450th Sec | f/2 | ISO200
Fujifilm X-T10 | XF35mm F2 | 35mm | 1/600th Sec | f/2 | ISO200
Fujifilm X-T10 | XF35mm F2 | 35mm | 1/120th Sec | f/2 | ISO200
Fujifilm X-T10 | XF35mm F2 | 35mm | 1/60th Sec | f/2 | ISO200
Fujifilm X-T10 | XF35mm F2 | 35mm | 1/100th Sec | f/2 | ISO200
One thing to note before I wrap this post up is that at the time I visited, tripods were allowed up on the roof terrace. Not just the little ones but standard sized tripods. This is quite rare and for a photographer incredible refreshing. I spoke to the security guards there and their policy is that as long as they are kept off the glass, not too high near the top of the glass and not in the way of other people, they were happy to allow tripods…. for now. This policy may change and I suspect it probably will when popularity increases.
Until next time.
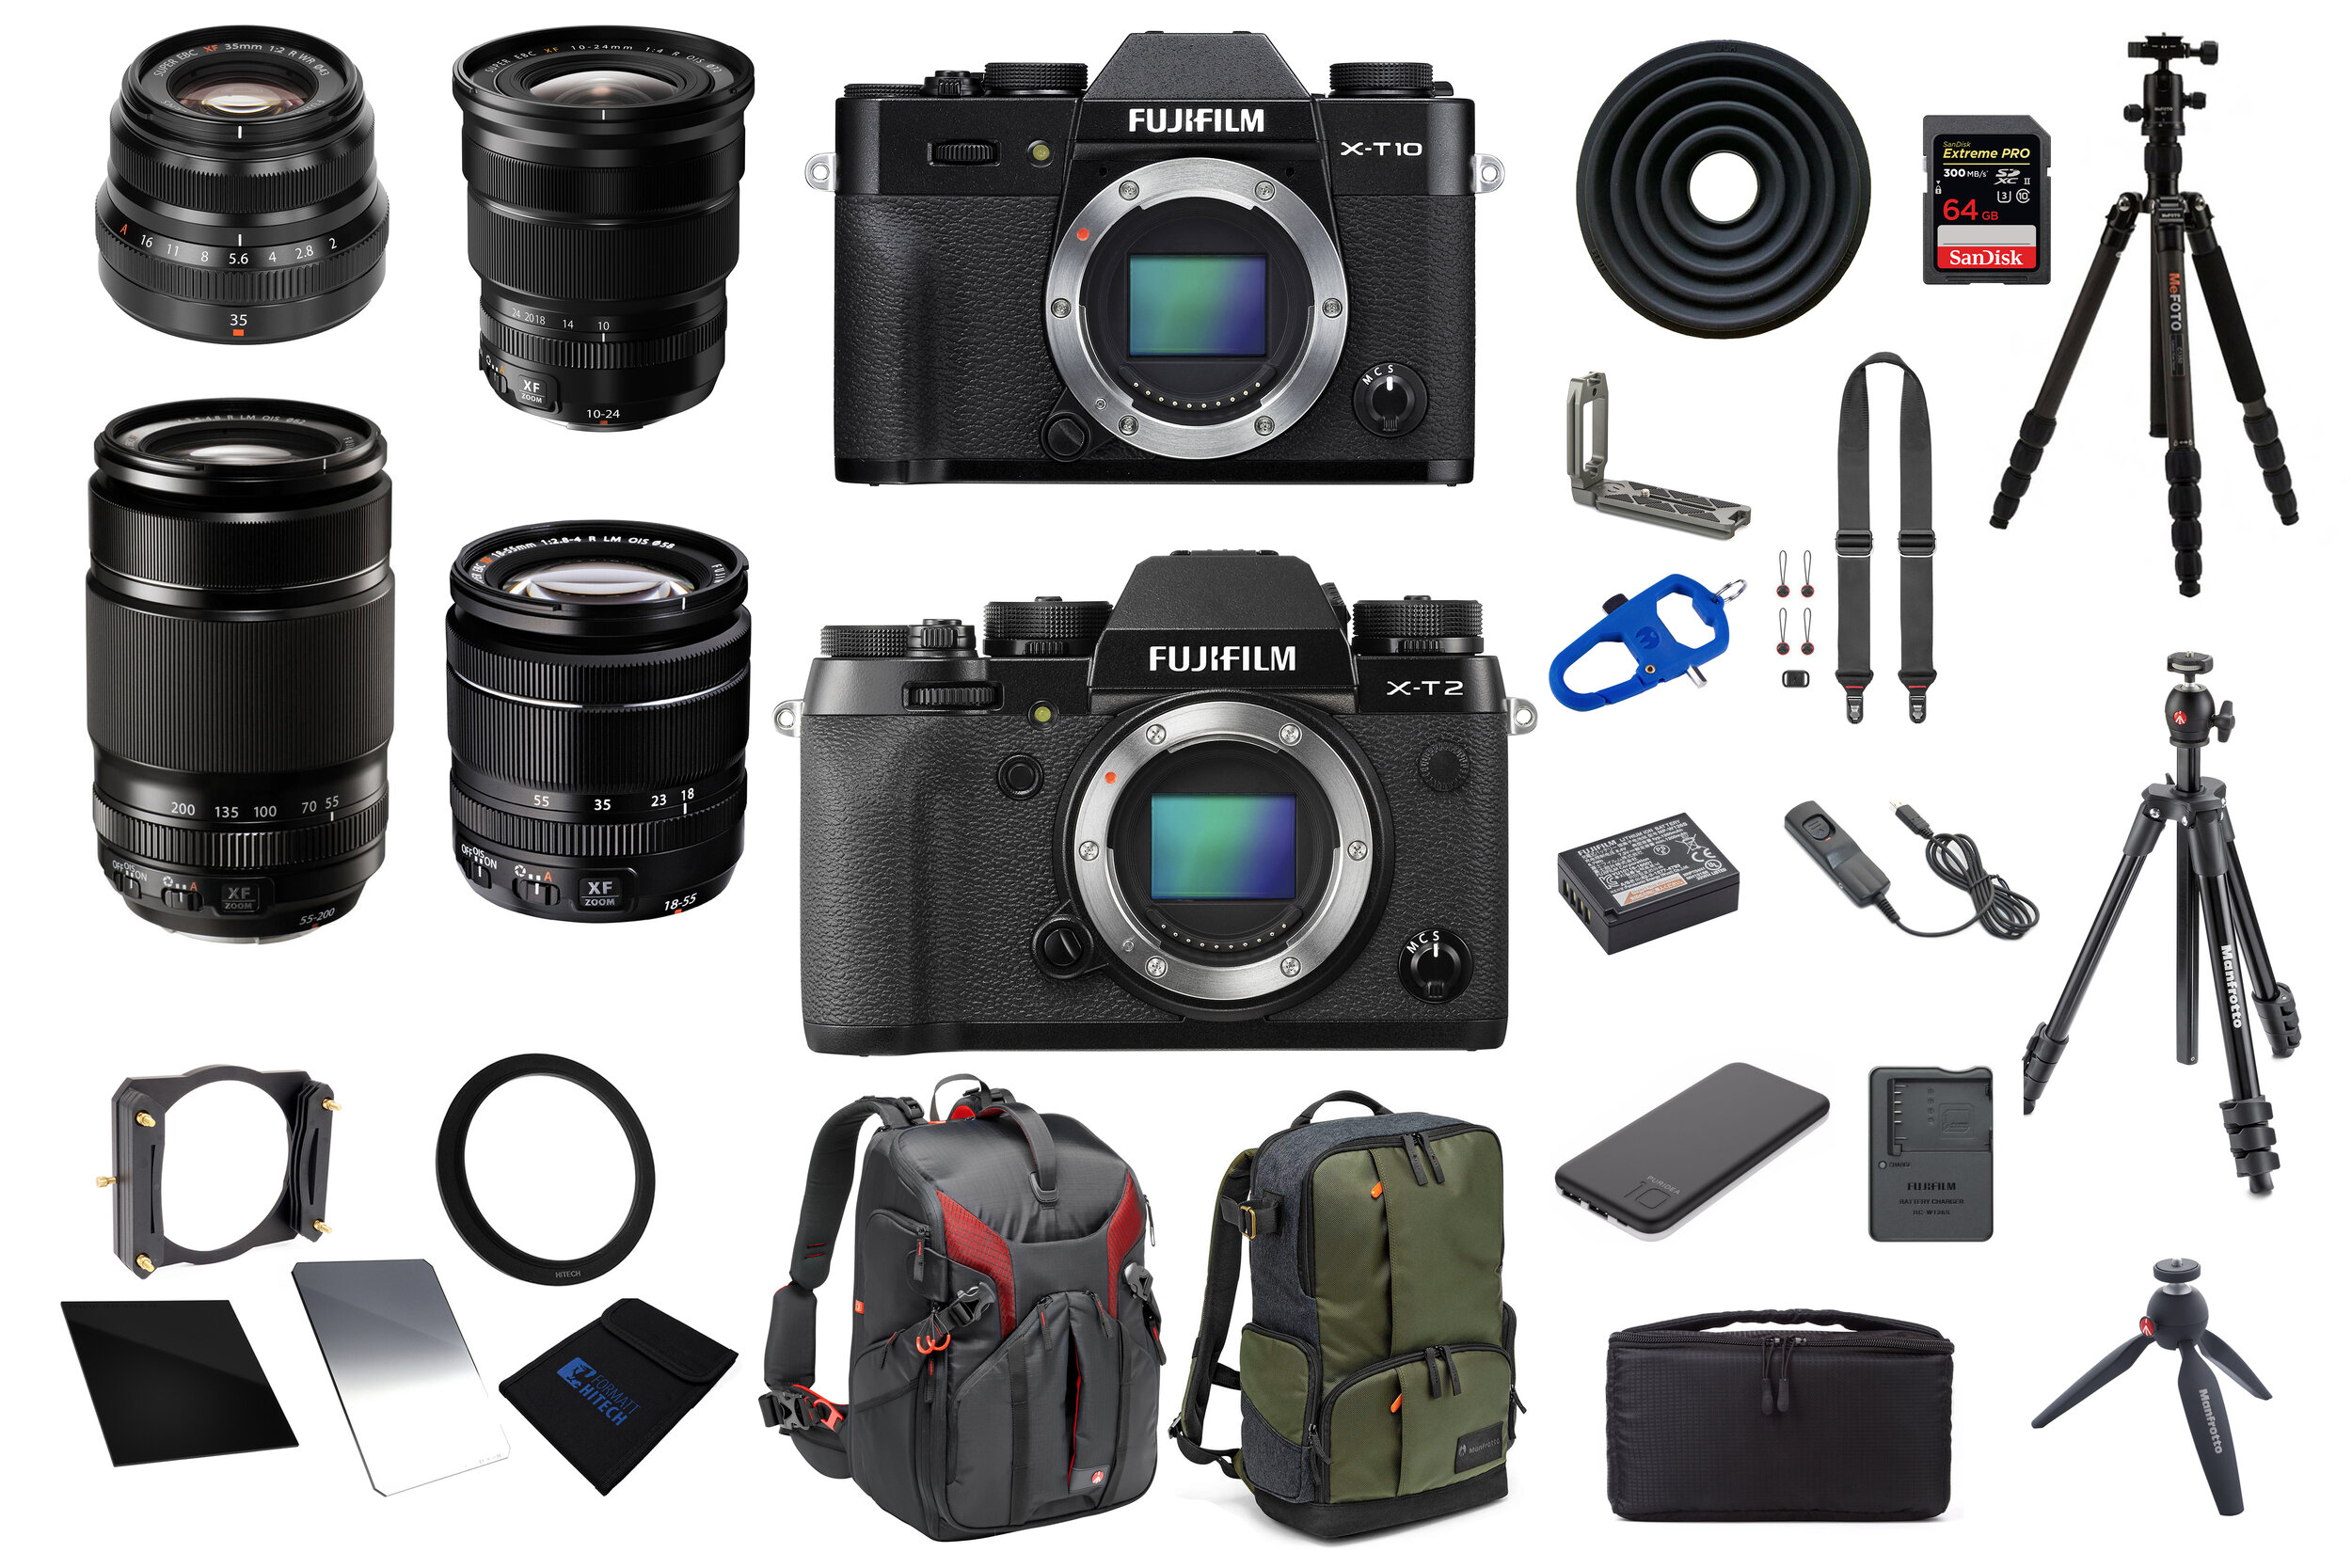
What's In My Camera Bag? (2019 Edition)
“What’s the best camera to get?” “That’s a great photo, what camera did you use to take that?” These are just a couple of the questions I regularly receive when people see my photos, so, for those interested, here is my own What’s in my camera bag? 2019 edition.
“What’s the best camera to get?” “That’s a great photo, what camera did you use to take that?” These are just a couple of the questions I regularly receive when people see my photos, so, for those interested, here is my own What’s in my camera bag? 2019 edition.
Before I start, it is worth noting that I firmly believe it’s the photographer that has the vision, chooses the subject and creates the image. There are many photographers that successfully shoot with a single body and lens, a compact camera or even just their camera phone and still produce quite stunning work so don’t get fixated on the photography gear, always fixate on the craft and seeking to create your own artistic style.
“The single most important component of a camera is the twelve inches behind it.” - Ansel Adams.
That being said, if you are shooting with intent and have particular style of image you want to capture, then the right equipment can remove all of the friction in the process and allow the photographer to focus on the creative instead of working overly hard to get the shot and maybe even taking some of the fun out of the process.
Lastly, this is not going to be an overly technical post. It won’t be about the features and specifications, just what gear I am currently using and why.
Cameras
Fujifilm XT2
Those that have followed me for some time know I am a Fujifilm shooter and this XT2 is my primary camera. Unless I am travelling super light (more on that below) I take this amazing camera. It may no longer be the latest model but it is still super-fast, very capable and not going anywhere yet!
Fujifilm X-T10
When I moved over from Nikon to Fujifilm in 2016, this is the camera I brought and I instantly fell in love with it. I loved and still love the tactile dials and buttons, it literally changed my photographic life. Yes, this camera is a little long in the tooth and at time of writing, I am waiting for the X-T30 to be delivered after I pre-ordered it but this little gem is going no-where and is what I carry with me when I am travelling super light or need a second camera in my bag.
Camera Lenses
Fujifilm XF 10-24mm lens F4 OIS
A great and versatile wide-angle lens. Great for architecture and cityscapes, this lens will often come on a shoot with me. Not the fastest lens at f4 but the OIS certainly helps when shooting handheld in low light situations.
Fujifilm XF 18-55mm f2.8-4 R LM OIS
This was the first Fujifilm lens I brought as it came with the X-T10 and is regarded as it’s kit lens. This may be true but normally kit lenses are considered entry level and not able to match the quality of more expensive lenses. The XF18-55mm breaks that mould as it has excellent image quality and a fantastic standard zoom. This lens ca be found on my camera more often than any other.
Fujifilm XF 55-200mm lens f/3.5-4.8 lens OIS
For the weight and size, this is a fantastically compact zoom lens with great image quality to go with it. When I first purchased this lens, I was concerned as I had previously brought similar lenses for similar money when I shot Nikon and image quality was quite poor. This lens is different, it’s IQ is great and the optical image stabilisation is a godsend, especially at those longer focal lengths.
Fujifilm XF 35mm F2 R WR
This 35mm F2 is one of Fujifilm’s “f2” range and it truly is a great lens. It may not be as fast as the f1.4 35mm Fujifilm also make but this compact little lens packs a punch and coupled with my X-T10 means I have a very lightweight system to wander around with and when used with my XT2 I have a full weather resistant system. I plan to add the 16mm f2.8 which Fujifilm has just announced later in the year.
Tripods
MeFoto Roadtrip
I don’t own any big, bulky tripods. This is as heavy as it gets for me which is all I need to capture my long exposure and low light photography. This will be in my bag if I know my photo shoot will include some extensive tripod use. The ball-head is strong enough to hold the weight of my heaviest combination which is the XT2 and 55-200mm lens.
Manfrotto Compact Light
I brought this tripod just before I took my first trip to Venice. I knew that tripods would be difficult in such a crowded place so a lightweight tripod seemed an ideal compromise between weight and frequency of use. Since then I now carry it as a part of my lightweight kit (see the differing kits below).
Manfrotto Pixi
This little table top tripod is excellent. It is super strong and super light and perfect to carry around for those just in case moments you need a little stability while out shooting.
Filters
Formatt-Hitech 85mm Filters
A great set for landscape and long exposure photography. The 85mm filters are perfect for the Fuji mirrorless system and more than big enough for all of the lenses with one small exception. The 10-24mm, which at its widest has a little vignetting at 10mm when the filters are attached. Currently, I have a 10 stop ND filter and a set of three ND graduated filters for those landscape photos where the dynamic range is too high.
Camera Bags
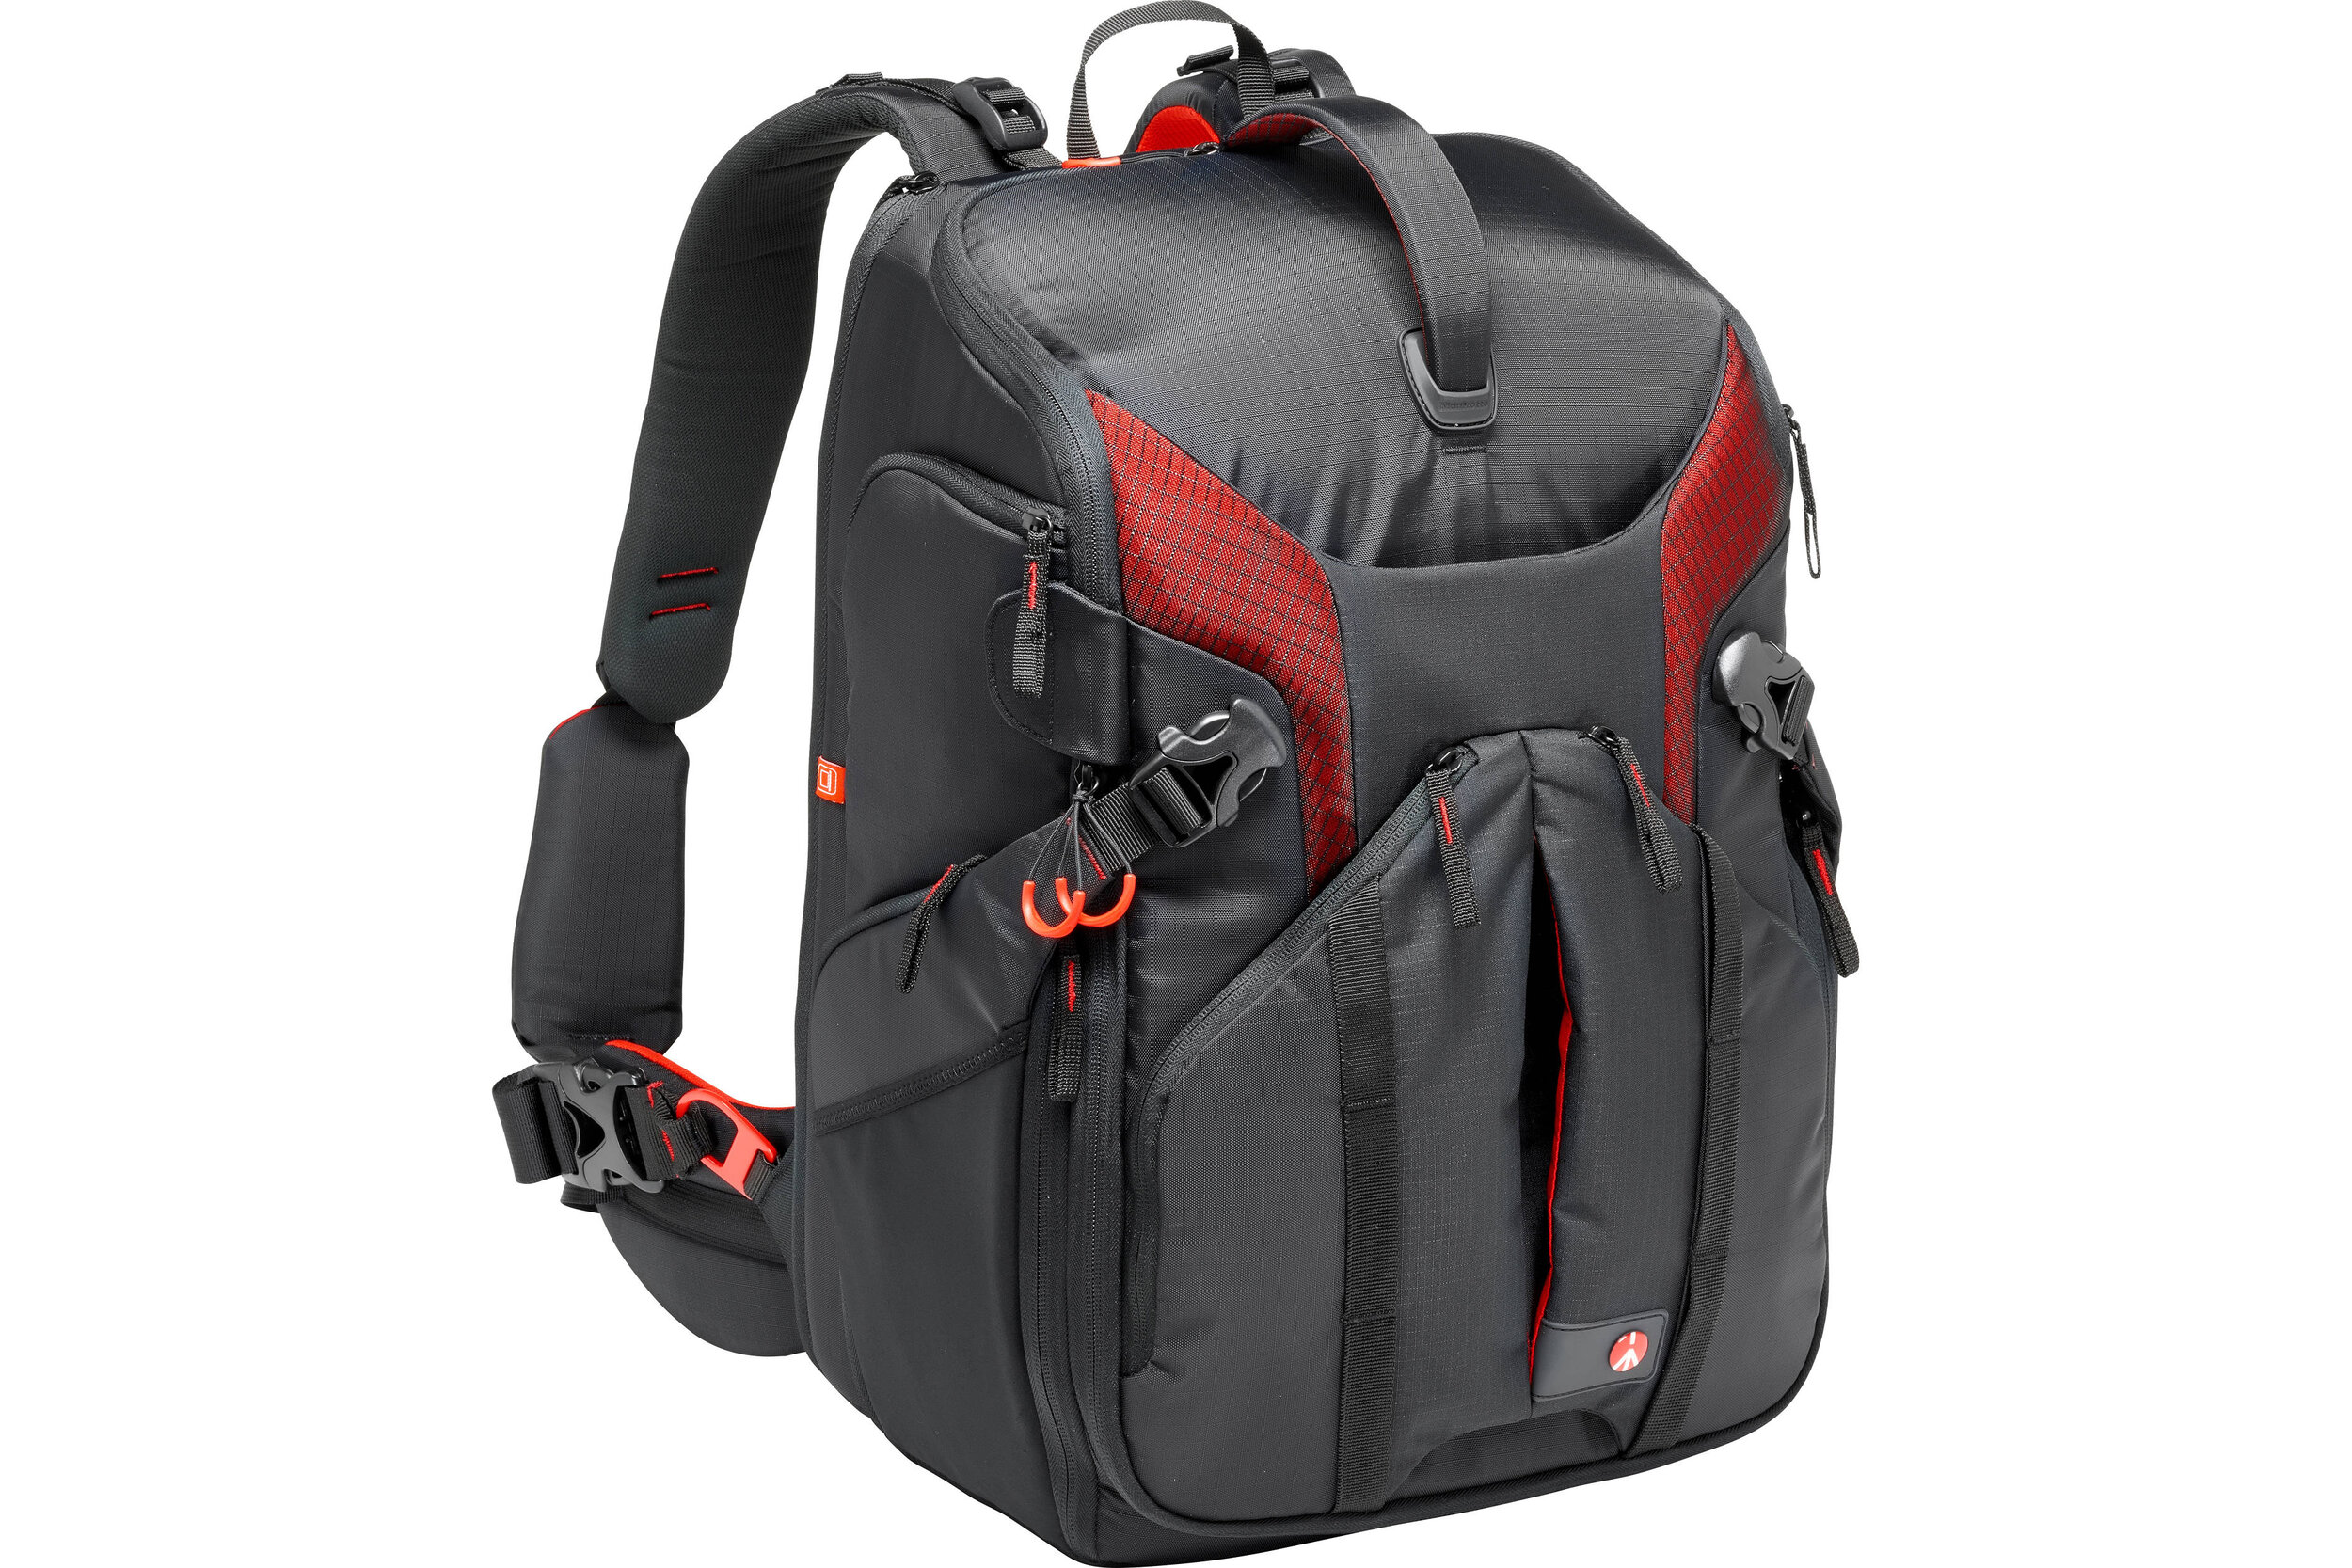
Manfrotto Pro Light Backpack
Having a mirrorless system means the size and weight of my kit is kept a little lower and that means I don’t need a huge bag to carry it all. I chose this bag as it both carries all of the kit I would take on a shoot with its multiple configuration options and it also allows me to carry my biggest tripod centrally to keep the bag balanced and takes the pressure off my back.
Manfrotto Street Backpack
I use this bag when I need to travel light or I need to carry other bits as well as some camera equipment. This easily fits a camera and a couple of lenses leaving enough room in the top compartment for clothes and laptop etc.
Camera Bag Insert
I use one of these camera bag inserts to combine a little camera gear with my standard backpack. I like to always have a camera with me just in case an opportunity presents itself so this insert fits a camera and a lens which is perfect when I need to travel ultra-light.
Accessories
3 Legged Thing L-Bracket
Perfect to quickly switching between landscape and portrait while using the tripod.
3 Legged Thing Toolz
Quite a critical tool as the 3 Legged Thing L-Bracket covers the battery compartment on my XT2 so when the battery needs changing, out comes this tool to quickly remove the L-bracket.
Ultimate Lens Hood
Perfect to help cut out those reflections when shooting through glass. I used the ULH when I was on this sunrise shoot in London.
Remote cable Shutter Release
Critical to ensure no camera shake happens when pressing the shutter or keeping the shutter open during long exposure shoots.
Peak Design Slide
This is a great camera strap, it’s comfortable and the quick release anchors mean it can be removed with minimal fuss.
Sandisk Memory Cards
I use Sandisks memory cards because so far, during all of the years I have been photographing, I have not had one failure. I do retire cards when they start showing any sign of wear which I am sure helps avoid failures.
Fujifilm NP-W126s Battery
On a long shoot, I will go through many batteries. One downside of mirrorless is still the battery life. It is improving but still nowhere near what it was when I shot with a DSLR.
BC-W126s Charger
The charger comes with me on longer photography trips when I know my batteries might not last the entire time.
Puridea S2 10,000mAh
This neat little battery pack can charge my phone 4 times or using my other USB charger, can charge 6 or 7 camera batteries. An incredibly useful gadget.
So, how do I pack all of this gear in my bag?
Although I have a healthy collection of camera gear, I certainly wouldn’t bring it all with me to each shoot. Below are 3 of the most common ways I pack my bag, depending on the type of photography I intend to do.
Full Landscape/ Cityscape
When I am on a long shoot, capturing long exposure images, high level cityscapes or grabbing the odd time-lapse, this is the kit I will usually pack. There is not a lot of room left in the bag and it’s my heaviest configuration but at least I am prepared for anything.
Lightweight City/Travel
Much more suitable for a long day walking around the city or while traveling where there will be a mix of intimate and sweeping landscapes to photograph. The shoulder strap for walking about and the very lightweight Manfrotto tripod to take photos in low light. Depending where I go and what I intend to shoot will depend on the combination of lenses I take.
Ultra Light-weight Walkabout/Street
I tend to have this kit with me when my primary focus for the day isn’t photography but I may sneak in an hour or two. I use a standard backpack with the camera insert which will fit the camera and lens ensuring it is protected while I go about my day.
So, there you have it, all of the gear I take with me as of March 2019. I mentioned previously, I will be making some changes very soon. I have already ordered the brand-new Fujifilm X-T30 to replace my X-T10 as my secondary/walk about camera and I am both excited to get this small but incredibly capable camera but sad that my favourite camera will be retired to the side-lines. I am also planning to buy the new Fujifilm 16mm f2.8 which is a member of the same family as my existing 35mm f2. Lastly, I plan to add the DJI OSMO Pocket. It looks like a fantastic little video camera and will compliment my kit nicely.
As my equipment evolves, I will try to refresh this post each year.
Until next time.
On Location Photographing Venice in Black and White
With a second visit to Venice on the horizon, I decided to try something new (well, for me anyhow). I set out to capture a set of black and white photos of this beautiful city. Jump into the post to read about how I got on.
In October 2018, I made my second trip to Venice. When I’d first visited back in July 2017, the weather was good and it was nice and warm the entire time I was there. When the sun is out the city is full colour and vibrancy and being someone who prefers to shoot in colour, I didn’t consider doing anything else.
You can read about my previous visits to Venice in my two-part article here:
Fast forward to October 2018 and the weather forecast was quite different. Throughout the time we would be in the city, the weather would start to deteriorate. We would have some sunny weather to start but by the last day there was heavy rain predicted so I knew right away that I would need to adjust my plans to capture some photos I would be happy with.
Photographing Venice with the Fujifilm XT2
On this trip, I would have with me my Fujifilm XT2. It’s the big brother to my X-T10 and although the X-T10 is a lighter camera, I decided to take the heavier XT2 as not only does it have the great image quality and tactile controls I love using so much, but it also has a weather-sealed body so it was less of a concern if I was out shooting in damp weather.
With the XT2, I took the following lenses, all of which you will see photos taken with below:
XF10-24mm
XF18-55mm
XF35mm f2 (weather-sealed)
XF55-200mm
Although I had all of these lenses with me, I would typically head out with just one on the camera and one in the bag. I like to travel light when on a city break and the Fuji X system helps me do that without compromising on the quality one bit.
Photographing Venice in Black and White
As mentioned above, I usually take colour photos and black and white would tend to be a bit of an afterthought. I might choose to convert to black and white if the photo is not working in colour and it would always be during the editing stage and rarely when capturing the photo.
For this trip to Venice, I decided to change things up a bit. I chose one of Fujifilm’s cracking black and white film simulations so I could visualise the image in black and white as I was taking it, removing the wait to see how it looks in Lightroom. This method worked incredibly well for me and I ended up with lots of images I really liked.
Although I used the film simulations to capture the photos, I did still record the raw files too as I wanted to process the photos myself when I returned from the trip using the JPGs as a reference. This way I retained all the creative control and if I saw an image that looked better in colour, I still had all of that data to play with.
San Marco Basin and San Giorgio Maggiore
Fujifilm XT2 | XF35mm F2 | 35mm | 1/125th Sec | f/2 | ISO640
The first set of photos were taken from various angles looking across San Marco Basin towards the Church of San Giorgio Maggiore. San Marco Basin is located towards the south of the island at the mouth of the Grand Canal and there are so many angles and compositions to shoot here.
I really like the contrast that black and white processing provides as it helps the tourists and their umbrellas stand out as silhouettes against the brighter background as they cross the bridge in the image above. It really helps tell the story of the conditions that day and I love the feeling I get from this photo.
I have found that black and white photography allows you to push the highlights and crush the blacks much more than you would dare in a colour photo and the high contrast images you are left with can have lots of impact and work well for photos such as these.
Fujifilm XT2 | XF18-55mm | 18mm | 1/9,000th Sec | f/4.5 | ISO1250
Fujifilm XT2 | XF55-200mm | 86mm | 1/3,200th Sec | f/4.5 | ISO200
Fujifilm XT2 | XF35mm F2 | 35mm | 1/1,100th Sec | f/2 | ISO200
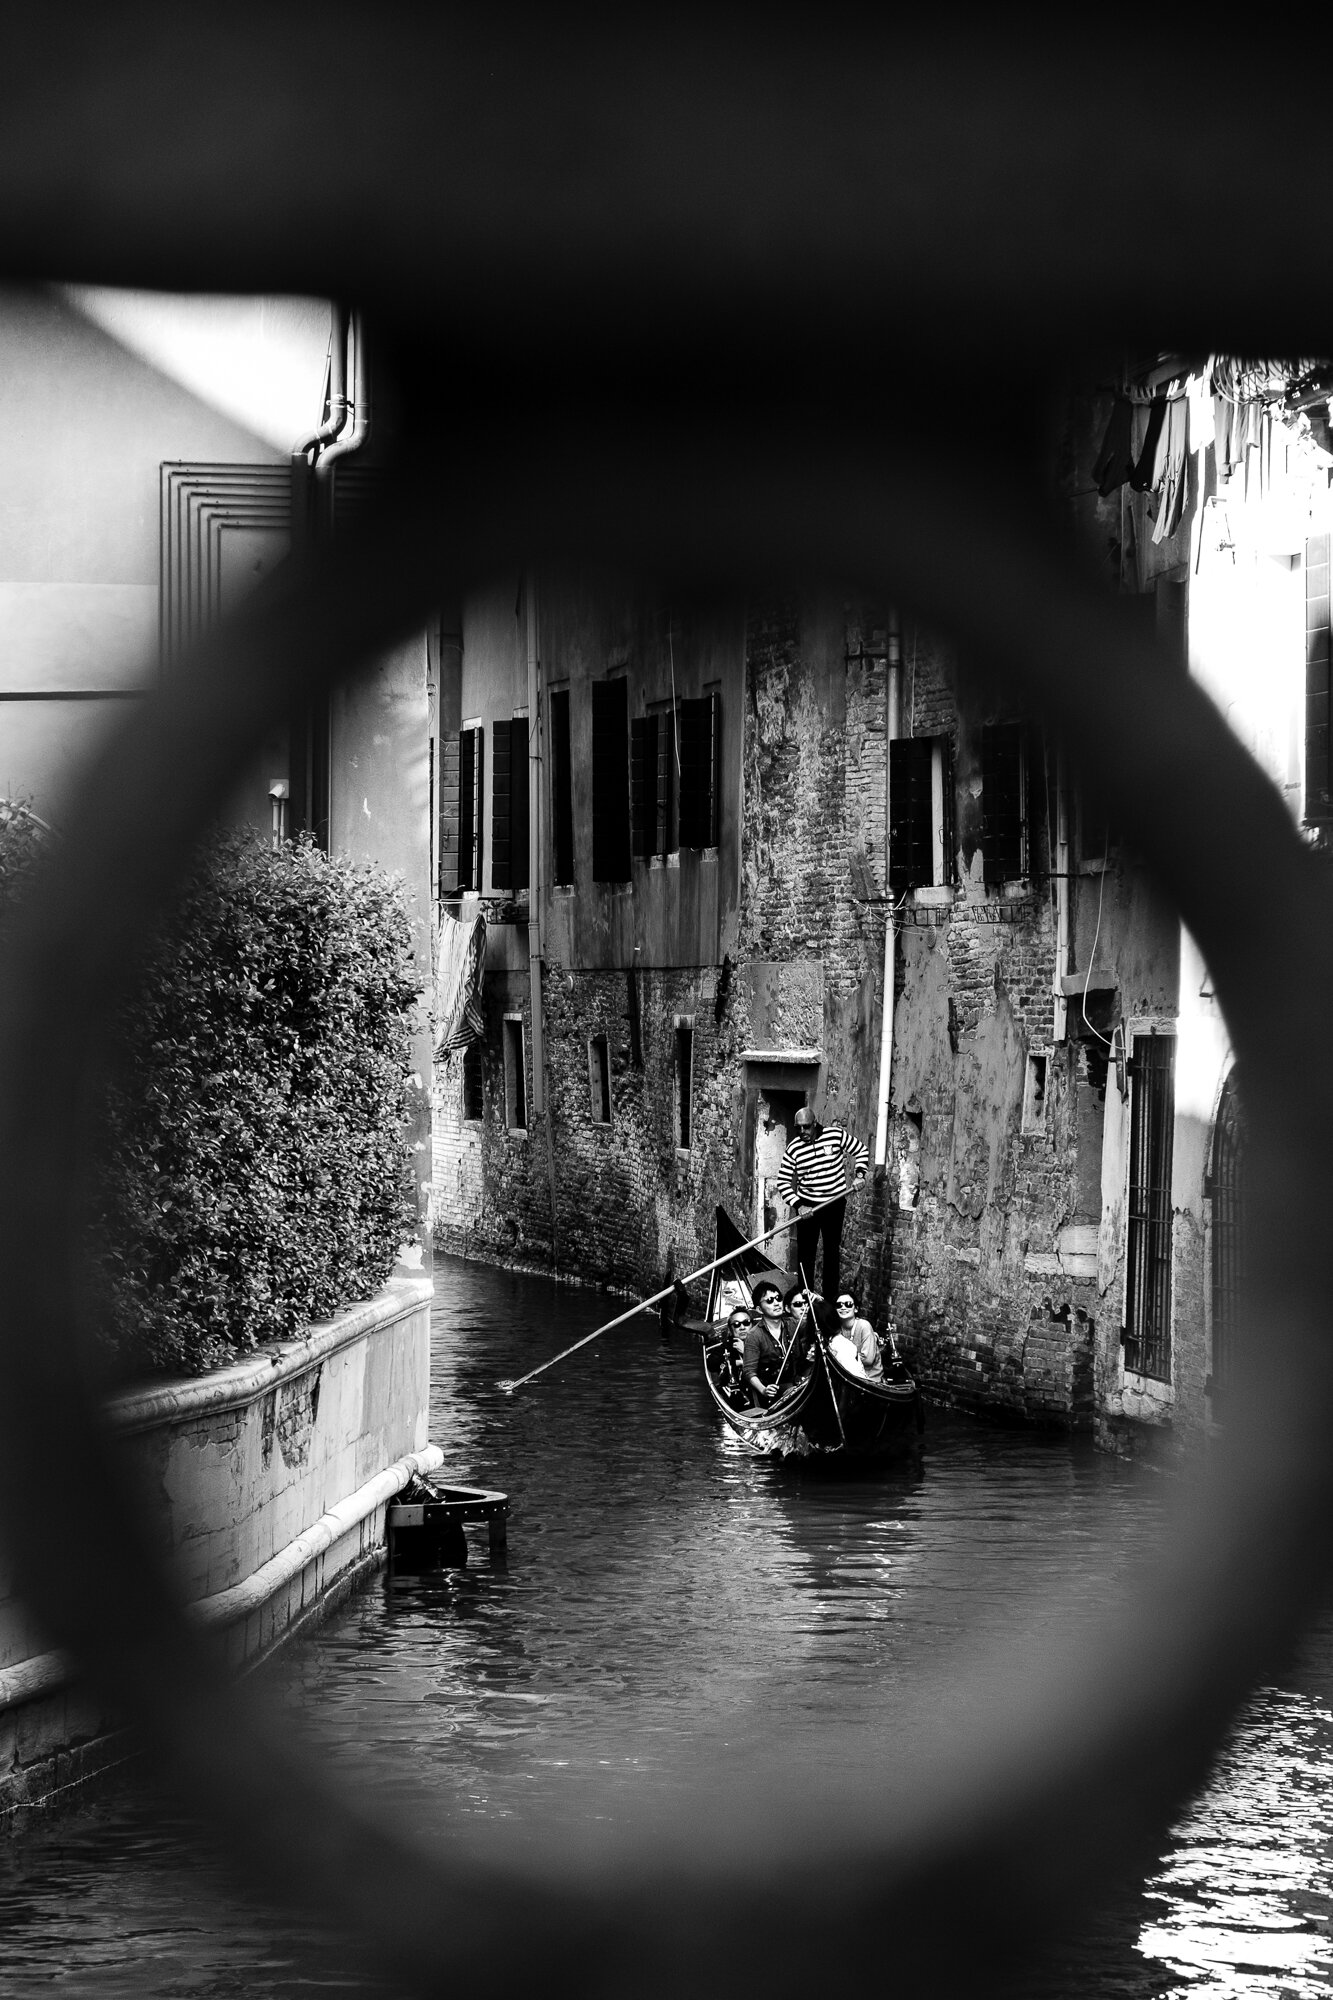
The Gondolier
During both of my trips to Venice, I couldn’t stop taking photos of the iconic gondolas as they would float peacefully along the twists and turns of the seemingly never-ending canals. These instantly recognisable boats are fun to shoot, especially when they catch the occasional light hitting the water creeping through the gaps between the buildings and with those tall Venetian structures flanking the canals they make perfect compositional frames which look fantastic in a black and white image.
Fujifilm XT2 | XF18-55mm | 46mm | 1/25th Sec | f/4 | ISO200
When converted to black and white, the photo can have a somewhat timeless look to it and in Venice, even more so as without any modern distractions in a lot of the scenes, these photos look like they could have been taken any time in the last 50 years. I guess it’s a bit of a throwback to the past when there was no colour photography and black and white film is all there was to use.
Fujifilm XT2 | XF10-24mm | 10mm | 1/1,400th Sec | f/4.5 | ISO200
Fujifilm XT2 | XF18-55mm | 55mm | 1/80th Sec | f/4 | ISO400
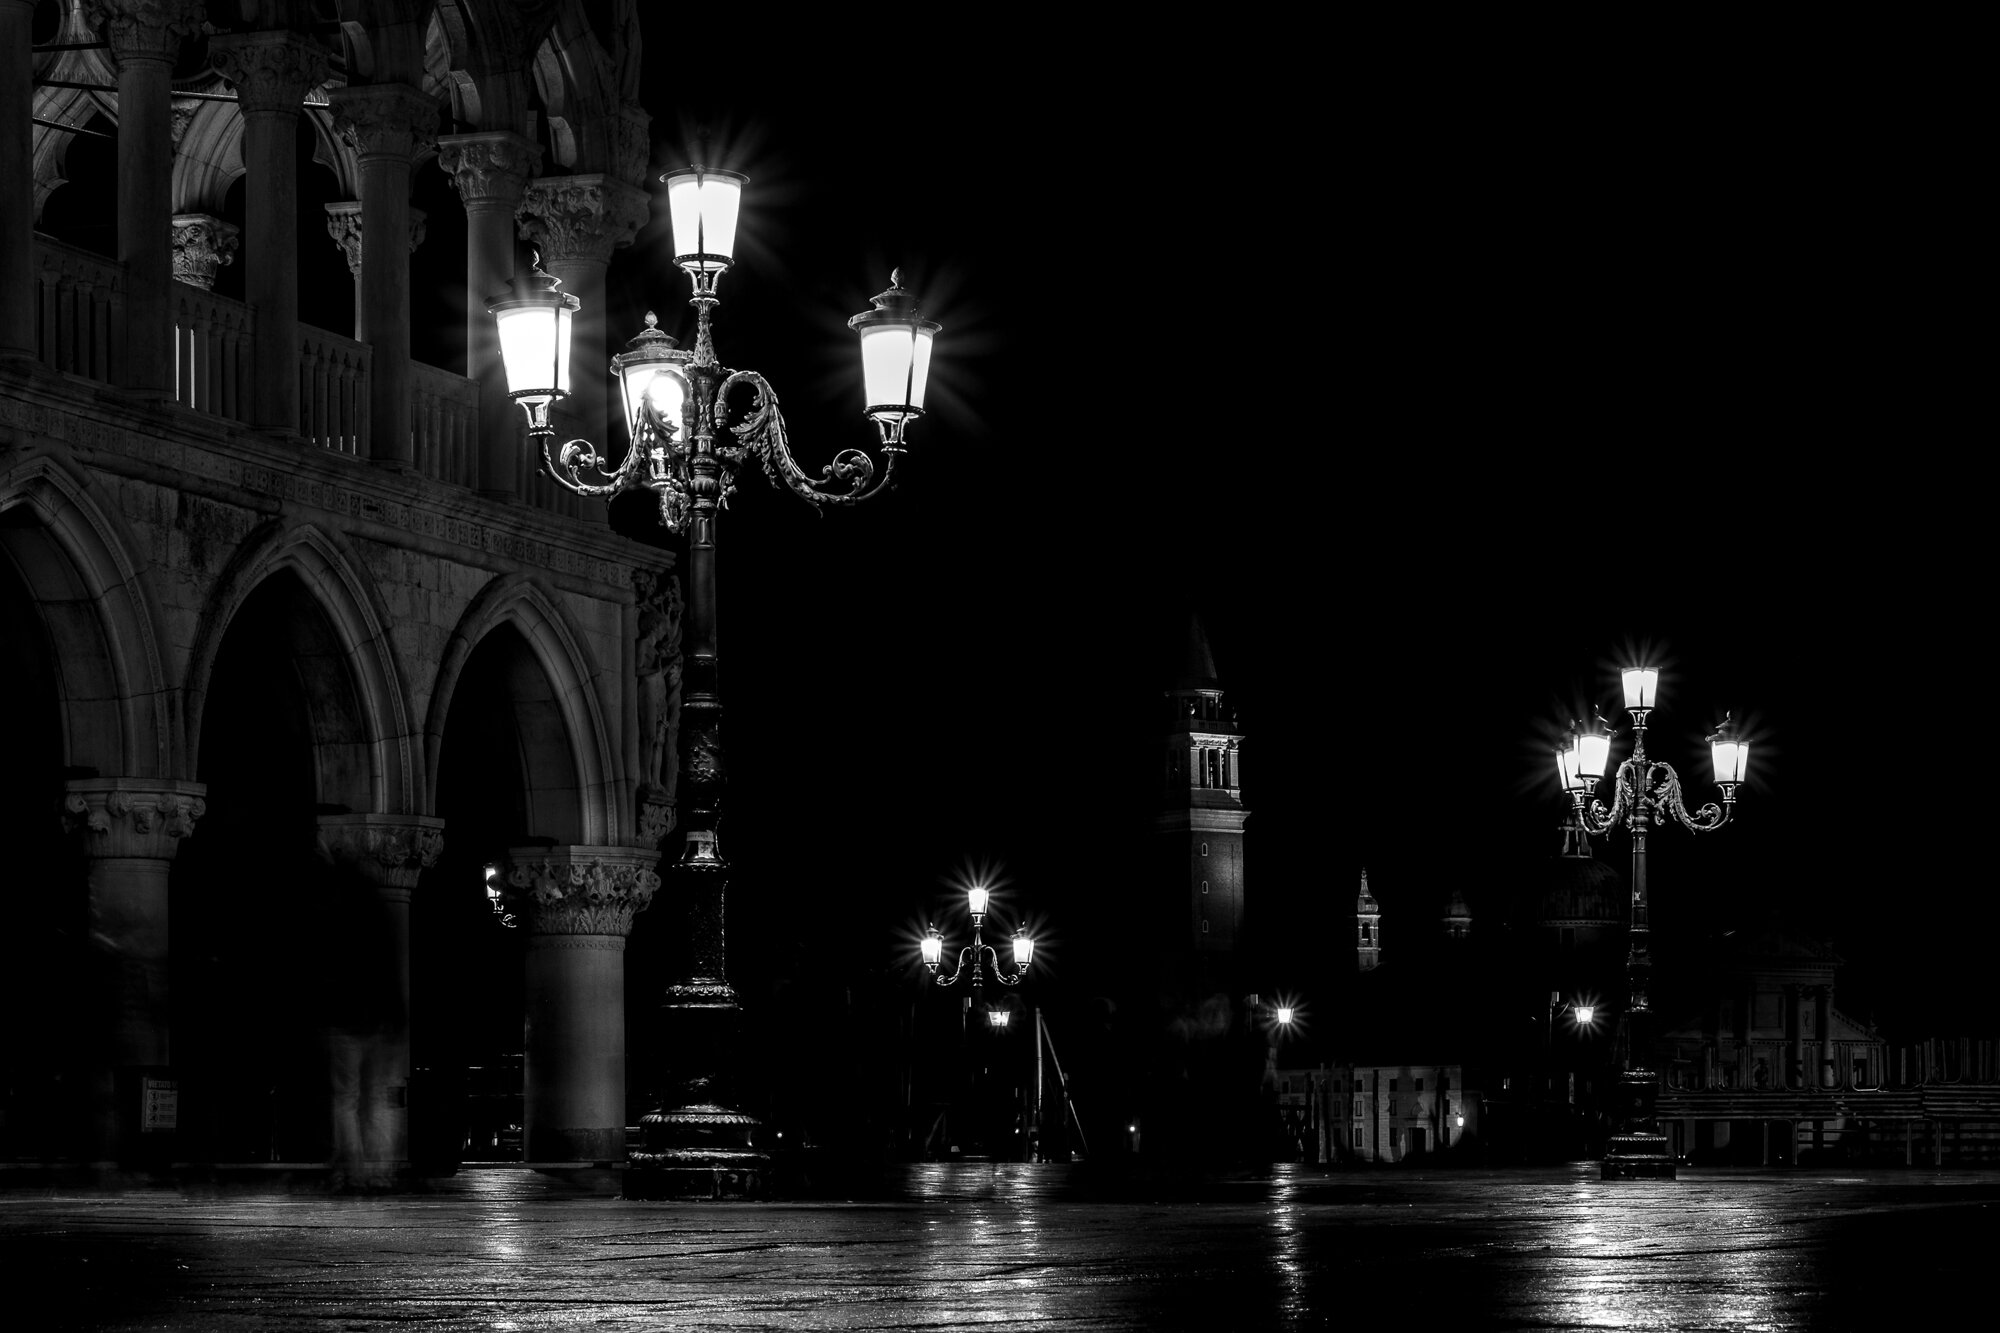
Venice at Night
Fujifilm XT2 | XF18-55mm | 50mm | 15 Secs | f/16 | ISO200
Black and white photography is particular good when taking low key images as those shown here. I really like the mood in the image above, in particular the tower of the Church of San Giorgio Maggiore partially illuminated across the water and the light from street lamps illuminating their ornate shapes and features. This style created the mood I was looking for perfectly
Fujifilm XT2 | XF18-55mm | 18mm | 1/125th Sec | f/2.8 | ISO1600
Fujifilm XT2 | XF18-55mm | 18mm | 30 Secs | f/14 | ISO200
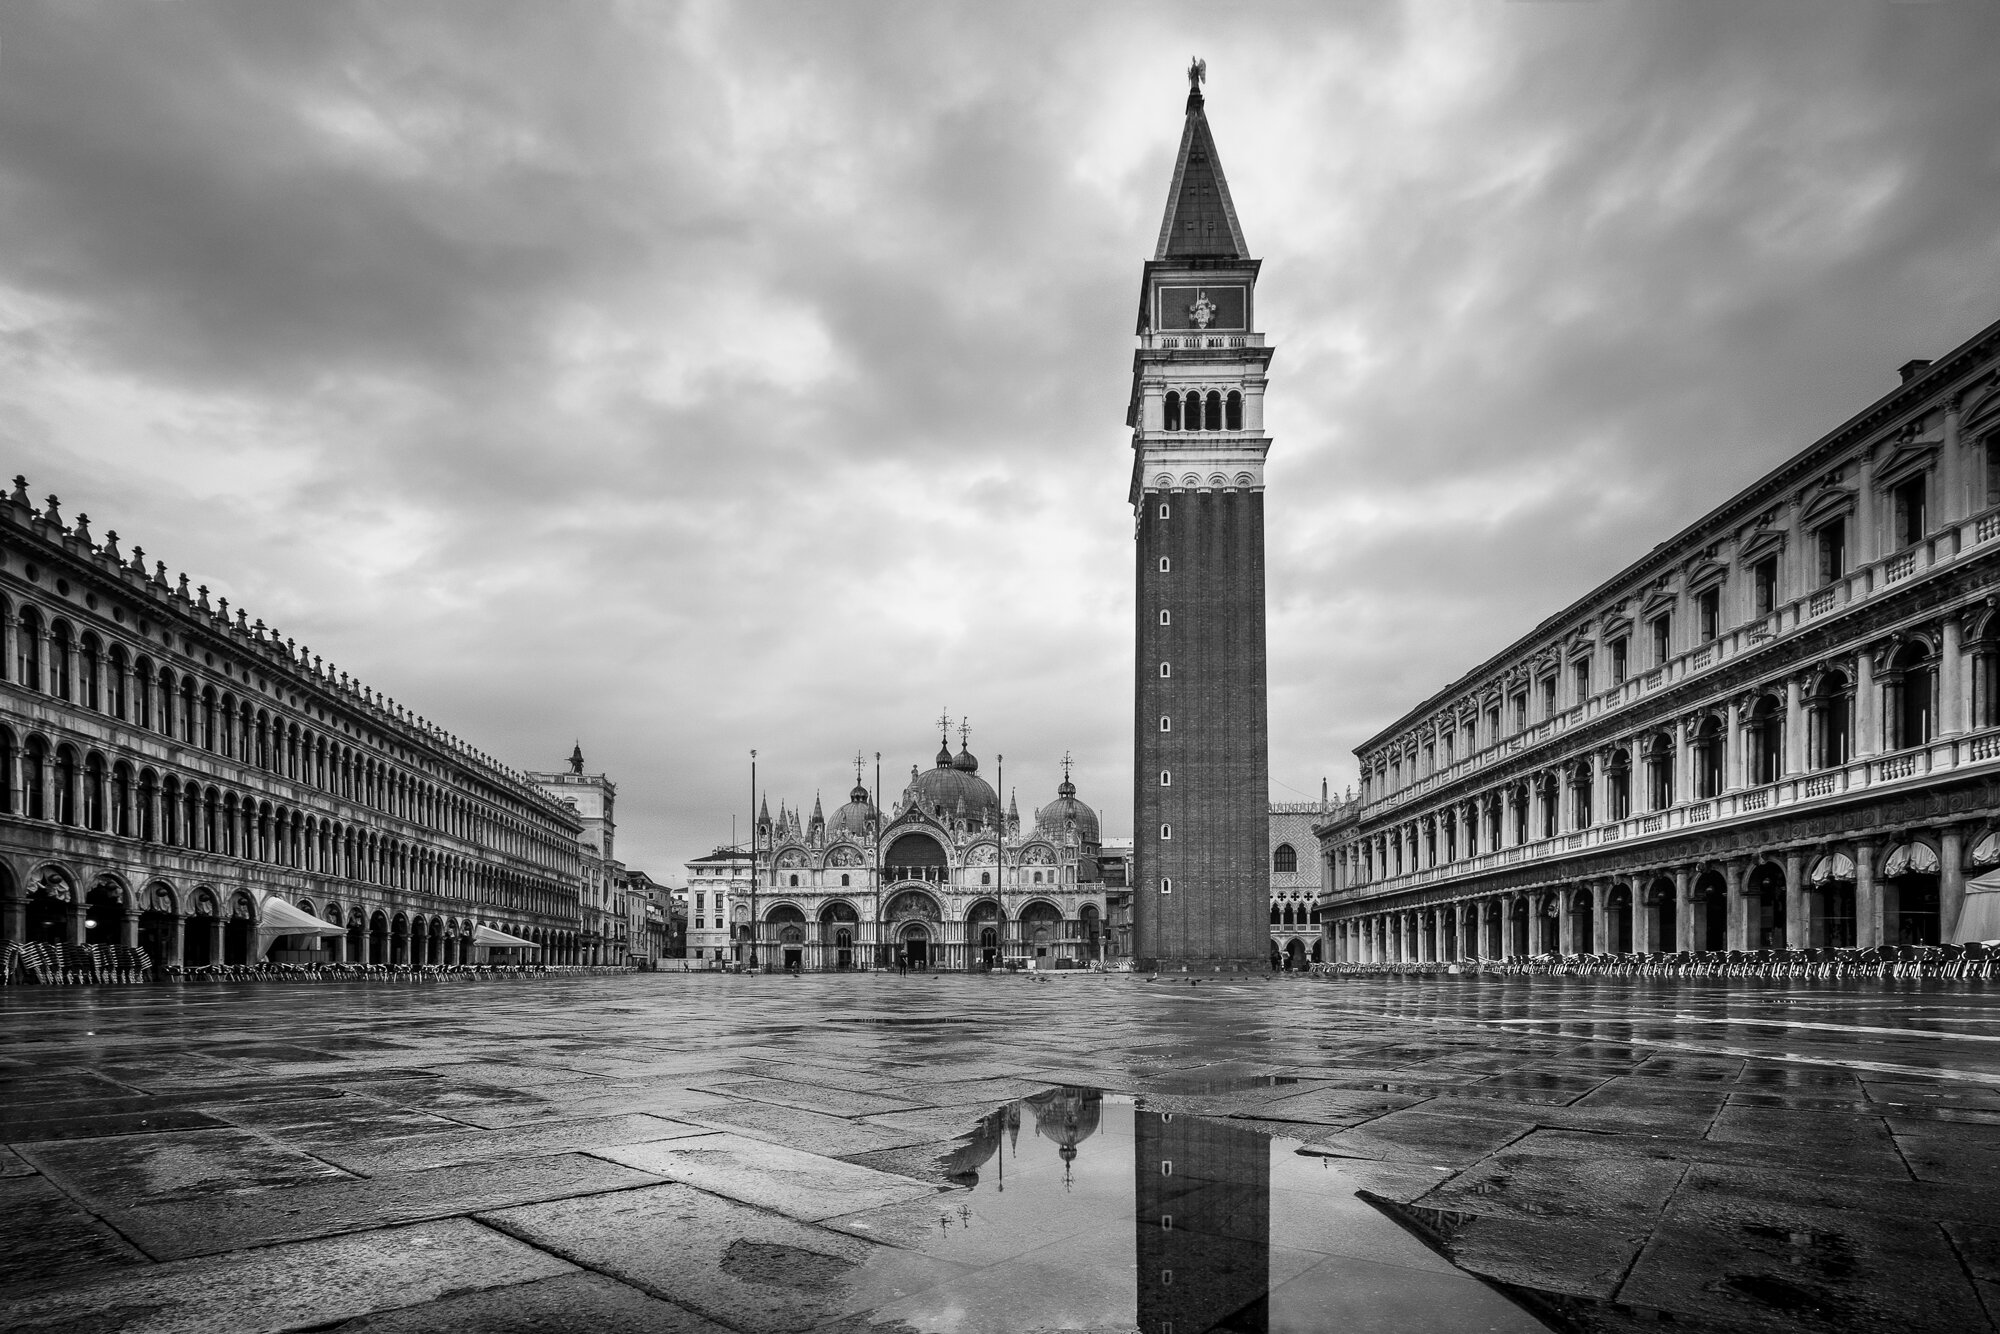
Piazza San Marco
You can’t possibly visit Venice and not capture a few photos of the striking architecture at Piazza San Marco. I had to get up extra early to capture the images of the square being empty of people but with all of the people removed, these photos portray well how a black and white image can emphasise the lines, shapes and patterns such as the paving slabs on the ground or the buildings that flank the square shown in the images below.
Fujifilm XT2 | XF10-24mm | 17mm | 1/6th Sec | f/8 | ISO200
Fujifilm XT2 | XF10-24mm | 10mm | 1/10th Sec | f/16 | ISO200
This was my first attempt at some deliberate black and white photography and I couldn’t have picked a better camera or a more beautiful setting to give it a try. Who knows, I may even attempt a similar approach on one of my regular walks around London. I wrote in my last post how we all should step out of our comfort zone now and then to see what we are really capable of and while in Venice I feel I did this and as I am happy with the photos I took, it was well worth it.
Until next time.
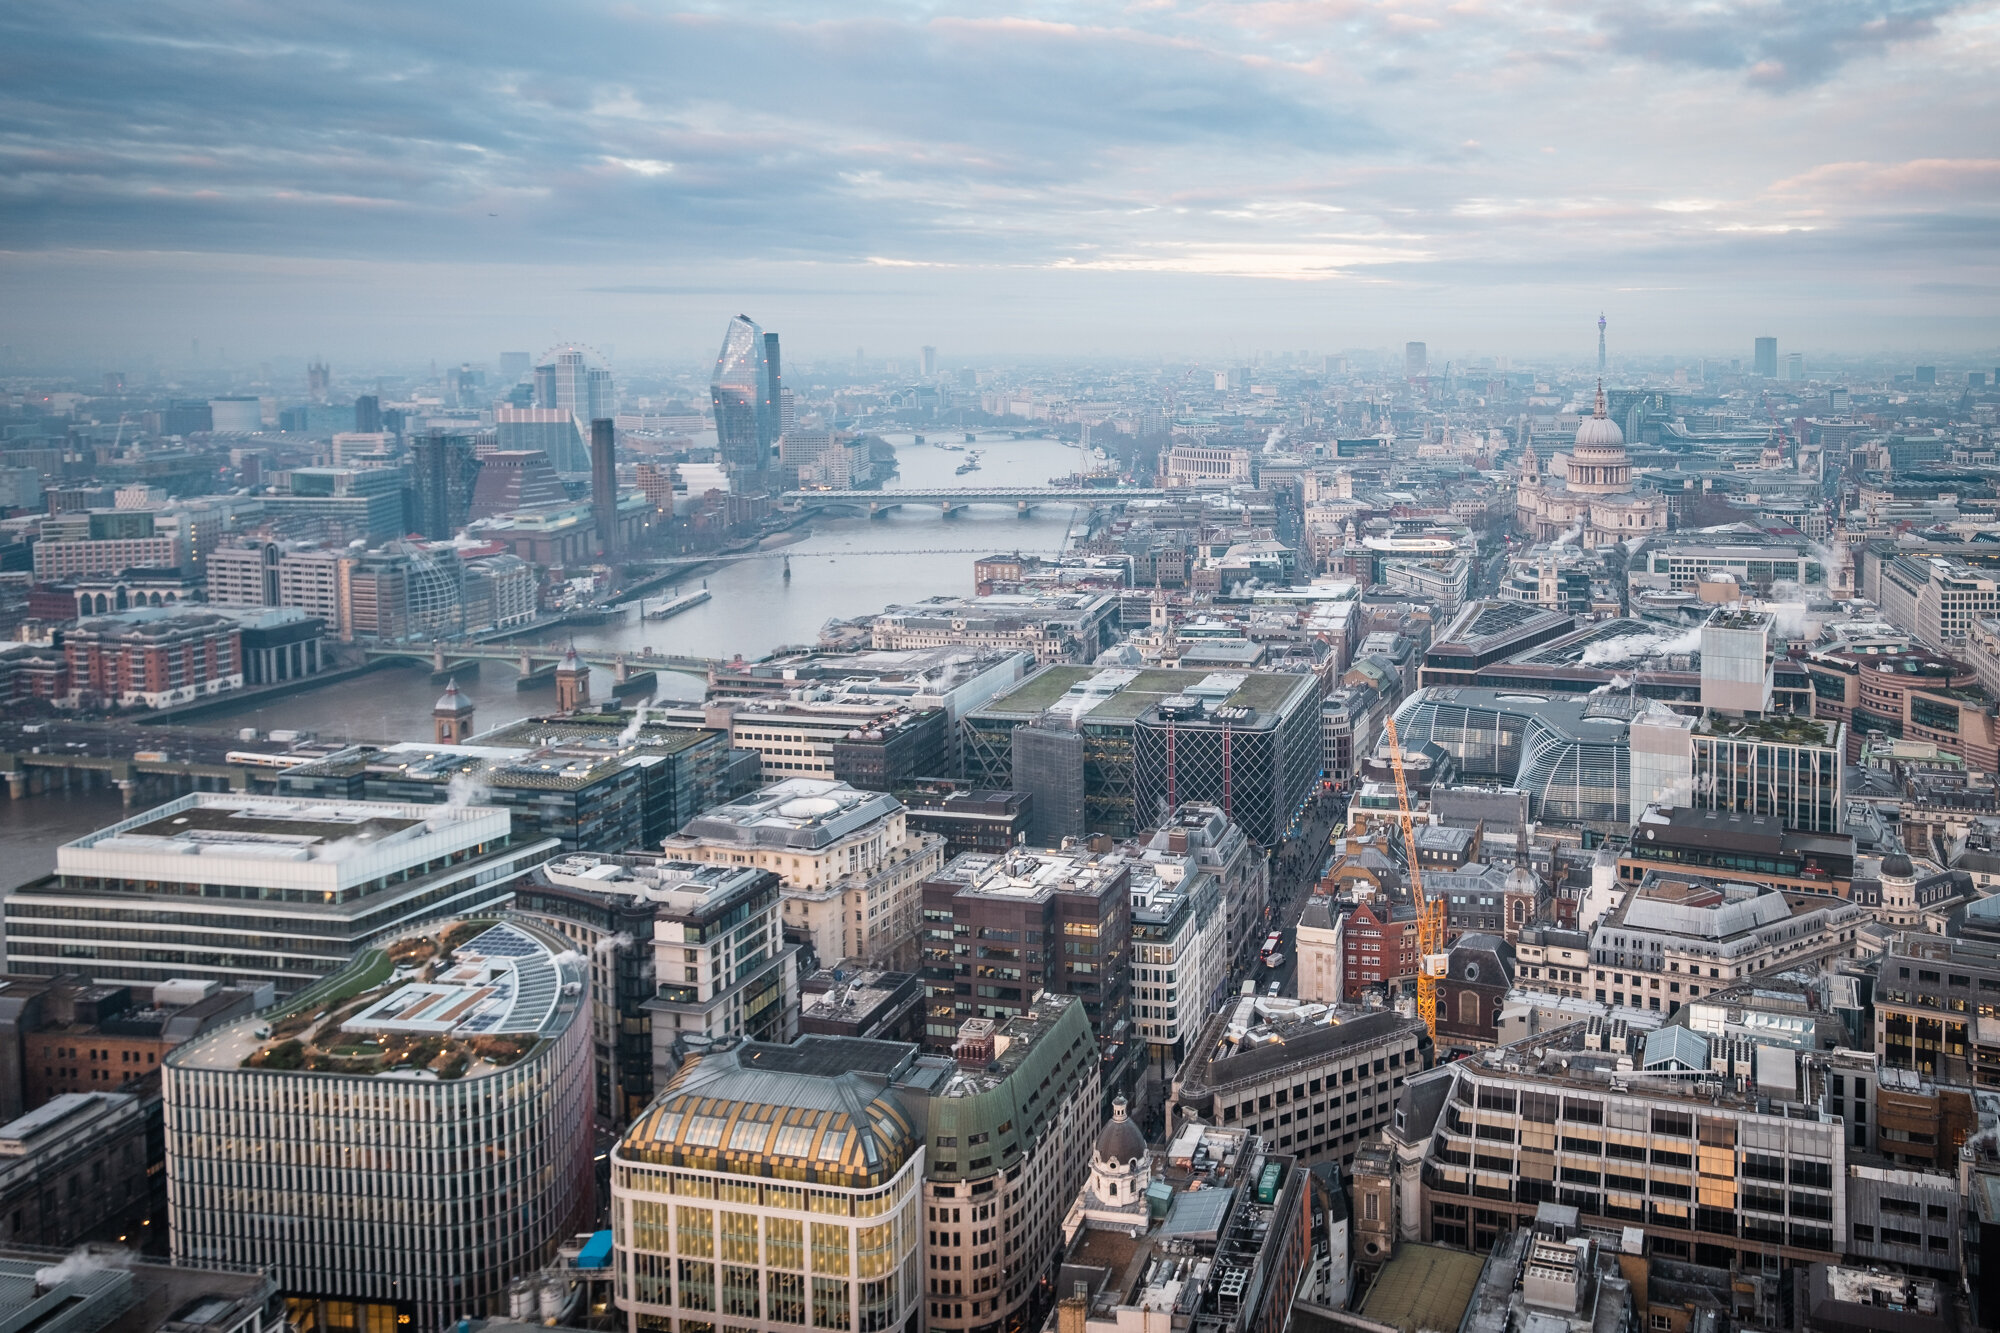
Photographing London's Rooftops
In this post, I share the photos from a sunrise shoot from 35 stories up at the Sky Garden in London. I plan to get up high to capture London a few more times during 2019 so watch out for more posts like this in the future.
London’s skyline is seeing an unprecedented rate of change, particularly in the Square Mile which is experiencing some kind of race to the clouds. New, taller buildings are being erected right now and even taller buildings than that are undergoing planning permission. One of the many strict conditions developers are having to comply with when obtaining permission to build is that in the taller buildings, publicly accessible observation levels need to be incorporated.
Policy 7.7 of the London Plan states that tall and large buildings should 'incorporate publicly accessible areas on the upper floors, where appropriate.
This may not be good news for potential developers but it is great news for us photographers looking to capture new angles and compositions of London’s cityscape.
One of my 2019 photography related objectives is to capture at least 3 high-rise keepers. That’s 3 images taken from London’s canopy during 2019 which I would consider including in my personal portfolio.
The Sky Garden - 20 Fenchurch Street, AKA “The Walkie-Talkie’.
So, my first attempt in 2019 started at the Sky Garden (see map). This location is perfect to start honing those high-rise photography skills for one great reason, its free!. That’s quite a rarity when getting up high in London as most of the viewing levels up this high cost money to enter and although the Sky Garden isn’t as high as The Shard, it is absolutely high enough to get fantastic views of London.
Another good reason to start photographing up high at the Sky Garden is that you can book your visit in advance at a time that suites you (assuming there is availability). That means you can book golden hour, sunrise and sunset time slots so you can be primed and ready to capture the city with the best light available if that’s what you prefer. Follow the link here to book: https://skygarden.london/booking.
On this particular occasion I booked to arrive at 7:15am and on this January morning, that meant I would be there around 30 mins before sunrise so timing was just about perfect.
Here are the photos I took during my visit.
Fujifilm XT2 | XF10-24mm | 17mm | 1/60th Sec | f/4.5 | ISO800
Fujifilm XT2 | XF55-200mm | 55mm | 1/5th Sec | f/6.4 | ISO800
Fujifilm XT2 | XF18-55mm | 48mm | 1/105th Sec | f/4 | ISO200
Fujifilm XT2 | XF18-55mm | 18mm | 1/70th Sec | f/3.2 | ISO200
Fujifilm XT2 | XF55-200mm | 58mm | 1/2 Sec | f/7.1 | ISO200
Fujifilm XT2 | XF10-24mm | 17mm | 1/25th Sec | f/4.5 | ISO200
Fujifilm XT2 | XF10-24mm | 10mm | 1/125th Sec | f/4 | ISO400
Fujifilm XT2 | XF10-24mm | 10mm | 1/200th Sec | f/4 | ISO400
I’m pretty happy with this set. The sun made a brief appearance as it rose above the horizon meaning I could capture East London with a fantastic warm glow cast across it. Once the sun went behind the clouds, the light was a lot flatter and less interesting but once processed using my city chrome LightRoom presets, I’m still happy with the results.
What’s next? I plan to revisit the Sky Garden soon and then look for the next building to photograph from after that. If all goes to plan and I take some share-worthy images, I will post them here on my site sometime soon.
Until next time.
Photographing London on a Cloudy Day
I have so much fun taking photos in great light. When the sun is low, the light is warm and the scene is full of contrast making good photos is so much easier. So what do you do when the light is flat and weather pretty miserable? Well, you go out and work harder for those images by finding strong compositions. In this post, I did just that during a day out photographing London’s Square Mile and beyond.
It’s been a bit of a struggle to fit as much photography in as I would like in the last couple of months. It was a busy time at work as the year drew to a close and having a family at Christmas means lots of festive related activities and unfortunately photographing landscapes and cityscapes needs to take a back seat every now and again when work and family commitments come calling. It’s important to get the balance right in these congested situations.
Having said that, I did manage to get out over the Christmas period and spend a day in The City of London’s Square Mile on what turned out to be a cloudy, quite miserable day in December. I already knew I wouldn’t be getting much in the way of sunlight as I checked the weather the night before but I decided to head out regardless to see what I could capture.
I find myself drawn more and more to getting out and about when the weather is bad as I am continually trying to challenge myself and capturing a good photo while the light is poor is certainly a challenge for me. It forces me to focus on stronger compositions and subjects to ensure the photo is still visually pleasing even without the good light. On top of this, it also helps me develop my post processing to better represent the mood of the photo.
THE TOWER OF LONDON
I started the day around a place I know well. I arrived at the Tower of London around sunrise, although you would never have known as the thick, dark rain clouds prevented any chance of some nice light. I wandered about looking for texture and a composition so I got my camera low to the ground to make the wet, reflective, cobbled street a little more of a feature and that coupled with the lines created by the street lamps and benches, I snapped my first image of the day.
Here is a post featuring more images taken around this area of London.
Fujifilm XT2 | XF35mm F2 | 35mm | 1/80th Sec | f/2 | ISO800
IN THE CITY OF LONDON
Heading into the city, I passed one of my favourite spots in London. A pretty little street, surrounded by modern skyscrapers, Leadenhall Market has an ornate look and feel to it with lots of history and is a great subject to photograph. I chose to once again get low to the ground to emphasise the wet cobbled street and as I was crouched in the middle of the street, slightly wary of being in in the way of other people I spotted this lady with her umbrella which along with the wet street, continued to tell a great story about the conditions I was photographing that day.
Fujifilm XT2 | XF35mm F2 | 35mm | 1/125th Sec | f/2 | ISO1250
Heading further into the city, I captured the photo below of the 30 St Mary Axe building, aka “The Gherkin”. I was drawn to the strong compositional shapes and layers created by the various structures in this photo giving the image a nice sense of depth.
Fujifilm XT2 | XF35mm F2 | 35mm | 1/125th Sec | f/4 | ISO400
I chose a central composition of this Christmas Tree at the end of St Helens Place which is another small but charming road tucked away amongst the city’s towers. I kind of regret not having my wider lens with me for this outing but even though it was taken at a slightly longer focal length than what I would have preferred, the central composition works well enough.
Fujifilm XT2 | XF18-55mm | 30mm | 1/125th Sec | f/3.6 | ISO400
Now heading back towards the river, I passed The Gherkin and had to capture the photo below showing the building’s entrance. The strong lines and shapes create an impactful composition but when you are presented with a subject like this, it is important to ensure the camera is both central and completely level otherwise the image will look unbalanced and compositionally weak.
Fujifilm XT2 | XF18-55mm | 18mm | 1/125th Sec | f/2.8 | ISO500
UP THE MONUMENT
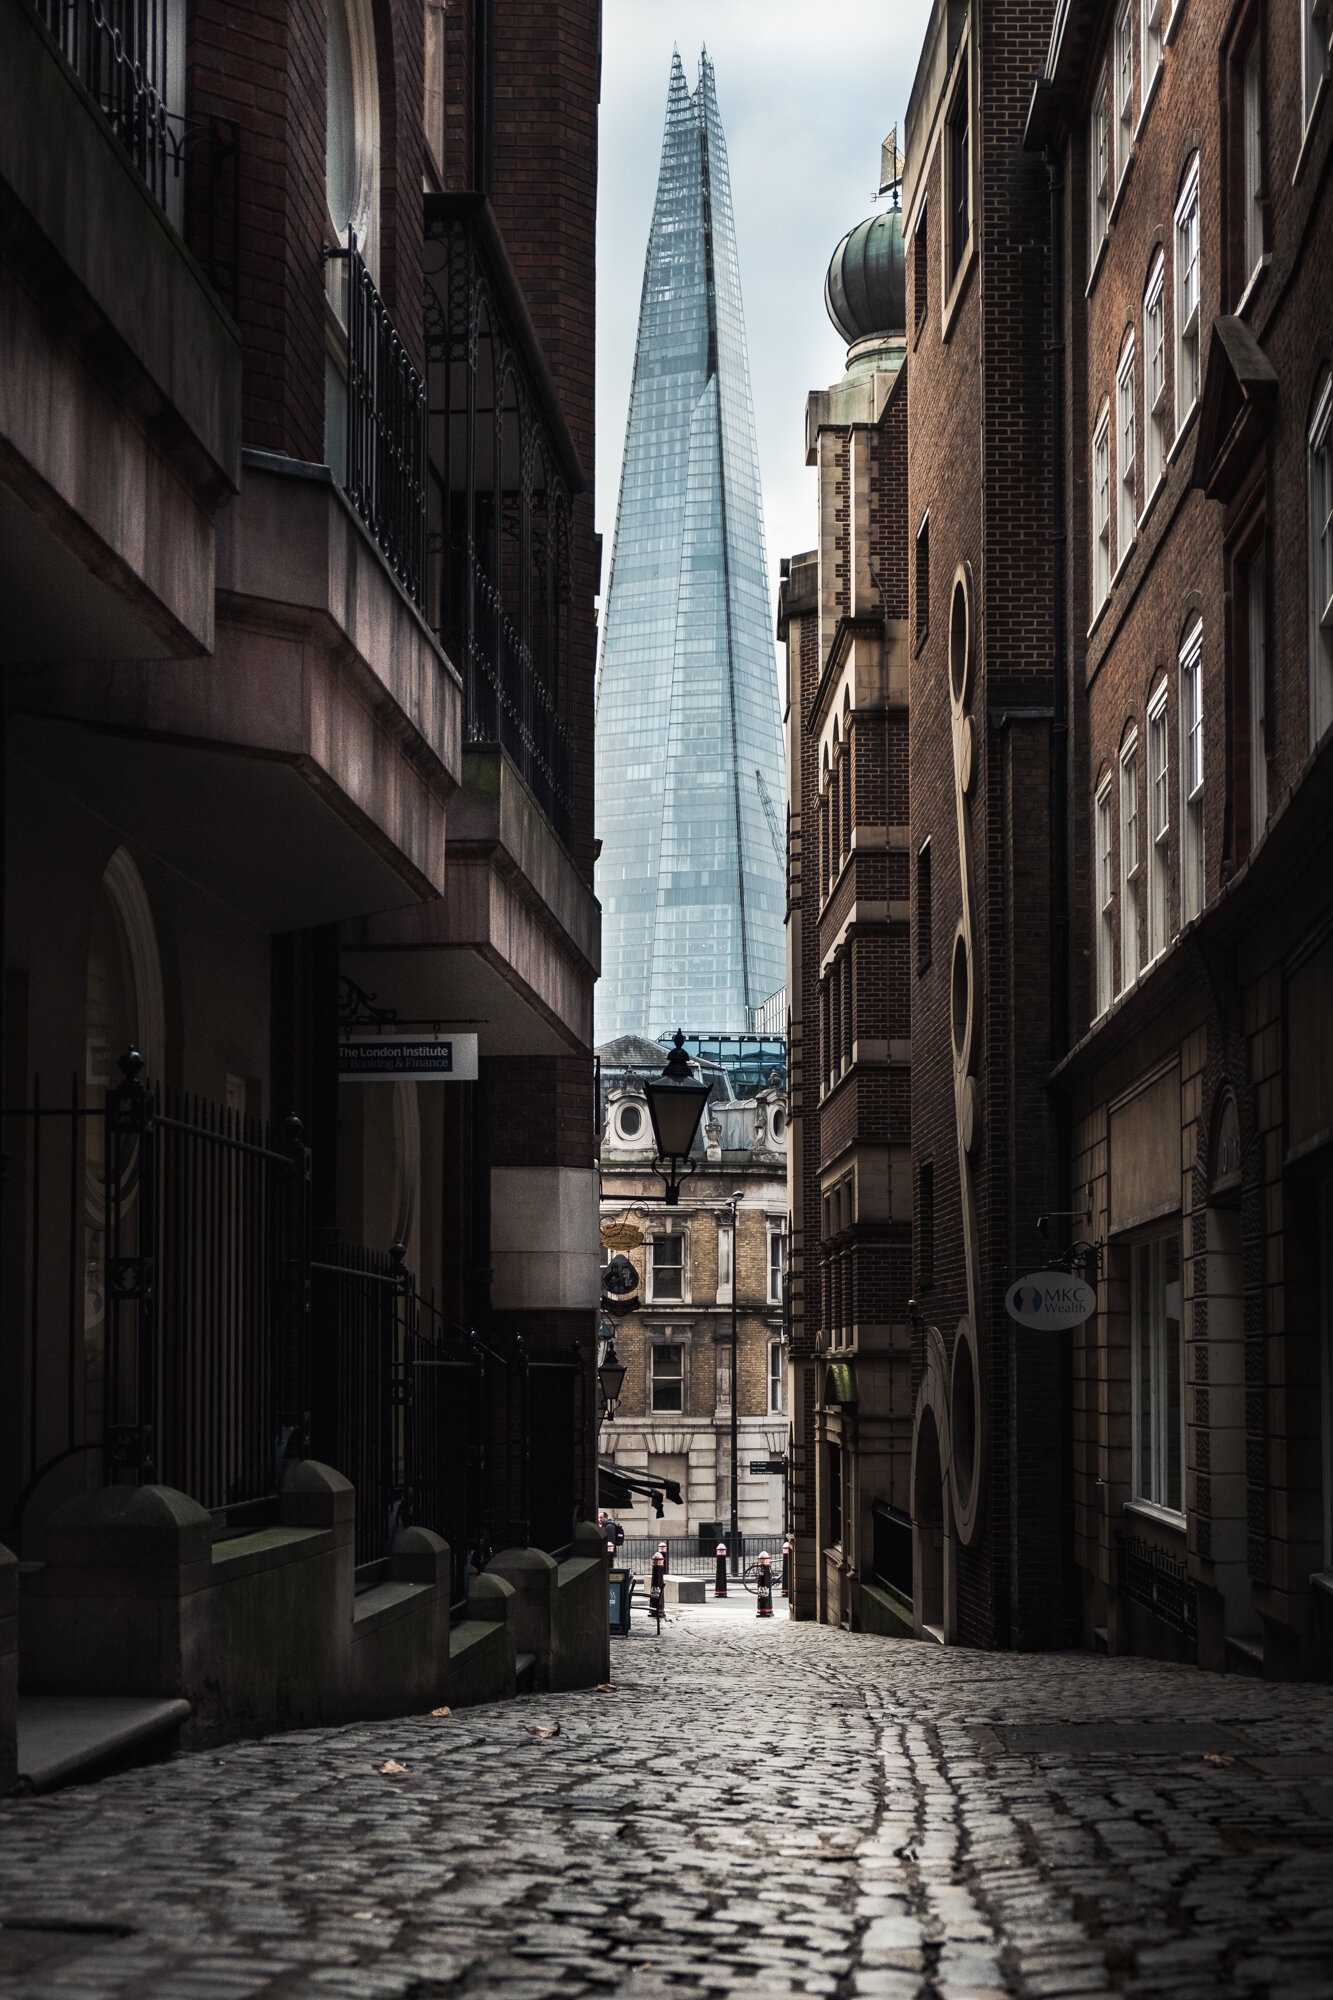
On my journey back to towards the river, I walked down Lovat Lane. I seem to have taken a few photographs of cobbled streets already and here is another. So down I went again to get a low angle of the road and the towering Shard from across the Thames.
Fujifilm XT2 | XF18-55mm | 32mm | 1/1600th Sec | f/3.6 | ISO200
I have been meaning to visit the Monument for a while now. In fact, the last time I went up to the top, I was shooting with Nikon DSLR which had lenses far too wide to shoot through the fencing at the top of the tower so with the smaller lenses on my Fujifilm mirrorless camera, I could just about shoot through the holes without the images being obstructed.
Fujifilm XT2 | XF35mm F2| 35mm | 1/125th Sec | f/2 | ISO320
Up on top of the Monument, I looked around and really, there was only one good photo I could take of this classic photo of the Thames and Tower Bridge. There was just a small amount of light just appearing in the breaks of the clouds but still not enough to change the scene dramatically. I do like this composition as the streets in the foreground provide some interest and lines leading the eye up the image towards the bridge.
Fujifilm XT2 | XF18-55mm | 29mm | 1/150th Sec | f/6.4 | ISO200
ALONG THE THAMES
I spotted the shot below as I walked along the north bank of the River Thames and across Waterloo Bridge. The dominant London Eye is almost silhouetted against the subtle bursts of light piercing the clouds creating an image which almost monochrome.
Fujifilm XT2 | XF55-200mm | 110mm | 1/1000th Sec | f/4.2 | ISO200
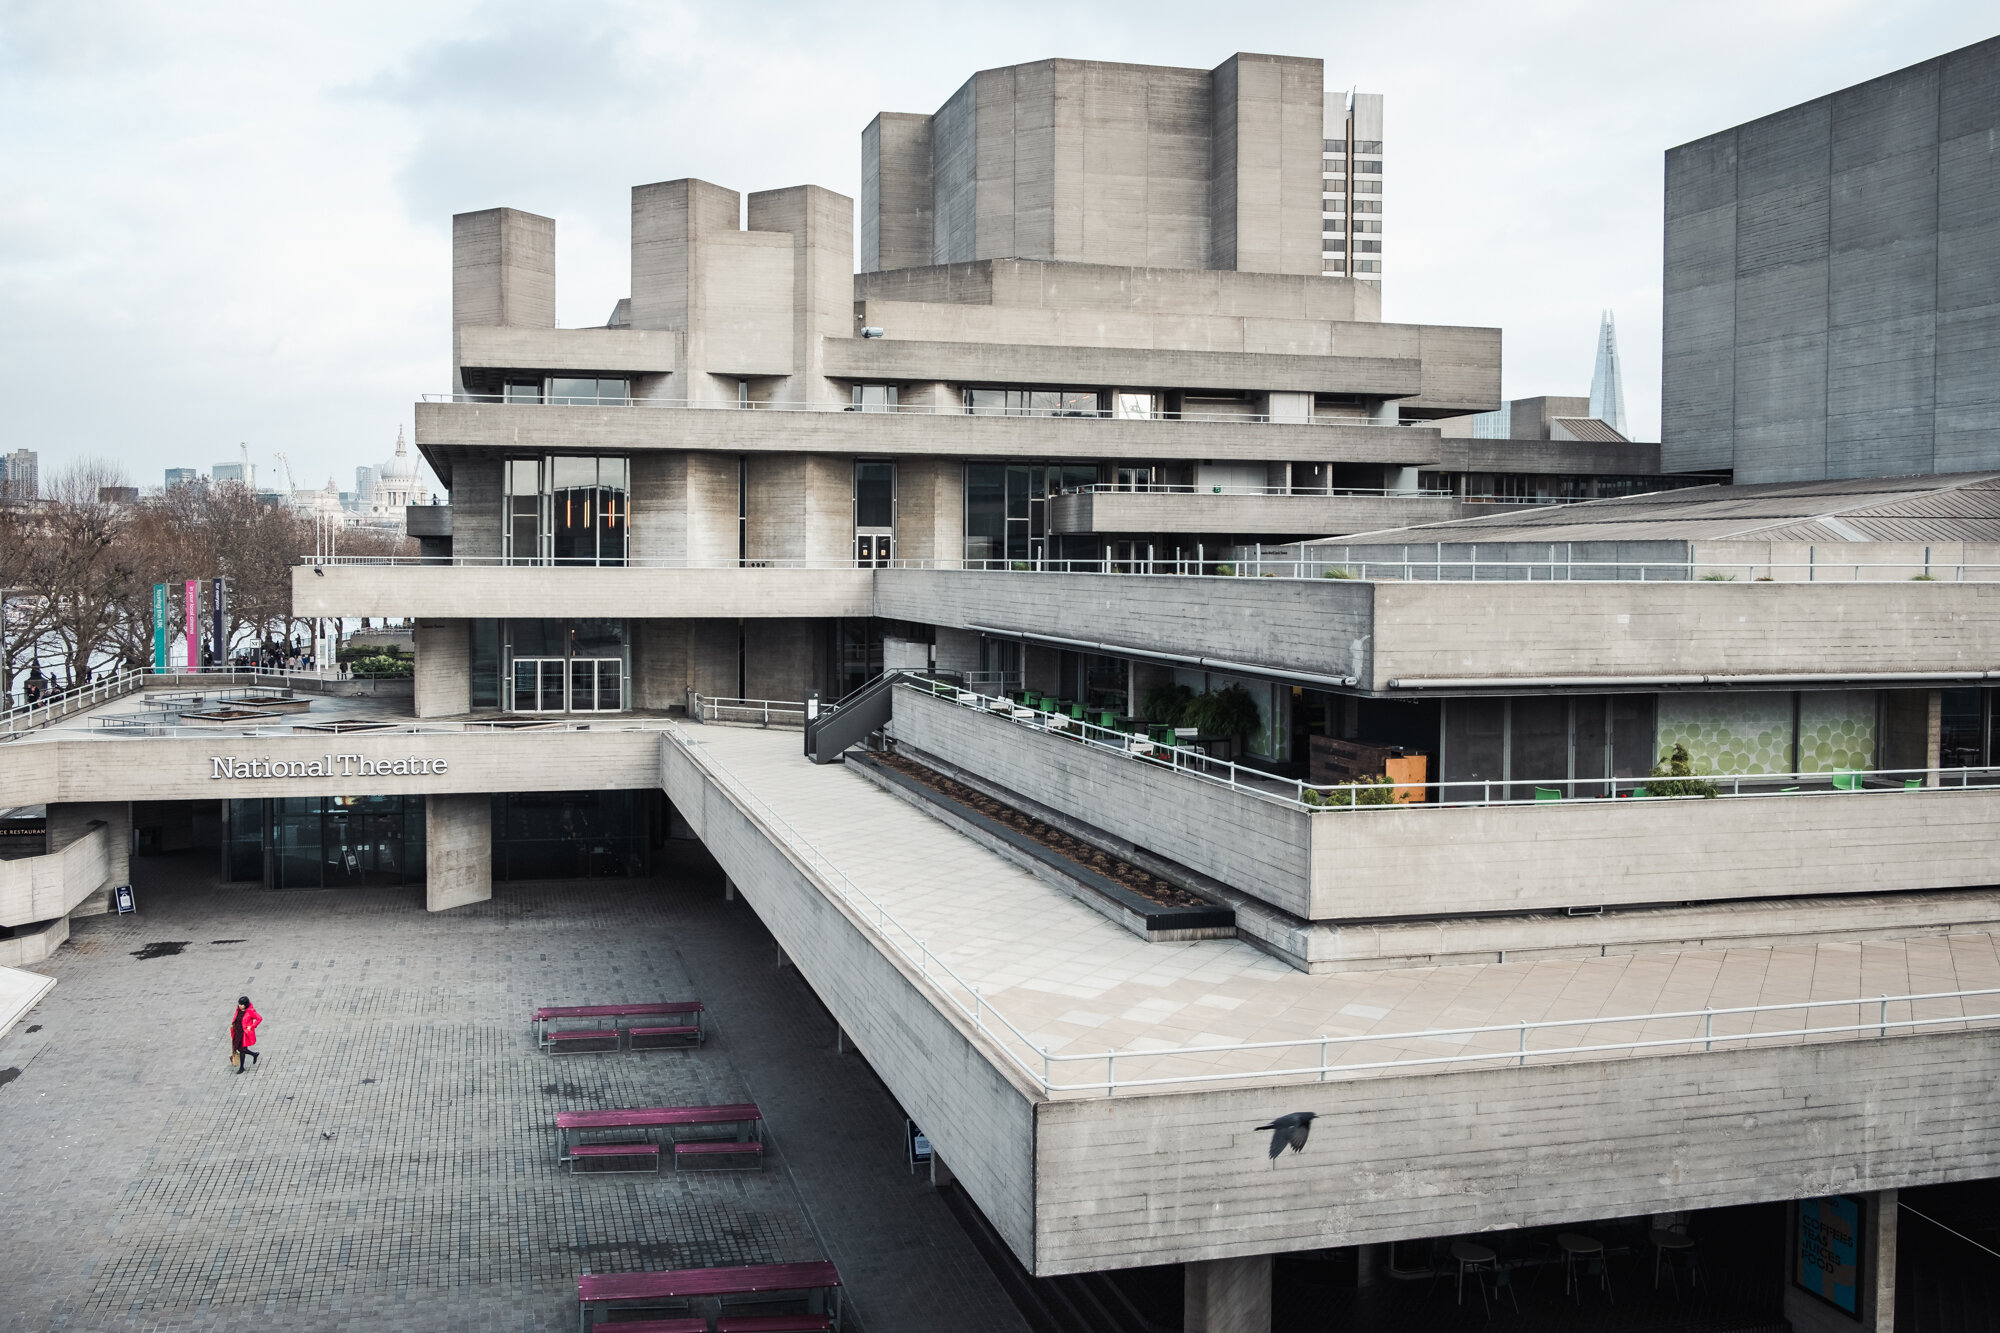
The two photos below were taken along the Thames South Bank. The first is probably my favourite shot of the day. From the end of Waterloo Bridge, I captured the National Theatre in all of its brutalist glory but there was something missing. The architectural lines looked great but I knew I needed someone to walk into the area in the bottom right-hand corner of the image. I had to wait around 10 minutes before this lady in red walked across the frame and I knew that was the shot in the bag.
I love the way the lady’s vibrant red coat contrasted against the desaturated building and being so small in the frame, she adds a sense of scale to the Theatre. At the exact moment I took the shot, a bird decided to fly into my photo and although I would usually think nothing about cloning it out, I decided to keep it in the shot. I don’t know, I just like it there.
The second image along the South Bank is of the Oxo Building. It’s another shot where there is a bold, dominant colour and strong architectural lines create a pleasing composition. I particularly like the way the Oxo Building and wooden pier frame the buildings in the city which continues to be the theme of this post. To think that only a few hours earlier, I was walking amongst those very structures.
Fujifilm XT2 | XF18-55mm | 18mm | 1/350th Sec | f/3.6 | ISO200
Fujifilm XT2 | XF18-55mm | 34mm | 1/600th Sec | f/3.6 | ISO200
AROUND TATE MODERN
To finish up my day I visited the Tate Modern’s viewing level at the top of the Blavatnik Building behind the main turbine room. The viewing level is 10 floors up and provides some pretty cool views of St Paul’s Cathedral and the high-rise buildings in the city. If you try to take a photo of the scene across the river while up on the viewing level, it will be hard to avoid the iconic chimney so as I have done in the photo below, it’s best to purposely make it a part of the composition.
Fujifilm XT2 | XF18-55mm | 18mm | 1/105th Sec | f/14 | ISO1600
Although there was a brief break in the clouds, there was no epic sunset but, in the image below, I used all 55mm of my lens mounted on the camera and captured the last light of the day hitting the buildings over in the city. I particularly like the gold/grey/blue colour palette in this image.
Fujifilm XT2 | XF18-55mm | 46mm | 1/125th Sec | f/14 | ISO1000
I don’t really like to use the word “resolution” but I have made a small agreement with myself that I will try to get out and about more often in 2019 and those times I look at the weather, see a cloudy, miserable day ahead and decide to stay in bed, those are the missed opportunities I need to take in 2019 to ensure I do spend time with the family, I am able to put a shift in at work and I do spend enough time out and about with my camera doing what I so enjoy doing. Let’s see how that goes.
Until next time.
My Favourite Photos of 2018
Another year has passed and it only seems like the other day that I wrote about my favourite images of 2017 and now, a year later I sit down to reflect a little on 2018 and think about where I want my photography to head in 2019.
Another year has passed and it only seems like the other day that I wrote about my favourite images of 2017 and now, a year later I sit down to reflect a little on 2018 and think about where I want my photography to head in 2019.
When reviewing my photos taken in 2018, I didn’t just choose those that had the most wow factor, I want to choose those that ignited some kind of feeling, a memory or some significance related to my photographic journey during the past 12 months. Photography has a far deeper meaning to me than just capturing the view in front of my lens. It allows me to take time out of a busy life, to recharge and reflect and most importantly it gives me a sense of personal achievement when I capture a portfolio shot or undertake and complete a personal project and there will be moments throughout this entire process that leave an imprint on me in some way from the place I was at to what I had to go through to capture the final shot.
The first few images I chose are of course going to be my first photographic love which is capturing London, particularly during a sunrise or sunset. These tend to be the photos I work the hardest to get and as a result give me the most satisfaction when all the elements come together. If I had to put a number on it, I would say that even with all the planning, checking weather apps etc, only 1 in 10 attempts to capture some great light at sunrise or sunset result in exactly that and that’s before I have all of the other elements going my way such as the cloud direction, the subject being clear of distractions etc. So not only do these London cityscape photos stand out as my favourites of 2018, they represent all of those early mornings and late nights I arrive back home in Surrey empty-handed because the light was flat or the sky was grey and featureless.
The image below is one I remember specifically as it reminded me about the role I play as a photographer in London and the patience needed while trying to capture a photo. This is such a busy spot and it was such a nice evening so there were many visitors trying to grab a look at Tower Bridge. Normally when taking long exposures, if the exposure is long enough, someone walking into my shot won’t register in the final image but if they stop, even for a short while, I will get a blurry figure in the scene. On this evening, there were so many people stopping to look out over the water, as much as I tried, I could not get a clean image. Every time I thought the coast was clear, I fired off a new shot only for another person to walk into the scene and stand there long enough to be visible in the final image. I could have asked for the other people to move away while I took the shot but I remember thinking at the time that me being there photographing this location gives me no greater right of passage and everyone is entitled to stand where they like and take in this epic view even if it means me missing the shot altogether. So I waited patiently for a gap in the foot traffic and I was eventually rewarded with a 150-second window without someone stopping for too long enabling me to capture this photo below.
Fujifilm XT2 | XF10-24mm | 16mm | 150 Secs | f/11 | ISO200
Fujifilm XT2 | XF18-55mm | 24mm | 121 Secs | f/10 | ISO200
Fujifilm XT2 | XF18-55mm | 20mm | 1.4 Secs | f/14 | ISO200
Fujifilm XT2 | XF18-55mm | 34mm | 1/500th Sec | f/8 | ISO200
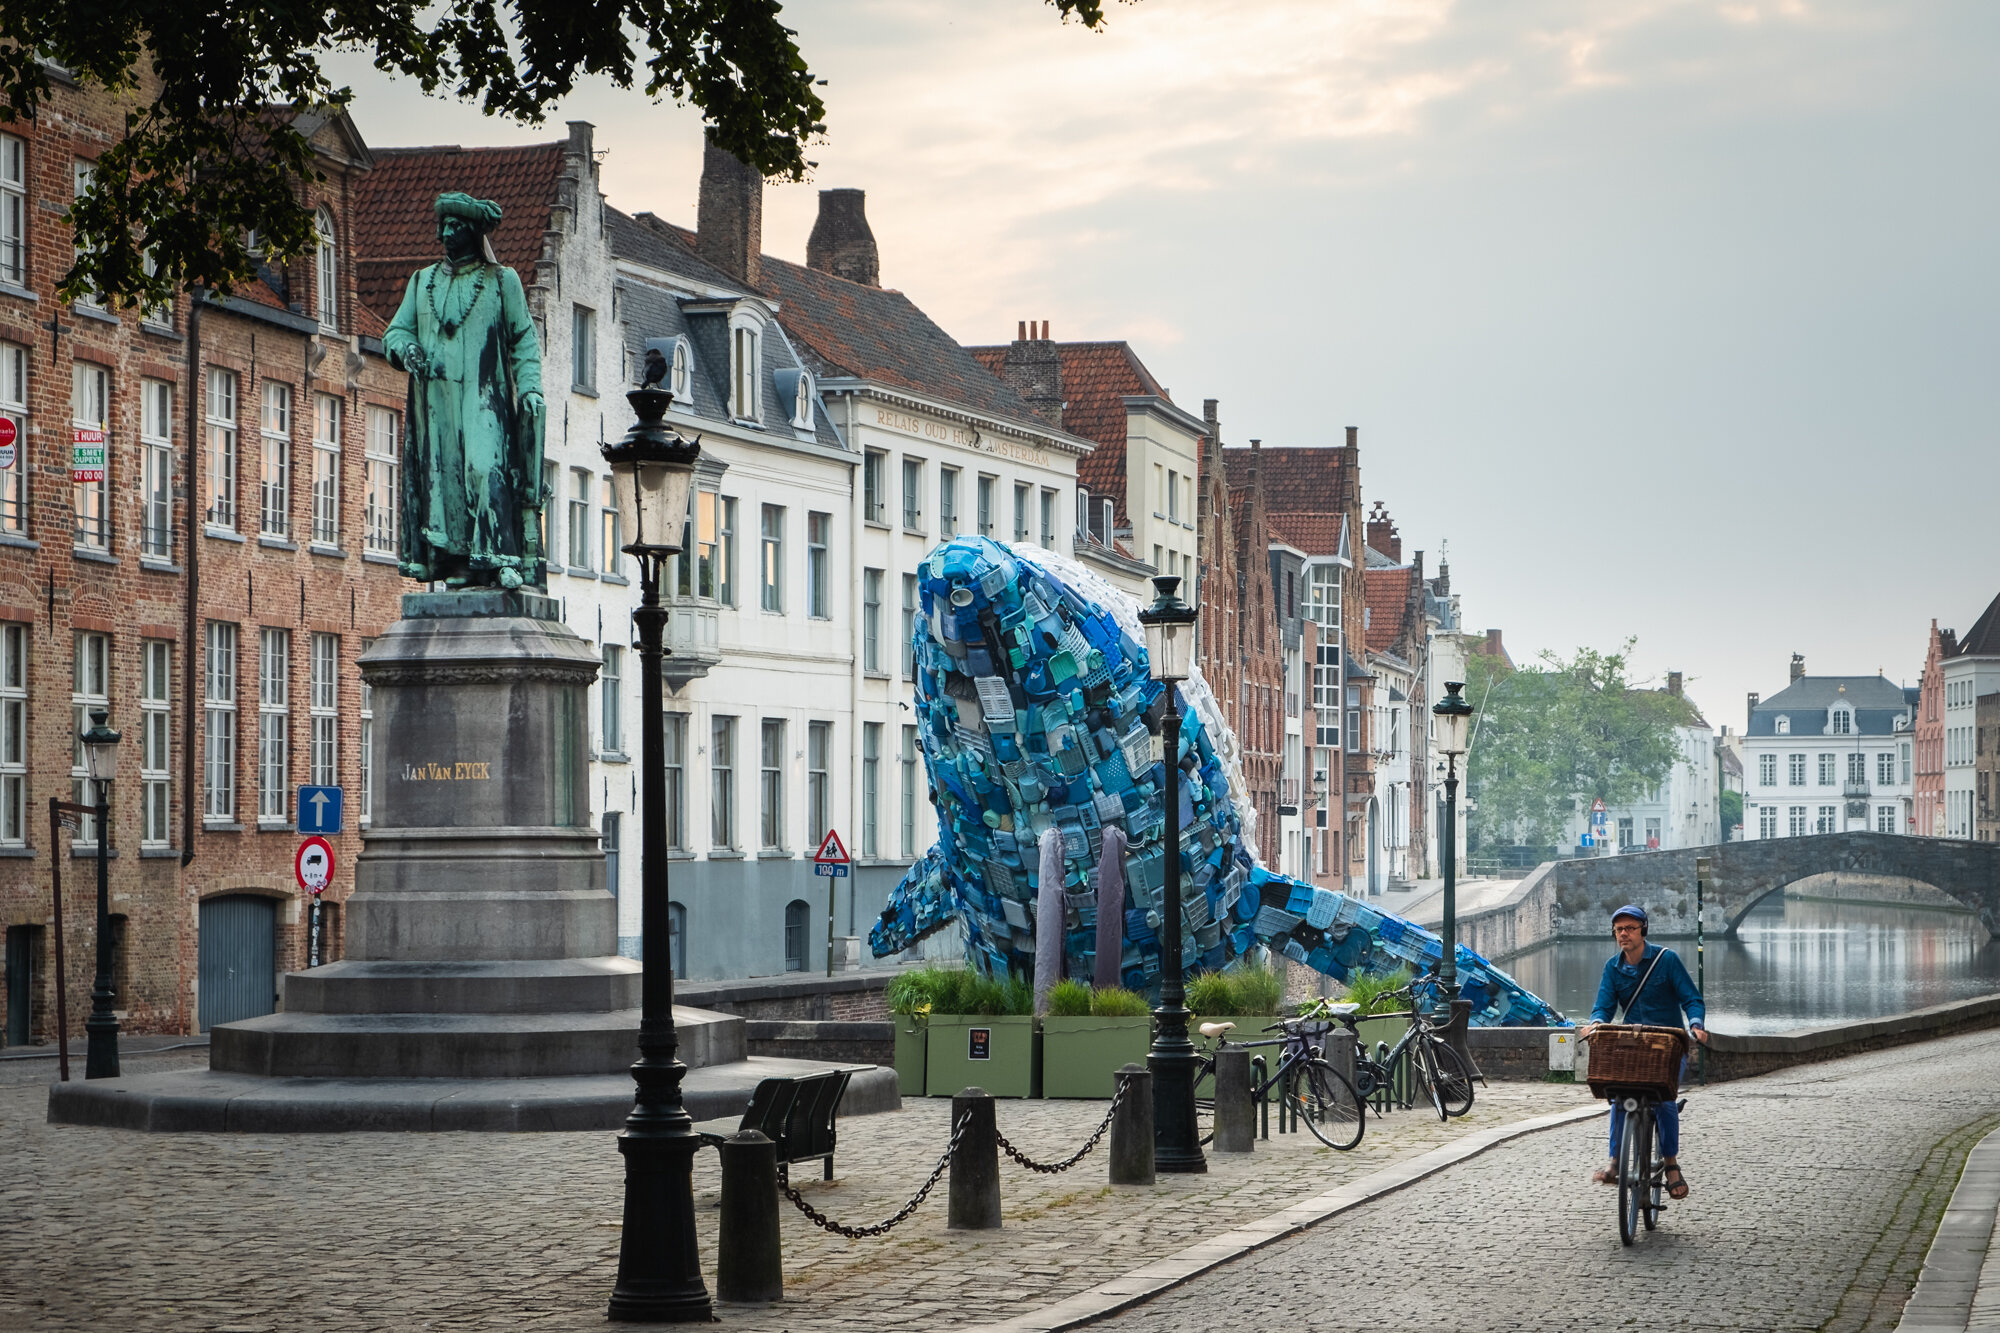
The next couple of images were taken in Bruges and Venice. The reason these are in my list besides the fact that I really like the final images are that they spark fond memories of my travels in 2018. It was my first trip to Bruges and I absolutely loved it there You can read about my trip in this post. On Location Photographing Bruges.
I took the photo of the Dijver Canal at sunrise and thats why it is extra special. Whenever I visit a new place such as this I wake up early and venture out before sunrise (as I did in Venice). Not only does this present some fantastic photo opportunities, there is just nothing that compares to experiencing a normally busy place while it is calm and tranquil. I really think it shows though in the images and they spark this feeling in me every time I look back on the photos.
Fujifilm XT2 | XF10-24mm | 10mm | 1/4 Sec | f/11 | ISO200
Fujifilm XT2 | XF18-55mm | 18mm | 1/40th Sec | f/9 | ISO200
The reason I chose these images is that they represent my first significant project to help me both progress and diversify my photography somewhat. These images also spark a feeling of liberation because one of the objectives for this project is to capture London without a tripod and allow me to move more freely as I wander about the city capturing it with a little more spontaneity.
Fujifilm X-T10 | XF10-24mm | 24mm | 1/100th Sec | f/4 | ISO200
Fujifilm X-T10 | XF10-24mm | 24mm | 1/1,600th Sec | f/4.5 | ISO200
Fujifilm X-T10 | XF55-200mm | 70mm | 1/200th Sec | f/4 | ISO200
This last photo of Colley Hill in Surrey brings me both joy and a little regret. Although I really like this image of a place close by many years ago and all the memories it brings, the small amount of regret is that in 2018 I didn’t venture out locally enough. I have focused on London as my main photographic subject and this photo has reminded me to make sure I make time to venture out into the beautiful Surrey Hills to photograph it more.
Fujifilm XT2 | XF18-55mm | 18mm | 1/45th Sec | f/22 | ISO200
So there you have it, my favourite images of 2018. As well as reflect on the past 12 months, I have been making a list of what I want to achieve in 2019 which I will no doubt share in time as these plans evolve.
I wish you all a happy and successful 2019.
Until next time.
My Top Spots To Photograph London at Christmas
London puts on a great show at Christmas and the illuminations can add something very special to the already iconic views. Join me as I show you my top spots for photographing London at Christmas.
Christmas is the one time each year that London gets a whole new look all over the city. Lights and decorations are erected to help everyone get into the festive spirit and for us photographers, this is an ideal time to capture a different looking London, especially at night when the illuminations create some quite dazzling photo opportunities.
I’ve decided to put together a list of some of my favourite places to capture London looking all festive and Christmassy.
1. Leadenhall Market
Leadenhall Market is a hidden gem located in the City of London. Nestled amongst the modern high rise buildings, this charming Grade II listed, 14th century street has been used as filming locations for movies, most notably Harry Potter and the Philosopher’s Stone.
Here at Leadenhall Market, you will find the cobbled streets lined with decorations and a large Christmas Tree where the streets cross.
Link to Leadenhall Market on Google Maps
TIP: If you are looking to get a photo of Leadenhall Market without lots of city workers in the shot, then head to the City on a Sunday morning. There will be far less people about.
2. Shard Lights
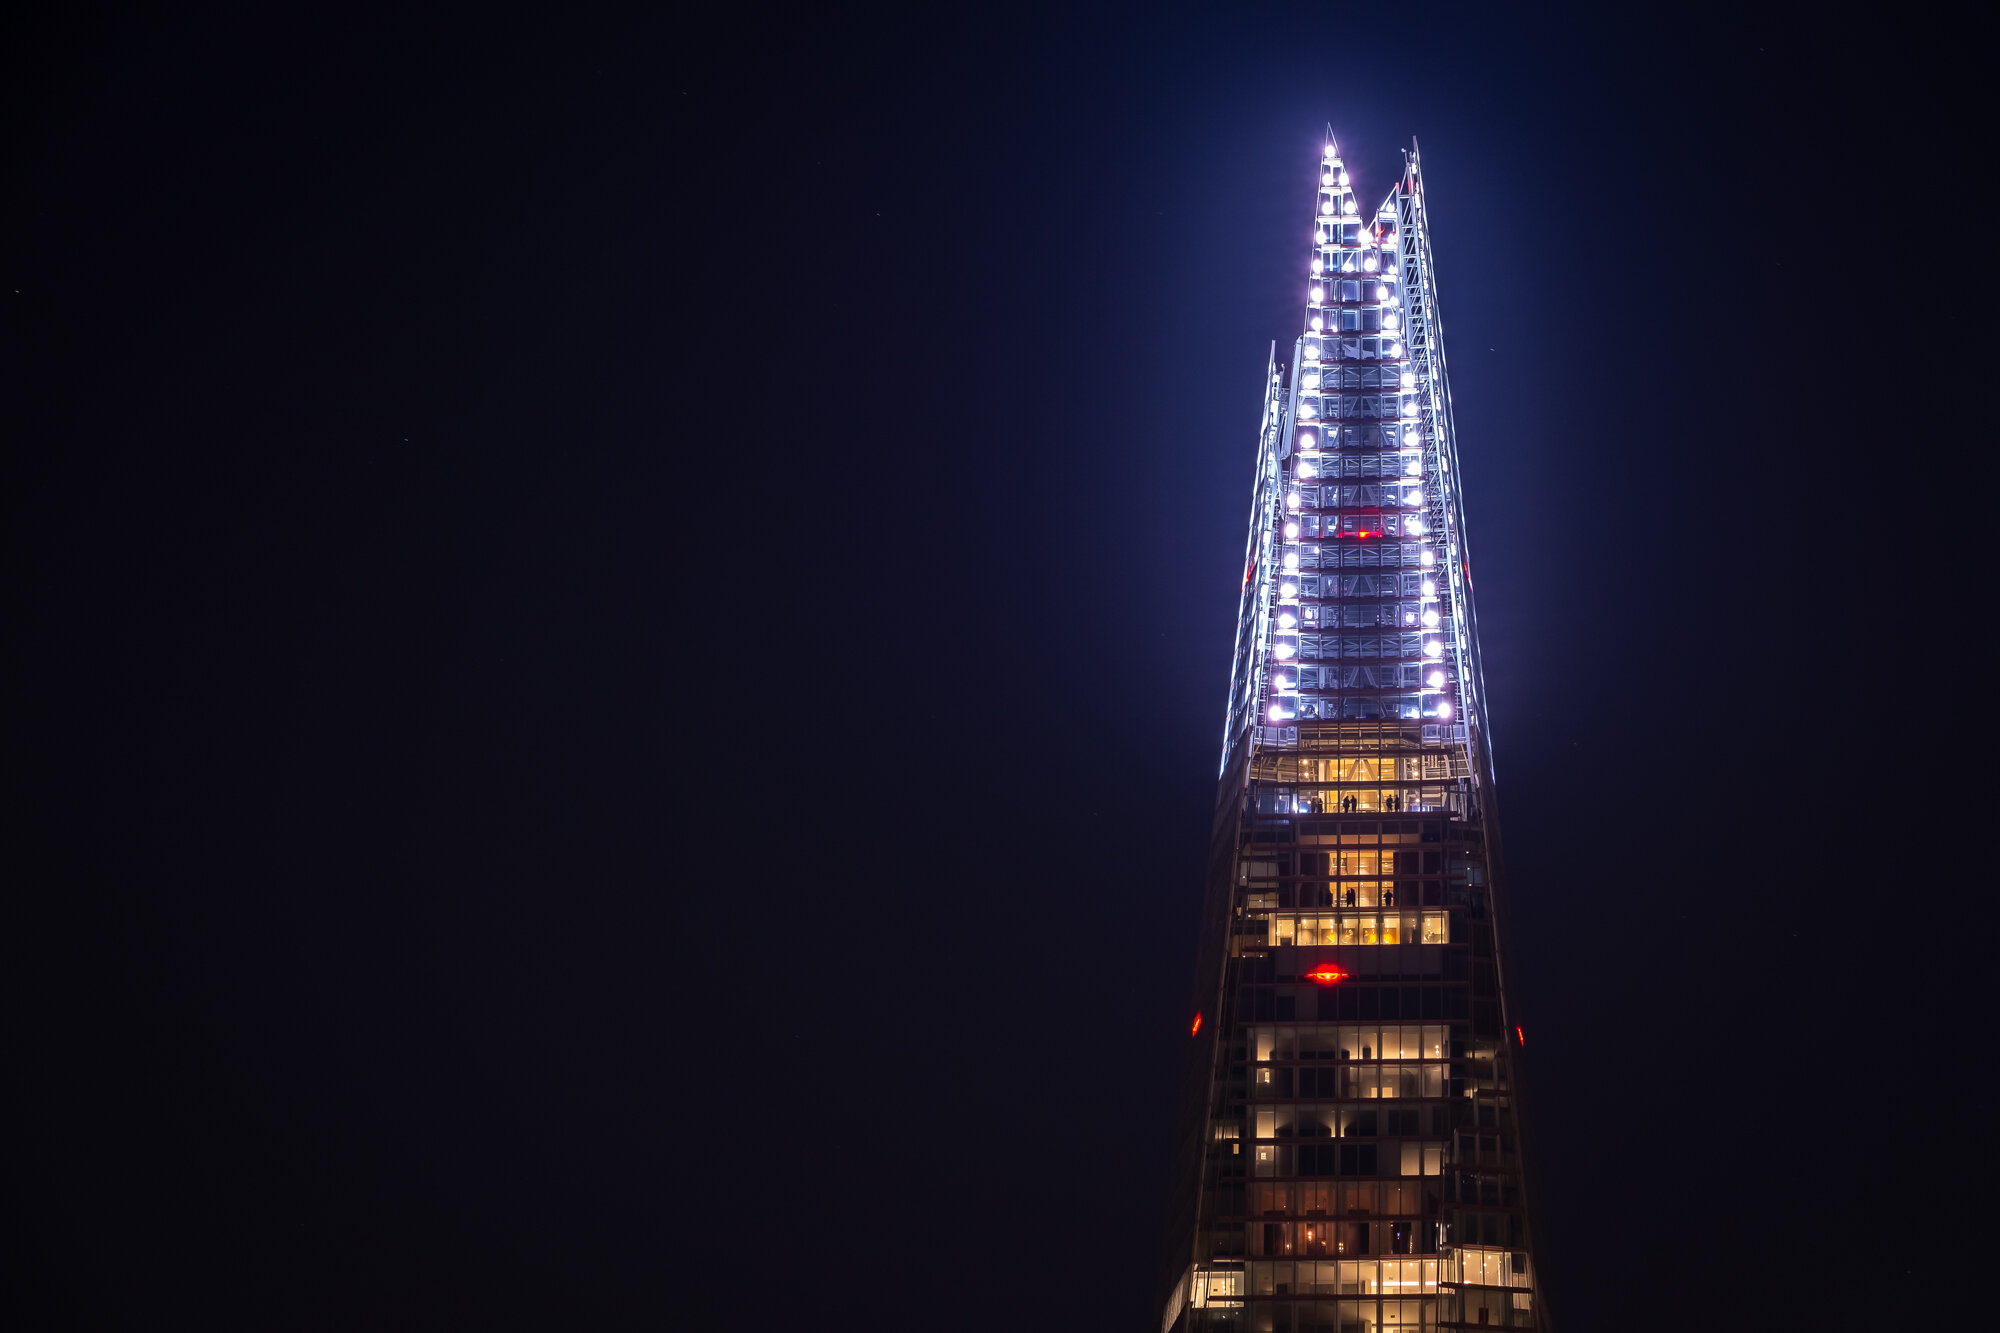
Each year, throughout December, The Shard will put on a show with lights and colours shining from its tip. Being that this is the tallest building in the city, it can be seen from almost anywhere but I recommend viewing the light show from across the river on the cobbled walkway directly in front of the Tower of London or from either Tower Bridge or London Bridge.
Link to a great vantage point on Google Maps
TIP: If capturing Christmas lights at night, make sure you have a tripod with you to avoid those blurry photos.
3. Tower of London
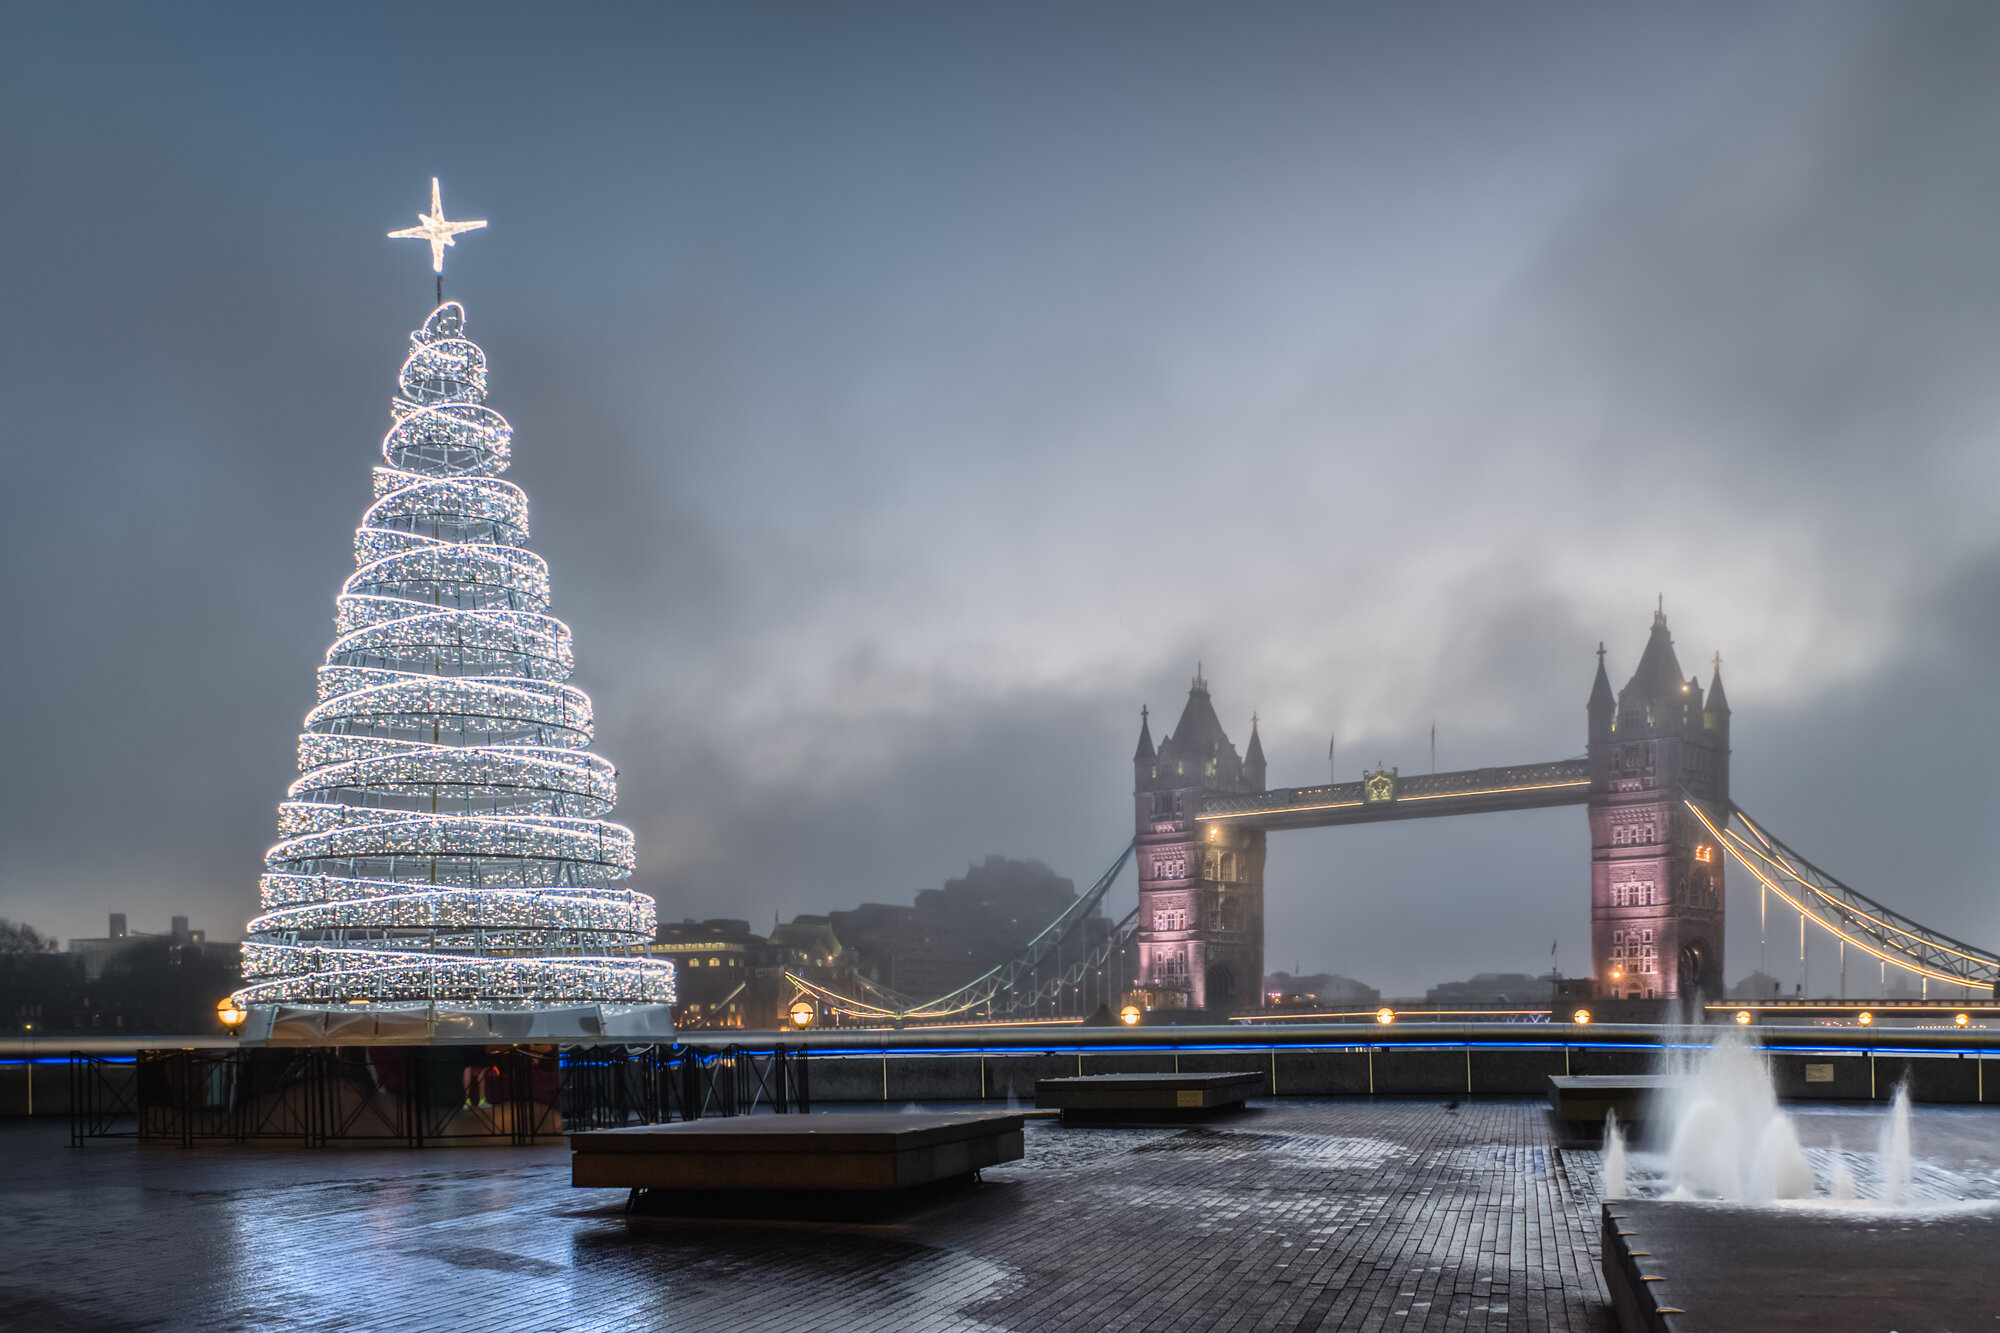
The Tower of London is a buzz of activity around Christmas time. Apart from the usual tourists visiting this famous attraction, they also have an ice skating rink in the old moat. Along the Thames path in front of the Tower, you will find trees and decorations such as this one shown below with Tower Bridge creating a fantastic background subject.
Link to The Tower of London on Google Maps
TIP: This path along the river in front of the Tower of London closes at night. Make sure you check the closing times before you head out to capture it.
4. More London Place
More London Place (also known as London Bridge City) is well worth a visit at Christmas. Each year they put up a contemporary Christmas Tree and there is a Christmas Market along the river front where you can grab some food and drink and a gift or two. You can also grab some great views across the river of Tower Bridge, The Tower of London and the skyscrapers in the city.
Link to More London Place on Google Maps
TIP: More London Place can be touchy about photographers using tripods. I tend not to be bothered by security guards if I use my tripod discreetly and keeping out of the way of other people.
5. Covent Garden
Moving west, Covent Garden is a great place to photograph London at Christmas time. Each year you will find a fantastic Christmas Tree and festive decorations around the Market square.
The tree shown here for Christmas 2018 is huge! Look how small the people look down by its base.
I also love the Morris Minor topped with gifts in the image below. Very imaginative and very British!!
Link to Covent Garden on Google Maps
6. Carnaby Street
Carnaby is famous for its Christmas lights. Located just off Regents Street, this place is well worth a visit. In 2018, the theme for the lights were lines from the song Bohemian Rhapsody by Queen. This area is particularly good to visit at Christmas as apart from it being a pretty cool street itself, it is right next to Regent Street, Oxford Street and the world famous Liberty London department store.
Link to Carnaby Street on Google Maps
TIP: The West End will be busy AT ALL TIMES so if you want to try to capture this area with less people, get up early and try to be there before 7am.
7. Knightsbridge/Mayfair
If you fancy a wander, the affluent Mayfair and Knightsbridge areas are great places to photograph London at Christmas. Some of the hotels and shops in this area create some fantastic displays. Below are just a couple of examples but there are many more.
If you have a couple of hours to spare, here are Google Map directions for a great walk from South Kensington to Oxford Street which will pass through Knightsbridge, Mayfair and new Bond Street.
These are just a few of my favourites but London has so many places to visit at Christmas and I know there will be many, many more. Feel free to drop a comment below telling me where your favourite place to visit at Christmas time. It doesn’t even have to be London!
Until next time.
On Location Photographing Bruges
In July 2018, I spent a day and a bit in the beautiful city of Bruges, Belgium. With only around 36 hours in the city, I wanted to soak up as much of this city as possible and photograph some of its stunning views, cityscapes and interesting architecture.
In July 2018, I spent a day and a bit in the beautiful city of Bruges, the largest city in the Flemish region of Belgium. With only around 36 hours in the city, I wanted to soak up as much of this city as possible and photograph some of its stunning views and interesting architecture.
As I had done with my trip to Venice, I want this post to be a good mix of photography and travel related content. This isn’t an all inclusive review of the city as there is so much more to explore and given how close I am in the UK to Bruges, you can bet your bottom dollar I will be heading back in the not so distant future.
See here for my post PHOTOGRAPHING VENICE - PART ONE
Rather than post the photos I took in the order they were taken, I decided to structure this post into the different locations I photographed, some I visited multiple times allowing me to photograph these places at different times of the day.
This post won’t be too gear orientated but below is a quick list of the camera/lenses I had with me:
Fujifilm XT2 and X-T10 cameras
XF10-24mm lens
XF18-55mm lens
XF35mm F2 lens
XF55-200mm lens
Manfrotto travel tripod which I didn’t use too much
Plenty of batteries and memory cards.
As you can see, I am a Fujifilm shooter and during this trip, i tended to carry the smaller XT-10 and a single lens while walking about during the day whereas the XT2 was used, alongside the tripod and other gear while shooting during the best light during the more focused morning and evening shoots. For some more details about the gear I use, pop over to my About page.
Burg Square
I’ve decided to start with Burg Square. Just a short walk from the larger, Market Square, the architecture in Burg square is quite stunning ranging from Gothic to Renaissance and includes some important buildings such as the 14th Century Town Hall, from which the city was governed for over 600 years.
Fujifilm XT2 | XF18-55mm | 18mm | 1/140th Sec | f/7.1 | ISO200
Fujifilm XT2 | XF18-55mm | 25mm | 1/110th Sec | f/7.1 | ISO200
Tucked in the corner of Burg Square is The Basilica of the Holy Blood. This ornate, tiny church has a Romanesque lower chapel and a Gothic upper. Visually, the upper Gothic chapel has it all going on with lots of colour and detail with the lower being a lot more subdue.
In the photo above, next to the Holy Blood, you can see the red door shown in this picture here. I often find myself capturing interesting doors and windows and this one caught my eye with the bright reds and the decorative statues.
Still in Burg Square, the photo below is a closeup shot of the Town Hall. I tried to capture some of the architectural details behind one of the ornate lamp posts in the square.
The red and white flag that flies above the Town Hall is the Flag of Bruges, Province of West Flanders, Belgium.
Fujifilm XT2 | XF18-55mm | 55mm | 1/420th Sec | f/4.5 | ISO200
Fujifilm XT2 | XF18-55mm | 22mm | 1/5,800th Sec | f/4.5 | ISO200
This is Berg Square with the Belfry of Bruges Tower in the background and a hot air balloon up above the city. The horse and carts you can see are a real feature of Bruges and taking a ride in one is a great way to see the city. The one time I needed the wider 10-24mm lens and it was at the hotel. I only just managed to get everything in the shot!
Fujifilm XT2 | XF18-55mm | 18mm | 1/350th Sec | f/5 | ISO200
If you ever visit Bruges and want to photograph the city, try and get out and about at sunrise. As you can see in the photos below, the streets will be deserted. I took these at around 7am on Sunday morning and had the entire place to myself. Bliss!
Fujifilm XT2 | XF18-55mm | 18mm | 1/75th Sec | f/7.1 | ISO200
Fujifilm XT2 | XF18-55mm | 29mm | 1/80th Sec | f/7.1 | ISO200
Palace of the Liberty of Bruges
Located in a corner of Burg Square and smaller in comparison to its neighbouring buildings, the Palace of the Liberty stands out on the square with its decorative, golden trimmed architecture. Built between 1722-1727, this building has been used as a court house and now houses the city archives.
The photo here (below left) is what appears to be the entrance to the Palace but entry is in fact gained via the City Hall mentioned earlier in the post. Although the building looks impressive from the front, I particularly enjoyed photographing it from the back. If you wander down the side of the building, underneath the archway and along Blinde-Ezelstraat you will get a great view of the golden, decorative statues and trim framed by the buildings flanking the street. For this reason it’s a popular photographic composition captured in Bruges.
Fujifilm XT2 | XF18-55mm | 55mm | 1/50th Sec | f/7.1 | ISO200
Fujifilm X-T10 | XF55-200mm | 61mm | 1/900th Sec | f/5 | ISO200
Dijver Canal
There are some great photo opportunities along the very pretty Dijver Canal which is part of the main canal system that runs through the centre of Bruges. For this photo, I stood on the Wollestraat Bridge to capture the canal with the tower belonging to The Church of our Lady in the background. It’s such a beautiful composition but the bevy of swans that swam in to the scene as I was taking the photo finished the shot off nicely. I just couldn’t have timed it better if I tried.
Fujifilm XT2 | XF18-55mm | 26mm | 1/40th Sec | f/7.1 | ISO200
In the photo below, I took a wide angle shot of the Dijver Canal and the Relais Bourgondisch Cruyce (more on that below) and this view shows where this particular stretch of the river starts. I like the composition of this image as its as close to an epic cityscape as I got while in the city the two towers work well to balance the image.
Fujifilm XT2 | XF10-24mm | 10mm | 1 Sec | f/11 | ISO200
Relais Bourgondisch Cruyce
One of the most famous views along the Dijver Canal is where the river zig-zags past the very pretty Relais Bourgondisch Cruyce Hotel. As I mentioned earlier in the post, I got up before sunrise to try to capture the city without the hustle and bustle of my fellow tourists. I think the feeling of calm and tranquility does show in the photo below and the canal being so calm, almost mirror-like provides some fantastic reflections.
Fujifilm XT2 | XF10-24mm | 12mm | 1/10th Sec | f/11 | ISO200
I think the swans like having their photo taken. Here they are again adding some interest into this closeup of the canal.
Fujifilm XT2 | XF18-55mm | 44mm | 1/50th Sec | f/7.1 | ISO200
Here’s one more image from my early morning shoot of this location. Between the tree and the reflections, I they balance the image nicely.
Fujifilm XT2 | XF10-24mm | 15mm | 1/15th Sec | f/11 | ISO200
As I mentioned at the beginning of this post, I have grouped the shots I took by location rather than time and I headed back at this location to try and capture the Relais Bourgondisch Cruyce Hotel at sunset. The sun was still quite high in the sky when I captured the shot below and unfortunately the epic light didn’t arrive and this was the best it got on this particular evening.
Fujifilm X-T10 | XF18-55mm | 23mm | 1/320th Sec | f/5 | ISO200
A different view of the hotel scene is shown below. As soon as the sun goes down, the very warm artificial lights turn on along the canal and gives a very orange glow from the buildings. The architecture can create fantastic lead-in lines and some cracking compositions and in the shot below the boats on the left and building on the right do just that.
Fujifilm X-T10 | XF18-55mm | 18mm | 1/10th Sec | f/4.5 | ISO200
The final image I took at this location was after the sun had set and blue hour had kicked in. I had to tone down the orange lights quite a lot in post processing to balance the exposure a little but now thats done the vibrant blue sky and the orange buildings work really well together in the final image.
Fujifilm X-T10 | XF18-55mm | 18mm | 1.9 Secs | f/10 | ISO800
Belfry of Bruges
Visible from practically anywhere in the city and situated on the market square, this medieval bell tower stands 83m tall and towers over the entire city. You may have already noticed but I took so many photos which featured the Belfry Tower somewhere, in fact it was pretty hard not to.
Fujifilm XT2 | XF18-55mm | 18mm | 1/40th Sec | f/7.1 | ISO200
I took the photo above as I walked away from the canal along Wollestraat. This street had some amazing chocolate shops.
In this particular shop there was so much variety and the staff would be wandering around with different flavoured chocolate tasters. You can buy chocolate by the bar, truffles and you can even buy chocolate tools such as edible screwdrivers and hammers.
As you can see in this picture, these shops made great photographic subjects. Just open up that aperture and fire away.
Fujifilm XT2 | XF18-55mm | 37mm | 1/170th Sec | f/7.1 | ISO200
I took this photo above at around 6am and as you can see, it was calm, clear and ever so slightly hazy. Although the sky lacked drama, it did mean there was nothing to distract from the tower standing proud and unrivalled as the main focal point of the image with the hotel and reflections in the canal forming an attractive foreground.
I mentioned earlier that this city is so charming with it’s mixture of medieval, and gothic/neo-gothic styles, it really is something you would find on a chocolate box but if you follow my usual style of cityscape images, you will see I like a bit of the wow-factor in my compositions and that can mean adding scale using tall buildings and thats why I think, photographically the Belfry of Bruges and the other towers are such an important feature on the city’s skyline as they add impact to the otherwise relatively low city skyline.
Below is another photo of the tower taken along Wollestraat during a midday walk around the city.
Fujifilm XT2 | XF18-55mm | 33mm | 1/7,500th Sec | f/4 | ISO200
GROENEREI
The Groenerei is another stretch of the canal that runs through the city but in contrast to other parts of the river with the strong architectural features flanking the water, this small section looks more like a pretty little town in the country rather than a significant European city.
Fujifilm XT2 | XF18-55mm | 44mm | 1/60th Sec | f/6.4 | ISO200
Although the style of the buildings remains in line with many other buildings in Bruges, the trees, foliage and old bridges along the river change the look significantly providing a wealth of varied photography opportunities.
The photo above is one of my favourite images I took while in the city. It has some nice light, a balanced composition provided by the buildings and trees and some beautiful reflections in the canal.
When trying to capture the essence of a location, some say to start wide (the cityscape) and then gradually get closer, picking out features or the location such as the chocolate shop above and this charming little structure which looks like a mix between a location to moor a boat and a summer house at the end of the garden.
Note to self: Work harder to capture the details when visiting new locations rather than focusing solely on the cityscapes and architecture photos. Maybe a little street photography too.
Below is a photo of the Groenerei looking back up towards the centre of the city. Another image featuring the Belfry Tower.
Fujifilm X-T10 | XF18-55mm | 26mm | 1/140th Sec | f/3.2 | ISO200
Fujifilm XT2 | XF18-55mm | 46mm | 1/110th Sec | f/7.1 | ISO200
JAN VAN EYCKPLEIN
The last stop on this photographic tour of Bruges’ major sites is Jan van Eyckplein (Jan van Eyck Square). Named after the painter himself this pretty cobbled square used to be the main harbour in Bruges.
It was around 7.30 when I took this photo to the right here and the light was a bit flat but I just had to capture this great composition as I walked towards the square. The cobbled street leads the eye tight towards the main focal point of the square which is usually the Poortersloge (The Burghers' Lodge) and it’s slender tower reaching into the sky but while I visited Bruges there was also a temporary art installation of a whale leaping from the water which will likely draw your attention.
The image below is taken a bit further down the canal and has the Poortersloge’s tower situated more centrally with the bridge obscuring the whale sculpture somewhat. This time I used the wall on the left hand side as the lead in line towards the square.
Built in the late 14th and early 15th century the Burghers' Lodge was the place where the "important" citizens (poorters) had their meetings and where they received their trading partners.
Fujifilm XT2 | XF18-55mm | 55mm | 1/240th Sec | f/7.1 | ISO200
Fujifilm XT2 | XF18-55mm | 39mm | 1/170th Sec | f/7.1 | ISO200
Jan van Eyck was a renowned Bruges painter who lived in the 14th and 15th Century. As shown below, he has a statue in the square in his honour. Jan van Eyck was one of the founders of Early Netherlandish painting and one of the most significant representatives of early Northern Renaissance art.
I don’t take many photos with people in it but I liked the traditional look of this chap on the bike and him riding up the cobbled street as i think it adds to the composition and story nicely.
Fujifilm XT2 | XF18-55mm | 44mm | 1/160th Sec | f/8 | ISO200
Skyscraper (the Bruges Whale) is an art installation for the Bruges Triennial which invited globally renowned artists to create artwork based on the changing world and the pressures it puts upon all forms of life. This particular creation was made of 5 tons of plastic waste fished from the Pacific and the Atlantic Oceans to represent the 150 million tons of plastic waste that has been dumped into the world’s oceans. What a fantastic representation of what is a growing global concern.
Although photographically I may have preferred to capture the traditional view of Jan van Eyckplein there is no question this amazing but temporary sculpture added something different to the scene creating its own unique story.
Fujifilm X-T10 | XF35mm F2 | 35mm | 1/4,000th Sec | f/2.5 | ISO200
One of the problems about spending such a short time in any city is that you don’t get a lot of time to explore inside many of these fabulous buildings and basilicas. I mentioned at the beginning of the post that I will likely return to Bruges in the near future where I will try to venture inside the buildings more often and try to capture some some of the close-up details of the architecture around the city.
As ever, I welcome any questions or feedback about this or any of my posts.
Until next time.
How I Printed This Image of The Shard London
I love to see my photos printed but for some, printing at home can be both daunting but equally rewarding. In this blog post I walk you through the simple steps I took when printing my own London cityscape photo of The Shard on Fotospeed’s Metallic Gloss paper using photoshop and my Canon PRO-10S printer.
So, last year I decided to buy my first professional printer in a bid to start printing my own images at home. I was at the UK Photography Show in Birmingham and I brought the Canon PRO-10S. This printer had a show exclusive £150 cash-back on it’s already reasonable purchase price of £500 so in end I paid £350 for it. Bargain!
Although there are cheaper and more convenient ways to get my images printed by using third party printing labs, I wanted to own the entire creation process from capture to edit and then print with the aim to experience more of my work in a tangible print form while careful selecting the paper and styles to get the print exactly how I want the finished article to look.
I’m not going to cover in this post how I originally edited the image I chose to print, nor the process around calibrating screens as this is a topic for another day. In this post I will run through how I prepared the image to print and talk about some of the settings I used along the way. If you want to read a post covering how I edited a print from RAW to finished image, see this blog post:
Editing Sunset at The South Bank
Below is the photo I decided to print. This is a long exposure photo I took of The Shard in London from across the River Thames. This is a great spot to capture an iconic view of London and what’s great about it is that although the vantage point is private property on the grounds of the Tower of London, they don’t have restrictions around the use of tripods which can be an issue elsewhere in London. That being said, the usual rules should still apply when using a tripod in busy areas such as not getting in peoples way and being polite and thoughtful of those around you.
Fujifilm X-T10 | XF10-24mm | 13mm | 100 Secs | f/13 | ISO200
Step 1: Choosing the right Paper
I learned quite quickly that it’s particularly important to ensure the photo matches the paper it is printed on. Some images just won’t look at their best when printed on a high gloss paper and likewise, other images wouldn’t be at their best with a matt finish. For that reason I chose to print this image in particular as with the reflections in the glass and highlights in the clouds and water, it was crying out for a glossy, vibrant finish and I just happened to have recently bought some of Fotospeed’s Metallic Gloss paper to test out. See here for Fotospeed’s own description of this particular paper:
Metallic Gloss 275 is a flat, stiff, middle-weight paper with a metallic effect gloss finish. The paper has a neutral white base and an instant dry, microporous coating. This paper has a wide colour gamut and a high D-MAX which delivers beautiful images, both in colour and B&W.
Step 2: Preparing the Image
Now with paper and image chosen, I went about preparing the image for print in photoshop. Since this image is already processed, I didn’t need to do a lot to it to get it ready but I do think these steps are crucial to ensure the image looks its best in print.
Start with the highest quality image you have: When I edit photos, I always export a gold master copy in TIFF format. TIFF does not compress the image and from this gold master, all copies of the image can be made from a consistent baseline. I will create lower resolution copies for web or like in this instance, edit a copy in readiness for printing.
Brightness and contrast: There is a big difference between how an image is illuminated between on screen display and print. On the screen, the image will be back-lit and appear brighter whereas on print, the image is illuminated via reflective light so it will react to the environment. If the room is dark, the print will be dark. As such, I always increase brightness and add a little contrast to my images before printing. For this image I increased brightness by 20% and contrast by 10%. As always, watch those highlights and shadows by using the histogram and make use of a layer mask to mask out the effect where needed.
Resize the image: I always resize my images at this stage to ensure the image is at the right size to print to prevent resizing taking place at the print stage. I will use the Image->Image Size option in the menu and use the appropriate recommended settings to ensure the image is the exact dimensions I want to print the image. I used the following settings (also see image above):
Width = 11 inches (to print on A4 paper with a small border)
Lock aspect ration to auto adjust the hight
300 pixels per inch for print resolution quality
Reduction option to preserve sharpness on the resample option
Sharpen the image: I always sharpen my images a little when I print. In Photoshop, I create duplicate layer of the image, and I use the High Pass filter (Filter->Other->High Pass) add a 1-2 pixels to taste being careful to not to add too much to keep the image looking at its best. In this image, I added 1.5 pixels. Next, to allow the base layer to show through, change the blending mode to Overlay on the layer with the High Pass filter applied.
Vibrance and Saturation: The last thing I do before I print is add a little more vibrance and saturation as I notice on colour prints, I can lose a little bit of the punch in the image so I like to add this back a little. With another Adjustment Layer, I added 15% Vibrance and only 5% saturation. Be very careful not to overdo these effects but they need to be adjusted based on the image being printed.
That’s it, the image has been prepared for print. See below for a before and after image. As you can see the effect is noticeable but not extreme and will ensure the image looks fantastic when printed.
Step 3: Printing the image
So, now it’s finally time to get the ink to paper!
Before I printed my image, I made sure that I downloaded and installed the correct printer/paper profile from Fotospeed’s website. This is important to ensure the print, paper and ink all match which goes a long way to ensuring the colours render correctly when the image is printed.
So, still within photoshop and once the print dialog box was open, I chose the following settings:
Selected the correct printer
Ensured Photoshop was handling the colour
Chose the correct printer profile mentioned previously.
Centred the image on the paper to make an even boarder
So off the printer went and out came my image. The image to the right was taken as soon as the printing had finished.
Tip: Leave the print at least a few hours before handling to ensure the ink fully dries. The tones may also change a little too so don’t inspect the finished print until it has had tome to dry.
So there you have it….
Below is the final print in all it’s glory. Although this photo doesn’t do it justice as it looks a little too blue/purple, it looks fantastic in person and much more alike to the image at the top of this post.
It was far from a comprehensive overview of the printing process but to some it is quite daunting to try and this post shows that it can be done well with minimal steps.
Feel free to add any of your own tips to simplifying the print process in the comments below.
Until next time.
How I Created This Epic London Panoramic
Do you want to know how I created this epic panoramic of London’s skyline? In this article, I walk you through the capturing and post-processing steps I used to create the final image.
At the beginning of 2018, I ventured out into a clear, cold London to capture a new panoramic of the ever-changing skyline. Although cold, the conditions were great as the night was clear and city lights were lighting up the scene nicely.
In my bag, I had my Fujifilm XT2 and three lenses. The XF10-24mm, XF18-55mm and the XF55-200mm. For this shoot, I used the XF55-200mm with the XT2 and you will read why shortly.
Fujifilm XT2 | XF55-200mm | 82mm | 6-30 Secs (bracket) | f/14 | ISO200
On Location, capturing the photos
So, let's start with the obvious question. Why take a panoramic image when even a standard 18-55mm lens would capture the entire scene in one shot?
Well, it will vary scene to scene but one of the characteristics of using a wider focal length is it tends to push the background further away, de-emphasising it from the composition somewhat. This is really not what I wanted for the final image as the tall buildings in the background are an important part of the image and need to remain prominent so I needed to use a telephoto lens to bring the background closer. So, on this occasion, I had already prepared to use a longer focal length and take multiple images from left to right.
This panoramic of London was taken from Waterloo Bridge. I like this composition as it has recognisable structures such as the dome of St Pauls, the Oxo Tower to the right and the many new modern buildings in the background. I also particularly like the way the lights on the Southbank sweep into the frame leading the eye towards the city skyline.
Due to the dynamic range within the scene with deep black shadows and bright lights, I also decided to bracket each photo by 1 stop of exposure.
On went the 55-200mm lens and with my XT2 mounted in portrait mode I panned from left to right, ensuring I overlapped by 50% or more to help the stitching later. The focal length used was 82mm at f14 with each bracketed exposure ranging from 6 to 30 seconds each. I also carefully checked each image to ensure it was sharp and once I was happy I had the sots in the bag, off I went to catch the train home.
Back home, combining the bracketed images
Now back home, I loaded the RAW files into Lightroom and proceeded to merge each bracketed shot resulting in an image with lots of dynamic range to play with. To do this in Lightroom, select Photo - Photo Merge - HDR. I was then left with just 7 HDR images.
Now, a quick note about HDR. Although some like it and others don't, done correctly HDR can be a valuable tool in the post-processing workflow. As long as the effect is not overdone, using HDR subtly can help create some fantastic images.
Once I had the 7 images (in DNG format), I gave them all a star rating and filtered my view by that star. It's a neat way to declutter your workspace as it leaves you just the images you want to work with.
Creating the panorama
Next, with the 7 DNG files ready, I then proceeded to merge the images into a panorama. To do this, I selected all 7 files then chose
Photo - Photo Merge - Panorama.
I selected the Spherical projection and let Lightroom do its thing. As you can see, by taking the images in portrait mode, it has allowed for extra height for when some inevitable cropping is needed. However straight you set your camera up on the tripod, there is always some cropping required. Below is the merged, cropped image ready for some post-processing.
Post Processing
Next, I commenced my usual Lightroom workflow, working down the different sliders enhancing the image. Here are the settings I used:
As you can see, it didn't take a huge amount to create the image here. I cooled off the white balance, toned down the highlights, then gave the image a bit of vibrancy to bring out the colours in the city lights. After adjusting the curves and adding a small vignette and I was done. Below is how it looked after this stage of the process.
The final step in the process was to export the image into Adobe Photoshop. Here I performed the following:
Cloned out a few light trails left by the lights of a plane
Added a bit more contrast using levels and curves
Used the high pass filter on a new layer to add just the right amount of sharpening
(I rarely add sharpening in Lightroom)
And that's it! The final image is below (select the image for larger version)
Fujifilm XT2 | XF55-200mm | 82mm | 6-30 Secs (bracket) | f/14 | ISO200
With the resulting image being over 62 megapixels, it can be difficult to demonstrate just how much quality and detail there is so be sure to check out the video below to better show off this final panoramic photo.
And there you have it, the full end to end process I followed to create this striking panorama of London's vibrant skyline. If you have any questions for me about this or any other image I have created then please get in touch by emailing me at photo@trevorsherwin.co.uk or using my contact page here.
On Location Photographing London Day and Night
I recently spent a rare full day in London capturing sunrise at Tower Bridge and sunset over at Canary Wharf. This post covers the shots I took ending with a time-lapse video taken throughout the day.
Regular readers of my blog will know that I often spend time in London taking photos but usually just a few hours at a time and normally before or after my day job and it is a lot less often I decide to spend an entire day dedicated to wandering around, photographing the city so I decided to get out for the day and see what I could capture.
I started the day capturing Tower Bridge at sunrise then over to Canary Wharf at sunset while in between I captured some images for a time-lapse compilation which you can see at the end of this post.
The first shot below is a photo of Tower Bridge during the Blue Hour which is the time between night and sunrise. If you look to the bottom right-hand side of the shot you can just see the first hints of sunrise just underneath the bridge.
Fujifilm XT2 | XF18-55mm | 18mm | 1.7 Secs | f/13 | ISO200
Looking east along the River Thames, the photo below captures St Katherine's docks with the towering buildings of Canary Wharf in the background. More shots of those later.
Fujifilm XT2 | XF18-55mm | 55mm | 0.6 Secs | f/13 | ISO200
Now on the other side of the river, this shot of the "Girl with a Dolphin" fountain in front of Tower Bridge is a pretty popular composition but I really like the timing here with the ambient light complimented by the artificial lights from the lamps and Tower Bridge. You can also see The Shard in the background.
Fujifilm XT2 | XF18-55mm | 18mm | 0.9 Secs | f/13 | ISO200
Moving further away from Tower Bridge, below is a photo of the sundial at St Katherine's Docks. Although I would prefer more interest in the sky, the good thing about a cloudless sky is you often get to see the subtle pastel pinks and reds above the horizon just before the sun rises. It is rather beautiful and adds a touch of simplicity to the image.
Fujifilm XT2 | XF18-55mm | 19mm | 1/8th Sec | f/13 | ISO200
At this point I wanted to try a composition I have already captured at sunset further east along St Katherines Docks but it turns out the gates to that stretch of the waterfront is closed at this time (so much for planning ahead, right?) so with the best light about to appear I had to think fast so I rushed back and captured the photo below with the warm glow from the sun lighting up Tower Bridge.
Fujifilm XT2 | XF18-55mm | 18mm | 1/17th Sec | f/11 | ISO200
My last photo of the morning was from the other side of Tower Bridge, capturing the shot below of the sunburst underneath the bridge.
Fujifilm XT2 | XF18-55mm | 18mm | 1/100th Sec | f/20 | ISO200
So, that was the morning shoot. As mentioned before, I continued throughout the day to capture a few time-lapse sequences but luckily with the shorter winter days, there's not a long time to wait before the light starts to improve again as the sun starts to lower before sunset.
I captured the photo below of the Royal Naval College in Greenwich from across the river. With the longer exposure, I smoothed out the river, removing any distractions and keeping this symmetrical scene as simple as possible.
Fujifilm XT2 | XF18-55mm | 36mm | 30 Secs | f/9 | ISO200
My last image of the day was taken from just in front of the Millennium Dome which provides fantastic views of the skyscrapers of Canary Wharf on the Isle of Dogs. With the colours evolving in the sky as the sun was setting and the long exposure blending the changing light, I really like the tones in this final image.
Fujifilm XT2 | XF18-55mm | 29mm | 345 Secs | f/9 | ISO200
I am still learning loads about time-lapse videos and have not created as many as I had hoped so far but below is the result of a day of capturing multiple smaller time-lapses and editing them all together to create the video below.
My Top 6 Photos of Venice
A few months ago I took a trip to Venice and while most of the trip I took handheld photos, I did have the opportunity to grab some sunrise long exposures and capture some of my favourite photos of this unique city.
A few months ago, I spent some time in the wonderful city of Venice and absolutely loved it.
I have visited quite a few cities such as Paris, New York, Valencia, Barcelona and of course London but Venice is like nothing I have experienced before. From the many canals breaking the city lots of smaller islands to the ornate very typically Venetian architecture this place has a unique atmosphere full of culture, art and history.
One thing any person visiting the island in the summer months will notice is the number of people. During my visit, it was packed full of tourists from about 9am as they all arrived in their droves from the many boats that bring them in. I can't complain though, as I was one of them but it was for this reason I decided to approach my photography a bit differently from my normal approach while in a city. For each day I was there I took just one camera and lens out with me as I knew I would be blocking pathways and just getting in other people's way if I tried using my tripod through the narrow streets and canal paths.
I am so glad I made this decision as I came home with a collection of images that I was really happy with and not in keeping with my usual style. I took so many photos during my visit and covered so much ground so I wrote a two-part blog post documenting my visit below.
As I have already covered my visit in detail within the above posts, I won't repeat myself here but if you are interested in finding out a little more about the images I took, grab a coffee and give the above posts a read.
So, all that being said, I am still a fine art, landscape photographer and I'm not happy unless I have the camera mounted on the tripod, methodically dialing in my camera settings and fitting my filters to capture a carefully composed image. I decided to venture out before sunrise one morning to capture the city as it sleeps. As an urban landscape photographer, whatever city you happen to be in, there is no better time to capture it than at sunrise. This is the time where you can have the place to yourself and capture the landscape in a way it is not normally experienced by most other people so below are my favourite shots from my early morning shoot in this magical city.
If there was one shot I just had to capture during my stay it was this composition below looking down the Grand Canal towards the Basilica di Santa Maria della Salute in the distance. The light wasn't as epic as I hoped but if I was going to capture a long exposure, this had to be it.
What I really like about this image is I had one chance to capture it while there was some light in the sky. The eight-minute exposure makes the water almost mirror like with a touch of etherealism and the resulting image is a clean crisp shot ensuring the sweeping curve of the water leads the eye to the main focus being the architecture and Basilica.
Fujifilm X-T10 | XF18-55mm | 18mm | 480 Secs | f/8 | ISO200
Now, I know the composition below is similar to the above but I had to include it in the post too. I really like the atmosphere in this shot. It suits the location and represents the feeling I had while I traveled around the city. You see, a photo does not have to be technically perfect for it to be a favorite. It just has to be an image that evokes a personal and emotional bond with the viewer. Well, this shot does that for me.
Fujifilm X-T10 | XF18-55mm | 37mm | 0.5 Secs | f/11 | ISO200
Here's a little lesson for any landscape photographer. Always look behind you! While still on the Accademia Bridge and as I had just taken the image above and I looked behind me and the view up the Grand Canal was beautifully lit with the sun lighting up the clouds with this fantastic magenta. I was not expecting to capture another composition from this bridge so I was really happy with that!
Fujifilm X-T10 | XF18-55mm | 18mm | 0.7 Secs | f/11 | ISO200
Although on its own, this is a nice shot of the entrance to St Mark's Square from the river with Doge's Palace to the right of the shot, what I like most about the image is the Lion of Venice standing to attention on top of the pillar appearing to welcome the sunrise as it just hits the top. I'm not sure if the statue is deliberately placed in that location and that height but I like to think that this was more about fortuitous timing and witnessing a moment not many will.
Fujifilm X-T10 | XF18-55mm | 34mm | 6 Secs | f/8 | ISO200
Next up is a photo of the Bridge of Sighs. Again, if you wanted to know more about this location, check part 2 of the blog via the links above. There are a lot of ornate, architectural details in the buildings in Venice and it should stand out and be prominent which is why I decided to take another long exposure to smooth out the water and any distractions. That coupled with the central composition and lines leading in from the edges of the image results in a more striking image of this beautiful bridge.
Fujifilm X-T10 | XF18-55mm | 24mm | 4 Secs | f/10 | ISO200
Last but not least is one of the more popular compositions of the Venice Gondolas. This one took a bit of work to get the composition right as the water level was high and spilling over to the walkway and the boats were moving up and down, left to right in the water but I got there in the end. I had to use the ND Grad filter for this shot to capture the motion of the boats with a longer exposure and I am really pleased how this turned out with the central composition and the prominent wooden poles adding contrast and texture to the image.
Fujifilm X-T10 | XF10-24mm | 17mm | 14 Secs | f/7.1 | ISO200
On Location taking Long Exposures at The Shard
A few weeks ago, I headed out to one of my favourite photography locations in London to capture a few shots of The Shard and City Hall at sunset. This has proved to be a location that has left me wanting time and time again. Can I get the shot this time?
A few weeks ago, during a cold winter's evening, I headed out to one of my favourite photography locations in London to capture a few shots of The Shard and City Hall with my newly acquired Fuji XT2 camera. I've never really been much of a kit guy. I like to have the right tools to use but I was a little excited to see how this new camera would perform.
I parked myself across the river from The Shard, in front of the Tower of London. I love this area, especially as it is a private path but they still allow tripods which isn't that common in the Big Smoke these days. As you can see in the map below, this spot is perfect as you get great compositions of the cityscape across the river and of Tower Bridge too.
So, although this is a popular place to shoot the London cityscape, it is one of the hardest to get right in my opinion. The best light would normally hit the buildings in the summer months as in the winter the sun drops down behind the buildings which is nice but with all of that glass on show, it really comes alive when the sun is setting off to the right of the scene casting the light across the image from right to left. On top of this, the light's dynamic range is through the roof making it really difficult to avoid creating a silhouette of the buildings. I didn't bracket these shots hoping that the camera will capture this dynamic range allowing me to pull the details from the shadows and rescue the sky. It did not disappoint.
Fujifilm XT2 | XF18-55mm | 18mm | 1/75th Sec | f/22 | ISO200
Although the light was good on this particular evening, the weather was not playing ball. Here in this image, you can see my Fuji XT2 camera poised to capture this iconic view and there are hardly any clouds in the sky.
Before heading out, I had checked the weather and all was looking good for the right amount of cloud cover and the direction of the wind was supposed to mean the clouds would be traveling away from me but alas, the cloud cover was lighter than expected and the wind direction wasn't quite right. If the clouds were moving towards or away from me, they would create great lead in lines and make fantastic compositional elements in the image.
Nevertheless, the golden rule with landscape photography is that you never know what might change and it's not over until it's over. As the sun dipped below the horizon, a few more clouds turned up and the sunlit those up nicely so on went the 10 stop ND filter and off I went capturing the shot below.
What I think works about the image below is that the long exposure has captured and elongated the clouds making them a little more prominent in the shot with the warm light emphasising them even further.
Fujifilm XT2 | XF18-55mm | 18mm | 43 Secs | f/10 | ISO200
To try to demonstrate how much better the clouds look when moving towards or away from you when taking long exposure images, I took changed direction and took the image below of Tower Bridge. Again, the cloud cover was not perfect, but you can still see how the direction the clouds are moving is important and how it can change the entire look of the image.
Fujifilm XT2 | XF18-55mm | 18mm | 60 Secs | f/10 | ISO200
My last shot in this particular spot was back looking across at the Shard as the last of the sun's warm light was in the sky. Again, cloud cover was lacking but with the light levels dropping I was able to take an even longer exposure of 120 seconds with some darker reds in the sky resulting in a totally different looking shot than before. This is another important lesson about photography and that is the light is everything and compositions that have been shot a thousand times before will take on their own unique look and feel as the light changes. No two images are ever the same.
If like me, you like a cleaner, more minimal shot of London, long exposures can really help simplify the scene. The boat traffic on this stretch of the Thames is particularly busy and this technique helps remove these distracting elements.
I covered this topic a bit more in my post titled Slowing Time: Why the Long Exposure?
Fujifilm XT2 | XF18-55mm | 18mm | 120 Secs | f/10 | ISO200
Heading back for the day (as the cold had got the better of me) I snapped this pleasing composition of Tower Bridge. I had seen an image like this before so by no means an original composition (if such a thing exists for London cityscape photography) but with the lights providing my lead-in line to the Tower Bridge itself, it came out pretty good.
Fujifilm XT2 | XF18-55mm | 55mm | 6.5 Secs | f/11 | ISO200
I think my first outing into London with the Fuji X-T2 was a successful one. It performed well and was, like others before great to use with all the tactile dials and knobs quickly accessible rather than having to hunt around the menu system to make changes during the shoot. I still think the composition of the Shard and City Hall has more to offer and I will no doubt be back again at some point to try to capture it again. But for now, I am really pleased with the images I came home with on this particular day in London.


