BLOG ARCHIVE
How I Process My Landscape Photos Taken with the DJI Mini 3 Pro
In this article, I share my processing steps to create the best quality landscape photos with my DJI Mini 3 Pro.
When I first decided to buy a drone to use for landscape photography, I had to consider the pros and cons of each model available at the time. For example, the larger Mavic models typically have a more capable camera, but the smaller, sub 250g Mini models have fewer restrictions on where they can be flown. After weighing up the pros and cons, I eventually chose the DJI Mini 3 Pro. I’ve already published a post covering my thoughts on this drone, and you can read a full review from a landscape photographer’s perspective here: DJI Mini 3 Pro | A Landscape Photographer’s Review.
Following on from the review I wrote about this drone, I published a second post demonstrating the different camera settings I use while out taking landscape photos with the Mini 3 Pro. DJI Mini 3 pro Camera Settings for Landscape Photography.
You can find both of my previous DJI Mini 3 Pro blog posts below:
So, given that I’ve written a review of the Mini 3 Pro and published a blog post detailing the settings I use to take landscape photos, what’s this blog post all about then? When I published my previous post, I had a few messages asking for a bit more detail as to how I process the Mini 3 Pro raw files and although there are countless different approaches one can take, I decided to write this post detailing the steps I took from raw to final edit using a photo I took recently in low light conditions.
Before I start, I wanted to make two points. Firstly, this post is aimed at those wanting to get their files ready to be printed. The techniques I use to sharpen and overcome noise in the image aren’t really going to benefit you if you plan to just share your drone photos on social media.
The second point to make is that both this and the camera settings for landscape photography post above applies to those using the DJI Mini 3, Mini 3 Pro and the recently released Mini 4 Pro. Features may vary from model to model, but overall, their capabilities are very similar when it comes to taking landscape photos.
Step 1: Taking the photo in the field
Let’s start with the original raw files I took in the field. This is Arundel Castle located in West Sussex and after sunset came and went without much fanfare, I decided to hang back just a bit longer to take a photo during blue hour. It’ll not win any awards but with the low light conditions, I figured this image was a good candidate to use for this processing blog post.
Raw files as shown in Adobe Lightroom. DJI Mini 3 Pro | 24mm Pano | 1/6th and 1/3rd Second | f/1.7 | ISO100
In terms of camera settings, I used the 48mp setting in PRO mode when taking this photo to get the highest resolution. I knew from previous experience that there would be some noise in the files, so I decided to take two pictures, manually adjusting the shutter speed for each. The first image was exposed for the castle at 1/6th of a second, and the other was exposed for the sky at 1/3rd of a second.
Step 2: Increase detail and reduce noise in Adobe Lightroom
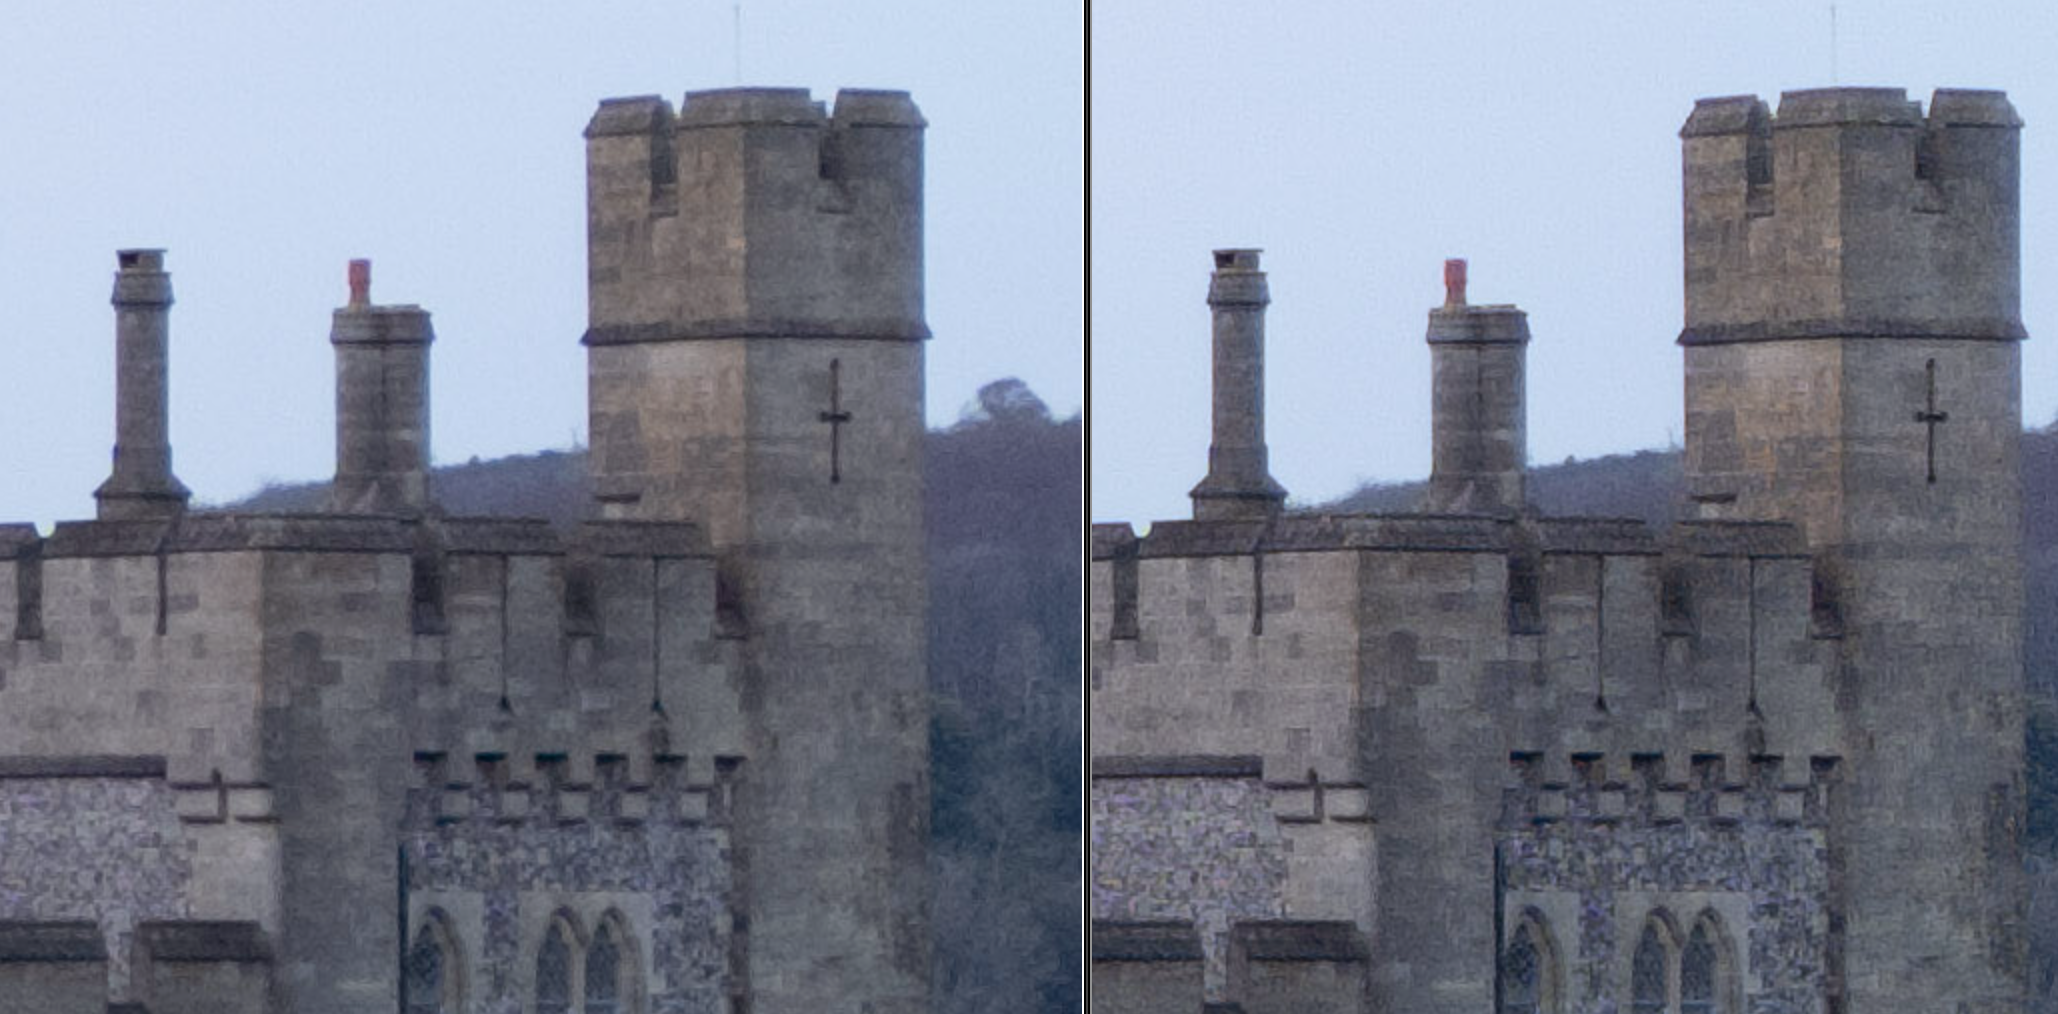
As I expected, there was some noise in the sky when viewing the raw file at 100%. So, before I merged the bracketed images, that noise needed to be dealt with. Even though I can see the noise at 100% here on my screen, I’m not too sure how well that comes across on yours, so here’s a 100% and 200% crop demonstrating the noise I can see in the sky. I know the 200% crop isn’t representative in the real world but it’s just to help visualise the noise. If you still can’t see it, you’ll just have to trust me that it is there.
There seems to be a plethora of noise reduction software hitting the market recently and among those, Adobe released its own AI Denoise feature in Lightroom and Camera Raw. Having tried some of the other tools available, in my opinion, Adobe’s AI Denoise is as good as, if not better than many of the other options out there. Plus, its baked into Lightroom making for an easier workflow.
AI denoise is a part of Adobe’s Enhance feature (located in the Photo menu along the top). Along with denoising an image, it also improves raw files by enhancing the details and reducing artefacts. It can, however, only be used with raw images so needs to be applied before using the Photomerge-HDR function in the next section.
To remain consistent across both the under and over-exposed raw files, I ran them both through the Enhance feature, being careful not to add too much noise reduction as overuse can have unintended consequences.
Below is a side-by-side comparison of the original and enhanced files. With any hope, you will be able to see the refined edges and enhanced definition on the right-hand side.
Step 3: Merging the bracketed image files in Adobe Lightroom
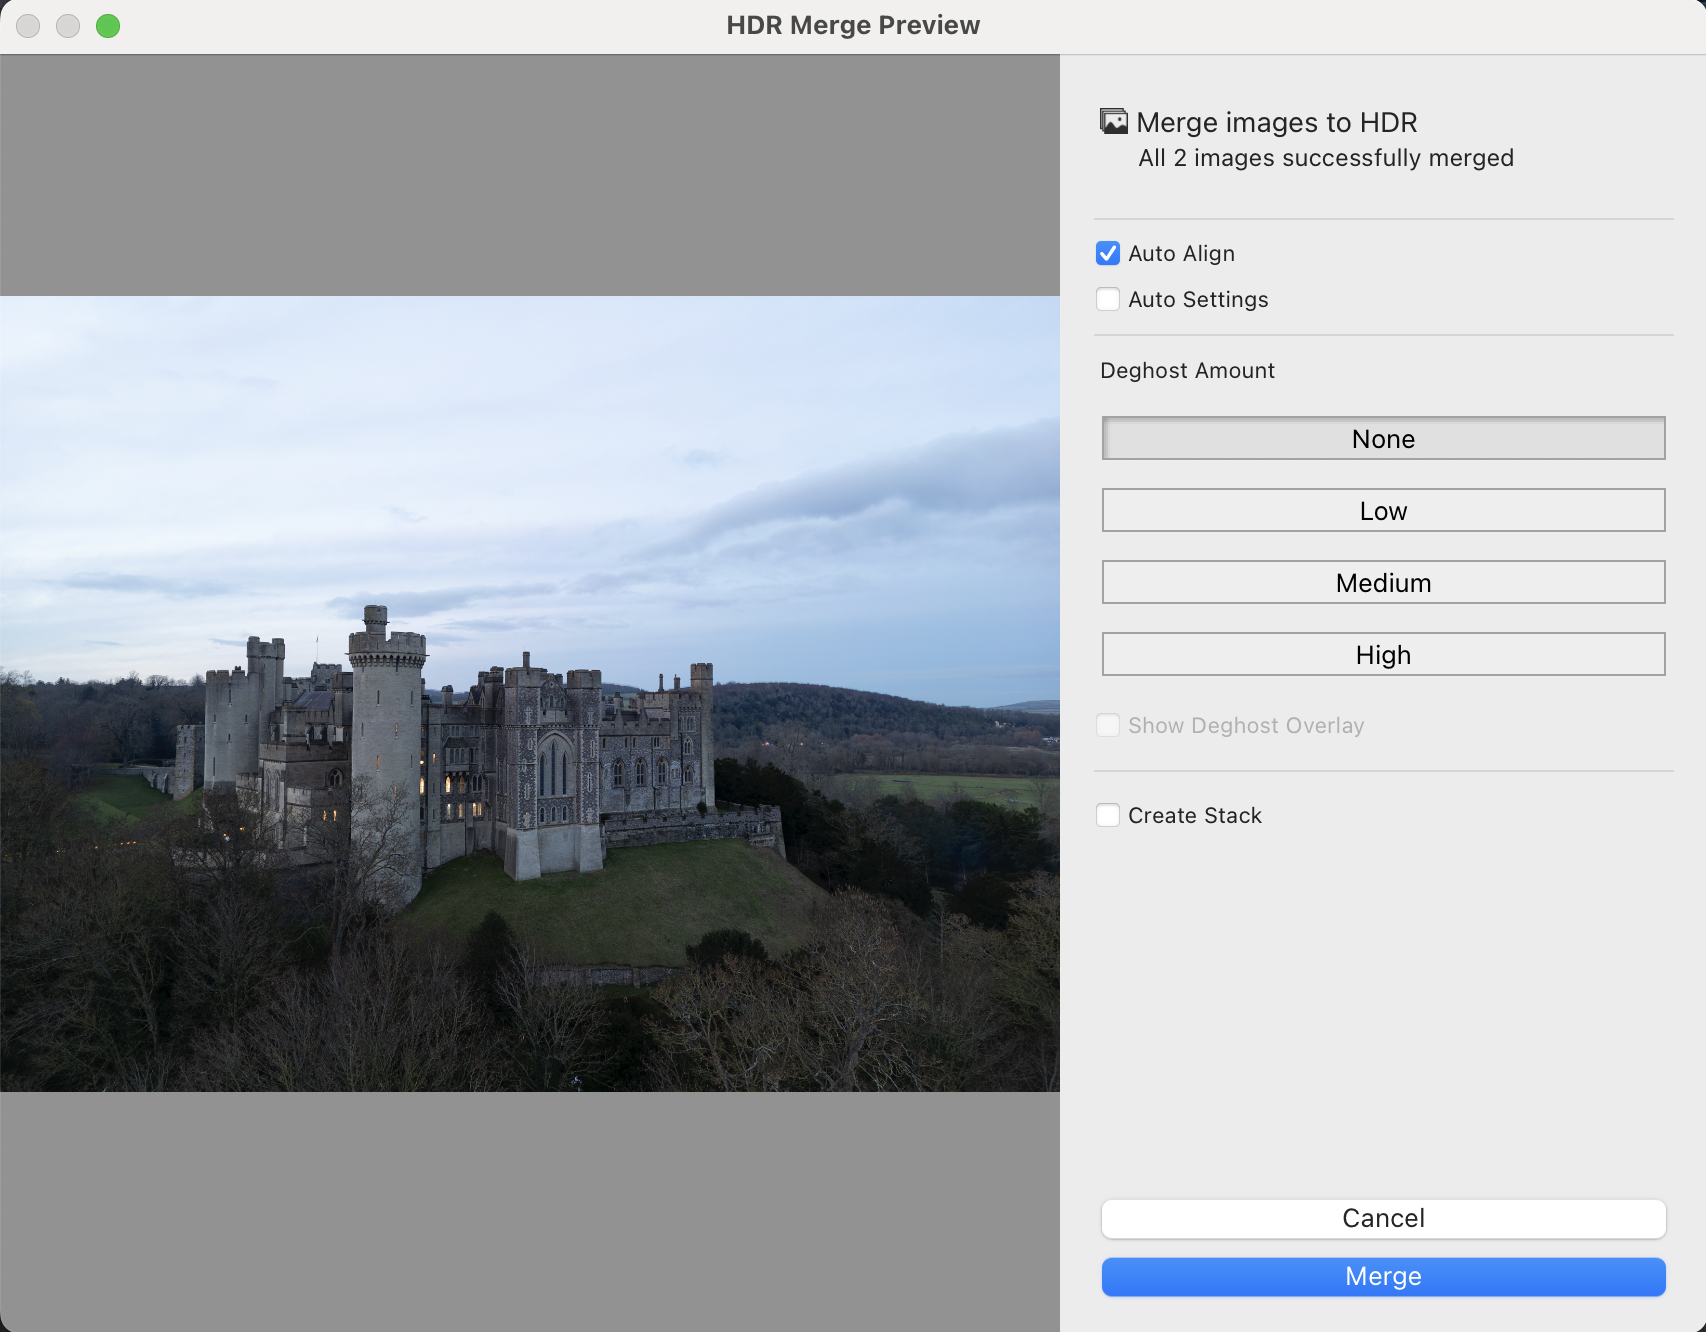
With the two new DNG files created by the Enhance feature, I selected them both and used the Photomerge-HDR option in the Photo menu (or via a right-click on the photo). I typically use the settings you see below and once finished, a new HDR DNG file is created. This new file will have less noise in the shadow areas and more detail that can be recovered in the brighter areas, resulting in a cleaner, editable image.
Step 4: Editing the image in Adobe Lightroom
Now, with the image file prepared, it’s time to edit.
This post isn’t a tutorial as to how best to edit a photo as everyone’s style will be different. However, what I have highlighted below is the Detail panel showing that I have applied minimal sharpening in Lightroom and for the small amount that is applied, I have increased the masking to ensure it only applies to the areas of high contrast such as the castle edges, excluding large parts of the image such as the sky.
Step 5: Sharpening in Adobe Photoshop
A note on sharpening. Opinions vary as to when to apply it. During the edit or only when the file is being outputted for a particular use case such as web, socials or print. This is just my approach, and I don’t for one minute suggest it is right for everyone. I will typically add some sharpening when editing, call it a “base sharpening” if you will. This is typically fine for all of my online needs but If I feel I need to add any more sharpening for print, I will do so when preparing the file before sending it to the printer.
Not being a big fan of how Lightroom sharpens my raw files, I apply just a small amount of sharpening using the Details panel before I finish it off properly in Photoshop. For this, I use the High Pass filter. It’s a great tool to detect the edges (or high contrast areas) in a frame, which, when combined with a contrast-boosting blending mode applied to those edges, sharpens the photo without affecting the areas with less contrast, such as the sky.
First up, create a duplicate layer and then, from the menu, select Filter - Other - High Pass. Here, you will decide how much sharpening you want to add by adjusting the Radius amount. Choosing the right number depends on the resolution of the file and how much sharpening you want to add. Typically, I stick between 1-2 pixels at this stage with the view that I can add more later if needed. If you start to see colour artefacts in the preview, you’ve probably taken it way too far. Experiment with the radius yourself to get the effect you like. Once I’m happy with the thickness of the edges detected by the High Pass filter, I then hit OK.
Next, I use the Overlay blending mode for the same layer. This blending mode will hide the grey areas and add contrast to the edges highlighted by the High Pass filter, resulting in a clean, sharper file. Hopefully, you can see the effect by comparing the before and after images in the screengrab below.
The final image, ready to print
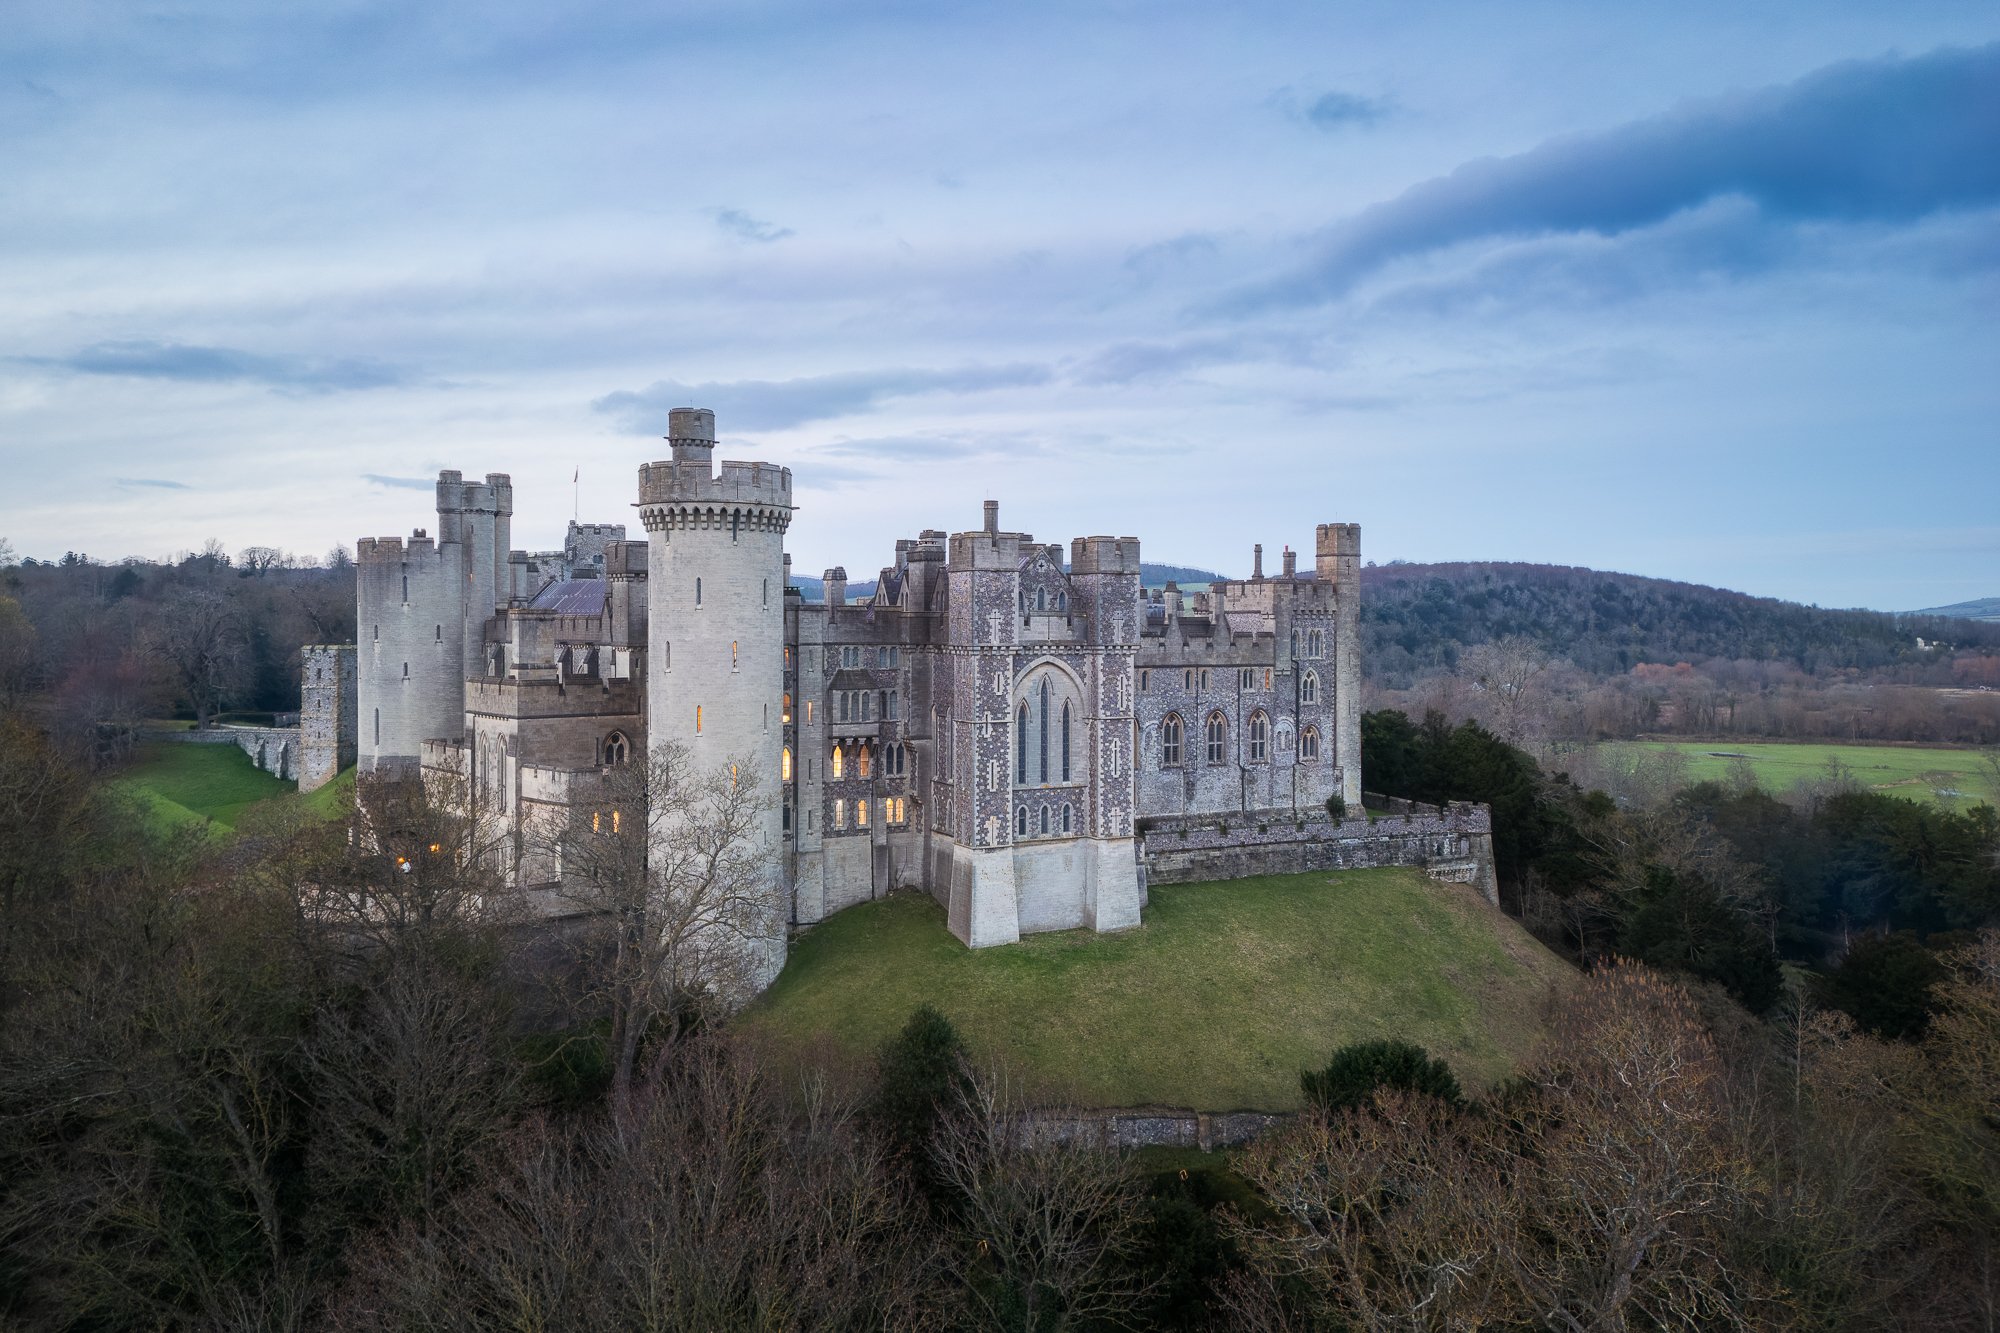
After a few Photoshop tweaks that include the spot healing brush to remove a few distracting lights and a final 3:2 crop back in Adobe Lightroom, here is the final photo with more clarity and less noise than before.
As with all processing methods, this approach, which works for me, may not work for everyone, but in some way or another, I will use some or all of these steps when processing my drone photos.
Having said all of that, the proof is in the pudding, so, next up, I plan to print this and a few other photos I’ve taken with my drone to see how the quality holds up at different sizes. If I can find a way to communicate that process in this blog format, I’ll post a follow-up article on that soon.
I hope you found this article useful, and if you have any tips or tricks or can suggest any improvements to my workflow, feel free to leave a comment below.
Until next time.
Trevor
DJI Mini 3 Pro Camera Settings for Landscape Photography
In this article, I share the camera settings I use to take the best quality landscape photos with my DJI Mini 3 Pro.
I’ve had quite a few questions, both in the comments or sent via email since I posted my 6-month review of the DJI Mini 3 Pro for landscape photography, and one question that has been asked a few times is how I find the image quality, particularly when it comes to editing the raw files. The DJI Mini 3 Pro is a very capable drone. When looking to fly almost anywhere (flight restrictions aside) by staying under the 250g weight limit, you will do well to find a more capable drone on the market today.
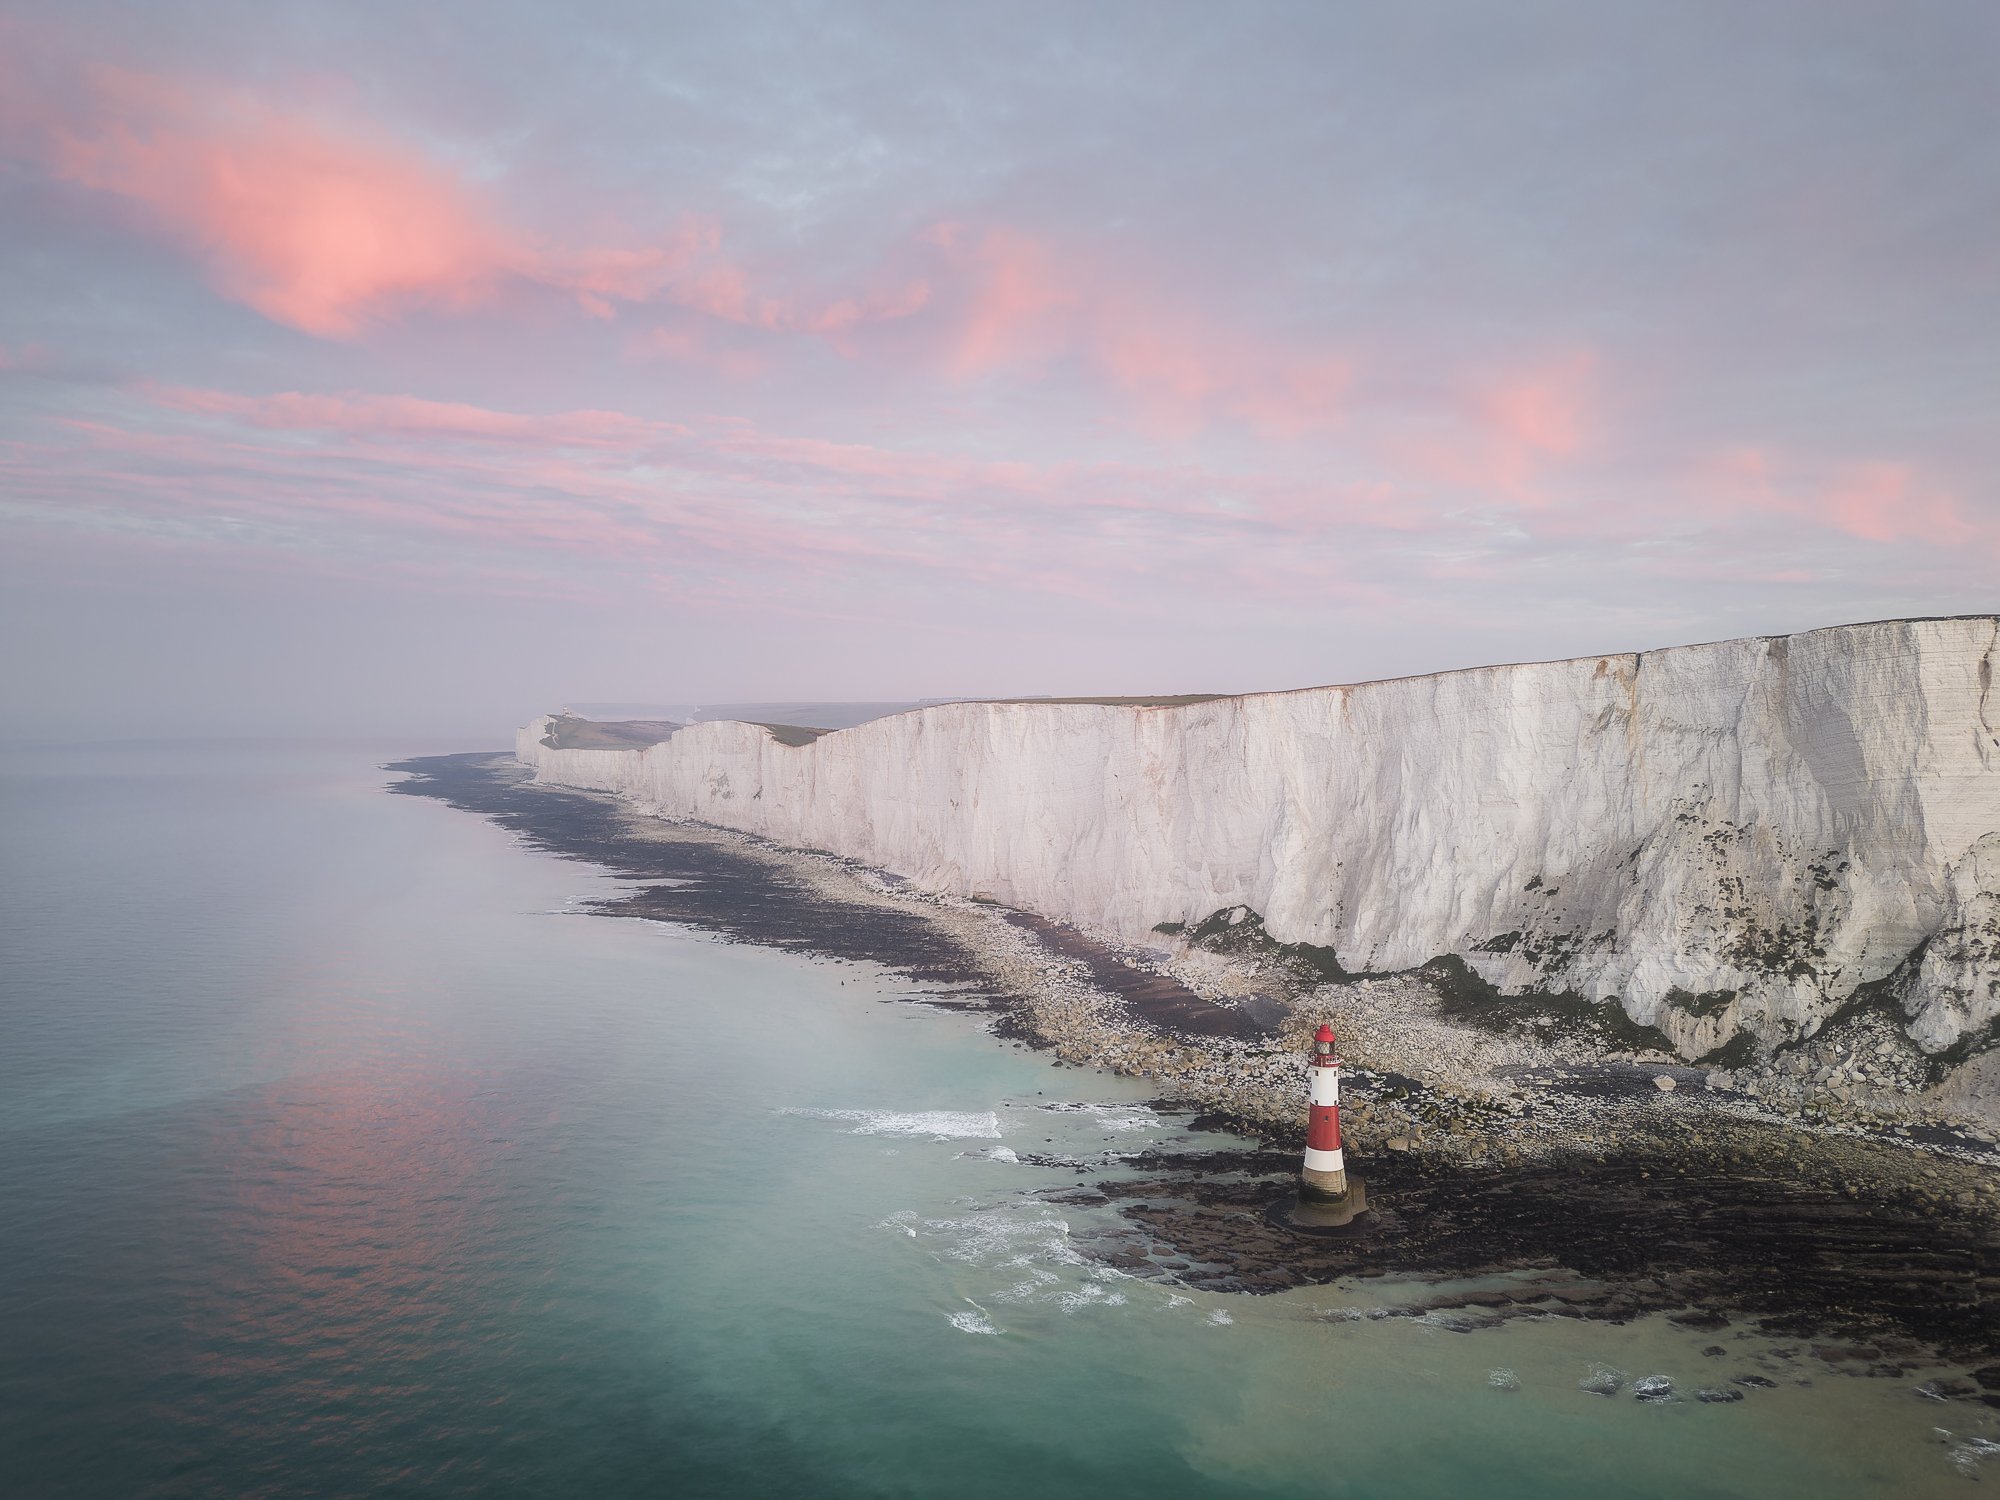
DJI Mavic Mini 3 | 24mm (effective) | 1/30th Second | f/1.7 | ISO100
That being said, there is no getting around the fact that the image sensor used in the Mini 3 Pro’s camera is a little on the small side. With smaller pixels and a lower resolution compared to some of the larger drones on the market, getting the very best image quality will require you to take advantage of all of the settings and features available. In this article, I will share some tips and tricks I’ve picked up over time so you can take the best aerial landscape photos possible with the DJI Mini 3 Pro.
One final point before we jump in. This article has been written with a specific focus on photos and contains my personal opinion based on my own experience capturing and editing photos taken with the Mini 3 Pro. I won’t be covering other topics in this post such as the best video settings or even flying modes. I’ll save those topics for someone else.
Set the photo mode to PRO
Like most traditional cameras, the Mini 3 Pro has both auto and pro (manual) camera modes. For those that may be apprehensive about switching their camera away from auto mode, it really isn’t as scary as you may think and making the switch provides you full control of the shutter speed, white balance and ISO settings. Having the PRO picture mode enabled will open up more possibilities to ensure the image looks the way you want, and the great thing is, the real-time feedback you get on the screen will help ensure you don’t under/over-expose your photos. Many of the settings I mention in the post rely on PRO mode being activated, so, in my opinion, this should be one of the first things you do when you’ve mastered flying your drone and want to take better photos.
To switch from AUTO to PRO mode, simply tap the AUTO icon located in the bottom right-hand side of the screen. You will know you are shooting in PRO mode as the icon will change and more settings will appear.
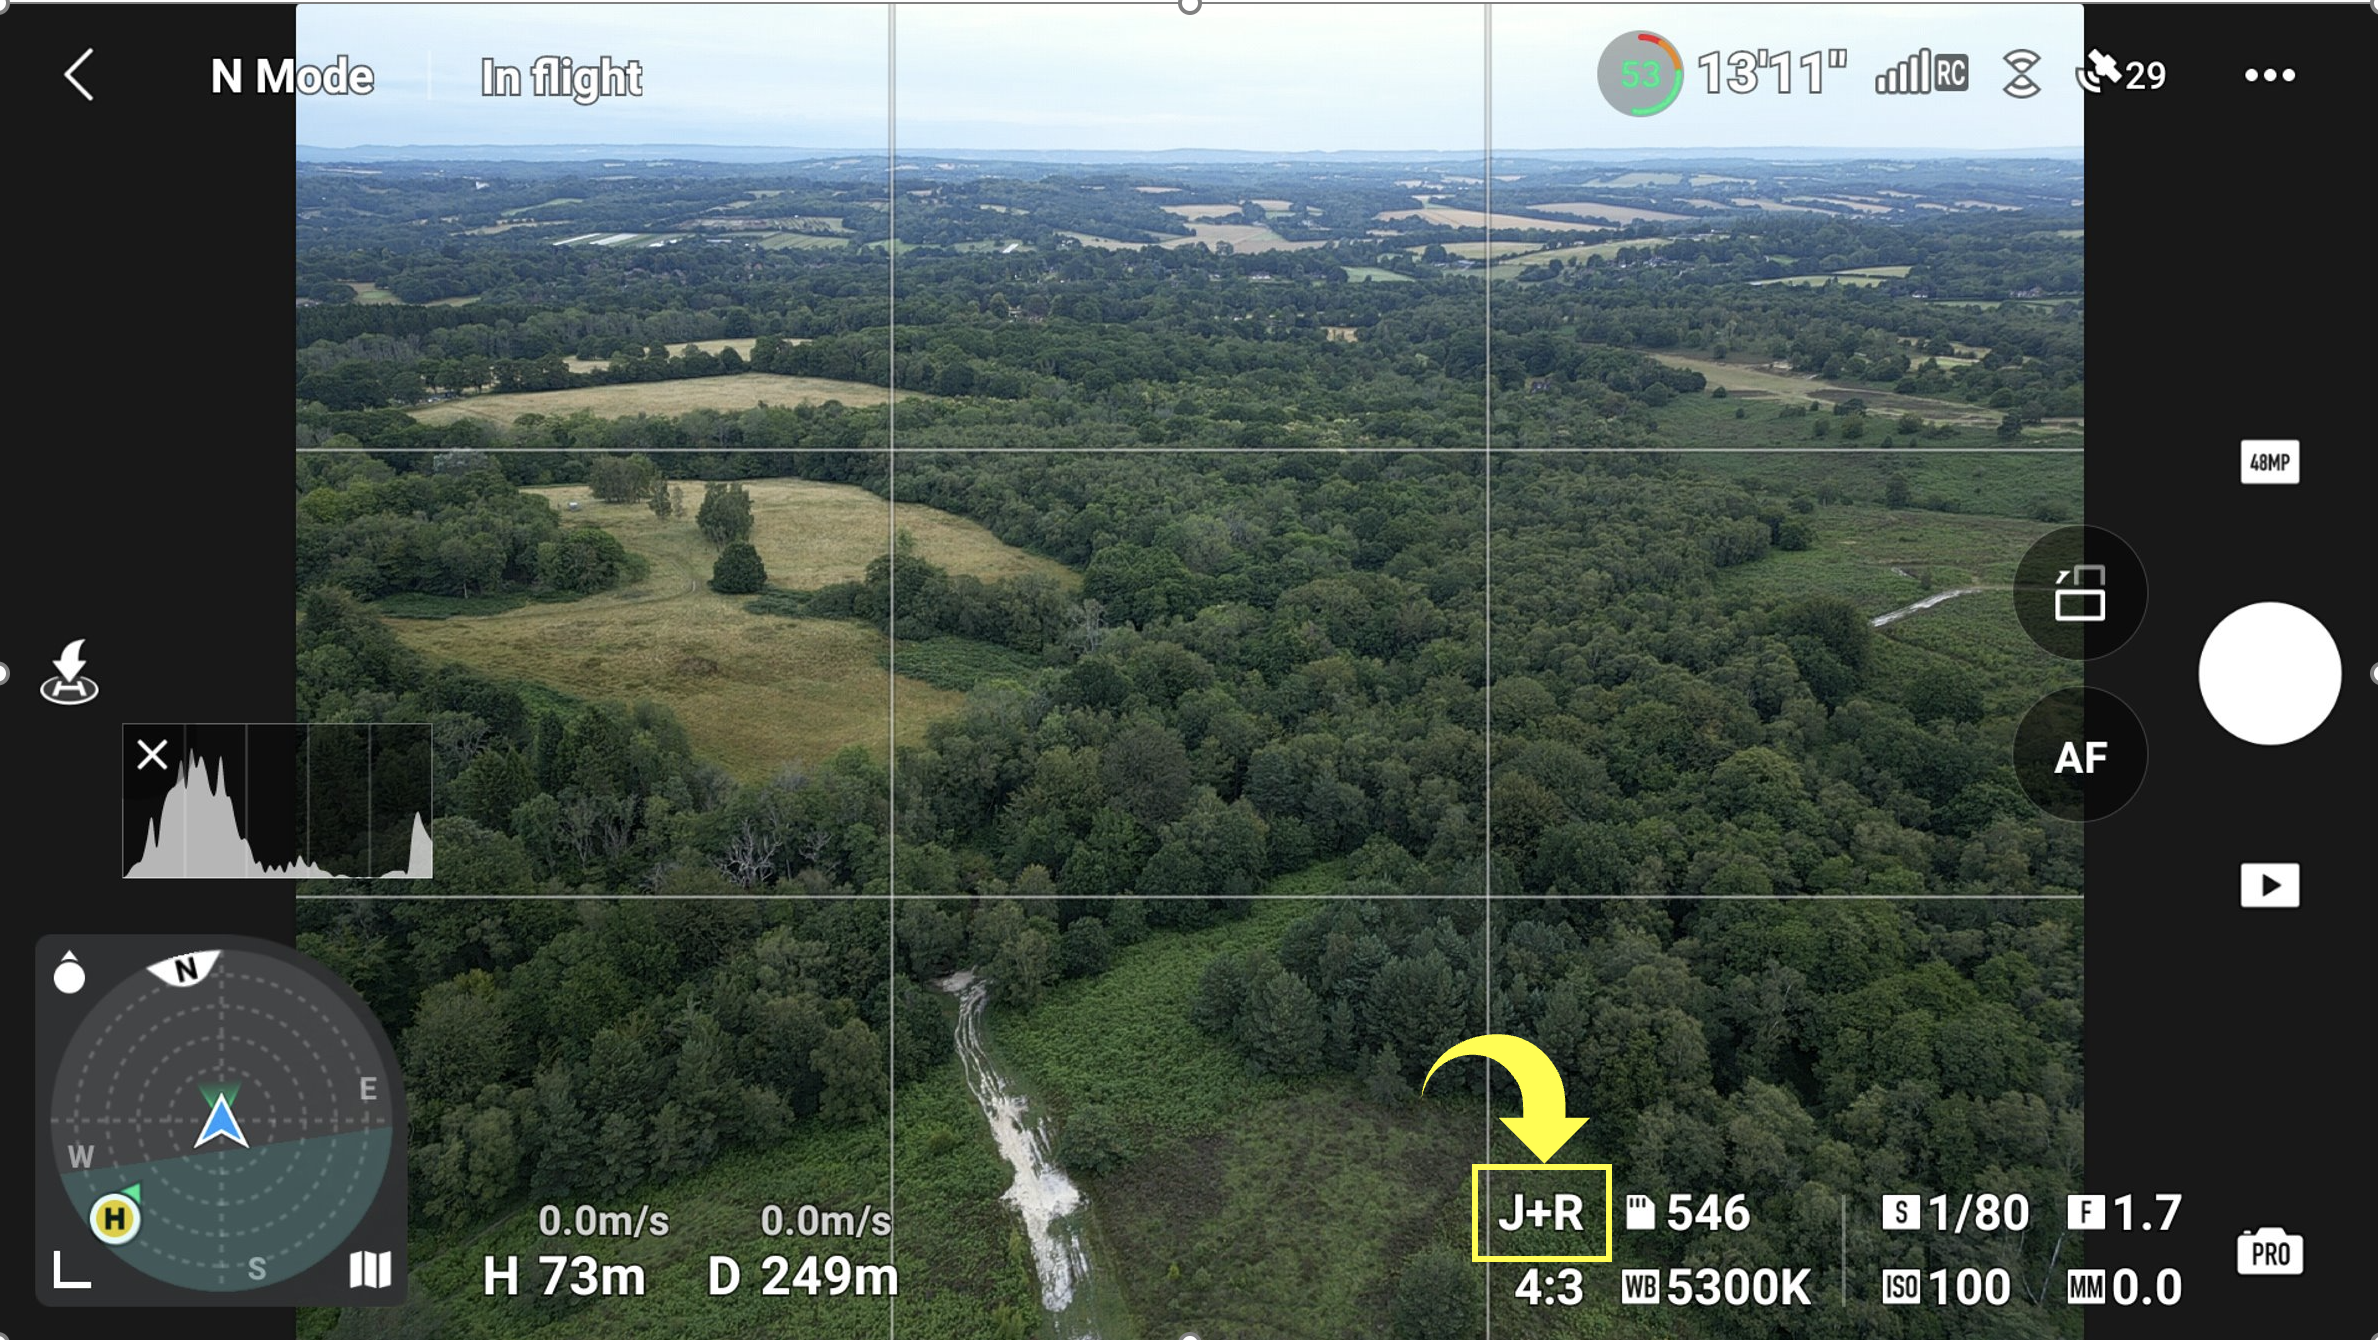
Shoot in J+R (JPEG+RAW)
Most people who take digital photos will be familiar with a JPG or JPEG file as it’s by far the most used image format out there. But what is a raw file? Think of it as a digital negative. It’s a lossless picture format that contains all the image data captured by the drone’s camera, without any editing or adjustments and although not for everyone, shooting stills as raw images really is the best way to ensure all of that image data is retained.
When taking JPGs, the camera’s processor will apply the default picture profile settings and discard all other data no longer used. The file size is smaller and if that’s all you need, that’s great. But if wanting to maintain full control of the final look of the image and plan to import the photos into your chosen editing software, then choosing to shoot raw is the better choice.
It’s worth noting that the Mini 3 Pro doesn’t have a raw-only mode, so whatever format you choose, you will still have a JPG copy saved onto your card. That can be useful for the times you just want to quickly grab an image from the memory card to share, bypassing the editing stage altogether. It really is the best of both worlds.
You can shoot in JPEG+RAW in either AUTO or PRO modes. To change from jpg to raw, tap the word JPEG in the bottom right-hand corner of the screen, and depending on whether you are in PRO or AUTO mode you will need to select either J+RAW or J+R.
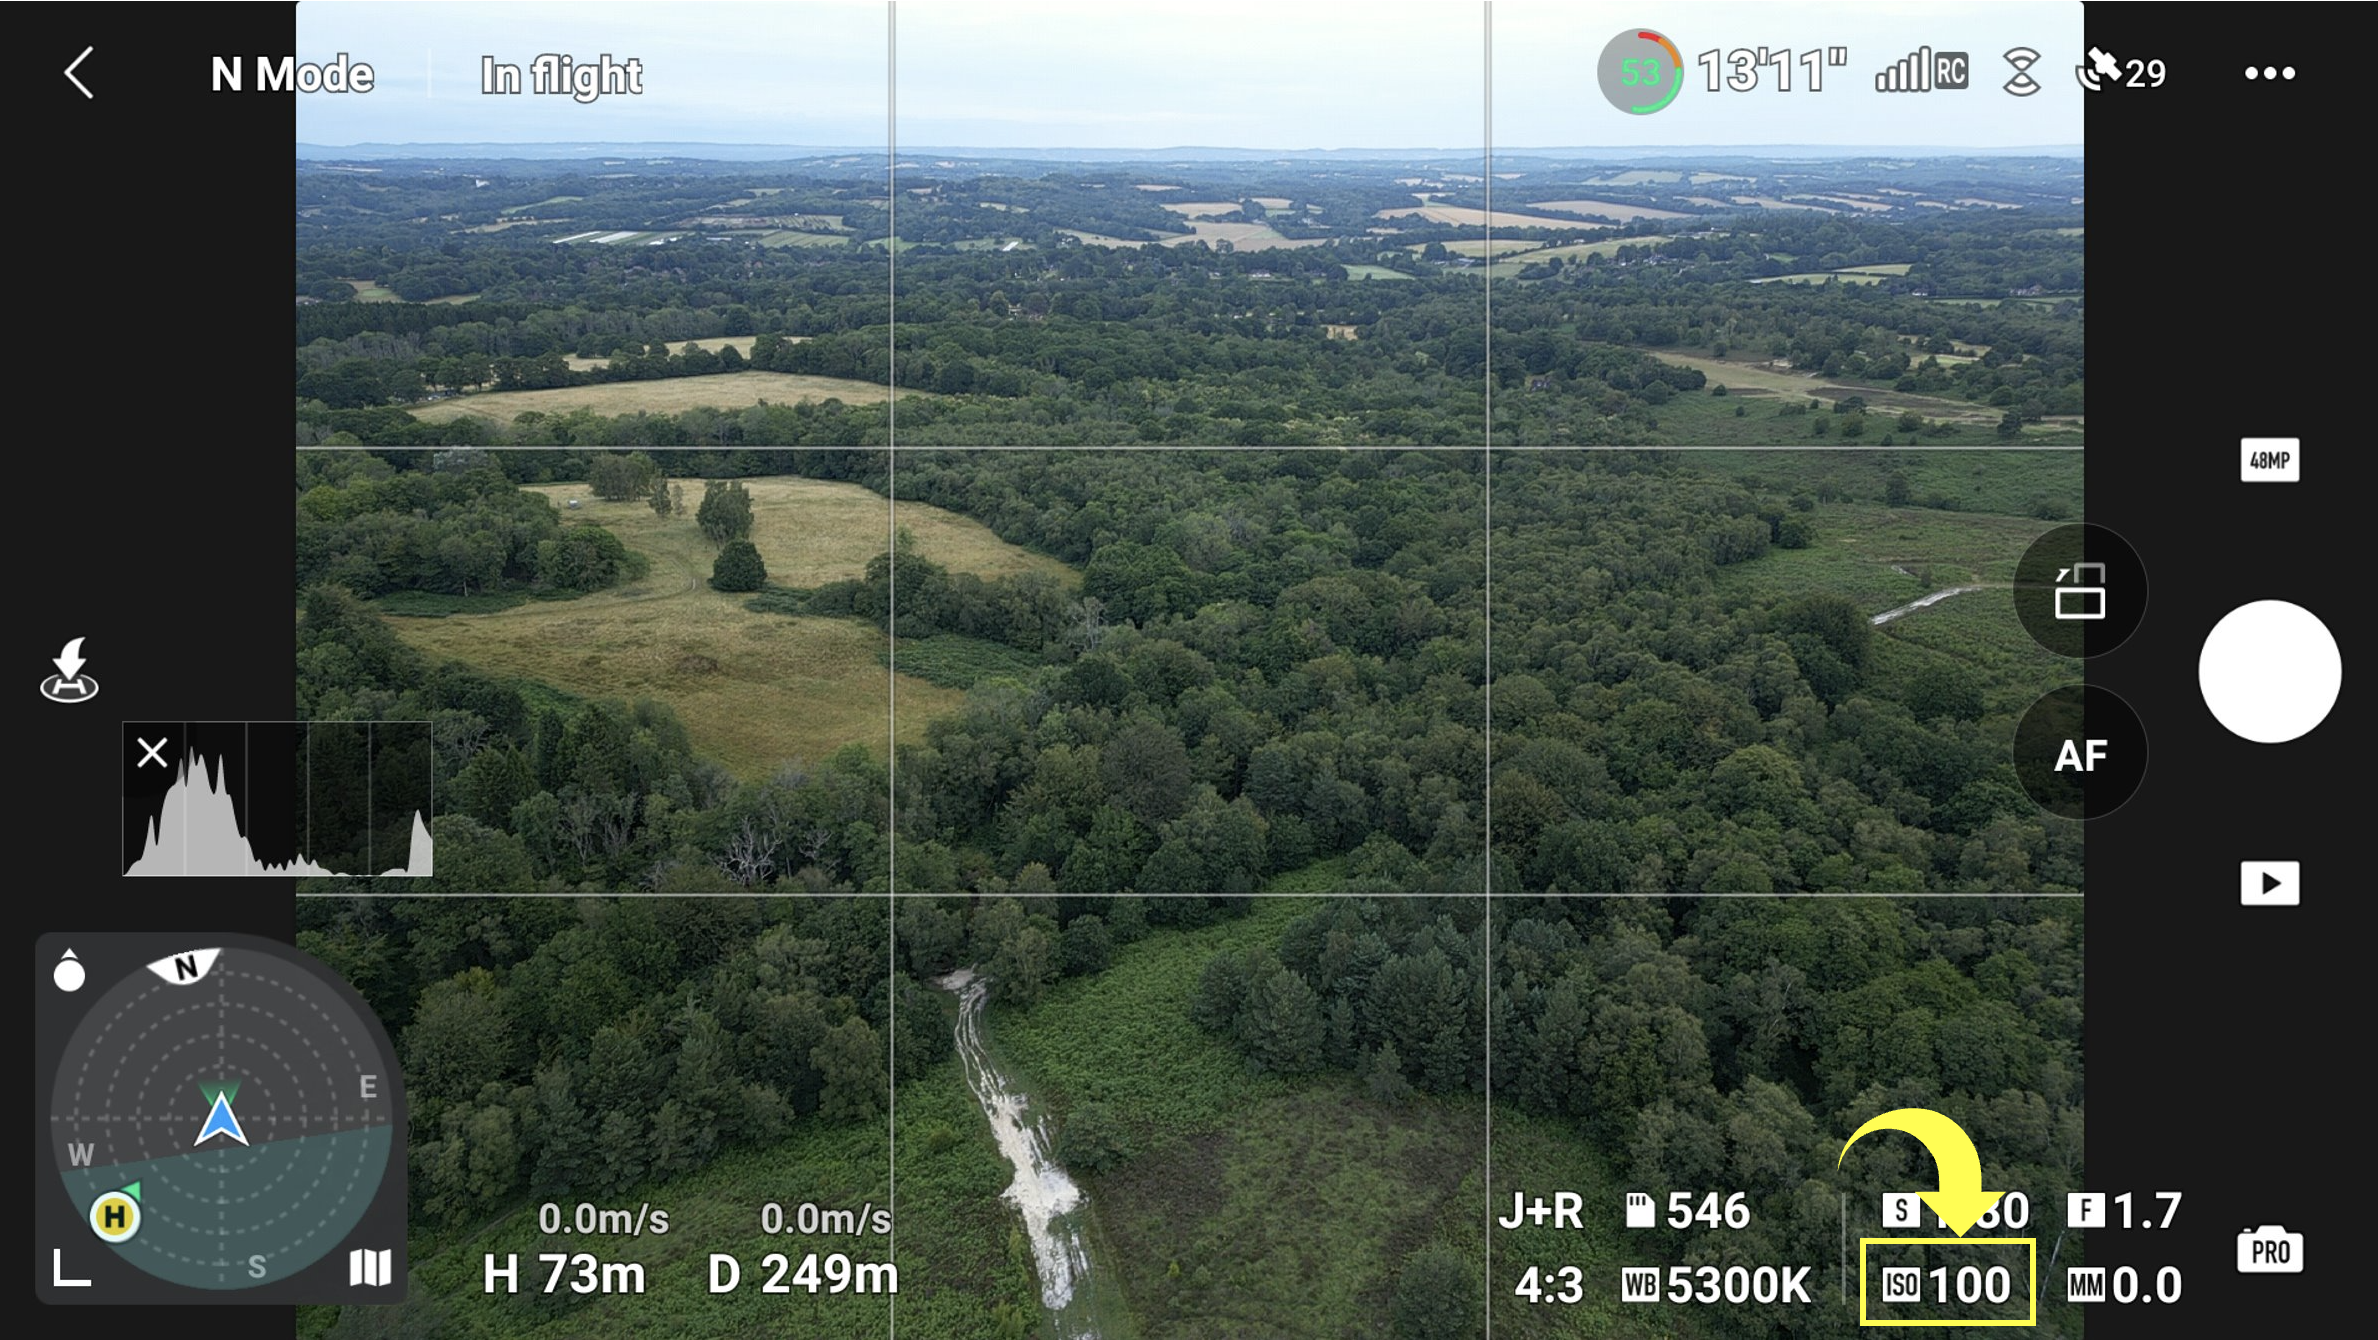
Keep your ISO as low as possible
The native ISO for taking photos with the Mini 3 Pro is 100, and although raising your ISO can be incredibly useful when the ambient light is too low to take a sharp photo, it will negatively affect picture quality. The higher the ISO, the more digital noise and artefacts will be introduced to your images, and yes, a sharper, noisier image is better than a blurry one in nearly all cases, to keep my images as clean as possible, I will only raise my ISO as a last resort.
If you are in a situation where a higher ISO is needed and PRO mode is enabled, simply tap the ISO icon located at the bottom right of the screen and slide the dial until you have the exposure you need.
Enable the Histogram and Overexposure Warning
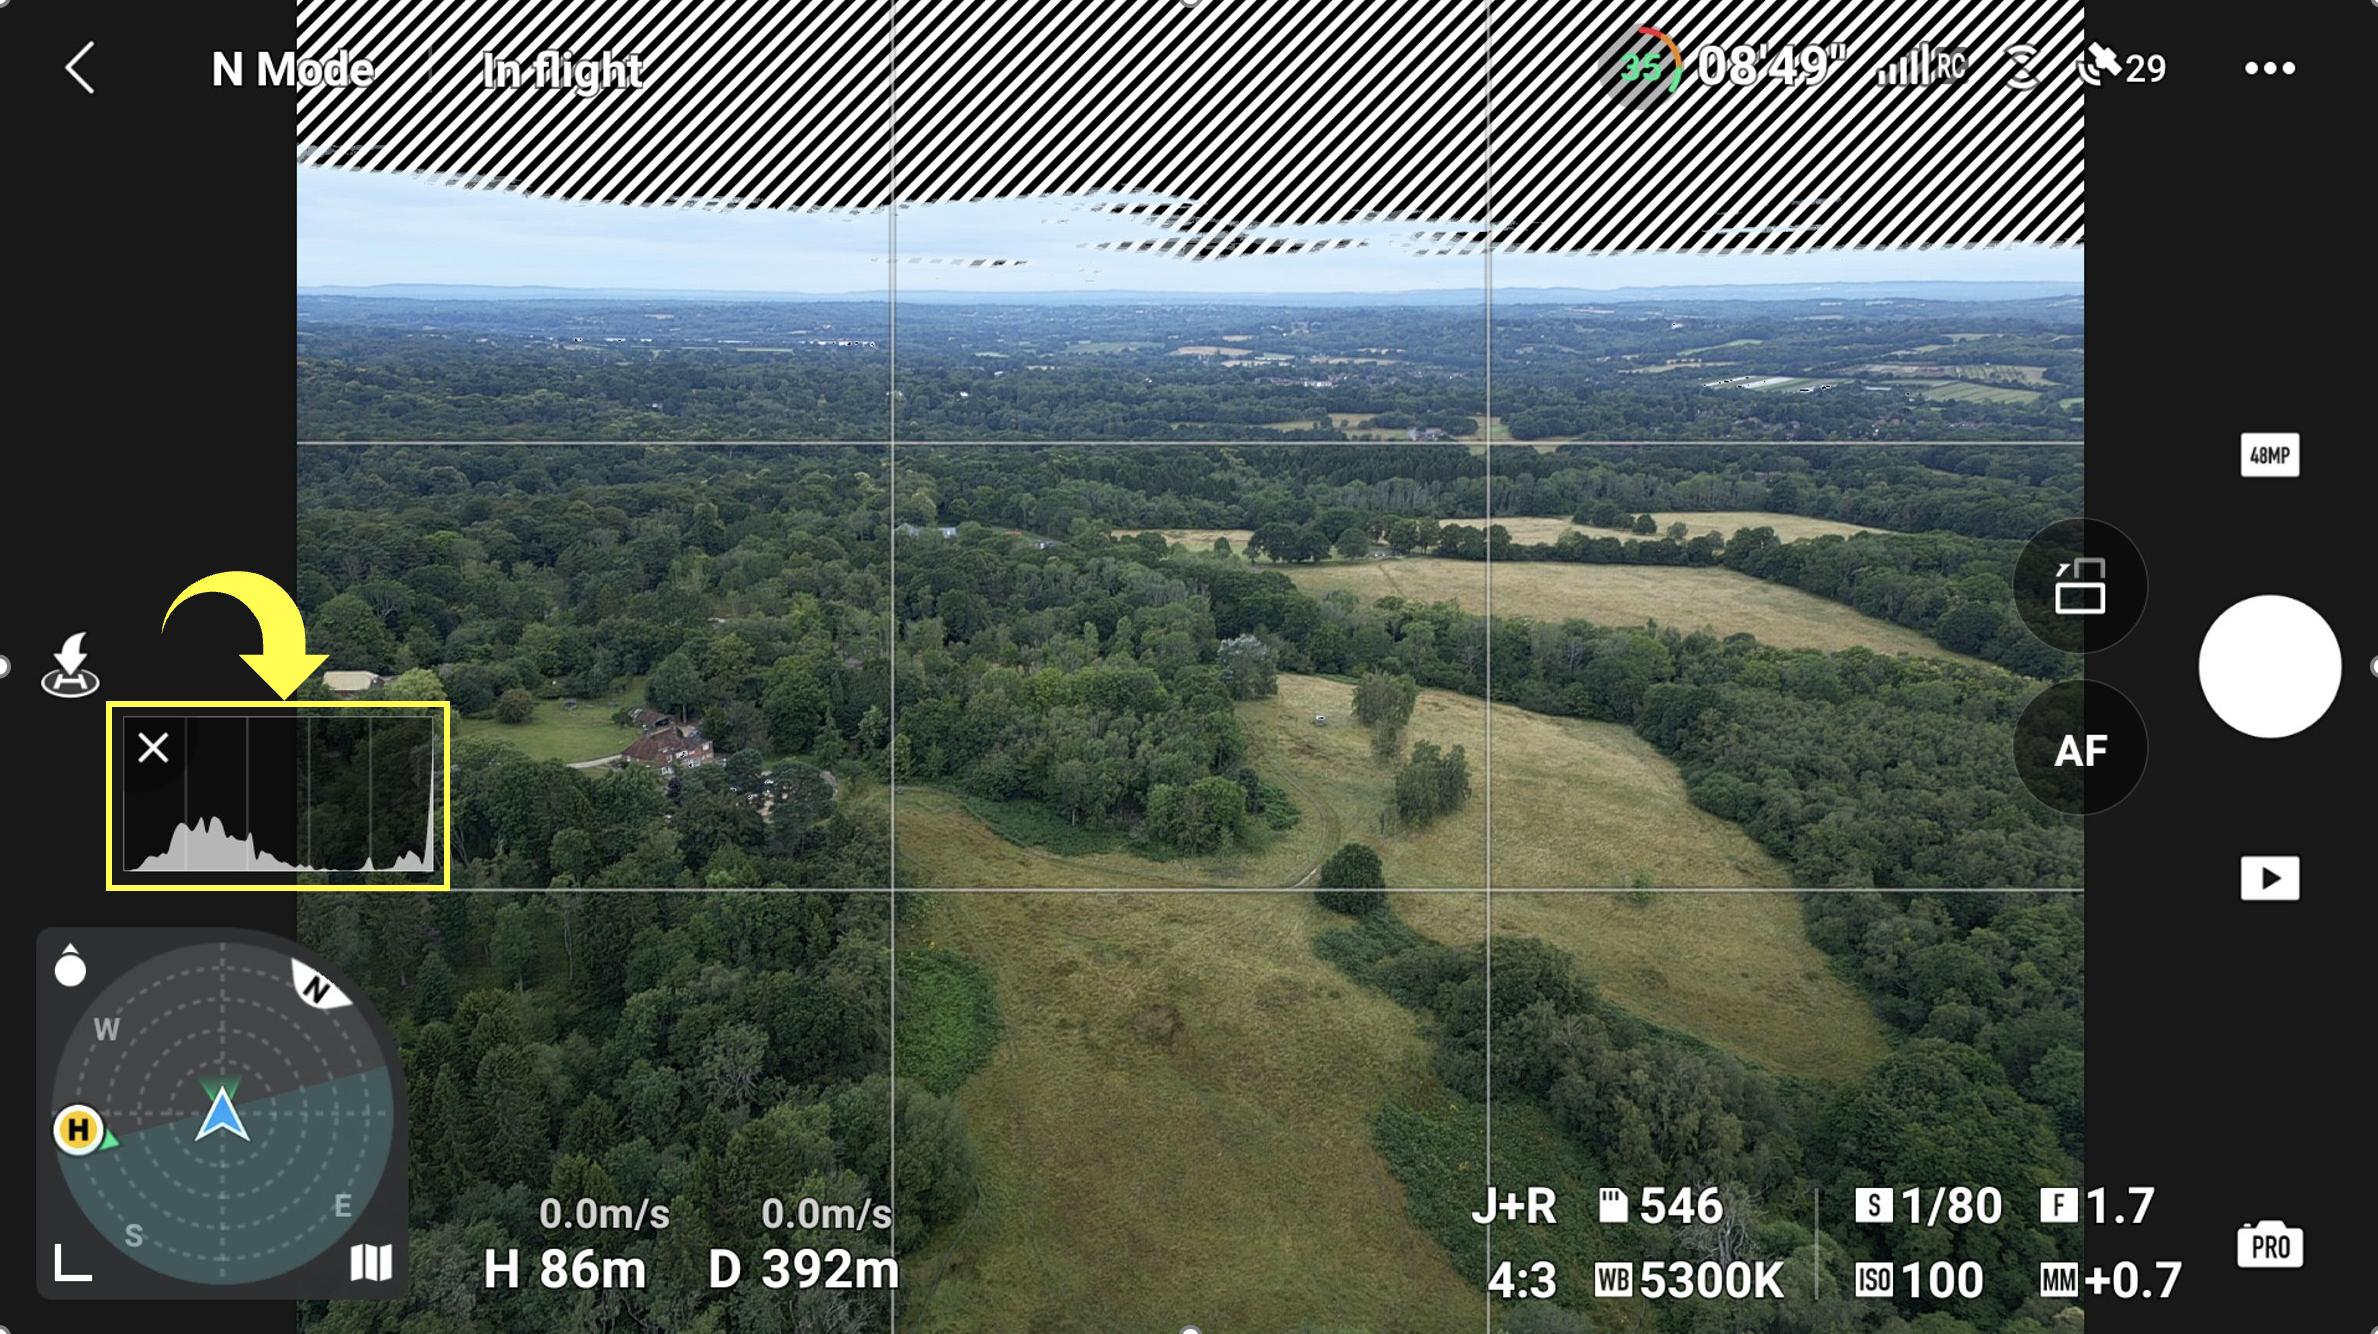
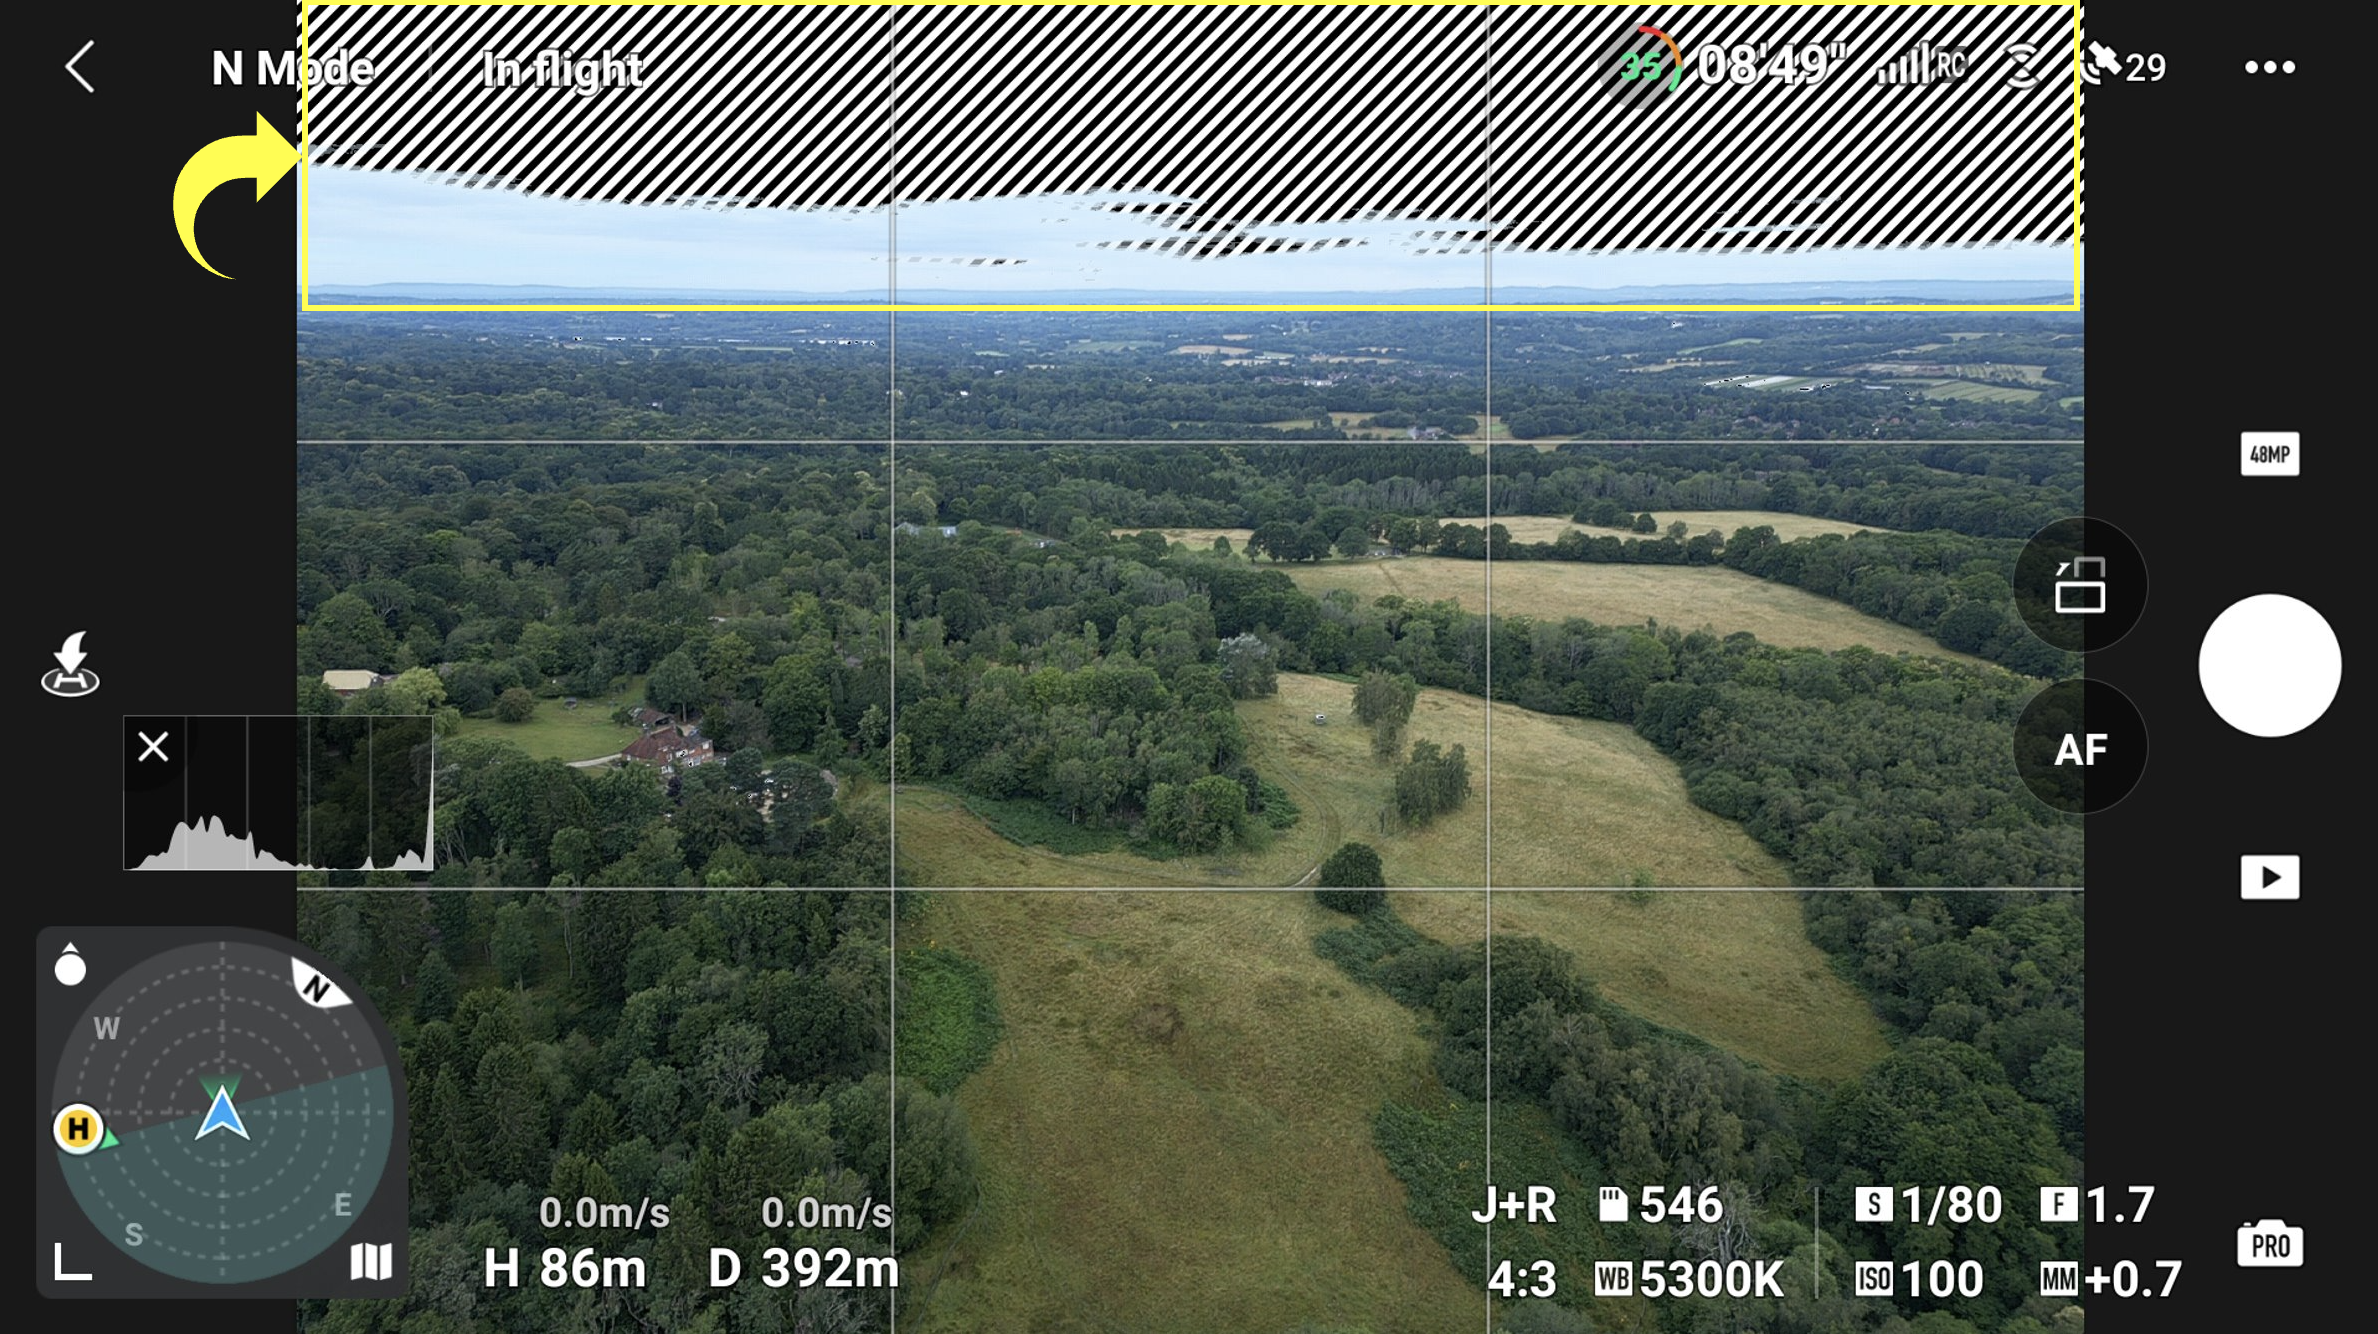
Unlike traditional photography where you and the camera typically have the same view of the subject, taking photos with a drone means relying far more heavily on what you can see on the screen. So, in my opinion, the more info it provides, the more likely you will take a high-quality, well-exposed photo and that’s why I keep the histogram and Overexposure Warning enabled when taking pictures with the Mini 3 Pro.
I won’t dig too deep into what a histogram is, but in short, it is a graph that visually represents how much light, mid or dark tones are in the photo. The shape of the graph will depend on the type of photo being taken but the thing to watch out for is when the graph data starts to touch and overlap with the far left or right-hand side. Typically, this is called clipping and means you’re losing image details in the shadows or highlights which might not be recoverable later in post-processing.
The Overexposure Warning feature is a little easier to explain. All this really does is highlight parts of the image that are overexposed with black and white moving lines. To some, this might be a bit too distracting, but I use the same option on my main Fujifilm camera and find it a useful feature to enable to prevent overexposing parts of the image.
To enable one or both features, select the three dots on the top-right of the screen to open the main menu. From here, select the Camera settings sub-menu and scroll down. Here you will see both options with a toggle switch to enable or disable the feature.
Shoot to the right
This suggestion requires the histogram to be enabled, so check out the previous point to see how this is done.
Typically, the more light collected onto the sensor when exposing an image, the higher the quality, because less noise and artefacts will be present in the resulting photo. So, one technique to try is to overexpose an image by a stop or two where the histogram will be heavier weighted towards the right. This is where the term “Shoot to the right” or STTR comes from and is commonplace in traditional landscape photography.
Shooting to the right should be practised with a degree of caution. For example, slowing down the shutter speed risks adding motion blur to an image and if not careful, you can also end up pushing it too far and clipping the highlights. Shooting to the right along with AEB being enabled (see the next tip) can help get around these issues.
Use AEB mode when shooting in high dynamic range situations
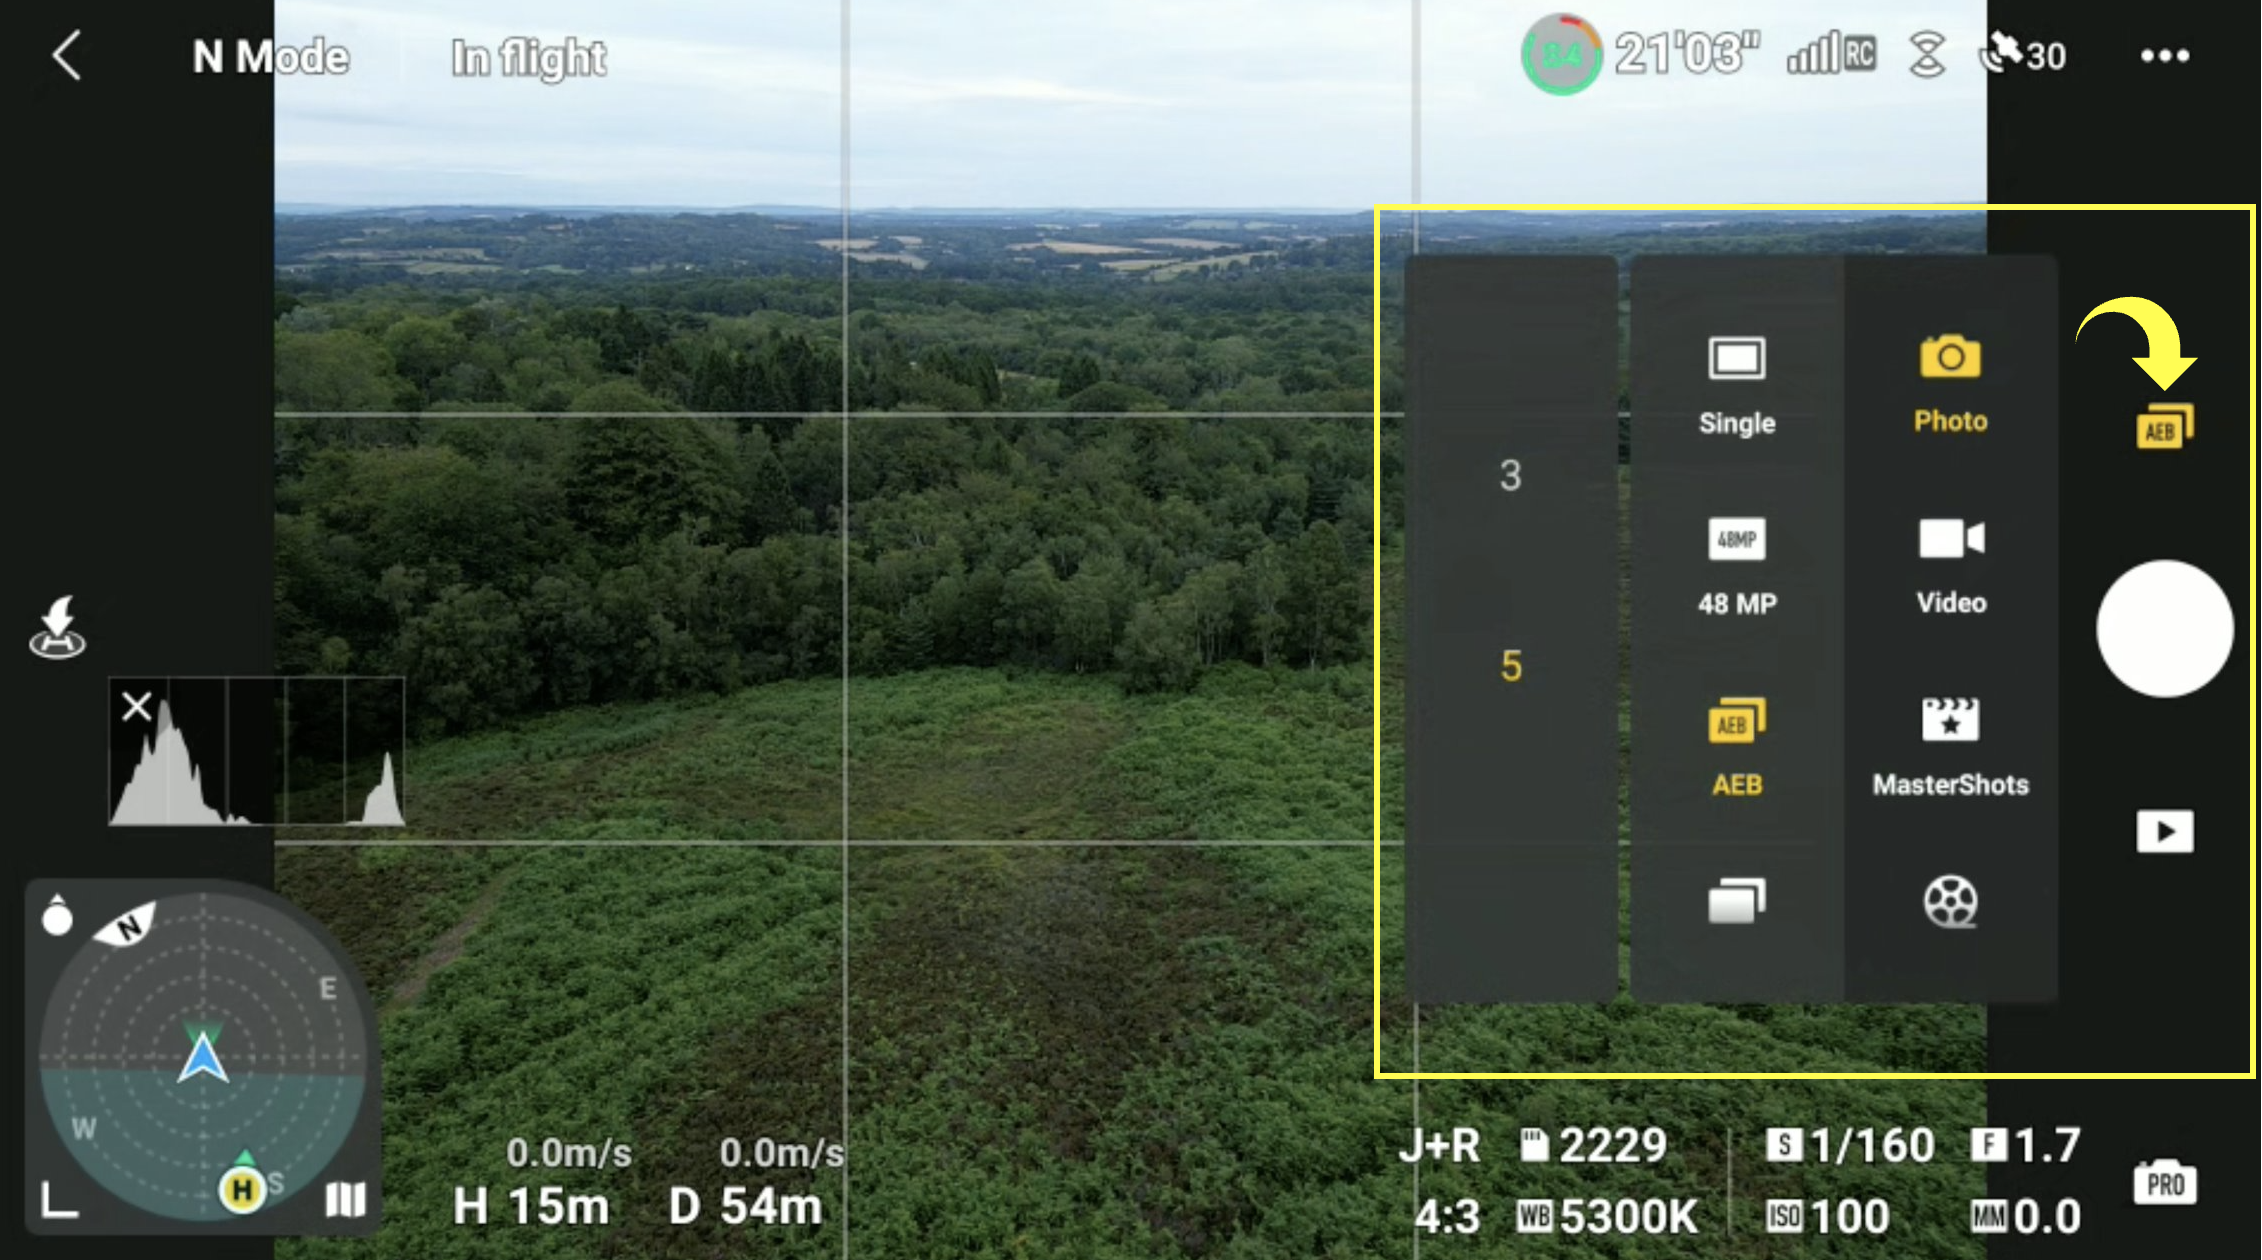
AEB stands for Auto Exposure Bracketing and is a super useful feature enabling you to capture varying exposures of the same scene, all with a single press of the shutter button. It works by taking a base exposure using the settings you have already chosen, then taking either one or two extra photos on either side, increasing or decreasing the exposure by a stop each time. This results in 3 or 5 separate images which can be merged in your chosen image editor later.
DJI Mavic Mini 3 | 24mm (effective) | 1/2500th Second | f/1.7 | ISO100
As I mentioned at the beginning of this article, the DJI Mini 3 Pro has a smaller sensor, with smaller pixels compared to the higher end/bigger drone models, meaning it will have more difficulty properly exposing a photo in high dynamic range scenes. So, to make sure I gather as much image detail in the highlights and shadows as possible, I will take 5 bracketed images of a given scene 90% of the time. Not all photos will need to be bracketed, but the file sizes are relatively small and, in my opinion, the benefits significantly out way the minimal drawbacks.
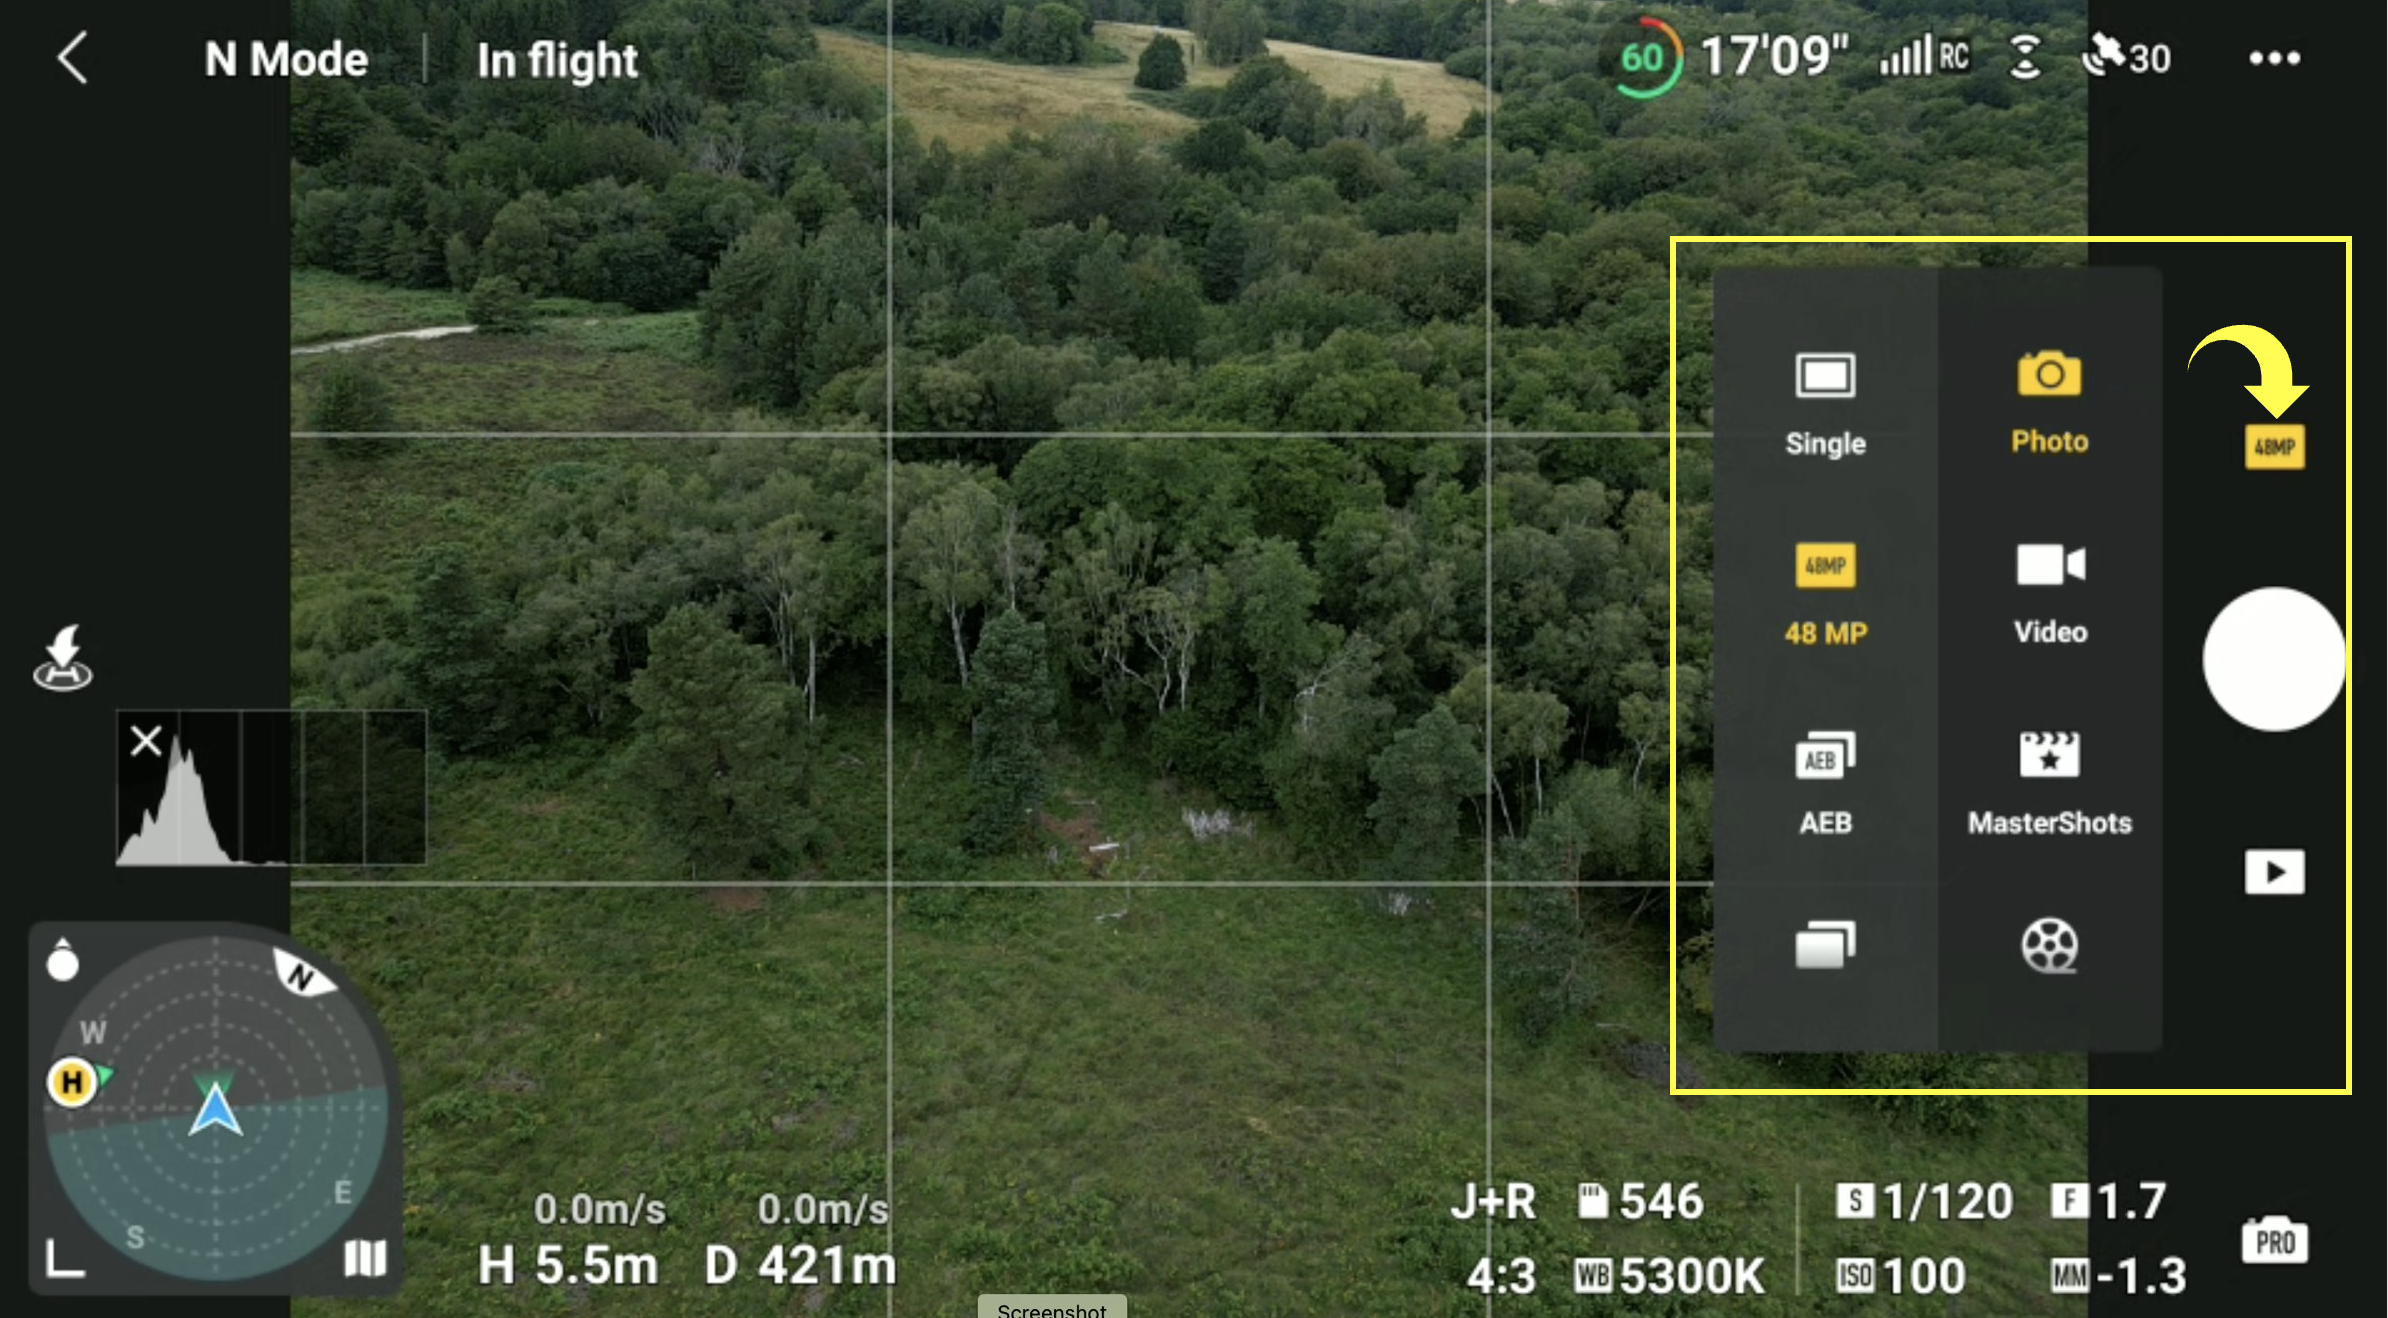
To enable AEB when in photo mode, select the icon just above the screen’s shutter button, select Photo, then AEB, then select whether you want to take three or five bracketed images. Select the AEB icon above the shutter once more to close the menu.
Capture a panoramic image for maximum resolution
The native image resolution for the Mini 3 Pro is 12MP which, by modern standards is on the lower side and if you plan to print your photos, then a great way to boost your resolution is to take multiple images and stitch them together in post. There are actually a few ways to achieve this.
First up, there are the built-in Pano options. If there is plenty of light and the dynamic range isn’t too high, then using one of the built-in pano modes is a great option as the drone will take care of panning and picture taking. All you need to do is set your exposure settings and press the shutter button.
I used the built-in Pano mode when I created the picture below.
DJI Mavic Mini 3 | 24mm (effective) | 1/2000th Second | f/1.7 | ISO100 - Wide Pano Mode
When shooting in jpeg+raw, the drone will automatically stitch the JPEG image and place the individual raw files in their own sub-folder on your memory card, ready to be imported and merged into your chosen software later.
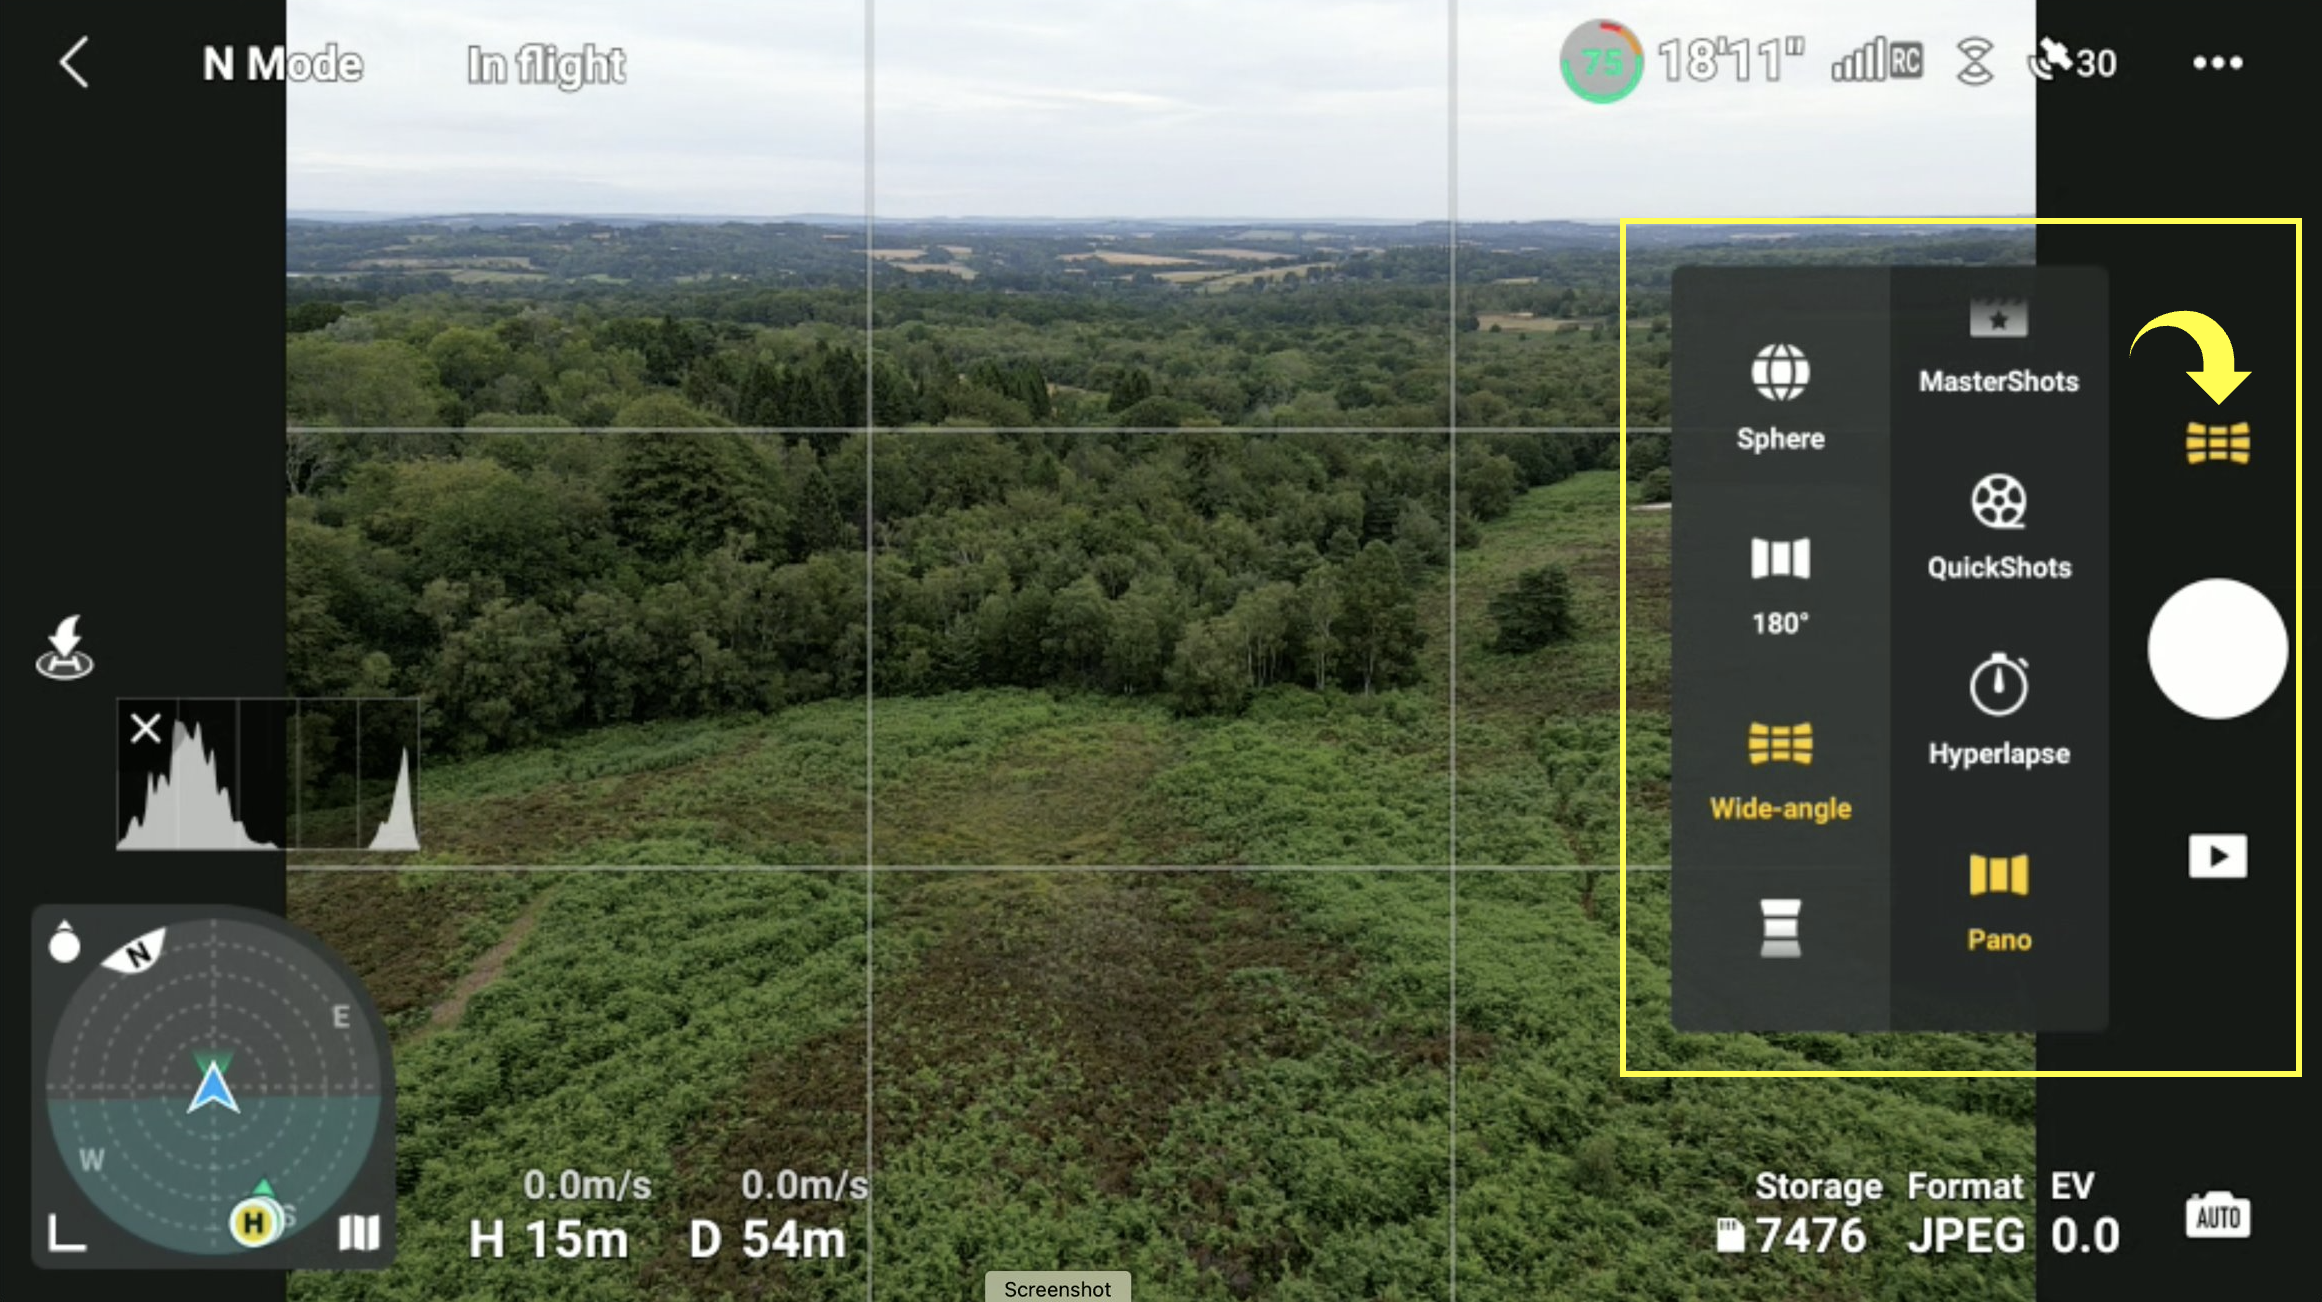
To access the built-in pano modes, choose the icon above the screen’s shutter button and when the menu opens, scroll down and select Pano. Here you can select from the different panorama options which are Sphere, 180°, Wide Angle, and Vertical. I won’t go into all the various options here but for a traditional panorama, you would select the wide option. In this mode, the Mini 3 Pro will take a grid of 9 photos automatically.
The built-in pano modes are incredibly useful but to retain more control of the final image, I prefer to take the individual photos manually, like I would when taking traditional landscape photos with my main camera. My typical approach would be to switch the camera to portrait mode (a welcome feature introduced in the Mini 3 Pro) as this provides more vertical resolution without the need to tilt the camera up or down, thus avoiding any unnecessary distortion which would need to be dealt with in post. I will then pan horizontally, taking individual photos as I go, overlapping by 30-50% and leaving a little room on either side for cropping.
DJI Mavic Mini 3 | 24mm (effective) | 1/5th Second | f/1.7 | ISO100
Create a manual pano with AEB for maximum dynamic range and resolution
This is the number one reason why I like to create my panoramas manually. For reasons only known to DJI, the Mini 3 Pro does not have the ability to take AEB images in pano mode. Maybe it will be introduced later but this seems an obvious feature to add with a firmware update. So, for now, I manually combine the two by taking a manual panorama with the 5-image AEB mode enabled. The resulting images will have the highest (native) resolution with the most image detail and the highest dynamic range.
I will then import them into Adobe Lightroom (my chosen image editing software) and with all the raw images highlighted, I select Photo - Photo Merge - HDR Panorama from the main menu.
With the sun setting behind the mountains, I needed all the dynamic range available to avoid blowing out the sky when creating the panorama below.
DJI Mavic Mini 3 | 24mm (effective) | 1/6400th Second | f/1.7 | ISO100
Use the 48-megapixel mode, (but do so with some caution)
The Mini 3 Pro comes with a high-resolution stills mode, allowing you to take photos at 4x the resolution compared to the base 12-megapixel option. In the right conditions, using the 48MP mode can help when you might want to crop the image later or print your photos even bigger.
Sounds too good to be true, right? Well, maybe. Although the native resolution is 12MP, to achieve a 48MP image, the Mini 3 Pro’s camera has a type of filter (called a quad bayer filter) which, splits each of the 12MP into four, resulting in the 48 megapixels mentioned. The issue is that smaller pixels capture less light and can result in noisier, lower-quality images. If the conditions are good for photography and there is plenty of light, the 48MP images can look really good, but when conditions are less than ideal, the images can leave a lot to be desired. That’s certainly my experience, anyway.
My usual workflow when taking stills with the Mini 3 Pro is to hedge my bets and capture a native 12MP image with AEB first and then a 48MP version which I can then compare and decide on the best one to edit later in Lightroom.
To enable the 48MP stills mode, simply select the icon above the screen’s shutter button, from there select Photo then to the right, select 48 PM.
It’s probably worth mentioning that using the base 12MP stills mode and taking a panorama can result in high-resolution, less noisy images too, but it will be a wider aspect, requiring the drone to be closer to the given subject. There is no right or wrong here, just different options suitable for different situations.
Set your white balance to manual
There are a couple of reasons why you might consider manually setting your white balance while out taking photos with the Mini 3 Pro. If you’re taking single, raw photos, then it’s not such an important topic as the white balance can be changed later in post. But if taking JPEGs, the white balance is baked into the image at the time it is taken, so getting it right while out with the drone is much more important.
Secondly, and the main reason I set the white balance manually is to keep all images completely consistent when taking panoramic images. As you pan the camera around, the changes in the scene being photographed might lead to changes in the white balance which can add more work when trying to seamlessly stitch the photos together later.
I tend to keep the WB at about 5300-5500 on brighter days and a little higher when there is more cloud around but typically, I will judge each situation individually. To manually set the white balance, you need to be in PRO photo mode. On the bottom right corner of the screen, there will be a square with WB and a Kelvin number next to it. This number is the numerical value the white balance will be set to. Select the WB icon and a familiar box will pop up. At the top, if the white balance is set to automatic, the box with Auto will be highlighted in yellow. If so, tap that and then use the slider to scroll through the numbers to your desired white balance value.
BONUS TIP: Fix it in post!
Ok, I hear you. We all want to take the very best photos while out in the field but sometimes you will reach the limit of what the Mini 3 Pro camera is capable of and have noisy photos. Luckily, we seem to be in a bit of a boom when it comes to software-based noise reduction. Amongst others, DxO, Topaz and not Adobe have all recently released updated software with some impressive noise-reduction features. So, even if you use all the suggestions I have listed in this article and still end up with noise or artefacts in your photos, try running them through one of these applications as it might save the day.
Printing your photos taken with the DJI Mini 3 Pro
If you regularly visit my website, you will know that I am a big believer in the printed image. Be it a single print, a photo book or wall art, the physical, tangible print is a far better way to view and experience a photo compared to a screen. With this in mind, I recently printed some of the drone photos I’ve taken over the last year to get a better idea of how they look in the flesh.
I printed a selection of my photos, taken using many of the techniques I mention above at both A4 and A3 sizes, and although it’s impossible to demonstrate here, I have to say, they look pretty good. Nice and sharp and with little to no noise. If you’ve taken some photos with the Mini 3 Pro and are on the fence when it comes to printing your photos, then my advice is to power up that printer or choose a good lab and get some printed. You won’t regret it!
DJI Mavic Mini 3 | 24mm (effective) | 1/30th Second | f/1.7 | ISO100
So, there you have it. If you follow some or all of these suggestions, you will take the very best landscape pictures possible from the DJI Mini 3 Pro and if you have any suggestions I might have missed, feel free to leave a comment below.
Until next time,
Trevor
DJI Mini 3 Pro | A Landscape Photographer’s Review
My review of the DJI Mini 3 pro from the perspective of a landscape photographer after 6 months of owning his very first drone. Was it easy to fly? Is the camera any good? Have a read and find out what I think.
Those who know me are aware that I’ve been talking about getting a drone for ages! Years in fact. Put off by the many restrictions and rules that went hand in hand with owning and flying a drone, my biggest concern was that I just wouldn’t use it enough. I thought that it would be mostly unused, sitting on a shelf gathering dust, but when DJI announced the Mini 3 Pro, the time was finally right to jump in and place the order. Having now owned the Mini 3 Pro for around 5 or 6 months, I thought I would share my thoughts from the point of view of a landscape photographer owning his very first drone.
Why did I choose the DJI Mini 3 Pro?
To answer that question, I guess I need to answer another question first. What had previously stopped me from buying a drone and why did I believe it wouldn’t get much use?
In short, the drones with the most freedom to fly and the least restrictions were not good enough when it came to photography (in my opinion). If I wanted DJI’s crème de la crème in terms of consumer drone photography, I could have opted for the Mavic Pro, but living here in the Southeast of England, there are so many restrictions and built-up areas, I felt I would be constantly frustrated by the lack of opportunities to fly and would have to travel far and wide to get the most use out of a drone like that.
The DJI Mini line of drones are perfect in terms of form factor as with a sub 250g take-off weight, I could fly almost anywhere as long as I wasn’t in restricted airspace but the original Mini and Mini 2 fell short with regards to the camera. Either because of a lack of RAW format support in the first iteration, or just sensor size and what I had read about the general image quality. If video was my priority, I would have jumped in far earlier, but to get high quality photos that I could edit and print at a reasonable size, the Mini and Mini 2 were not quite good enough.
So, when the Mini 3 and it’s improved, larger image sensor was announced, the time was right to make the jump.
DJI Mavic Mini 3 | 24mm (effective) | 1/500th Second | f/1.7 | ISO100
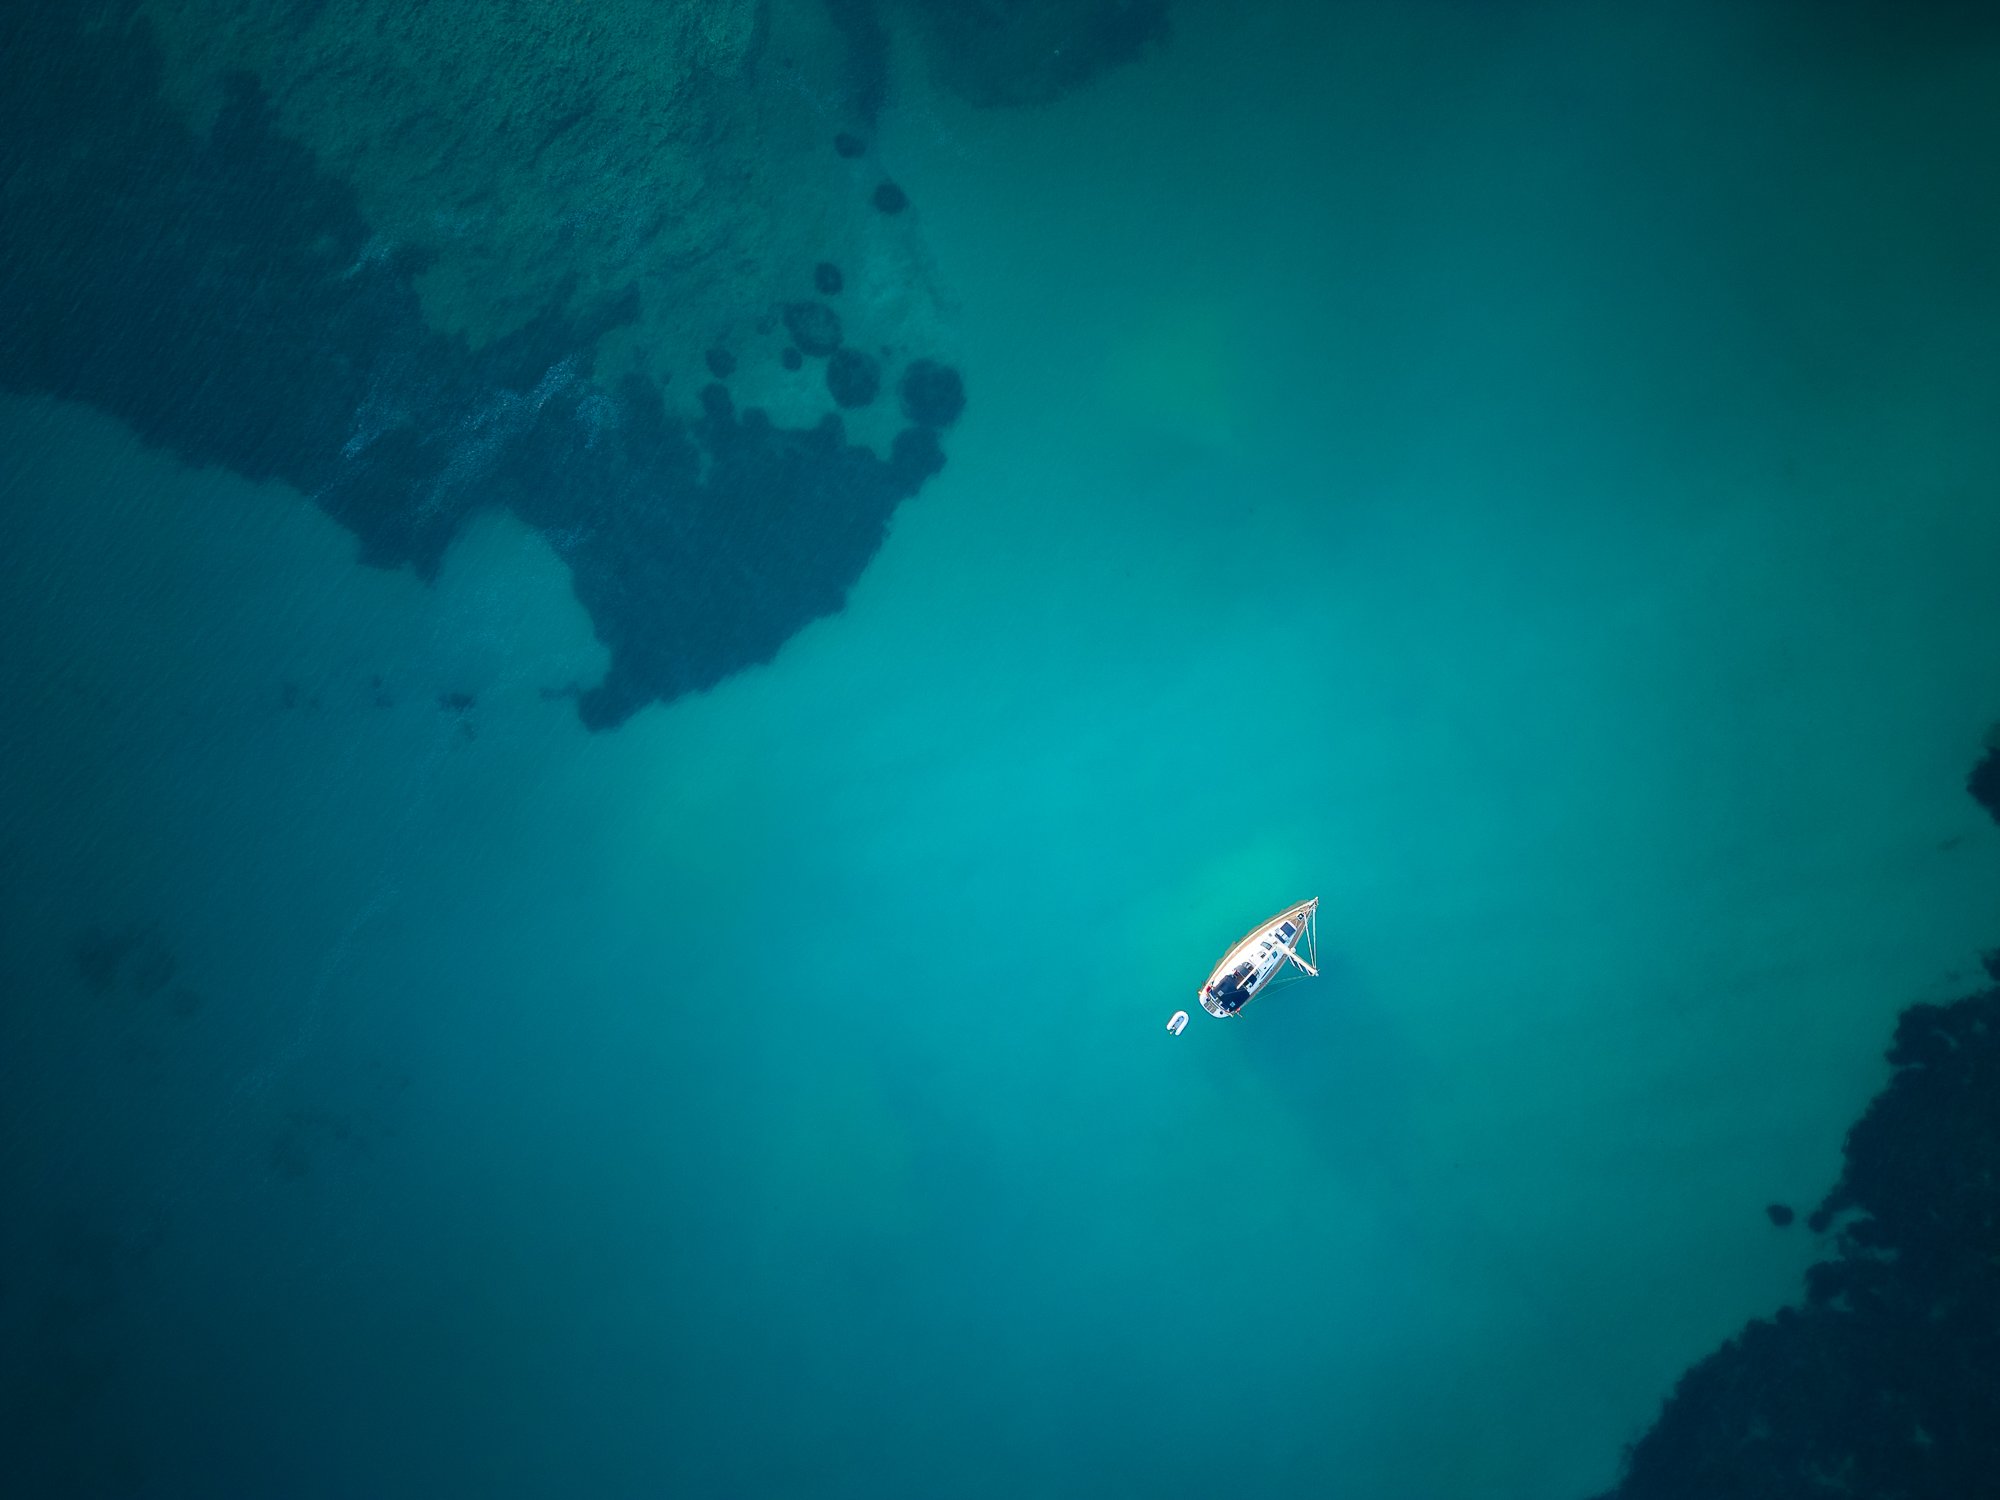
The image above was taken along the East Sussex coast shortly after the Mini 3 Pro was delivered. It’s not an original composition but allowed me to practice flying and composing photos. Along with traditional landscape and cityscape photos, I also hope to use the drone to build a body of work which features more abstract shapes and textures.
The two photos below were taken above a forest in East Sussex. It’s a place I’ve been photographing for a few years, and it was nice to add some alternative viewpoints to the body of work I’ve been building over that time. By-laws prevent me from taking off from within the forest boundary due to livestock grazing, so I had to take off from the side of a public road and stay high to avoid breaking any rules and scaring the animals in the forest. Thankfully the Mini 3 is much quieter than its predecessors which helps avoid scaring any animals below.
DJI Mavic Mini 3 | 24mm (effective) | 1/200th Second | f/1.7 | ISO100
DJI Mavic Mini 3 | 24mm (effective) | 1/30th Second | f/1.7 | ISO100
I just want to confirm at this point that this blog post is in no way a technical review, I won’t be deep diving into the drone specs, nor will I be comparing the drone to any others as being the first and only drone I have ever owned (or even flown), that would be a little difficult. This is just me sharing my opinion and showing some of the photos I’ve taken along the way.
What DJI Mini 3 Pro package did I buy and how much did it cost?
With the plethora of new features added since the Mini 2, DJI added the Pro label to the Mini 3’s name. With Tri-Directional Obstacle Sensing, 4K HDR Video, true vertical shooting, real-time obstacle avoidance and much more, they were probably justified in doing so. However, with the word “Pro” added to the name came an inevitable price hike from £419 for the Mini 2 to £709 for the Mini 3 Pro (without the RC remote). Personally, I feel these extra features more than justifies the bump in cost, but opinions may vary on that point.
With the desire to fly longer than circa 30 minutes (I did say this wouldn’t be a technical review), I opted for the Mini 3 Pro with the DJI RC Remote along with the extra fly more kit giving me some extra batteries, tripling my flight time. Although around £150 more, the DJI RC Remote with its built-in screen appealed to me as it meant I didn’t need to use my phone in order to fly.
Altogether, (Mini 3 Pro with RC remote £859, the Fly more kit £159 and 1 Yr. Care Refresh £75) I spent a total of £1,093. Far from an inexpensive purchase, especially as I had never even used a drone before, but when compared to the other options and features I wanted, I was certain this was the right choice for me.
DJI Mavic Mini 3 | 24mm (effective) | 1/500th Second | f/1.7 | ISO100
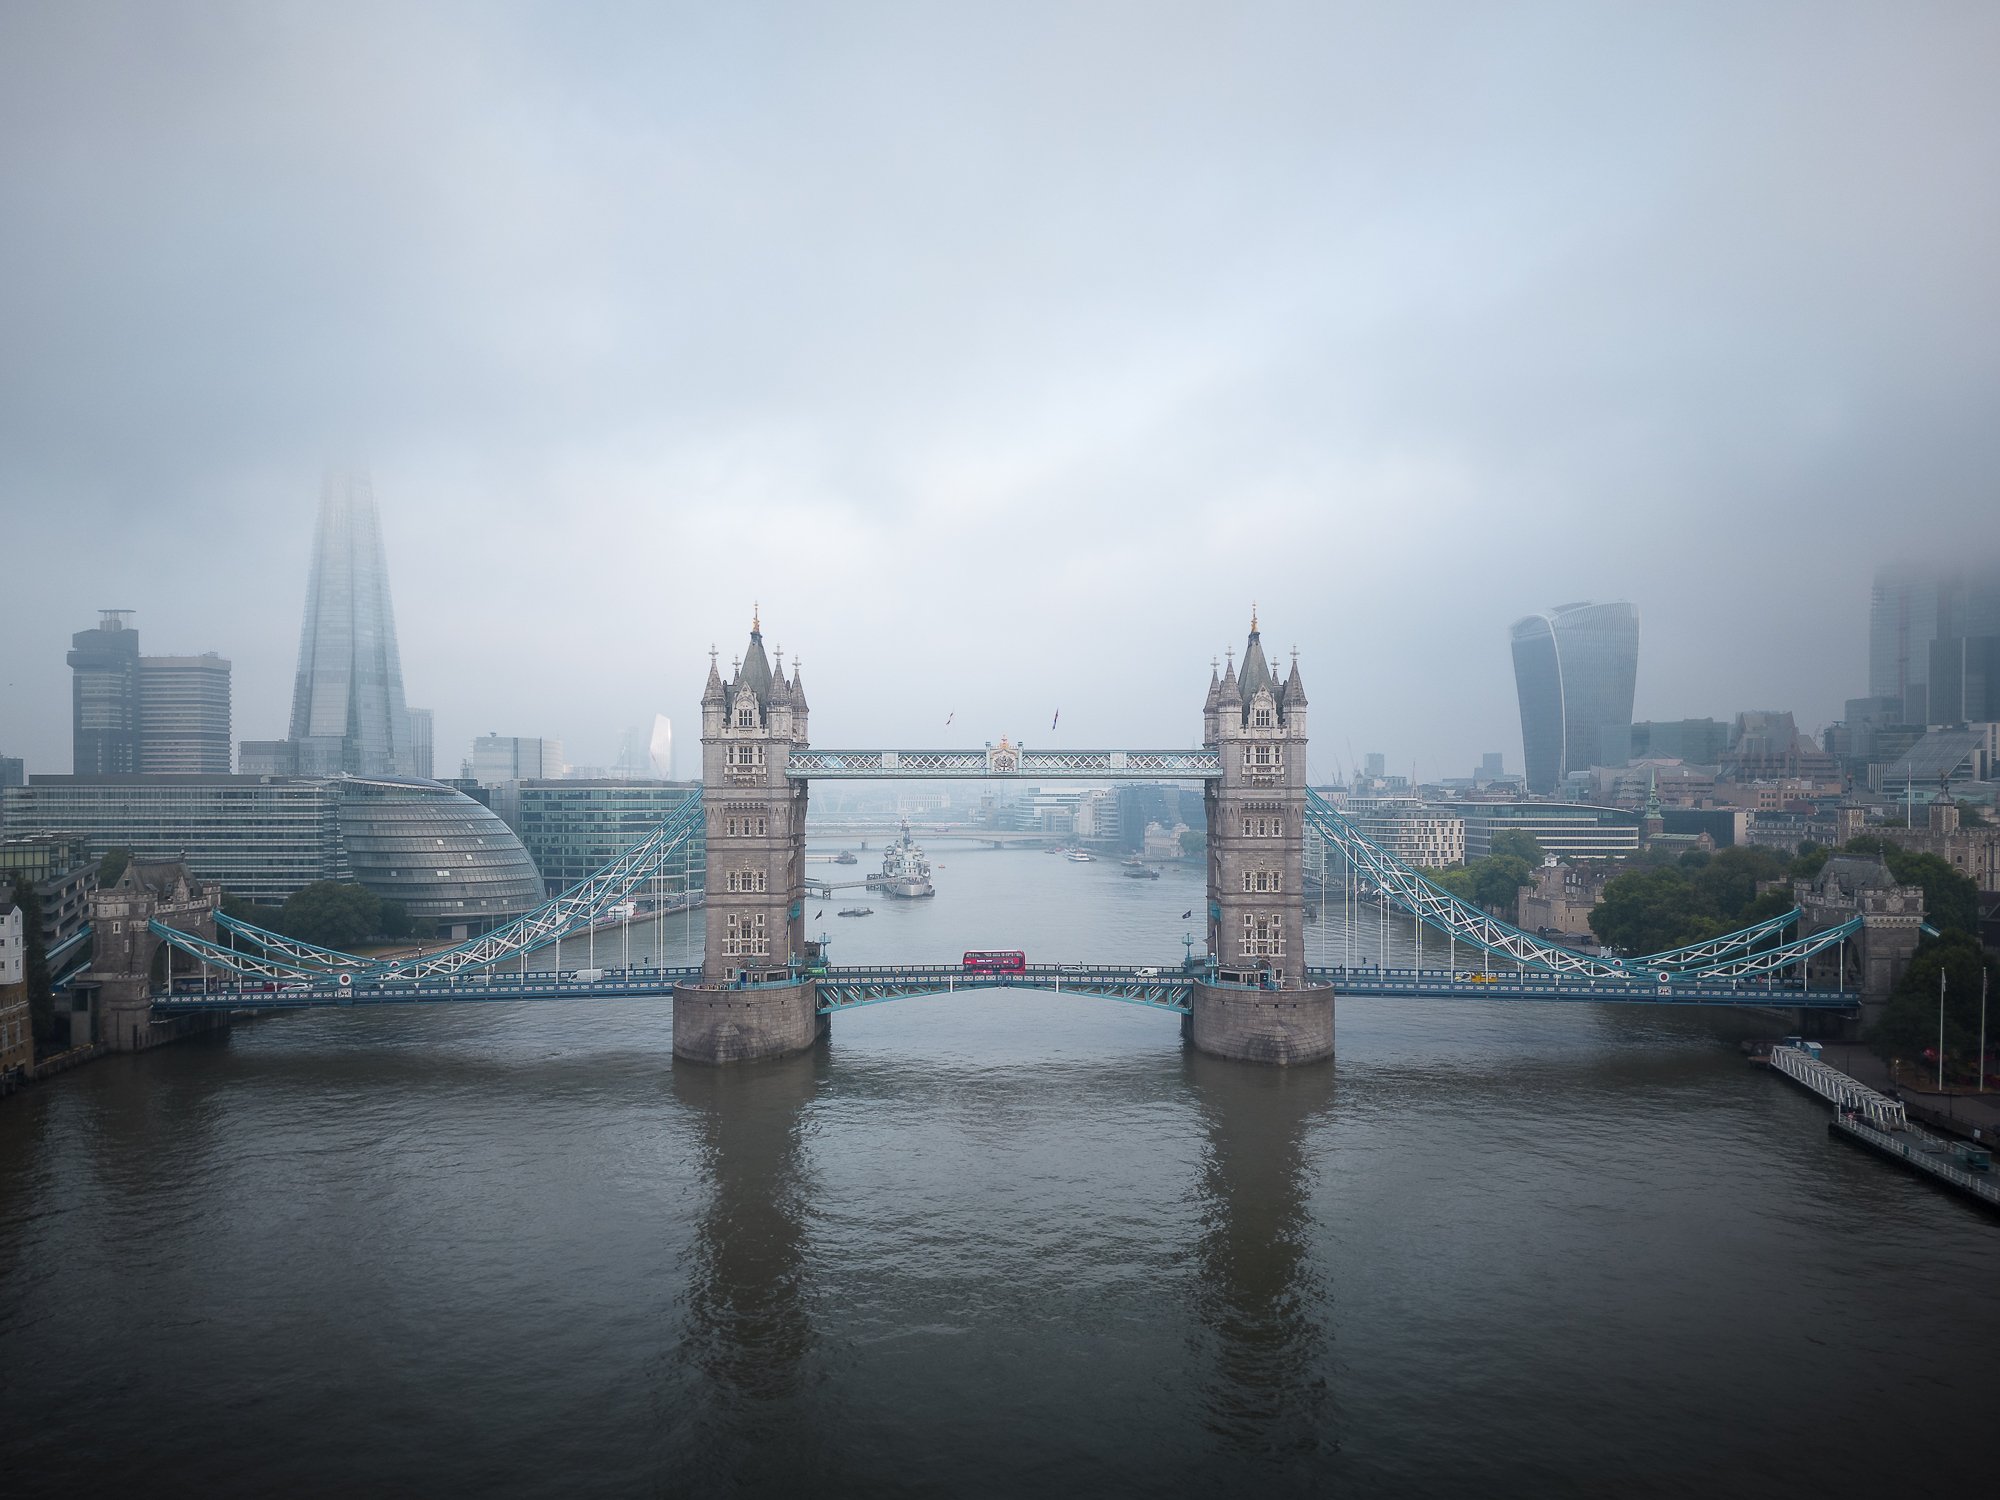
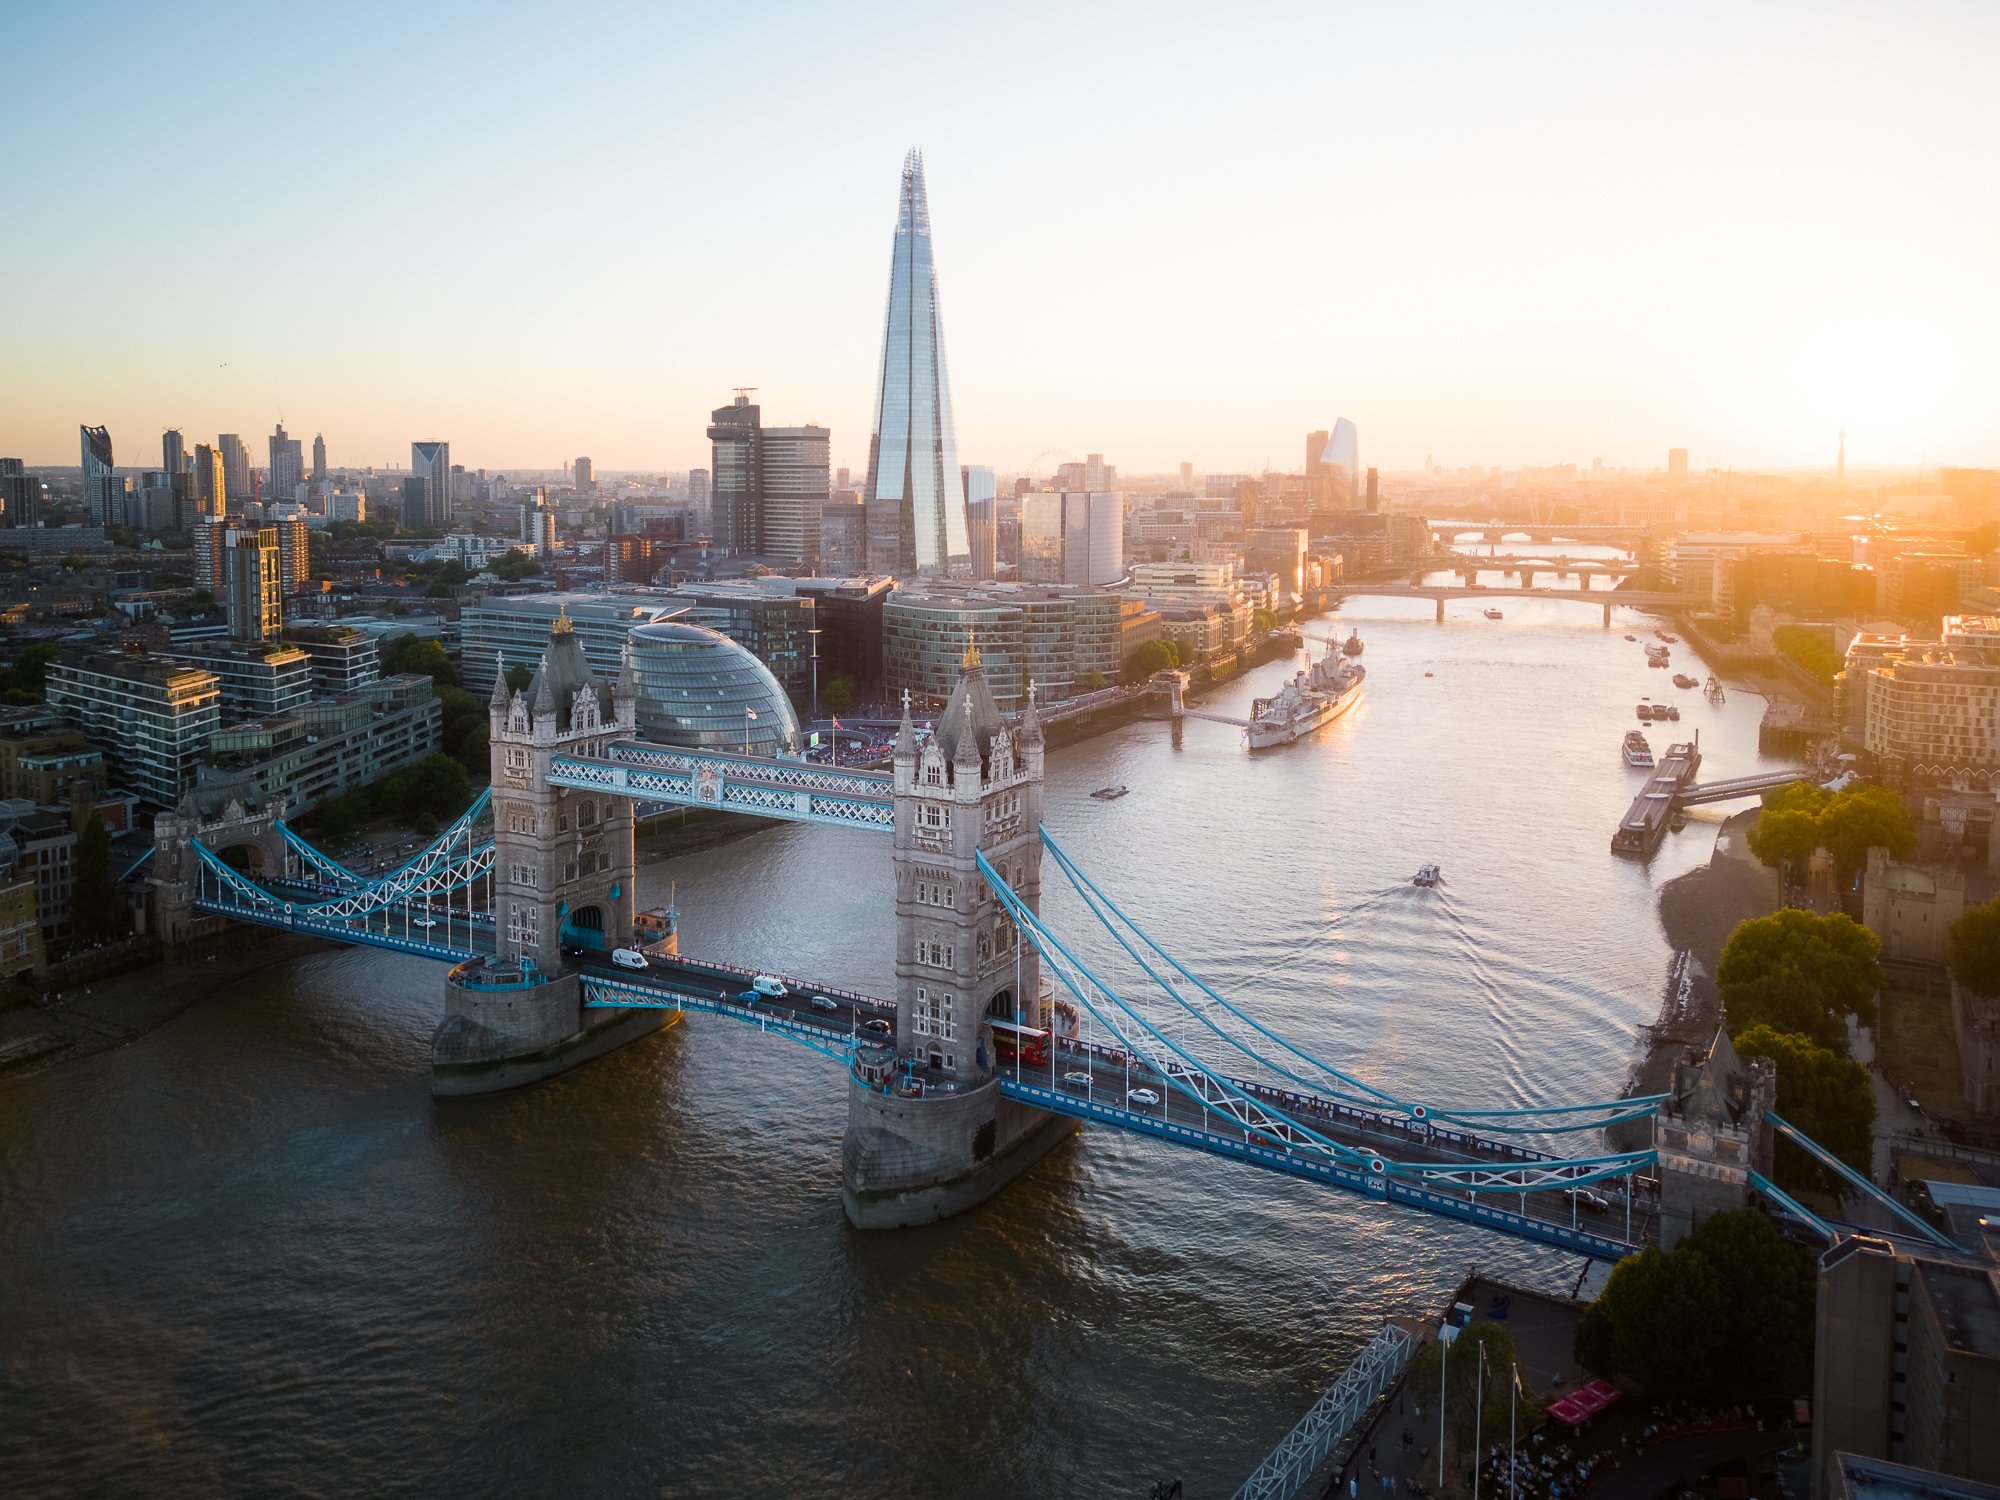
These photos were taken on an early morning flight in London. Conditions were perfect for taking some atmospheric photos and although the City of London restrictions prevented me from flying any further west, I still managed to get the drone in the air and take a few photos from the eastern side of Tower Bridge.
DJI Mavic Mini 3 | 24mm (effective) | 1/2000th Second | f/1.7 | ISO100
DJI Mavic Mini 3 | 24mm (effective) | 1/1600th Second | f/1.7 | ISO100
Is the DJI Mini 3 Pro easy to fly?
I’m writing this post from the viewpoint of a landscape photographer who has never used a drone, so, I guess that’s also my target audience. Maybe you’re also a photographer, tempted by drone photography and concerned flying a drone might be too difficult to master. Let’s be honest, the drone alone is around £709 new, so even with the DJI Care Refresh, it’s not the sort of thing you want to crash too often.
I have to say, flying the Mini 3 Pro was surprisingly straightforward. There are some great tools onboard to keep things simple such as the fantastic return to home feature, single button take-off and landing and the three-way obstacle sensors. The sensors are on the front, back and underneath and help you keep out of trouble for the most part, although you need to remember that the Mini 3 Pro lacks sensors on the side so care should be taken when flying sideways.
5 tips for anyone buying their first drone
I’ll keep this relatively high level as the specifics will differ country by country, depending on where you intend to fly.
Research the local Drone rules applicable for the class of drone you own and complete any registrations and certifications needed.
Research any useful apps that provide aviation information such as real time flight restrictions in your area as the DJI Drone app isn’t always up to date. There are also apps that show flight conditions specific to flying a drone and warn you if the wind is too strong or provides such things as the Geomagnetic storm index which apparently is a thing and can be a problem as it can interfere with the signal.
Make sure you set your new drone up in advance, applying any firmware updates and fully charging the batteries before you head out. It can be a real pain when you are prompted to update the firmware while out in the field with no internet access.
Like the point above, do some research into the best settings before you head out. This might include altitude limits, return to home, camera setup and movement settings. There are so many videos on YouTube and doing a bit of research, really helped me to understand the options and settings before I went for my first flight.
Just because you can, doesn’t mean you should. The Mavic Mini 3 gives me the freedom to fly almost anywhere but I still need to be sensible around people and fly safely. I hate the stigma that comes with flying a drone as so many people feel threatened by them, thinking they are being spied on or maybe even worried it might drop on their heads. Personally, I want to keep drone flyers away from being public enemy number one so as much as possible, I try to stay inconspicuous, avoiding people, and if they are around, I fly a lot higher to the point they probably won’t notice I’m there.
DJI Mavic Mini 3 | 24mm (effective) | 1/2000th Second | f/1.7 | ISO100
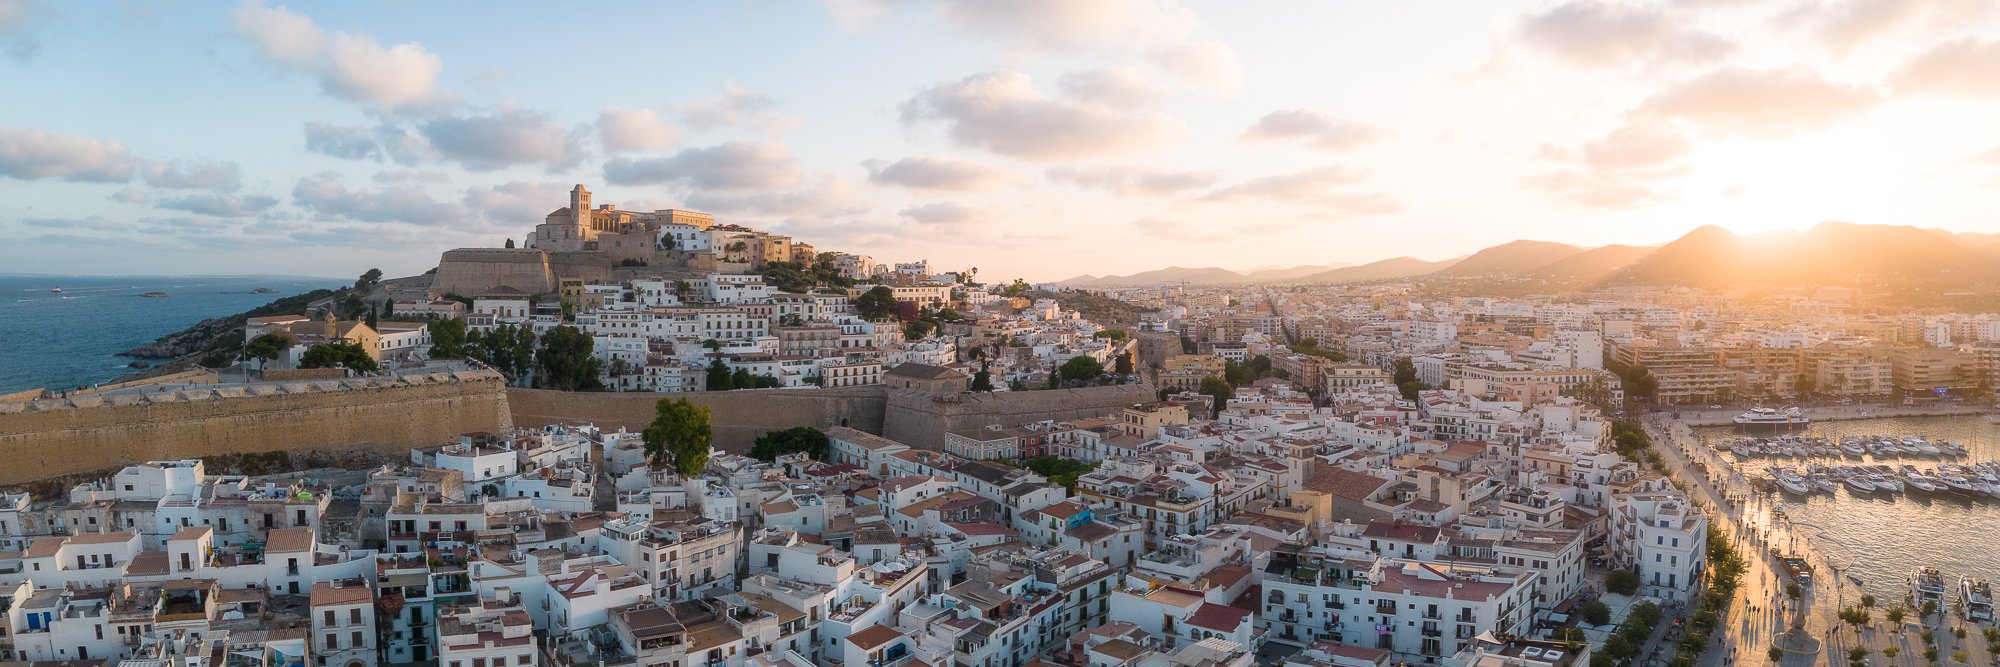
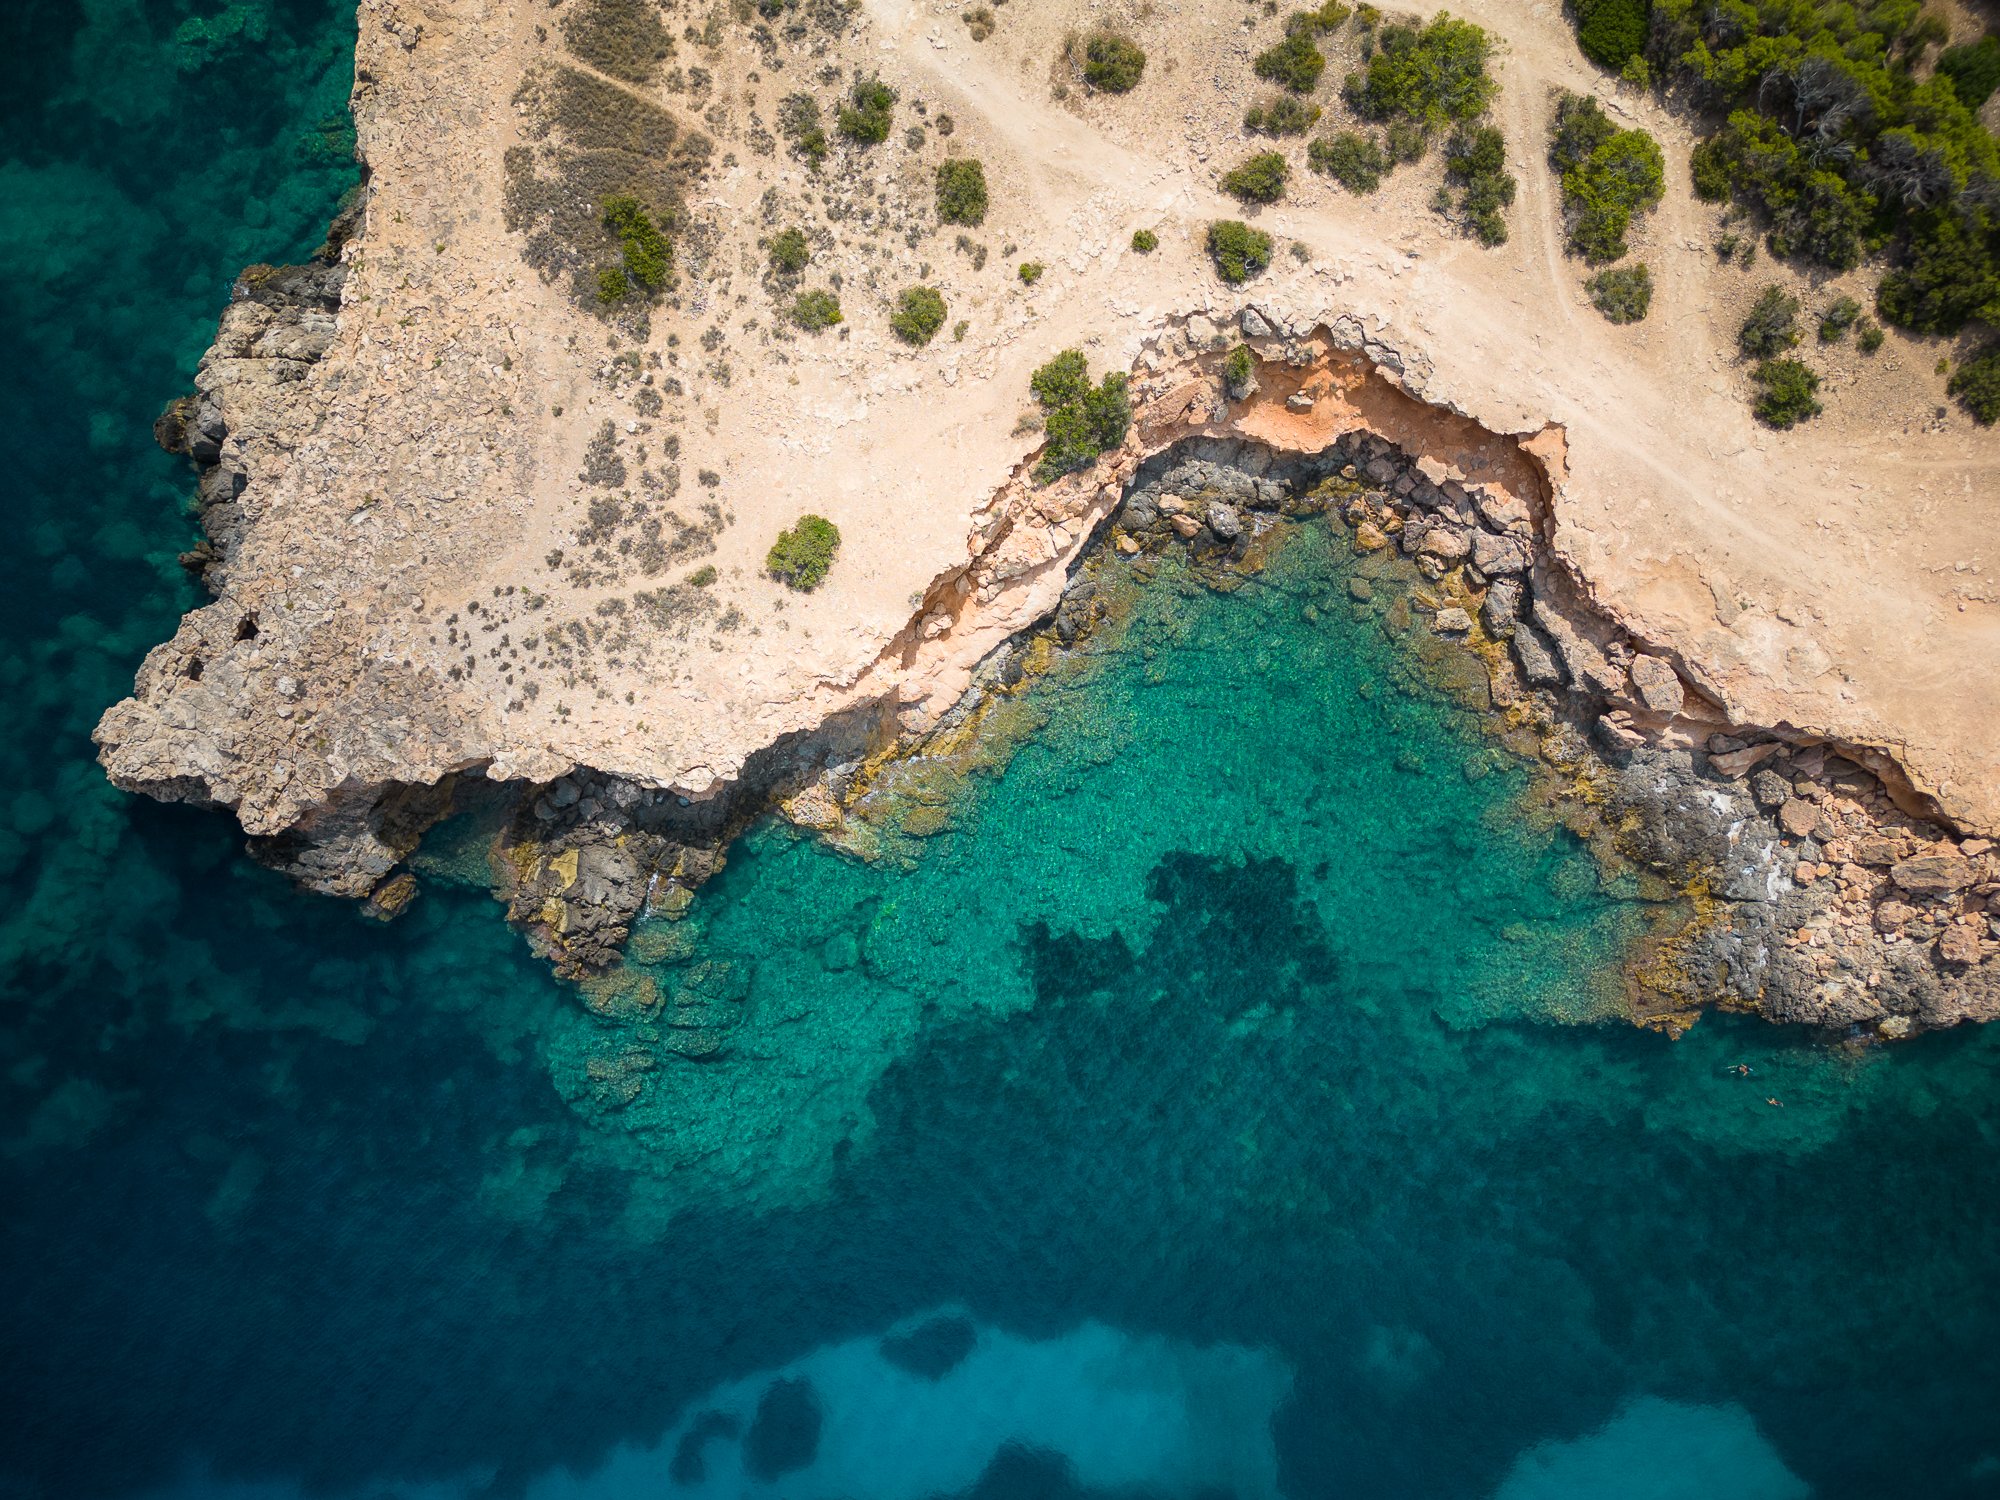
With such a compact package, there was no way I was going to travel to Ibiza without the new drone. During my 2-week trip, I managed to get a few early morning and sunset flights around the island. I used the 9-shot automatic panoramic picture mode to take the photo of Ibiza Town above. I stitched and edited the photo in Adobe Lightroom and I’m incredibly pleased with the picture quality.
How good is the DJI Mini 3 Pro camera?
Finally, we can now start talking about taking photos with the Mini 3 Pro, its why I bought it after all. I have to say, I’m not exactly a pixel peeper but I do strive for the best image quality possible, and so far, I have been really impressed with the camera in this drone. In terms of resolution, at 12MP it won’t set the world alight but it’s good enough for most use cases. As I understand it, it’s the same sensor as the 20MP Air 2S model, with the same size pixel size but less of them on a smaller sensor. So, less resolution but equal in terms of image quality.
There is also a 48MP mode where the Quad Bayer Filter tiles the RGB filters to boost the pixel count from 12 to 48 megapixels. I have no idea what that really means, but it can be a great way to boost your resolution. In most situations, the 48MP mode works well, but based on my own experience, in darker scenes, the images can appear noisier in the shadows and completely fall away as the ISO increases. If I’m not too sure what the best option is while out in the field, what I often do is take the image at both 12 and 48MP, just to make sure I have the best version possible.
With the smaller sensor, the dynamic range is going to be limited somewhat and may affect the overall quality in certain situations where you have significantly brighter and darker areas in the frame. I knew this might be a problem before I brought the drone, so, for scenes where I feel the dynamic range is on the high side, I will use the Auto Exposure Bracketing mode which takes 5 separate photos at different exposures. That way I can combine all of them together in Lightroom with the Merge to HDR option and have a DNG file containing all the dynamic range from the 5 bracketed raw files.
Lastly, two other notable features I really like are both the vertical, portrait mode, which rotates the camera 90 degrees and the various panoramic modes to choose from. All are incredibly useful to maximise the photo opportunity or resolution while up in the air taking photos.
DJI Mavic Mini 3 | 24mm (effective) | 1/2500th Second | f/1.7 | ISO100
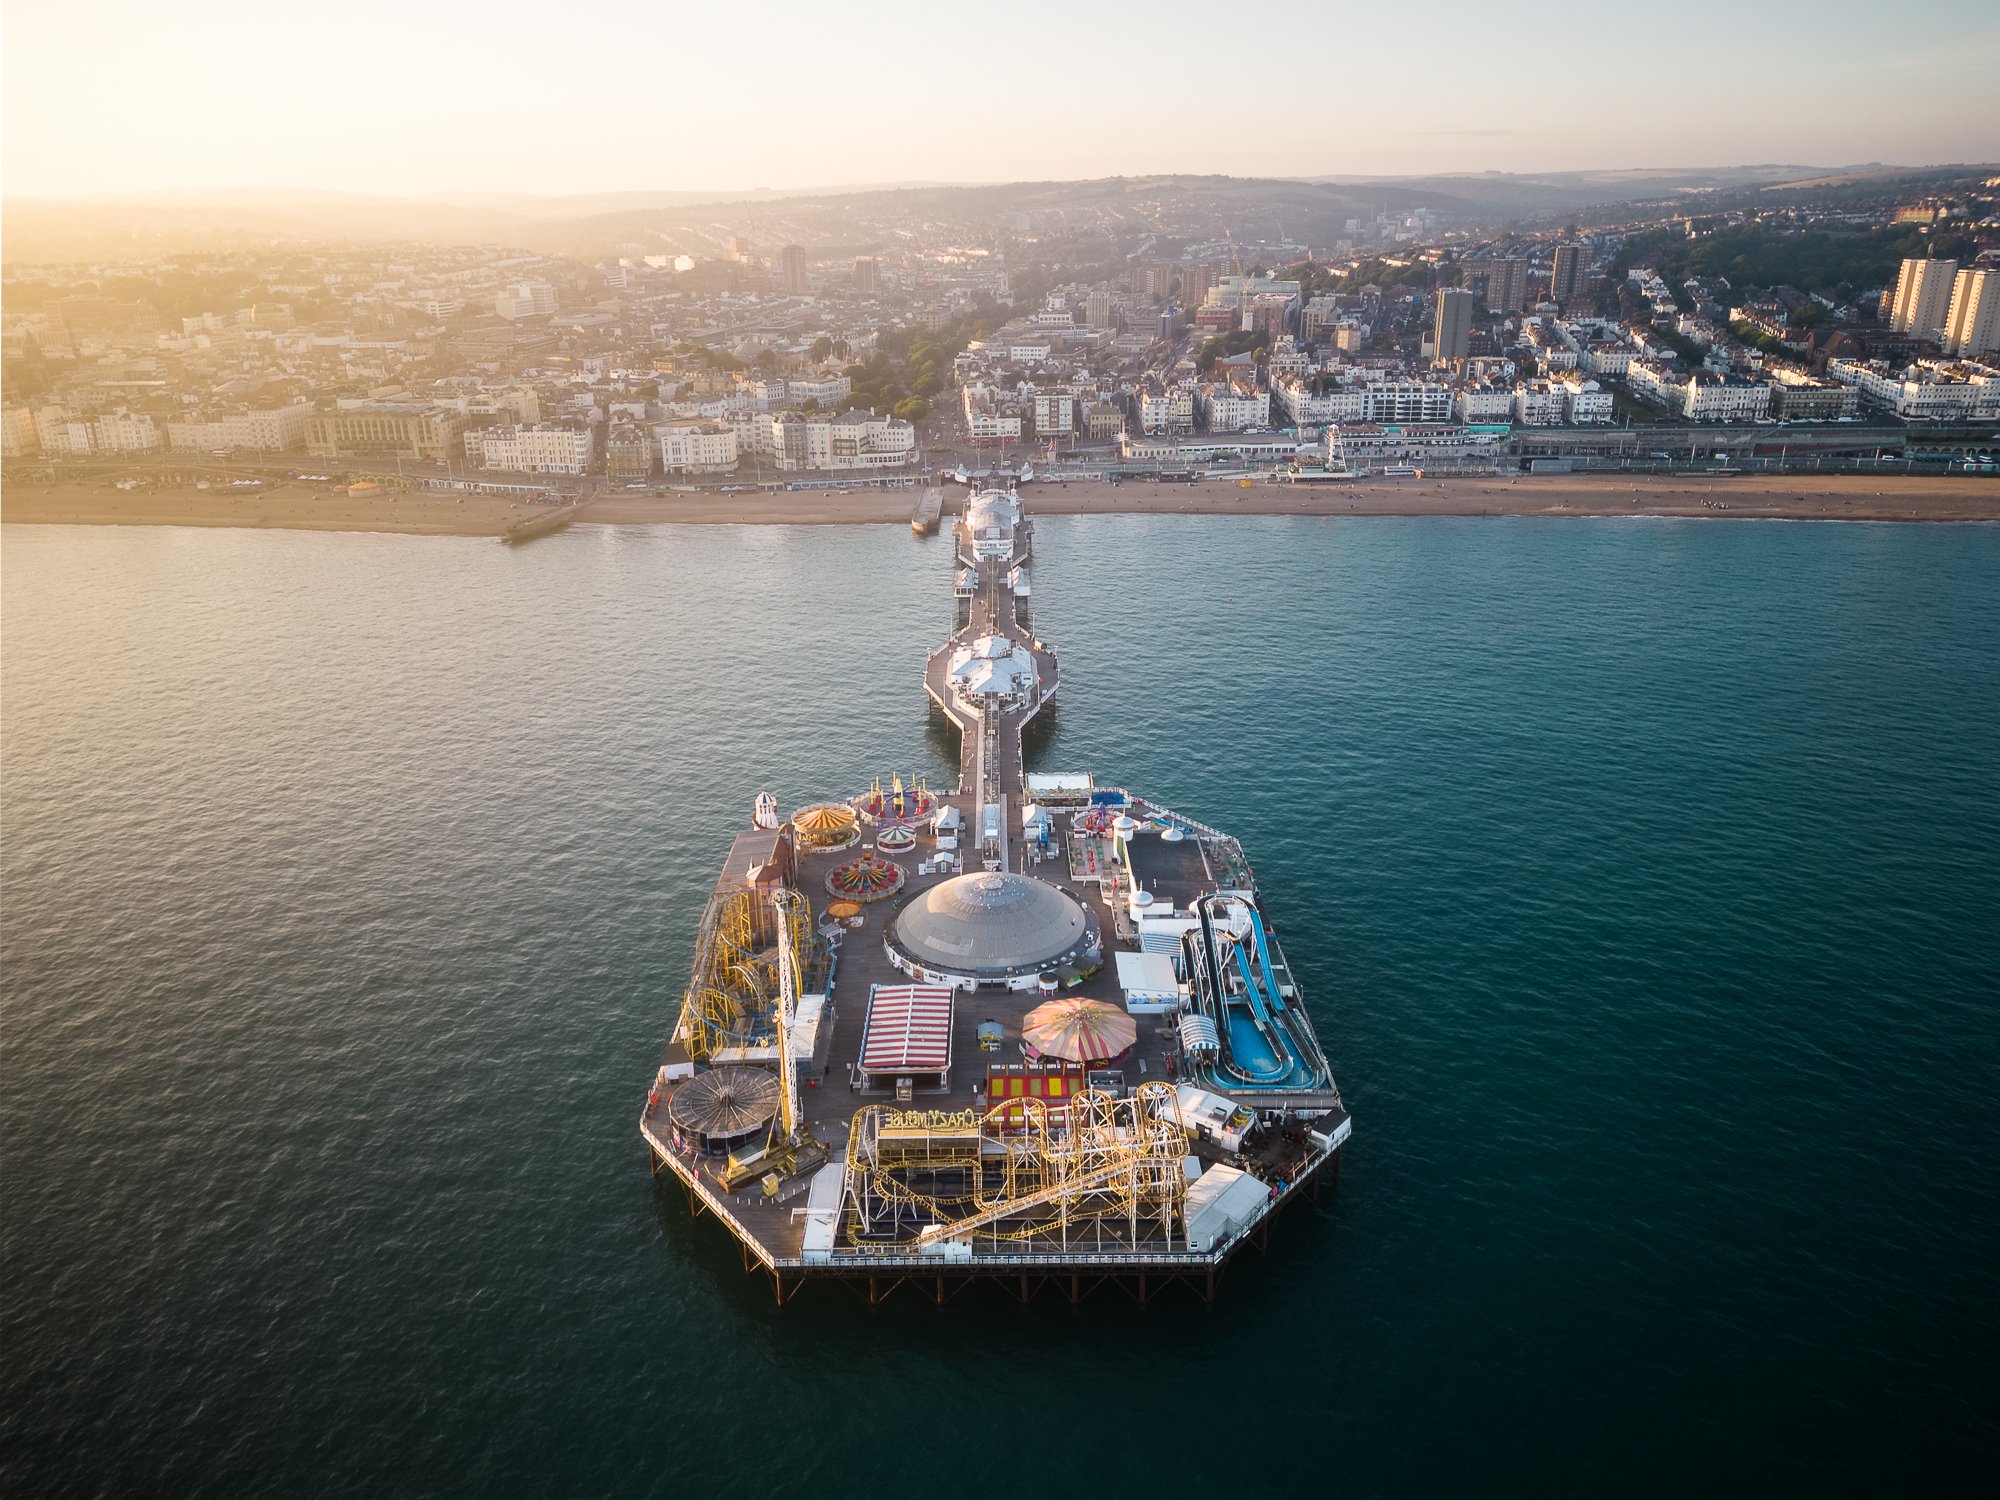
On a beautifully sunny day back in June, I took a trip down to Brighton in East Sussex to play with the drone and take some photos along the beach. Timing the flight just as the sun was low in the sky, the conditions were perfect, and I managed to take these three photos of both the fairground rides at the end of Palace Pier and a top-down photo of the skeletal remains of the old West Pier.
DJI Mavic Mini 3 | 24mm (effective) | 1/500th Second | f/1.7 | ISO100
DJI Mavic Mini 3 | 24mm (effective) | 1/640th Second | f/1.7 | ISO100
What could be improved on the DJI Mini 3 Pro
Even though I’ve already mentioned that I’m happy with this drone and the camera it has, the device is by no means perfect so here are a few examples of what I think could be improved.
Picture edge sharpness
With an aperture of 1.7, it wasn’t a surprise that the image sharpness would fall away around the edges, but it can be a little too much at times. It’s not a huge problem and can be improved a little in post processing, but it would be fantastic if the boffins at DJI could design a camera with a wide aperture that didn’t suffer this issue as much and provided better edge to edge sharpness.
Signal transmission range
I knew from researching DJI drones that it’s rare or even impossible to get the full advertised transmission range when flying the drone, but so far, the distance between drone and controller I’ve been able to achieve has come nowhere near what DJI advertises. According to DJI, in urban areas with high interference, providing I have line of sight, I should expect to get 1000-15000m and much further in areas without interference but so far, that’s not been the case at all. Even when stood on the edge of a cliff in Ibiza, flying the drone out at sea, the actual distances I’ve been able to achieve have come nowhere near what they advertise before I start to lose signal. I know mileage will vary and one must remember that keeping visual line of sight is usually required, but not even being able to achieve the low-end distances is a little disappointing.
Auto exposure bracketing in the panoramic modes
I mentioned above that with the smaller sensor and high dynamic range scenes, I will often bracket my images to get as much data into the final image as I can. But AE bracketing is not an option when shooting panoramic images. Why? I can’t think it would be a difficult feature to add in a firmware update (hopefully it’s on the roadmap) and if made available, would mean higher quality, well-exposed panoramic images can be achieved in high dynamic range situations.
DJI Mavic Mini 3 | 24mm (effective) | 1/2000th Second | f/1.7 | ISO100
Final thoughts on the DJI Mini 3 Pro…
I must admit, when I first considered buying the mini 3 Pro, I did wonder if I would quickly become frustrated by the smaller sensor and lack of resolution compared to the mini’s bigger brothers, but so far, so good. I’m still very happy with the drone I chose. I can still fly almost anywhere, with fewer restrictions compared to the heavier drones and using the panoramic or even the 48MP modes means I can still work around the smaller resolution in most situations.
The DJI Mini 3 Pro’s smaller, lighter form factor means it fits nicely in my camera bag, so I have it with me on all my landscape photography outings. So, not only are my fears of the drone remaining unused, and gathering dust on a shelf at home unfounded, but it also means I always have it to hand for when an opportunity to bag a good drone photo arises.
Would I recommend this drone?
This drone is a fantastic, capable bit of kit and I’m very happy I went with the Mini 3 Pro as it suits my needs to fly in more locations and be subject to fewer restrictions near where I live. If this is the situation you find yourself in and you’re not looking for the best possible image resolution you can get in a drone, then I certainly recommend the Mini 3 Pro. If, however, image quality/resolution is your top priority and you visit places with more open spaces and fewer flight restrictions, then for not a lot more money, you might opt for the DJJ Air 2S, or for a little more still, the newly announced (at time of writing) DJI Mavic 3 Classic.
Personally, this drone is a perfect fit for my current needs.

