BLOG ARCHIVE
My Top 5 Free Rooftop Locations to Photograph London
I showcase what I consider my top 5 rooftop locations to photograph London. For each location, I will showcase some photos, location information, and top tips to get the very best photos during your visit.
As a photographer, I am always on the lookout for fresh, unique views of London and one of the best ways to achieve this is to get up high and photograph the city from the rooftops.
With the pressure now on property developers to incorporate public spaces into new developments, getting up high to enjoy these rooftop views of London has never been easier but the majority of these locations come at a cost or are not very photographer friendly.
With this in mind, I have created this list of my top 5 free rooftop locations to photograph London that are both easy to find and photography friendly. In this post, you will read a bit about each location, see a few photos and find a Google Maps link to help you get there.
My Top 5 Free Rooftop Locations to Photograph London
#1 One New Change
Number one on my list of rooftop locations to photograph London is the 6th floor at One New Change, a shopping centre located right next to St Paul’s Cathedral. Although this location isn’t particularly high compared to some of the others listed below, once up there, you will see why this is such a popular spot as you are greeted by some of the best, close-up views of St Paul’s Cathedral and its famous dome.
Google maps location: One New Change
booking required? No
Nearest tube station: St Pauls (Central Line)
Tripod rules: No tripods allowed
Opening hours can be found on their website https://onenewchange.com
#2 Sky Garden
The second rooftop location I recommend to visit is the Sky Garden which sits atop the Walkie-talkie building, over 30 stories high at 20 Fenchurch Street and provides some of the best rooftop views of London you can get for free. Apart from the countless photo opportunities the Sky Garden provides, it’s a great place to have a drink or enjoy a meal while enjoying some spectacular views of the city. Of the 5 locations listed here, it is the most popular and for good reason but that does mean you will need to book your visit on their website but it is free to visit.
See a previous sunrise shot from this location here: Good Morning London | Weekly Photo #37
Top tip: The glass can get rather dirty and to avoid the dirt showing up in your photos, set your aperture as wide as you can as this will render the dirt invisible when shooting through the glass.
Google maps location Sky Garden
booking required? Yes
Nearest tube station: Monument Station (Circle and District Line)
Tripod rules: No tripods allowed
Opening hours and booking information can be found on their website https://skygarden.london/booking
#3 The Garden at 120
A relative newcomer to the party, the Garden at 120 opened in 2019 and is located upon the 16th floor over at 120 Fenchurch Street. Nestled amongst the taller buildings in the city, this particular location is a breath of fresh air when it comes to photography as they take a more pragmatic view of the use of tripods and as long as you are sensible and keep out of the way of the other visitors, they can be used.
Here’s another photo that was taken from this location featuring the building at 20 Fenchurch Street mentioned above: Rooftop Reflections | Weekly Photo #30
Google maps location Garden at 120
booking required? No
Nearest tube station: Monument Station (Circle and District Line)
Tripod rules: Tripods can be used but be respectful of other visitors
Opening hours can be found on their website https://www.thegardenat120.com
#4 Tate Modern Viewing Platform
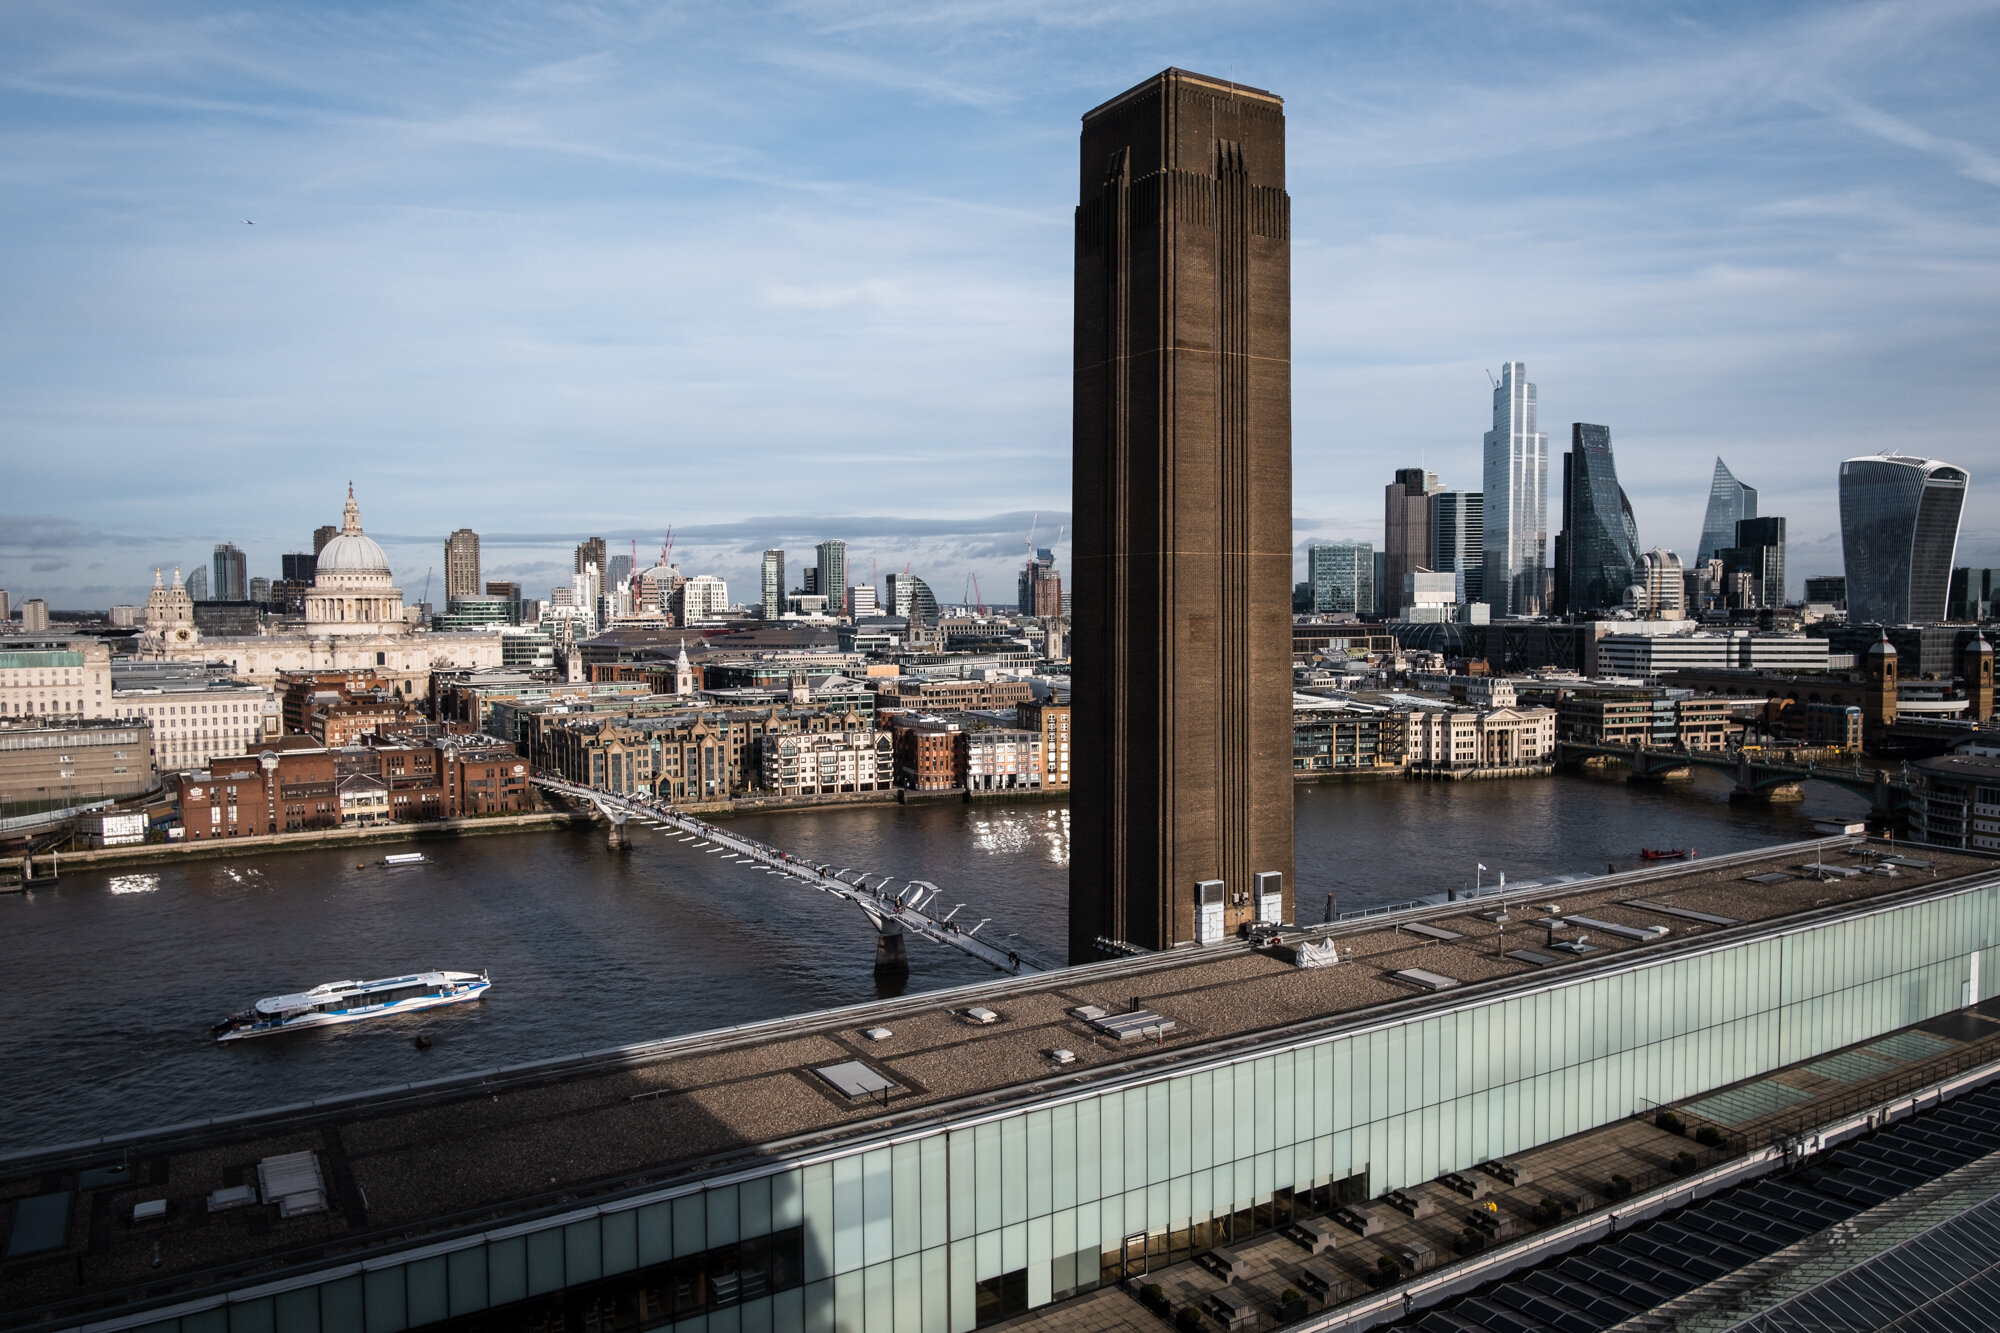
Number 4 in this list of top rooftop locations to photograph London is the Tate Modern viewing gallery. Positioned to the rear of the famous turbine hall is a 10 story tower that provides 360-degree views of the city. The highlights are the unobscured view of St Paul’s Cathedral and the high rise buildings over in the city.
While up at the viewing gallery, you can grab a coffee from the cafe and wander around the outer edge out in the fresh air and take in the different views on offer.
Top Tip: During the warmer months when the days are longer, you can grab a great sunset shot of the city by visiting on a Friday or Saturday night as the museum closes later.
Google maps location Tate Modern Viewing Platform
booking required? No
Nearest tube station: Blackfriars (Circle and District Line)
Tripod rules: No tripods allowed
Opening hours can be found on their website https://www.tate.org.uk/visit/tate-modern
#5 No 1 Poultry
The last but not least location in this list is the garden terraces atop No 1 Poultry building in the city, right next to Bank Station. This relatively modern building is liked and loathed equally but what it does offer is a great view up towards Bank with the high rises of the city providing an epic backdrop.
Up at the roof terraces is a bar/restaurant called Coq D’Argent which hosts live music events in the summer which creates a great vibe if you're looking for a bit of music to accompany your photography but if this isn’t your thing, make sure to check their website below so you know the best time to visit that suits you.
Google maps location No 1 Poultry
booking required? No
Nearest tube station: Bank (Central Line)
Tripod rules: No tripods allowed
Opening hours can be found on their website https://www.coqdargent.co.uk/find-us/
Those were my top 5 rooftop locations to photograph London but if you are looking for more and happy to book or pay, there are countless others such as The Shard, The London Eye, St Paul’s Cathedral and the list goes on, so, next time you are in London and looking for some inspiration, try one of these rooftop locations as I’m sure you won’t be disappointed.
Cloudy Dawn | Weekly Photo #52
The Weekly Photo series has been running for 1 year now and I’m so please I reached this milestone. This week, I have shared this photo of Tower bridge taken at sunrise on a wet, cloudy day.
I started these weekly photoblogs for a few reasons. Firstly, I wanted to limit the number of photos I would be posting online which helped to take the pressure off how many I needed to go out and take. One photo each week seemed an achievable number. Next, I wanted to write more. I felt that if I could write a bit of a story to accompany each image, be it behind the scenes, some useful tips or just some additional context, bit by bit, my creative writing might improve. Lastly, I wanted to drive more traffic to my blog by producing content people would enjoy as I absolutely love having my own corner of the internet, untouched by social media algorithms where I can share my best work to whoever wants to see it. With my readership steadily growing and my photography improving, I’m really pleased with how the Weekly Photo series is going and ecstatic that I’ve managed to release this, my 52nd post in a row without skipping a single week. That’s right, a full year! Where has the time gone?
At times, it’s not been easy. I’ve suffered writer’s block, wrestled with a busy schedule and on occasion got stuck thinking of a title for the post, but by giving myself a deadline each week, it meant I had to get the post finished, by hook or by crook
Who knows, I may even write about the experience in an upcoming blog post. We’ll have to see about that. but for now, I’m just please I’m still going and continue to enjoy the experience.
Fujifilm X-T10 | XF18-55mm | 18mm | 1/3 Sec | f/10 | ISO200
Back to this week’s photo.
When I left my house, early on this particular morning, my objective above all else was to capture this composition of Tower Bridge from beside the Thames and right in front of the Tower of London. I had tried and failed to capture this scene on a previous visit but the weather wasn’t ideal at the time so with only a limited amount of time before work, I marched straight from London Bridge Station, across the river to this spot.
On the previous visit, it was toward the end of the day with plenty of people still around and the sky lacked interest so when I was greeted with the scene free of people on this cloudy, wet morning, I knew right away I had a better chance of coming away with an image this time.
I arrived, I set my camera up onto the tripod and composed. Looking through the viewfinder, I knew there was a shot to be had here. The ground was wet, adding texture to the cobbles, there was a touch of colour from the sunrise piercing through the clouds and the lamp was still on. I love the ornate lamps that line London’s streets and I think the lamp being on in this image adds a touch of mood and makes all of the difference.
Short of time, I dialled in the settings (18mm | 1/3 Sec | f/10 | ISO200), tweaked the composition and took the shot. I was incredibly lucky as after only a few minutes, the lamp turned off and that meant the shoot was over but I had the shot in the bag so I headed off to work.
The photo is processed in Adobe Lightroom. Apart from some of the usual tonal adjustments, I added some clarity to the cobbled road and tried to bring out a bit of the drama in the cloudy sky. In Photoshop I removed some of the discarded chewing gum from the path in the foreground and finished up with the high-pass filter to sharpen the image a little.
The Weekly Photo series is still going strong and I have plenty more photos to take and share so, here’s to the next 52 Weekly Photo posts!
Until next week.
Trevor
This post is featured in my Weekly Photo series where I post a new photo every Monday. To have this delivered directly to your inbox, you can subscribe to the mailing list here.
Westminster | Weekly Photo #51
With a little more time to review some of my older work, I revisited this long exposure photo of Westminster Bridge and the Elizabeth Tower in an attempt to finally get the look I was originally after.
I’m not fortunate enough to be out with the camera taking photos every day and building up an image backlog that I will never have enough time to go back and edit. Having a full-time job and only getting out with the camera once a week, twice if I’m lucky means I’m never more than a couple of months behind on my post-processing.
With movement restricted for so many people due to the global situation, opportunities to head out with the camera have been near impossible over the last couple of months and without regular photography trips, I eventually ran out of new photos to process. To make the best of a bad situation, I’ve been spending a bit of time looking back at my library and editing some of the photos that I feel needed a bit more work.
Fujifilm X-T10 | XF18-55mm | 18mm | 28 Seconds | f/9 | ISO200
Since I took this photo back in 2017, I’ve tried and failed to get the edit right, in fact, this might be the third version I have created from the original raw file. When I captured the photo, it had all the hallmarks of a good long exposure shot. It has interesting clouds, a great subject, and nice light but in the end, I think I lacked the right tools and editing knowledge to get the particular look I was after.
In a previous post, I wrote about three reasons why photographers should revisit their older work and one of the reasons was that editing tools and skills will improve over time and I think that’s the case with this photo. Back when I first edited this photo, I struggled to control the dynamic range and I was frustrated because as much as tried, I couldn’t realise the photos full potential. That was then and a few years have passed. My technique has changed, my Lightroom skills have improved, and with tools such as range masking now available in Lightroom, I was finally able to edit the photo and achieve the look I wanted.
I’m still not fully sold on the crop. It might be better in a panoramic 2:1 ratio but for now, I’m happy with the final image and looking forward to revisiting a few more photos that I have previously struggled to process.
While I continue to avoid travelling to London for the next few weeks, I’ll shortly be heading to the UK’s South Coast and providing I come back with a keeper, I’ll be sure to share it on this Weekly Photo feed in the future.
Until next time.
Trevor
This post is featured in my Weekly Photo series where I post a new photo every Monday. To have this delivered directly to your inbox, you can subscribe to the mailing list here.
Misty Trees | Weekly Photo #50
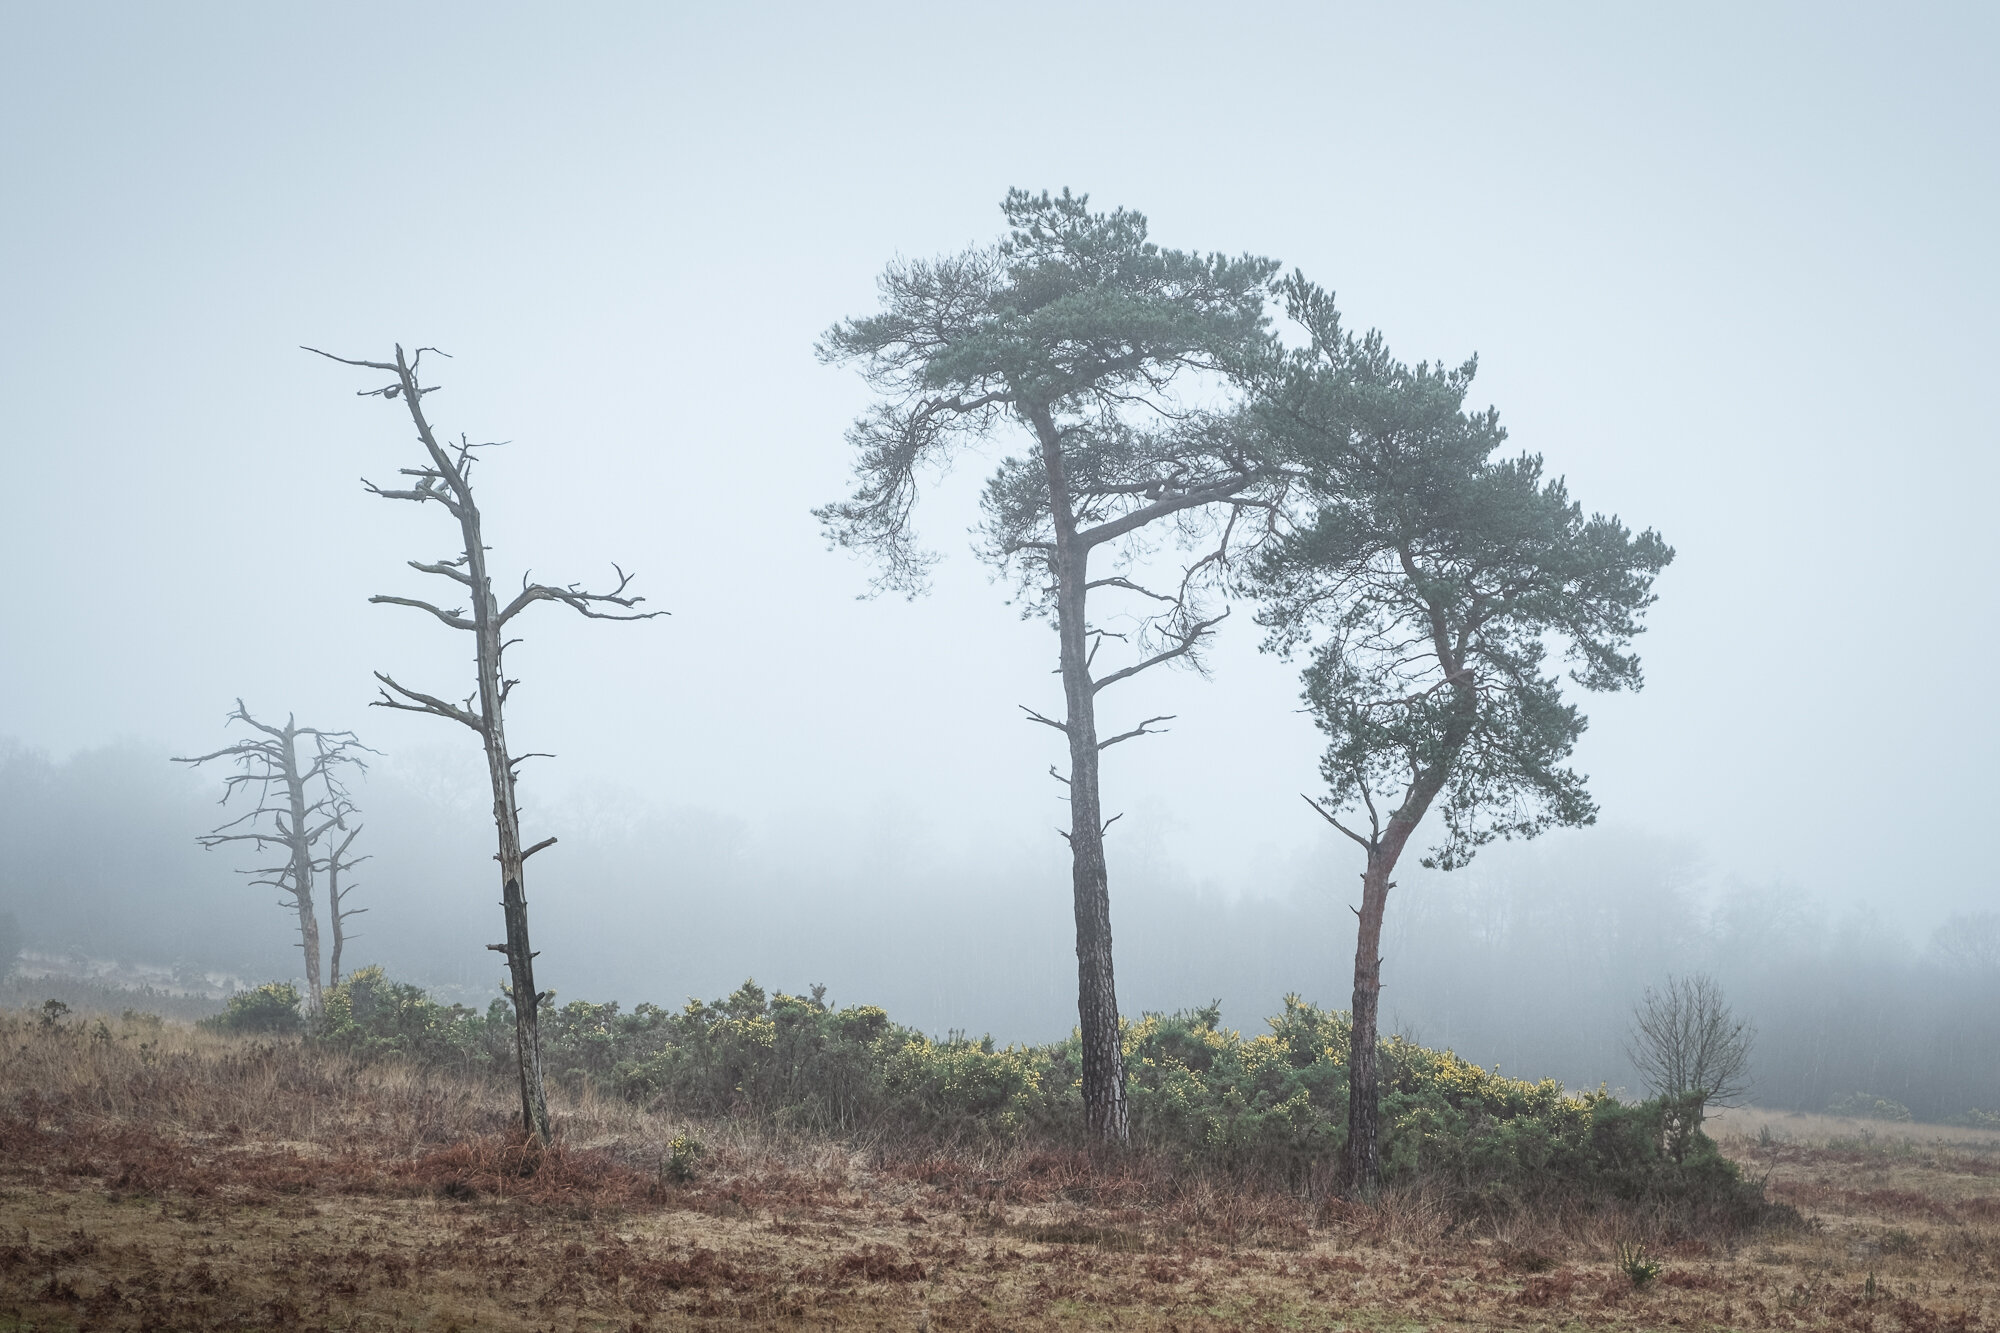
It was wet, cold and I was heading back to the car but on my way, I spotted this composition though the mist and had to capture it.
Things over here in Blighty are changing. it’s been about 7 weeks of lockdown while working through the dreaded Covid-19 peak, but things are finally looking up. We in the UK, have started to have the shackles loosened just a bit which now means I can get that camera charged and prepped ready to head out to capture the world once more. The only difference is that for the next few weeks at least, I won’t venture into London for photography to avoid adding to the public transport issues. Instead, I’ll be heading south from where I live into more open landscapes and seeing what this part of the world can offer me and my photography. I’ll be honest, with so much time spent capturing London over the last few years, I’m really looking forward to this fresh, new challenge.
Fujifilm XT2 | XF18-55mm | 39mm | 1/20th Second | f/9 | ISO200
This photo was taken on one of my last photo outings before the lockdown started, in a local woodland called Ashdown Forest, so, it’s only fitting that as I prepare to head out again, I use it for my latest weekly photo story.
On this particular early morning in March, the rain was relentless and I spent most of the time wandering the soggy heath in search of some inspiration. As time went on, my hope for a shot was dwindling and I was starting to consider this more of a scouting trip. After a good couple of hours of rain-soaked rambling, I started to head back to the car and along the way, I spotted this small cluster of trees out in the open and torn between a nice warm, dry car and spending longer getting rained on, I resisted the urge and went to investigate.
By now the rain had slowed just a bit and the mist was sweeping through and that made all the difference. The mist brought mood and depth to the scene and although the trees are on a slope, the arrangement and empty space make the scene look well balanced. I put the camera on the tripod and went about composing the shot. I used my XF18-55 standard zoom at 39mm on my Fujifilm XT2 camera. Although the camera is weather-sealed, this lens isn’t so I had to be careful and was a little relieved when the rain eased off. Once composed with the settings dialled in, I took the shot.
This photo is not intended to be high impact and probably won’t wow many people but that’s not what I was going for here. When I arrived at the scene, I was drawn to the composition of the trees and the melancholic atmosphere created by the grey, misty conditions and I think I captured that well enough.
I’ll keep you posted on how I get on over the next few weeks and along with my usual London cityscape photos, depending on how well it goes, I might also share a few more local shots in this weekly photo series.
Until next week.
Trevor
This post is featured in my Weekly Photo series where I post a new photo every Monday. To have this delivered directly to your inbox, you can subscribe to the mailing list here.
My Photo Backup Workflow
Having a reliable backup workflow for your photos is critical if you want to ensure they are protected and, in this post, I talk about why the 321 backup method is still considered one of the best to get started and how I have adapted it to back up my own photos.
Whether you take your photos professionally or for fun, how many of you out there can truly say you’re are happy with your photo backup strategy? If a drive was to fail, will you lose any photos? If you have a house fire or was to be burgled, do you have a copy elsewhere? As a photographer, I want to spend as much time as I can actually taking photos but the more photos I take, the more data I generate and subsequently need to store and protect and I for one would hate to lose any of them because I didn’t have a robust backup workflow.
For those of you that don’t know, I am an IT Professional and with the help of my team, we manage large enterprise-grade storage systems with petabytes of creative data and I have to ensure this data is backed up. I am employed to ensure all of this data is fully secured, redundant and protected from all types of threats and I take this incredibly seriously as I know without data, no company can function. Just as my company’s data is important to them, my photos are important to me so I employ a similar approach to ensure my pictures are protected throughout my own workflow allowing me to sleep easy at night knowing my most treasured data is safe and secure.
I get it. Getting your backup processes in place is a bit boring and not very creative but the more seriously you take your photography, the more you need to have a robust workflow in place. So, in this post, I want to run through my own strategy, explain a bit of the geeky jargon and suggest a few different backup options you could adopt, depending on time and budget.
If you’re already familiar with backup technologies and jargon and want to skip directly to my backup workflow, click here. Otherwise, feel free to read on.
The 321 backup strategy
You can’t research photo backup strategies online without coming across references to the 321 Backup Strategy. Put simply, the 321 backup strategy provides an easy to remember approach to how many copies of your data you should have and where those copies should be stored in order to protect against the most likely threats to your photos such as drive failure and house fire, etc.
Before we get stuck in, it’s worth noting that there is no such thing as a perfect backup system. It is impossible to predict and protect against all possible eventualities but this is a great starting point for anyone be it individuals or small businesses to get a solid workflow in place in order to protect their photos.
3 (copies of your data)
Including your working copy of data, it is recommended having at least 3 separate copies of your photos. Why 3 copies? 3 copies are the minimum number needed to be able to fully adhere to this 321 strategy. You will see why as get to the following points but it’s important to note that having 3 copies is just the minimum, which means you really don’t have to stop there. If you can manage more, and it gives you extra peace of mind then go ahead and create more but just be careful around creating an overly complex system as you’ll read a little later, keeping things simple is the name of the game here.
2 (different media or hard drives)
This point is important to avoid what we in the business call a “single point of failure” which means the last thing you want to do is store all copies of your photos on the same drive, only for that drive to fail and take all your photos with it. So, what you should do is ensure that all three of your copies of data are stored on separate devices so that if one fails, the remaining copies are completely unaffected.
1 (copy of your photos in another location)
So far, you’ve created 3 copies of your data and stored them across separate, individual hard drives but all of that means nothing if they are all sitting on the same shelf when a nasty burglar breaks into your home and takes all of your valuable electronics, including all copies of your photos. It’s for this reason, it is recommended to have at least one copy of your data in another location. This might seem a little difficult to achieve but I run through a few simple options further down in this article.
Let’s break down the jargon
As much as I want to keep this post as simple and jargon-free as possible, there’s no way to fully avoid including some of the technical components involved in creating a good photo backup workflow so to help those less familiar, I have tried to explain some of these in the simplest way I know.
What’s an internal hard drive? (Internal HDD)
When referring to internal storage, this means the hard drive which is installed inside your laptop or desktop computer. When you buy a new computer, you normally choose the size such in either gigabytes or more likely these days it will be Terabytes and when you save files onto your computer’s desktop or “My Documents” folder, that is normally stored on your built-in/internal storage.
What’s an external hard drive? (External HDD)
To expand your computer’s storage capacity, you can buy external drives which plug into your computer’s USB, USB-C or Thunderbolt port. These days, external drives come in in terabytes rather than gigabytes.
HDD (hard drive) vs SSD (solid-state drive)
Although I don’t really talk too much about SSDs in this article, it is worth knowing the difference when deciding which to buy. Here’s a simple comparison.
HDD: Hard drives are an older technology and with a spinning drive inside, are more prone to physical failure but being an older and more developed technology, they currently have more capacity and cheaper to buy. With the advantage of being able to store more data, HDDs are still the go-to technology for backing up your data.
SSD: Solid-state drives are the modern equivalent to the HDD. The main advantages are that they read and write much faster and with no moving internal parts, are less prone to failure. The downside is that for now at least, SSDs are considerably more expensive than HDDs. With less capacity, SSDs are not widely used for high capacity backup locations but rather with their superior read/write speed, they are more commonly used as a computer’s main drive where speed is much more important than capacity.
What’s a NAS? (Network Attached Storage)
NAS stands for Network Attached Storage and that’s essentially what it is. Instead of having your files and folders on a locally attached drive that only one computer can access at a time, a NAS can store your files somewhere on your home or office network and providing they have access, anyone on your network can edit and store files on it.
What’s RAID? (Redundant Array of Inexpensive Disks or Drives)
This is where things get a little technical but stay with me here. Most people do not need to know how a RAID works but when you buy a NAS which can hold multiple drives, you have the option to configure the drives in a way which means your data will be protected even if you suffer a failed drive. The two most common options to use are either a RAID5 or RAID6.
RAID5 - This option protects you against a single drive failing but of the two means you have more usable space on the RAID to store your files.
RAID6 - With this option, you can lose up to 2 drives and your data will still be safe so it is more resilient but the trade-off is that it will eat into your useable space on the RAID meaning not as much space to store your photos and other data.
So, depending on how much space you need and the size of the drives you can afford, you need to choose the best option that fits your needs from a capacity and protection point of view.
What’s Cloud Storage?
Simply put, cloud storage is a place on the internet where you can store your photos and other data away from your home and as long as you have a good internet connection you can essentially access your files from anywhere. You can get a small amount of space for free with services like Gmail or Outlook but if you take lots of photos and want to store them in the cloud, then you may need to pay for the amount of space you need. Although paid cloud storage services tend to require a monthly subscription, these days it can be pretty inexpensive.
In addition to services that just offer space to store your files, there are also dedicated cloud backup services such as Backblaze and Carbonite etc. These will install software on your computer and automatically upload your files to the cloud for you. Each offers different options so these should be studied carefully to make sure they fit your individual needs.
How I Backup My Photos
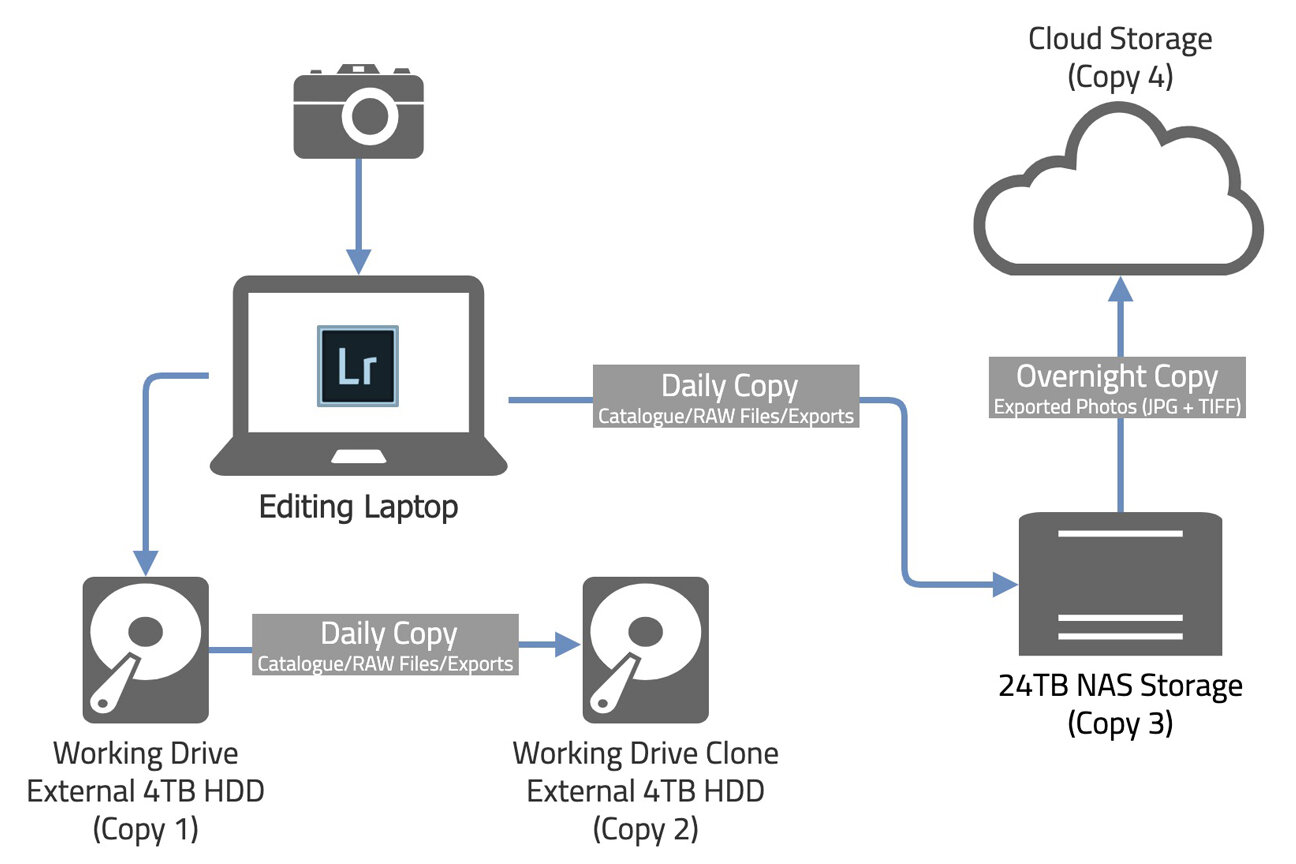
Hopefully, you are still with me and I didn’t bore you too much so far but what I want to do now is run though how I backup my photos. I won’t go into too much detail and to avoid too many words, I have created a simple diagram for you but if you need me to expand on anything I talk about here, just pop a question below in the comments.
Although this approach follows the 321 backup workflow, for my own peace of mind, it goes a little further by having 4 copies on 4 devices but as I mentioned previously, the 321 backup system is a great starting point but once in place, there is nothing to stop you going further to make it even more robust. To help read the diagram above, I have summarised each copy in the process below.
Copy 1:
Once I get home after a shoot, the first thing I do is copy my photos to my working drive. This is an external 4 Terabyte Lacie Rugged hard drive (the orange and silver device you can see in the photo above) which I use to store and edit my photos.
Copy 2:
As soon as I have the photos stored on my working drive and in Lightroom, I immediately make a clone of my working drive to an exact replica 4TB Lacie Rugged drive. I clone the drive daily from that point to ensure any new edits and new photos I export are quickly protected just in case my working drive fails.
There are so many tools out there for Mac or Windows to help copy your data and as I edit on MacOS, my tool of choice is Carbon Copy Cloner. It’s inexpensive and easy to configure and importantly, it just works.
Copy 3:
Next up, using Carbon Copy Cloner, I make a daily copy over my network to my NAS storage. I use a 6 bay QNAP device with 6x 6TB (terabyte) drives installed. I have configured this as a RAID5 which means I lose the space of one of the 6TB drives resulting in 24TB of usable space on my NAS.
So, at this stage of my workflow, I now have 3 copies of my photos and only now will I go ahead and format my memory cards that held the original photos.
Copy 4:
Copy 4 is my offsite backup. I don’t pay for a dedicated backup software but instead, utilise the 1TB of space in OneDrive I get with my Microsoft account and unlimited photo storage Amazon offers their Prime members.
Top Tip: Many people subscribe to Amazon Prime and know that they offer unlimited photo storage with the subscription but what you may not know is that they count RAW files as photos too, so I automatically sync terabytes of RAW photo files with no additional costs to my standard Prime subscription.
If you own a NAS drive, take a look at the features it has as many will allow you to set up and schedule copy tasks that will sync your photos to your cloud storage automatically for you. I have a daily task that synchronises a selection of my folders from my NAS up into OneDrive and Amazon Photos. That way, I never have to worry about forgetting to do it. The more automation you can introduce, the more reliable your backups will be.
Alternative 321 Backup Options
That was a quick run-through of my workflow and I accept with the 2x 4TB drives and the 24TB NAS, it’s not a cheap one so I have also come up with a couple of workflows below that don’t require the purchase of the NAS system but will still be robust enough to protect those precious photos following the 321 backup approach.
Alternative option 1 - Backup drive rotation
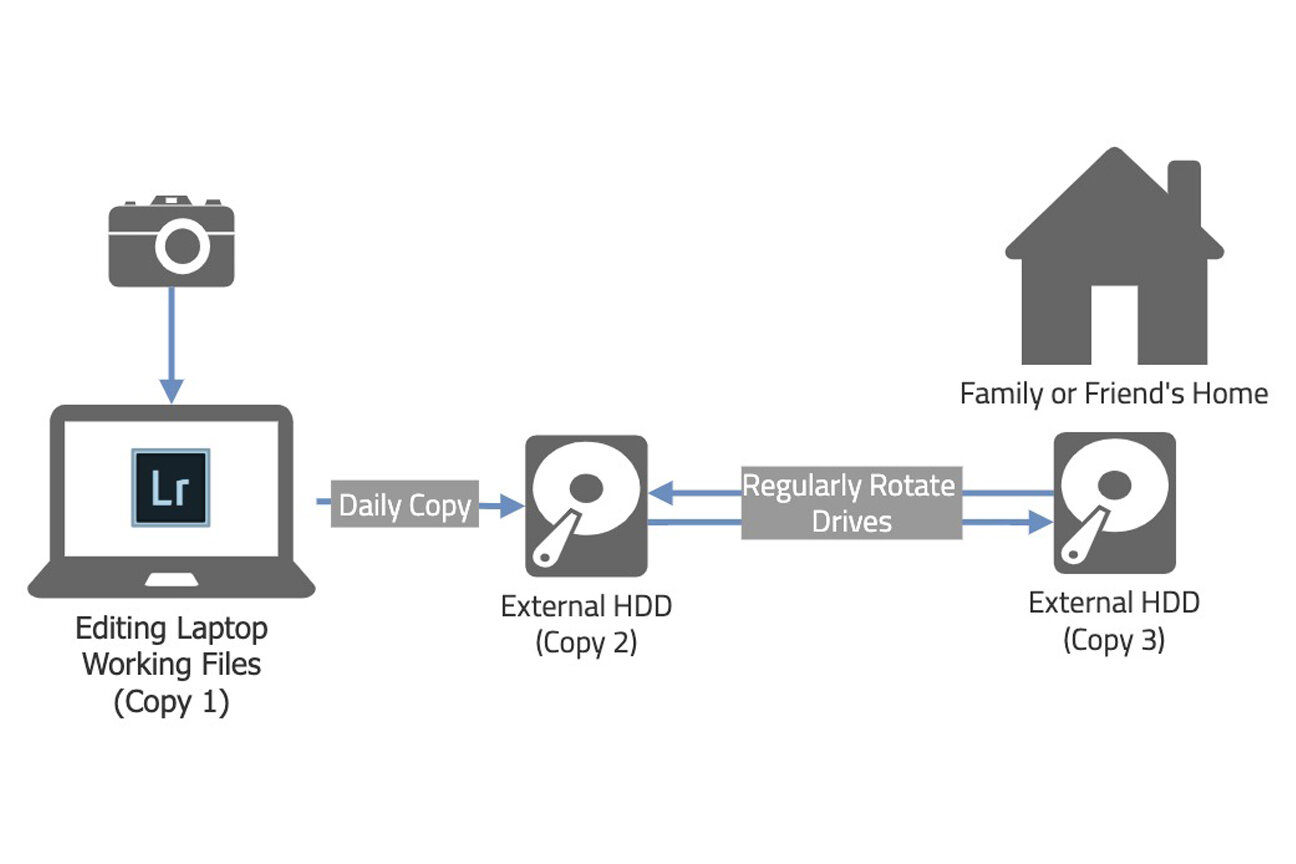
A fairly simple backup strategy is to make a copy of your photos onto a separate external drive and storing it at a family or friend’s home and every now and then, bringing it back to update with your new photos. This process only needs 2 or 3 backup drives which are relatively inexpensive these days (depending on how large your collection is) but is very manual so you would need to adopt a disciplined approach to ensure new photos are protected.
Alternative Option 2 - Cloud Backup
You can still achieve the 321 backup workflow by having a local copy on a separate external drive and a remote copy synchronised to cloud storage or an inexpensive cloud backup service such as Backblaze. This option is dependent on your internet speed and cloud storage space, especially if you want to send large amounts of data over but is a great option with a small amount of upfront cost.
The reason I suggest Backblaze is that they have an inexpensive unlimited plan which also allows you to back up a connected external drive. Many providers don’t offer this so it’s worth looking about for the best option for your needs.
Backup Workflow Top Tips
To finish up, I wanted to leave you with a few tips that may help you create and maintain a successful backup workflow.
#1 Keep your files organised
The reason this is important is that if your files are all over the place, some of them might not be included in the backup so try to keep your entire photography workflow in just one location so you know all of your precious files are safely protected.
#2 Keep it simple
Keeping your workflow simple and introducing as much automation as possible will help you stay on top of the process. If backups are time-consuming or you need to retrain yourself every time you attempt it, the reality is, it just won’t get done. Trust me, I’ve been there.
#3 Don’t just think about your photos
I have many other files that I need such as templates, fonts, spreadsheets etc, all relating to my craft. Consider all the files you will miss if lost when choosing what data needs to be protected. Everyone’s needs are different so protect the files that are important to you.
#4 Buy enough memory cards
As I mentioned previously, I don’t wipe a memory card until the photos are protected so I need to make sure I have plenty of cards so this can happen. Cards are cheap so make sure you have enough so you’re not forced to format them until you are happy your photos are protected.
#5 Test Test Test!
How do you know your backups will save you if you don’t test them every now and then? Make sure you check the backups are working and on occasion restore some files so you can be confident it will all come together when you really need it.
There are many different ways to back up your photos, from the basic process of swapping drives to the more involved, technical workflows, full of automation and scripts, but the most important message I can convey is to find the right approach that suits your workflow and skillset so you can be confident that your system works and your most important photos and data are protected.
I hope you found this article useful and I was able to introduce you to a few different backup concepts or maybe it helped you re-affirm your confidence in your existing approach but please do leave a comment below if you have any other tips and tricks to help others with their own backup workflow.
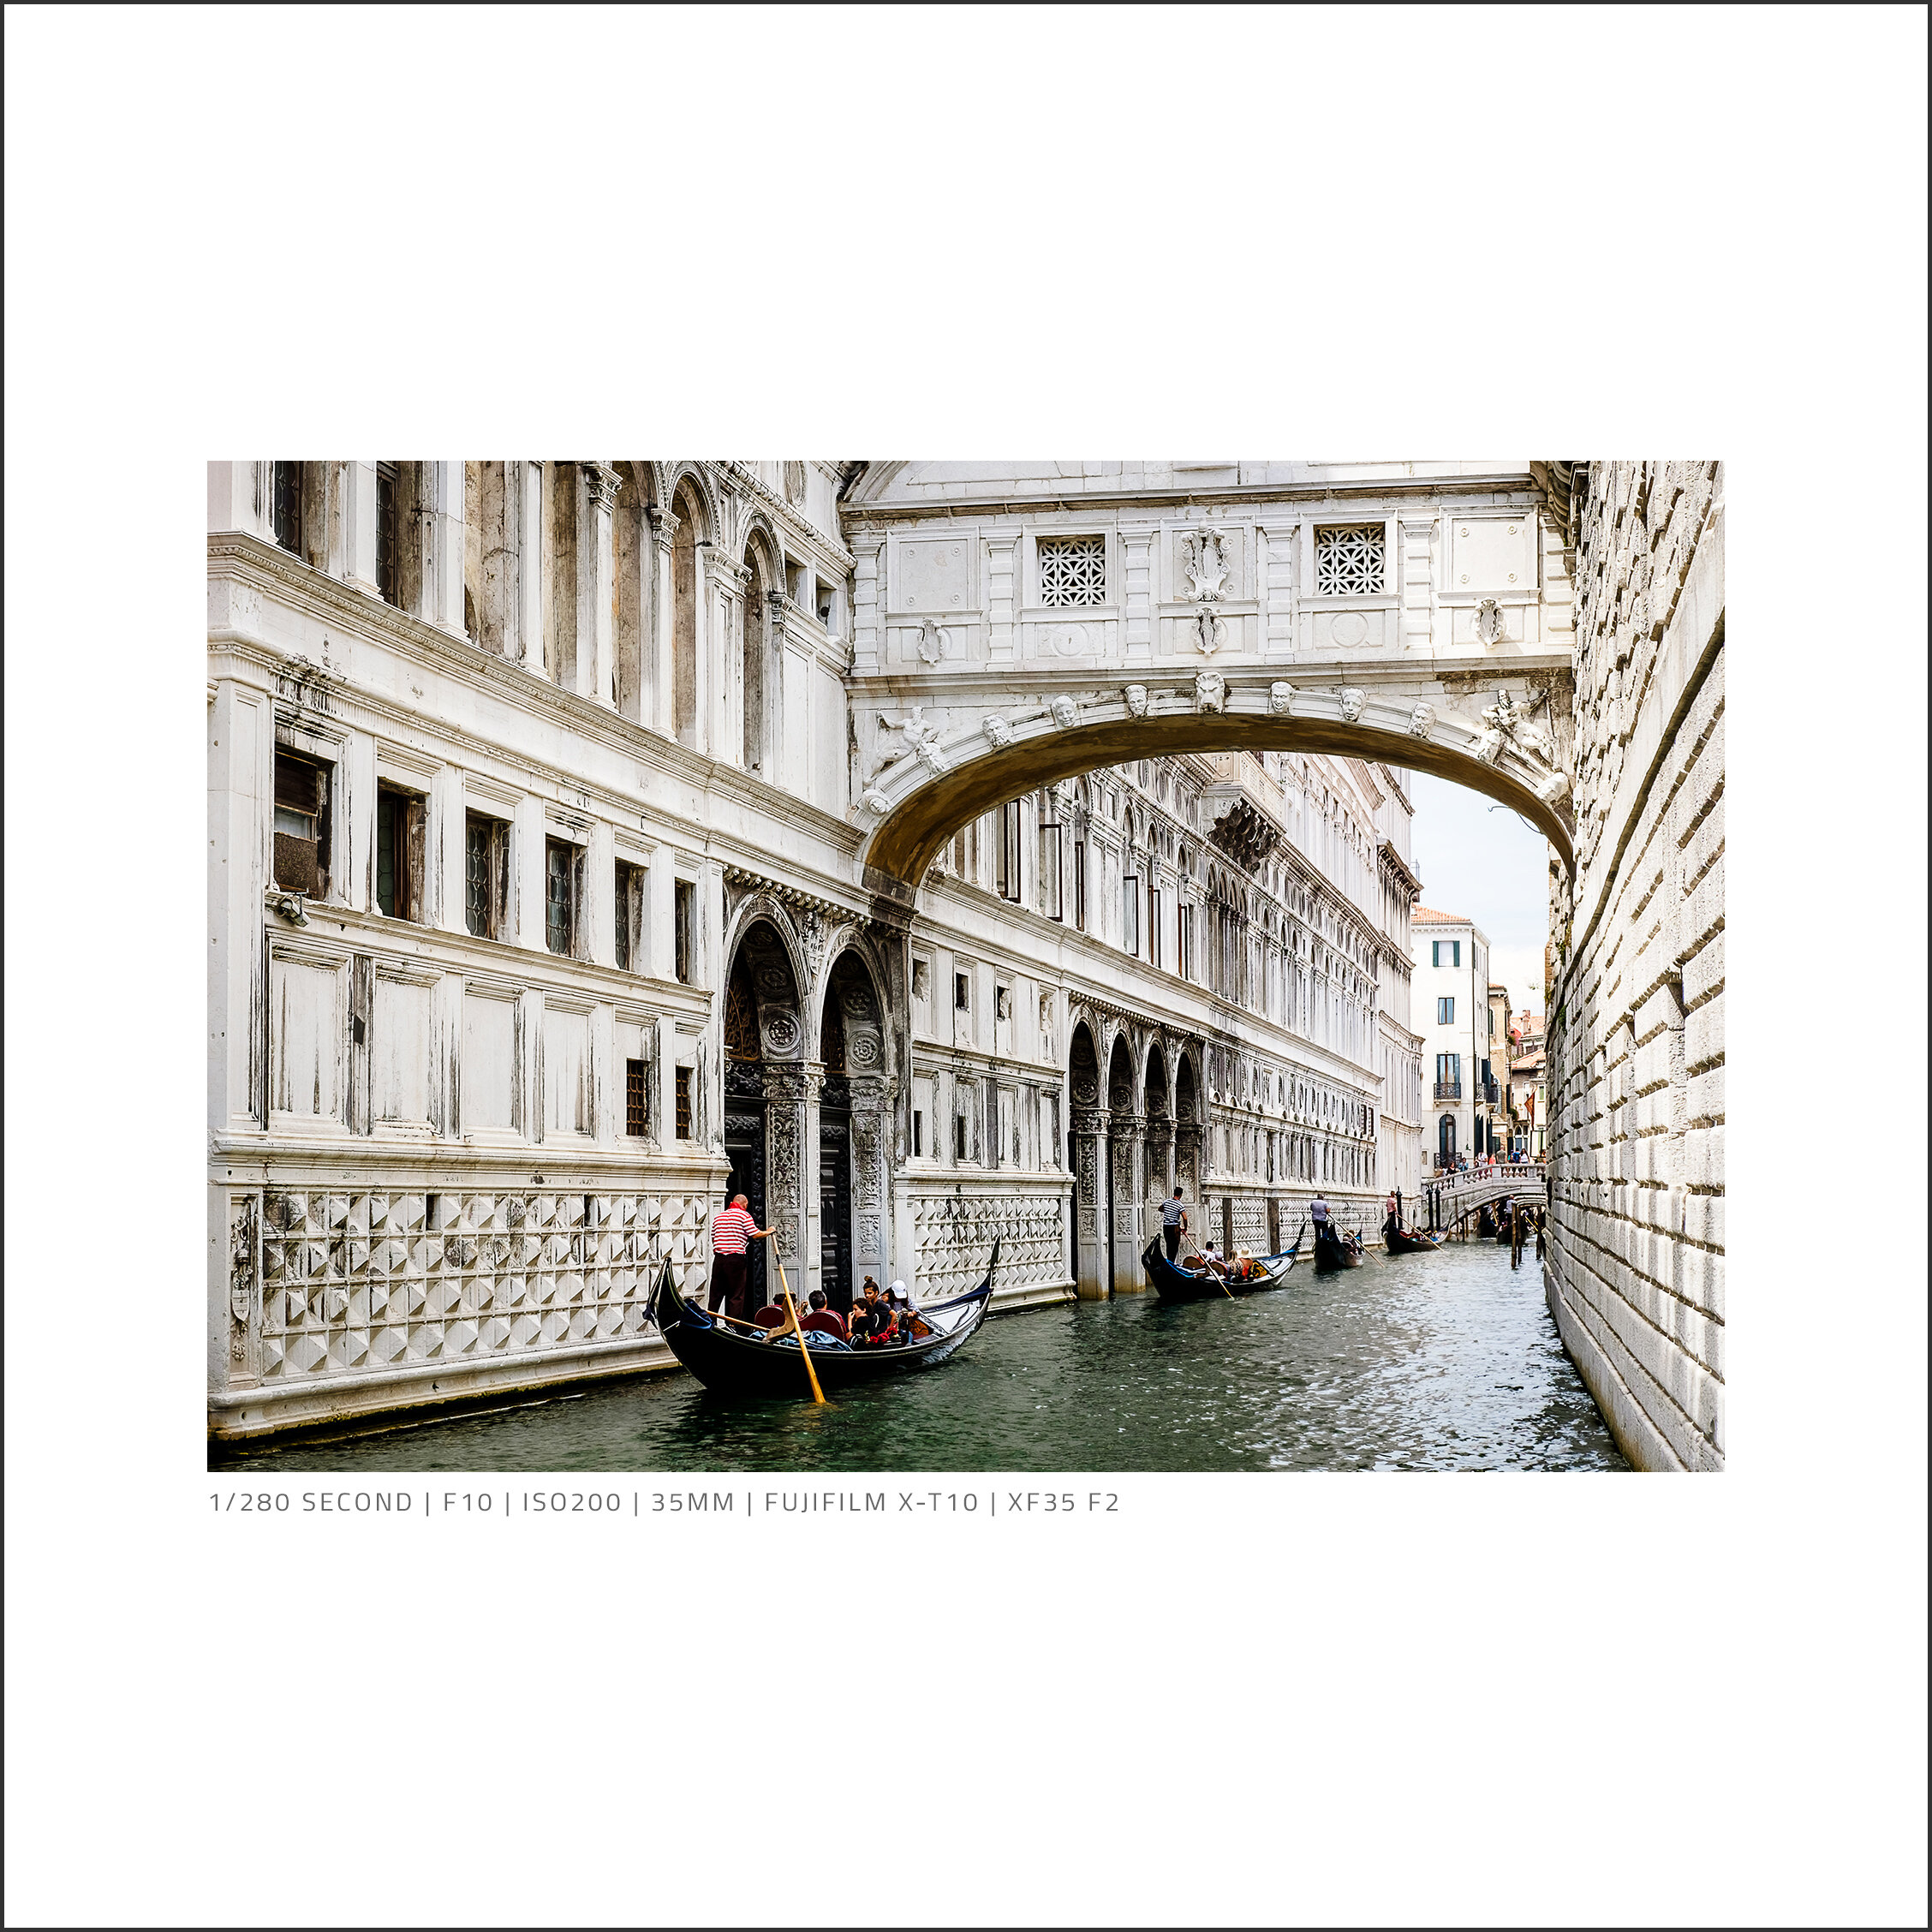
Archway to Venice | Weekly Photo #49
As I wandered the winding streets and canals in Venice, I nearly missed this view that appeared over my shoulder but I’m glad I didn’t as it quickly became one of my favourite photos of the trip.
I did have a trip to Amsterdam scheduled for the end of this month which we have had to cancel. I was really looking forward to going as it was my first visit to Amsterdam and I’d already started to prepare my must-see places to photograph. I don’t travel as much as I would like so when this trip was cancelled due to the wretched global situation, it was frustrating, but I do appreciate why it had to be done. I think all travel plans this year will be impacted in some way from cancellation to significant disruption while social distancing needs to be observed. I have tried to move the trip back to late August but we will have to wait and see how that goes.
One trip I did take was to Venice in 2018. It was my second visit and after travelling to this beautiful city just a year earlier in 2017, I fell in love with the place and wanted to return so, not long after I got back from my first visit, a return trip for the following year was booked and it then that I captured this week’s photo.
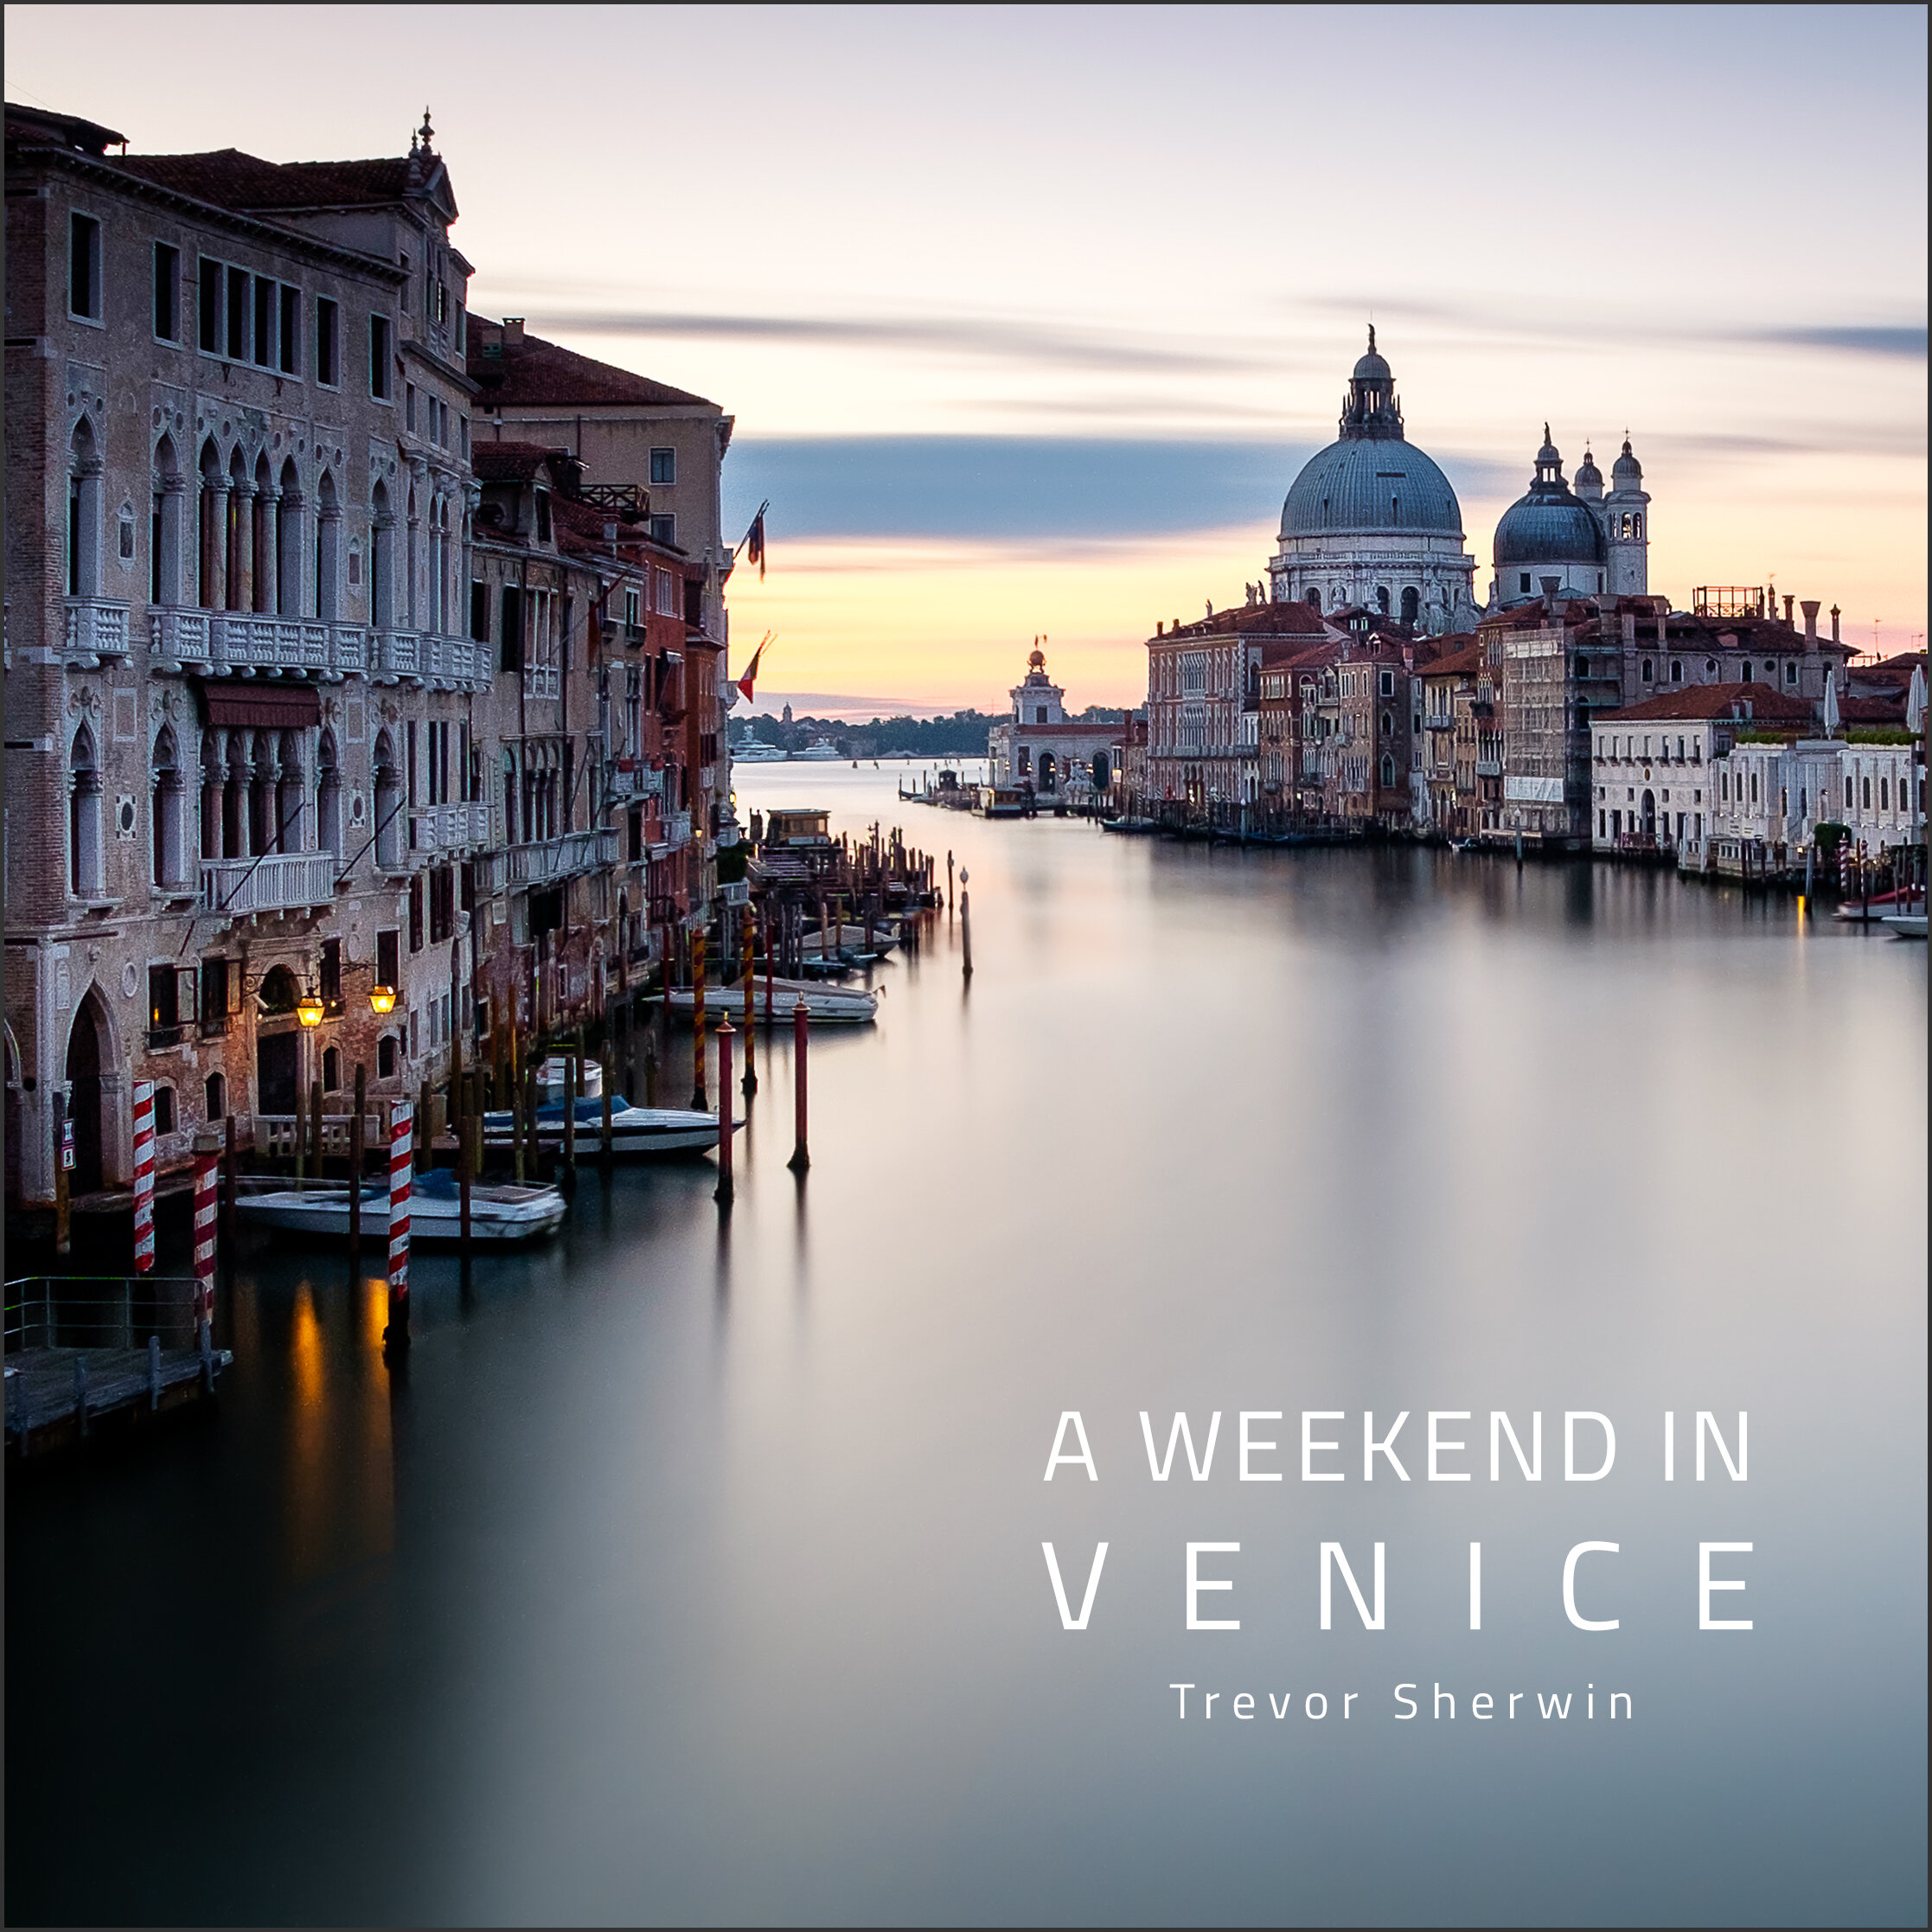
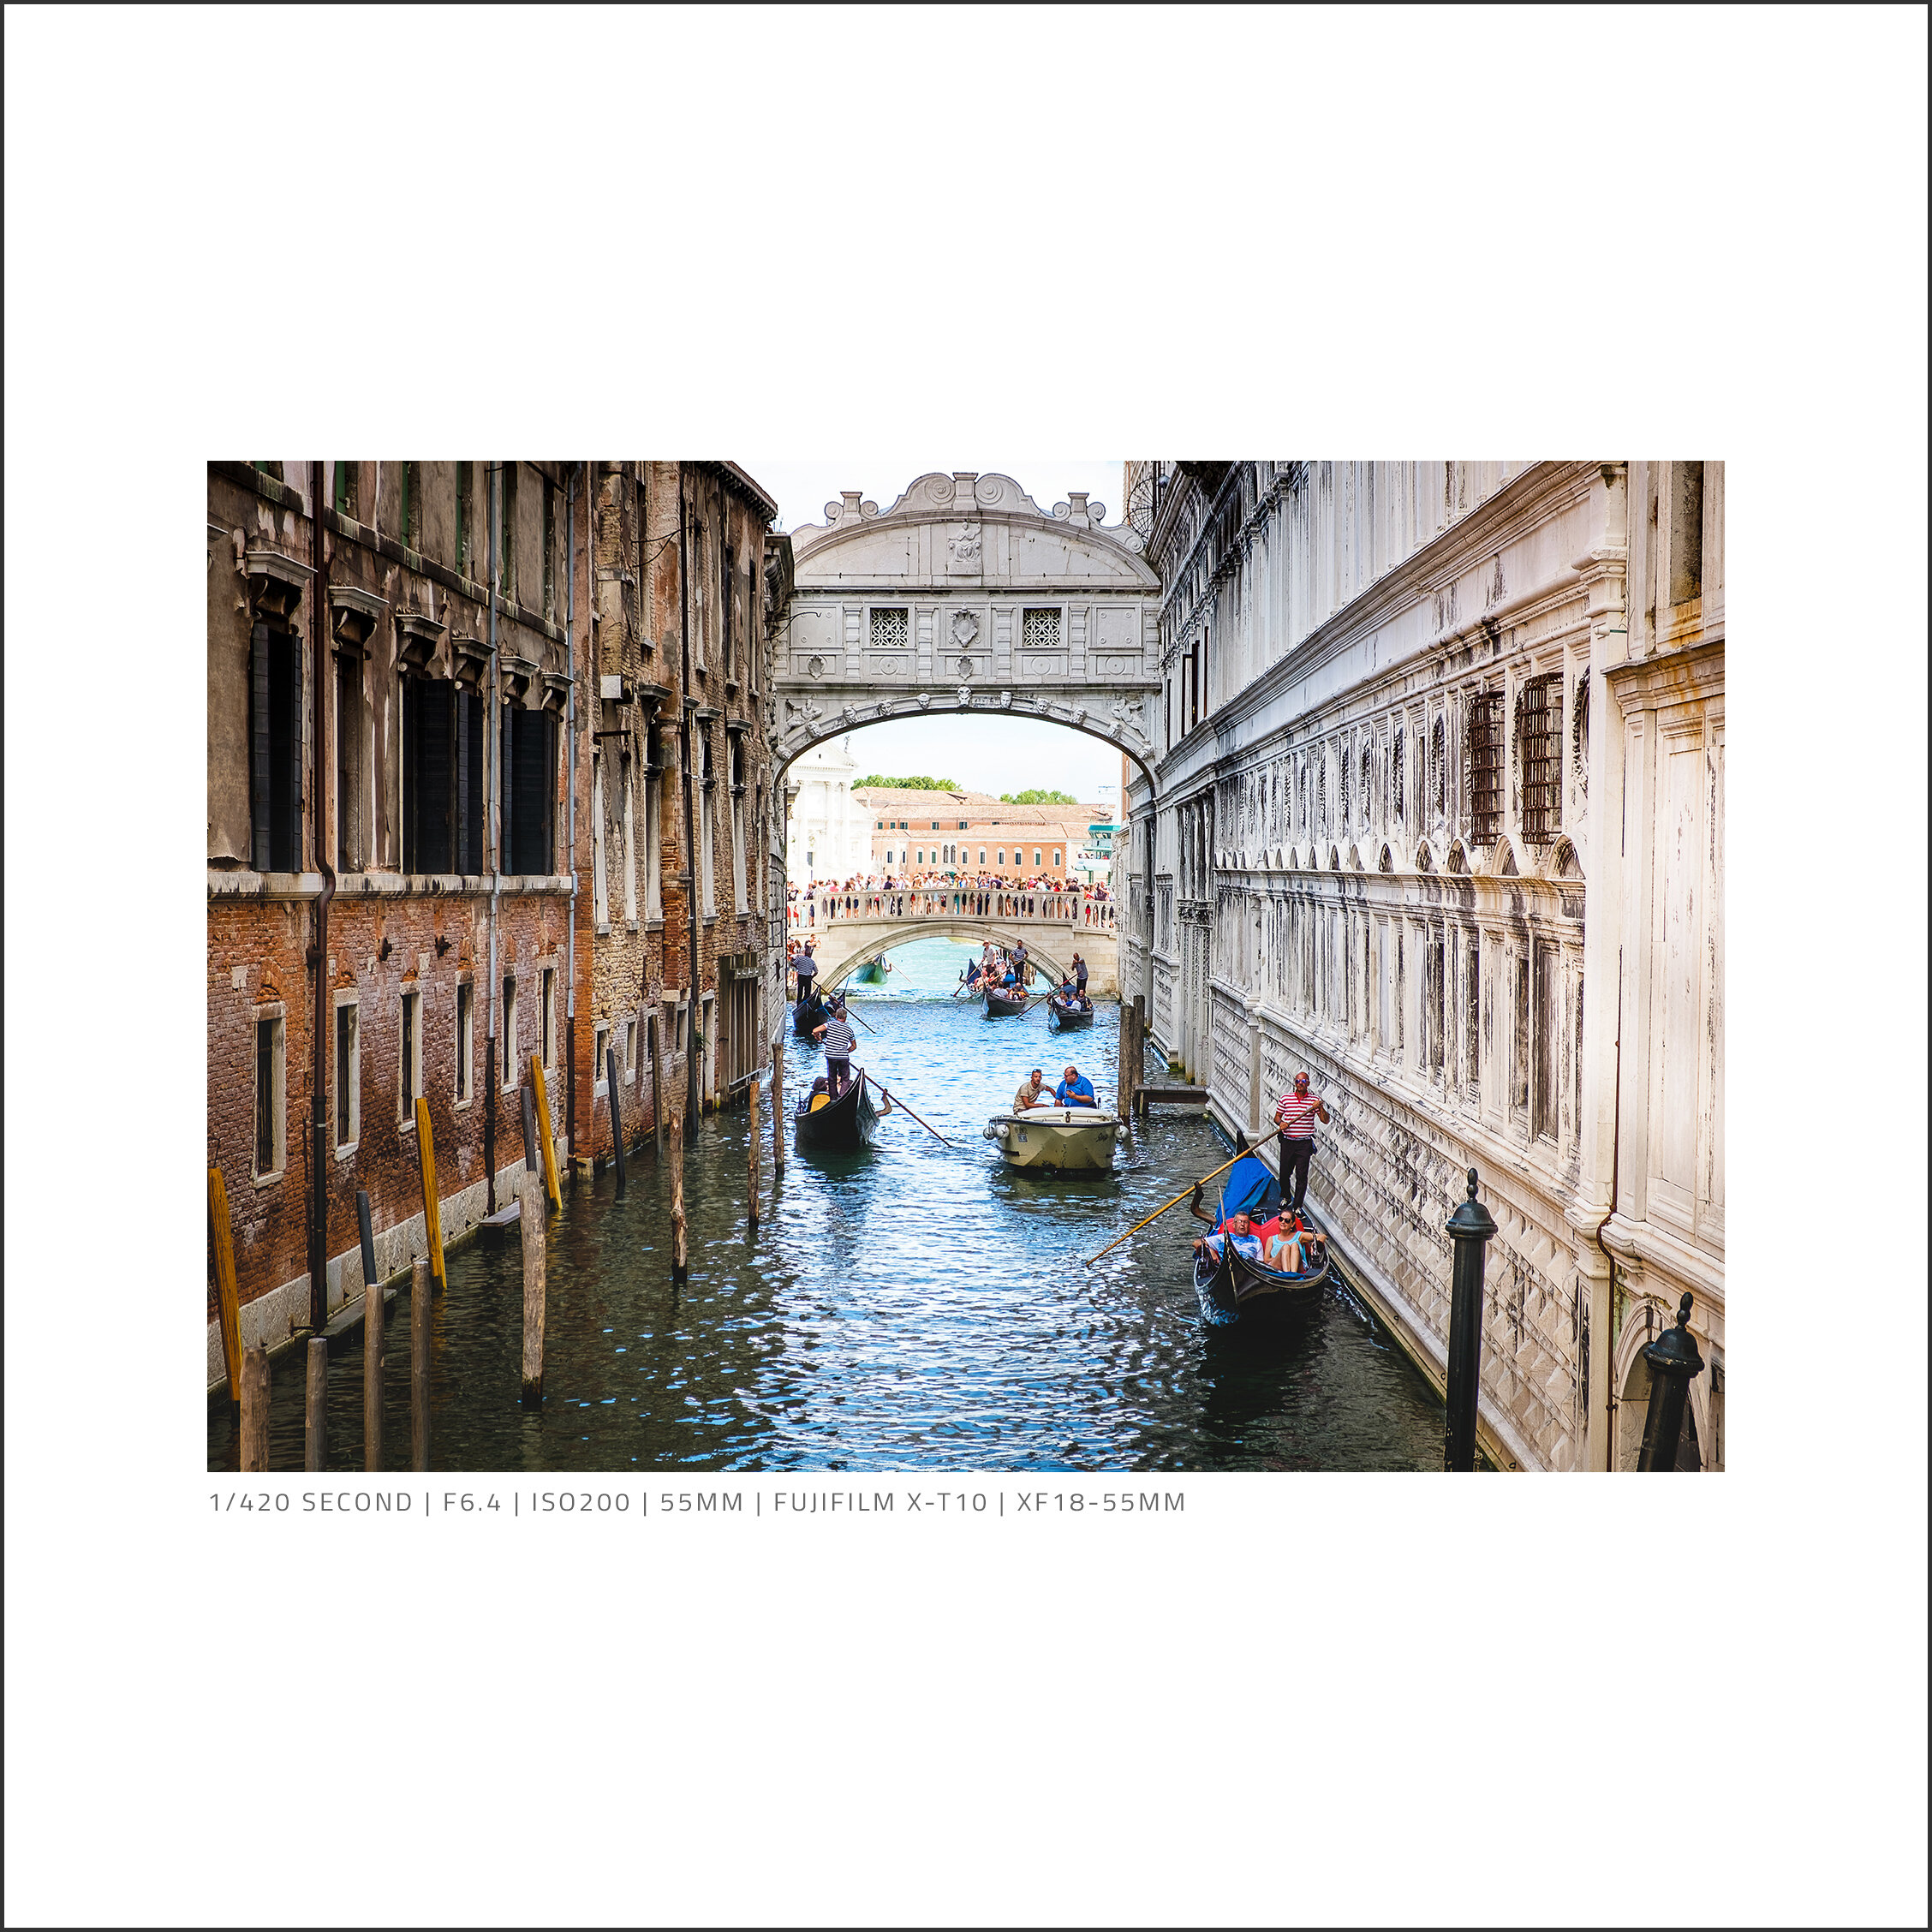
I have created a page on my website where you can see some photos and stories I wrote from my first trip in 2017 here A Weekend in Venice.
Fujifilm XT2 | XF35mmF2 | 35mm | 1/850 Sec | f/2.8 | ISO1250
One thing I like to do in Venice is to wander the streets and side canals without any particular destination in mind but to just see what I find. With so many twists and turns, it’s easy to get lost but every so often, you turn a corner and a new surprise greets you such as a beautiful church or basilica or a bustling square with bars and restaurants. As I wander around, I’m always on the lookout for a photo opportunity and whereas I will typically have a subject and composition in mind and work a location until I have the photo I'm after, sometimes the photo opportunities are spontaneous and I only have a split second to capture the shot and this photo is a great example of that.
As I crossed a bridge over a small side canal and descended down a flight of stairs, the light from this archway behind me caught my eye. It was just over my shoulder and looking back, I could have easily ignored it but thankfully I didn’t and turned around to see what was there. The gondola was being framed beautifully by this brick archway but was disappearing fast and I could instantly see the story, even mystery of the image. Without any time to check my camera settings, I switched it on and framed the composition the best I could and only just managed to take the photo before too much of the gondola had passed. After a quick check on the screen, I knew I had the shot but being Venice, I couldn’t dwell and had to keep moving to see what the next corner had in store.
I like this photo a lot. I like the pastel shades in the water, contrasted against the reds in the brickwork and I love the green of the foliage hanging down from the top of the arch. There are, however, some things I would like to change. First, I would have included a bit more of the archway, but this wasn’t possible as just to the left of the opening, there was some discarded building rubble that would have been too distracting if included. I also find the gondola cover a little messy, but you can only work with the subject you are given and I suppose in a way, having it there makes the gondola look a little more authentic.
Technically this photo isn’t perfect, but technically Venice isn't perfect either. It's about capturing the essence of the city and even with some rustic brickwork, an archway, and the stern of the gondola, you clearly know what this is and where it was taken. It’s subtly obvious.
If you want to see more photos from this trip to Venice, check out a post I wrote that features a set of black and white photos I took after the weather turned the following day. Photographing Venice in Black and White.
Until next week.
Trevor
This post is featured in my Weekly Photo series where I post a new photo every Monday. To have this delivered directly to your inbox, you can subscribe to the mailing list here.
Circle of Light | Weekly Photo #48
In this week’s post, I talk about the time I was finally able to re-take an old favourite photo of mine from back in 2015 and recommend a great landscape photography book I’ve been reading.
Like most people, life gets quite busy, and rarely do I get time to sit down with a cuppa and enjoy a nice book but in the last couple of weeks, I have taken advantage of the time indoors and done just that. I love to read about the story behind the shot and the photographer’s personal thoughts about a particular image. It’s why I write these weekly posts after all. The book I’m reading at the moment is called “Masters of Landscape Photography” (Amazon UK link) and I think this is a great book for two reasons. Firstly, it features some stunning photos from 12 of the world’s top landscape photographers such as Joe Cornish and Art Wolfe. Secondly, each photo is accompanied by a few words written by the photographer about capturing and processing the respective image. Understanding the thought process and motivation to take a given photo helps understand the wider story that surrounds the image and for me at least, creates a deeper connection to the photograph itself. The book also includes some great questions and answers and includes some of the settings and equipment used for every photo shown. If, with everything that’s going on right now, you need some landscape photography inspiration, this might be just what the doctor ordered.
Fujifilm X-T30 | XF16mm F2.8 | 16mm | 15 Seconds | f/13 | ISO160
Around 5 years ago, back in my Nikon days, I took a similar-looking long exposure image of the London Eye which is still one of my favourite photos from back then and over the last couple of years, I’ve been trying to capture an updated version with my Fujifilm camera so it was sod’s law that the day conditions were good and the photo was on, I didn’t have my tripod with me.
To get a night-time long exposure photo like this a few different elements have to come together. Obviously, it needs to be dark and the lights on but still early enough that the London Eye is still running so the spinning movement can be captured. Next, you want to avoid a high tide so anything floating in the foreground is low enough to be out of shot. If not, you will need to point your camera higher, creating more distortion to correct later. You will also have too much sky and a lot less foreground meaning you would lose the lights and colour reflecting in the water.
I was heading out from Westminster Station to take some night shots of London with my Fuji X-T30 and newly acquired XF16mmF2.8 prime lens (which you can read all about here) and just before the heavens opened, I noticed that this photo was on but without a tripod, my only option was to rest my camera on my camera bag, shuffle it around a bit until the image was level and pointing in the right direction and once in position, I dialled in the settings (f/13, ISO160) and took the shot. The full list of settings can be seen underneath the photo.
Back in Adobe Lightroom, I needed to straighten the photo, adjust the white balance to cool down the orange tones created by the city lights and sharpened the photo using the high pass filter in Photoshop.
Stay safe, stay inspired.
Trevor
This post is featured in my Weekly Photo series where I post a new photo every Monday. To have this delivered directly to your inbox, you can subscribe to the mailing list here.
Sunburst at More London | Weekly Photo #47
This week’s photo is one taken of The Shard during a Spring evening in London just as the sun was dipping behind the city’s skyline resulting in a cool sunburst effect.
What makes this whole lockdown experience just about bearable is the nice weather we’ve had in the UK throughout April. Just getting out for a walk in the sunshine each day is a welcome relief from the hours we have to stay indoors and if it was cold and wet outside, I suspect the whole mood would change and patience would be wearing a lot thinner than it is already.
With the nice weather comes some beautiful sunsets and I will often be caught staring out of the window longingly like a pet waiting to be let outside just to go and explorer and experience the great outdoors once again. Thankfully, over the last few years, I have taken advantage of as many opportunities as possible to head out and photograph this special time of day and it gives me some comfort to look back on these photos and appreciate some of the sunsets I have been fortunate to capture.
Fujifilm X-T30 | XF18-55mm | 18mm | 1/90th Sec | f/13 | ISO160
Without any new landscape or cityscape photos in the last 5 weeks, I continue to mix in a bit more of my previous work into these Weekly Photo stories. This shot of London was taken early last year during what was a glorious springtime evening. I had spent a few hours trying to make the most of photographing a clear, blue sky day in the city by looking for strong shadows and harsh light with little real success and as I wandered along the Thames I was keeping my fingers crossed that some interest in the sky would appear during the golden hour.
As it was nearing 6pm, I hadn’t yet settled on a composition and time was running out. The sun was starting to dip close to the horizon and the golden hour was in full swing. As I crossed Tower Bridge, I managed to get into position to capture this classic view of the Shard behind More London and City Hall just in time before the sun dipped out of view behind the buildings.
Normally, when capturing photos looking directly at the sun to create this starburst effect, I will take a number of photos to get the very best from the scene. For instance, I will bracket the shots and merge them in Lightroom later to recover some shadow detail as when shooting directly into the sun, with only one exposure, those buildings would almost certainly be rendered as a silhouette. Also, I will take an image with a smaller aperture (larger f number) to maximise the sunburst effect which would result in extra-long light streaks and add more wow factor to the final image.
Unfortunately, as I arrived the sun was disappearing fast and I had no time to take all of the different photos I mentioned above so, instead, I set the camera to bracket mode, the aperture to f/13 and just began shooting. Although I do feel with a bit more time on location, this photo could have been even better, I’m still really happy with how it turned out.
This photo is also included in my recently updated London Sunrise and Sunset gallery.
I do hope this nice weather continues here in the UK and wherever you’re reading this article from, I hope you are managing to find some positives throughout your day to help get you through these crazy times.
Stay safe, stay inspired.
Trevor
This post is featured in my Weekly Photo series where I post a new photo every Monday. To have this delivered directly to your inbox, you can subscribe to the mailing list here.
My 10 top tips for photographing London
In this article, I list my 10 top tips for getting the very best photographs of London from the ideal locations to essential techniques for capturing some epic pictures of this great city.
London is one of the most photographed cities in the world and with so many inspiring views from epic cityscapes to ornate details, after just a short time out with your camera, you will be hard beat to come away without a good crop of photos. That being said, with just a few useful pointers that will help you plan and inspire while out in the city, you can increase your chances of going from taking a few OK photos to taking a few great photos of London.
One thing to note before we dive in is that although some of these tips are specific to photographing London such as some of the locations I mention, most of the tips can be used in any city or town you happen to be in so just because you might not be photographing London, it doesn’t mean you can’t take some of these ideas and apply them locally to you.
So, let’s not waste any time and jump into my 10 top tips for photographing London!
#1 Check where and when you can use a tripod in London
This photography tip is an important one because the use of tripods in London is to some, a contentious topic. Experiences and therefor opinions of when and where tripods can be used will vary so although I won’t be able to say definitively what is or isn’t ok, I will be able to give you some general advice to help you manage this ambiguous subject.
There are some well-known areas of London that have some very strict “no tripod” rules such as the area around County Hall and the London Eye near Westminster Bridge as well as More London and City Hall over by Tower Bridge, as these are all technically private land. There are, however, plenty of places you can still use a tripod to capture some great shots along the Thames. Directly in front of the Tower of London on the north side and the areas around Tate Modern and the Millennium Bridge are good examples to start.
My personal experience has overall been positive. I have taken my tripod into London countless times and can count on one hand how many times I have been approached about the use of my tripod. I tend to stick to the rules and I’m aware of the absolute no-go areas so, overall, I have learned to work around the restrictions avoiding any necessary telling off from the local security guards. Check my advice below so you can be as informed as possible when heading into London with your tripod and remember, the vast majority of outdoor places are ok with tripods providing you act responsibly.
Research the location
Before you travel, do your research. Check the owner’s website if they have one or ask the photography community. Knowing the rules can help if you get approached by someone less informed and in some situations, enables you to reasonably and respectfully stand your ground if you know tripods are allowed.
Look out for the tripod police
If you are unsure of the rules and there are no signs, go ahead and set the tripod up but always be ready to be approached and told to put the tripod away.
Avoid confrontation
If approached, just be polite and respond appropriately. The guards are just following instruction and even if you come across a wise guy, the best thing to do is move on and avoid any unnecessary confrontation.
Be considerate to others
Even if tripods are allowed, remember that you have no right of way over anyone else so try to keep out of the way to avoid your tripod being bumped or worse, someone tripping on one of the tripod legs. Photographers have a hard-enough rep and we certainly don’t want it to be made any worse.
#2 Embrace the grey weather when photographing London
You may notice as you read this post that all the photos have a common grey, almost monochromatic look to them. This was a deliberate choice I made to keep the images consistent but also show that London can still look great in what most consider bad light. London gets cloudy. I mean, like, all the time and anyone who visits the city has a pretty good chance of experiencing this pretty dull weather for themselves. So when heading out with your camera, you have to keep an open mind as to the style of the photos you will likely walk away with and instead of being put off or unmotivated, try to embrace the weather, seek out some interesting shapes and lines and let the darker clouds give your photos a sense of mood rather than let them defeat your inspiration.
In this previous blog post, I talked about how a wet, miserable day in London turned out to be a surprisingly positive shoot: Capturing London on a Cloudy Day.
#3 Photograph London’s financial district on the weekend and don’t forget to look up!
Like most major cities around the world, London has a financial district, well actually it has two. One in the Square Mile (The City of London) and the other over at Canary Wharf just east of the city. The thing about most of these financial companies is that they tend not to work weekends and as such, this part of London pretty much shuts down over the weekend which for street photographers is less fun but if you want to capture some of these cool skyscrapers and empty London streets, it’s a great location to spend a few hours having the place nearly all to yourself.
While surrounded by all these tall buildings, why not have a go at some “Look Up” shots like this one here. Not an original idea but with the ever-changing London skyline, there is always a new view to be captured and best yet, you can take these types of photos any day of the week!
#4 Get out early to photograph London’s popular tourist hot spots
London can get really busy, particularly at the weekend around the popular tourist hot spots and if you are looking to capture the location free of too many people, then you really must avoid daytime and evening visits. Instead, set your alarm for 4 or 5 am and get out to these popular locations before most of the tourists have even sat down for their hotel breakfast.
London’s great for an early start as public transport will be running and you can get anywhere quickly enough. In addition, you get to be out during the very best time of day for photography as the light is always best in the morning, it’s so much quieter and you have the entire place to yourself for a short while.
#5 Get up high for free, without booking and photograph London’s rooftops
Although there are plenty of opportunities to get some cityscape photos from high up above the streets of London, many come at a cost for entry or requirement to buy food or drink but there are a few rooftop photo spots in London that don’t cost or even require advance booking and you can just rock up on the day and take advantage of some of the epic views of the city and start shooting. Below are my top three to get you started.
One New Change (Find it on Google Maps)
Great for fantastic high-up and close-up shots of St Paul’s Cathedral.
Tripods allowed? No.
Tate Modern Viewing Platform (Find it on Google Maps)
Great for elevated views of the modern financial district in the city and fantastic views of St Paul’s Cathedral from across the river.
Tripods allowed? No.
The Garden at 120 (Find it on Google Maps)
Great for a framed view across West London like the one posted above. Also, there are great rooftop views of Tower Bridge, Canary Wharf and St Mary Axe (aka The Gherkin).
Tripods allowed? Yes.
#6 Photograph the London skyline by walking the South Bank
My absolute favourite thing to do with my camera in London is to walk the South Bank between Westminster and Tower Bridge. This stretch of the Thames Path is popular for good reason as you get to experience some of the best views of London’s skyline available. Although the walk itself isn’t too long, you do need to allow a couple of hours at least if you visit for the first time as you will no doubt stop to capture all the great views as you go.
Along with the classics such as Big Ben, St Paul’s Cathedral and the high rises over in the city, the South Bank offers some great opportunities to capture some street photography and architecture too so, like much of London, it has something for all types of photographer.
Bonus Tip: If you have time, walk back along the North Bank. Although a little quieter, you can still grab some great cityscape photos of The Shard, Tate Modern and the London Eye.
#7 Walk London’s streets and photograph the hidden views
Next up in my top tips for photographing London is to get out on foot and find some of the hidden views of London. They are dotted all over the place and provide great opportunities to take cool, framed photos of some of London’s architectural icons.
The centre of London isn’t a huge place and if you're prepared to get your walking boots on and wander the streets you can be rewarded with some great views of the city. Unless I have a planned shoot and need to get somewhere in good time, I would rather wander the streets with my camera instead of missing potential opportunities by rushing across the city on public transport. If you’re short of time, I’ve listed a few of the more popular backstreets that provide great views of London which also include links to Google Maps to help you find them.
Lovat Lane (Find it on Google Maps)
This cobbled street provides a great foreground for this fantastic view of the Shard from across the river.
Watling Street (Find it on Google Maps)
A great view of St Paul's Cathedral where you can make use of the buildings that flank the street to frame the cathedral and the yellow painted lines which provide some great lead-in lines.
St Helen’s Place (Find it on Google Maps)
This is a cute little street hidden amongst the high-rise buildings in the city and provides some classic London architecture with a great view of St Mary Axe (The Gherkin) which towers over where you stand.
Those were three of the more popular hidden views of London but there are so many more which can be found as you wander the street so if you have time, grab some comfy shoes and head out to explore.
#8 Shoot London, whatever the weather
Number 8 in my top tips for photographing London is a bit of an extension of tip #2 as it also talks about the weather conditions but this time, it’s all about having some fun and shooting in the rain.
“Life isn’t about waiting for the storm to pass...It’s about learning to dance in the rain.”
Just like the grey, cloudy weather, there’s always a good chance that you’ll get rained on when in London so my top tip is to embrace the conditions as much as you or your gear will allow so you can capture some really cool shots during or just after the rain.
The photo below is a great example of how the scene changes in the rain. The wet cobbled street in front of the Tower of London provides this cool reflective surface making for a much more interesting foreground.
After mistakenly leaving my weather-sealed camera at home, I took a chance and went for a walk into London after dark to take photos in the rain which you can read all about here: On Location | Photographing London With The Fuji XF16mm F2.8.
There are endless opportunities to get creative by taking photos in the rain such as reflections in puddles or shooting through streaky wet windows so don’t let it put you off and grab your raincoat and hit the streets whatever the weather.
#9 Add people for interest and scale when photographing London
London boasts some of the tallest buildings in Europe but it can sometimes be challenging for those taking the photos to portray the scale and “epicness” of the city to those viewing the image, so, tip number nine is to try including people as a familiar point of reference that will allow the viewer to grasp just how big (or small) the objects in your photo really are. Including just one person, like in the photos below, can add just enough interest, mystery and scale to your cityscape photos without them looking overly cluttered and distracting.
Referring back to previous tips in this post, including just a single person in your composition in one of the busiest cities on the planet can be a tad challenging so as per tip #3, hit the city at the weekend when there are fewer workers around or tip #2 by getting up and out early when most people are still waking up. By doing this, it gives you the best chance of avoiding the crowds and capturing that solitary figure to help you portray the scale in your photos.
#10 Do your research before heading out to take photos in London
This final tip is about what to do before a shoot. Whether you have a particular location and type of photo you want to capture, or you like to just head out into the streets to see what photo opportunities jump out at you, you can always increase your chances of coming away from a shoot with a few good shots if you prepare to some degree.
Scout the location to get the best compositions
If you are after a specific shot of London and have limited time, research the location online before heading out. Use Google Maps, Flickr or Instagram to understand the best place to stand so you don’t miss the best light wandering around searching for that killer angle and not being able to find it fast enough. My website also has lots of London based articles to view and gather useful tips. Check out two of my articles below.
Check the venue information
Check opening times and like in tip #1 above, check the rules and regs they have. Not everywhere is photographer friendly and knowing this before you head out may well save a wasted trip.
Check the weather and conditions
Check the weather before you head out! The conditions, wind direction or angle of the sun can all affect the final image and, in most cases, can make or break the shot. Also, knowing the weather conditions will help ensure you head out with the right clothing and camera gear so you’re not standing there soaked through because you didn’t bring your raincoat rushing your shots so you can get back inside.
Bonus Tip: Stay safe and have fun
It should go without saying but please do not take your safety for granted. Photographers tend to carry quite a bit of valuable gear and not all areas of every city are safe to wander alone so, whatever you do, be discrete, take care of yourself and where possible, take a friend with you, especially at night.
That’s it. My top 10 tips for photographing London has come to an end. I do hope this article comes in useful for anyone looking to come and photograph London in the future or as mentioned earlier, using the transferable tips to photograph your local town or city wherever you live.
If you have any tips you would like to share, feel free to drop them in the comments below so everyone can take advantage and get the very best images when out photographing London.
A London Sunrise | Weekly Photo #46
A beautiful golden sunrise that was taken while on a photo walk along the Thames in London.
One of the first things I’ll be doing after lockdown is heading out with the camera to shoot this city once again. Being out on my own with the camera is my therapy which ordinarily, I try to do at least once a week but so far, it’s been a month and counting since I took the camera on a shoot and I’m itching to get back out there. During this period of necessary lockdown, one thing I have done is to make sure my camera (X-T30 with the 35mmF2 lens) is out of the bag and available so it can be picked up quickly in an instant when an opportunity to take a photo that documents my family’s experience while our movement is restricted. It’s not something I will ever share online but more of a personal project to both record our own journey as well as helping me keep my camera skills sharp for when we do get to go out and explore the world once again.
Fujifilm X-T30 | XF35mmF2 | 35mm | 1/2200 Seconds | f/5.6 | ISO160
This photo is part of a collection I took one morning in 2019 when I went for a walk along the River Thames at sunrise. I posted the full collection in a previous blog post called On Location | Photographing London With The Fuji XF35mm F2.
On this shoot, I had the X-T30 camera and 35mm F2 as I wanted to stay light and agile and find new compositions while keeping things simple and equipment decisions to a minimum. I had no plan to shoot anything in particular nor any idea as to what the weather had in store on that morning, I just wanted to be out with the camera and see what I could capture. Although at face value, walking around the city with a single 35mm prime lens might appear limiting, in fact, after just a short while my eye was in and I started to see all different compositions from the more obvious to the creative and I had great fun playing with depth of field to create some interesting shots. Do go and check them out using the link above.
Starting my walk near London Bridge, I ventured over to More London and captured a few of the classic compositions before heading along the river towards Bankside and the Millennium Bridge. As I crossed the bridge, the sun was hidden behind some of the clouds which defused the light enough to take the shot and not cast the entire foreground as a dark silhouette, leaving just enough detail and interest in the scene. This is also a testament to how good the dynamic range is on modern cameras. I am regularly blown away by how much detail can be recovered in the shadows in shots like this.
There is a cluster of taller buildings to the left of the frame which if included would change the entire look and interpretation of the image. I guess that supports the compositional lesson that it’s not just about what you include in the frame, it’s also about what you leave out.
Until next week.
Trevor.
This post is featured in my Weekly Photo series where I post a new photo every Monday. To have this delivered directly to your inbox, you can subscribe to the mailing list here.
Under Westminster Bridge | Weekly Photo #45
A re-imagining of a cityscape photo I took 4 years ago of Big Ben and the Elizabeth Tower in London and represents how my style has evolved over that short period.
It is inevitable that as time goes by, photography styles change and I’m no exception to this. Up until about 2 to 3 years ago, my approach to editing was to try and create high impact, stand out photos with lots of contrast and colour but I could be guilty of pushing every photo in this direction, some past their limits which, when looking back was a result of my immaturity and lack of patience, focusing on the result above all else. More recently, over the last couple of years, my style is changing again and I’ve started to appreciate that I don’t need to make every photo I take stand out in the same way but instead, I have started to enjoy capturing images in all conditions and instead of pushing the photo to look a particular way, I try to be more sympathetic to the subject and conditions it was taken without forcing it to be something it’s not during post-processing.
Fujifilm XT-10 | XF18-55mm | 21 mm | 0.6 Sec | f/10 | ISO200
As pretty much all of the world is stuck in their homes at the moment, there’s not much in the way of opportunity to get out and shoot so I have been spending my time getting my photographic house in order by getting through some of my editing backlog, organising some files, checking my backups and having a bit of fun printing some of my recent photos. In addition to those things, I’ve been looking through some of my older photos and having a go at re-editing a few to see how they might be improved using newer features since released in Lightroom and a few upgraded editing skills of my own. One photo I had a go at re-editing was this one I took in 2016 of the Elizabeth Tower and the Houses of Parliament from under Westminster Bridge.
Even though it was about 4 years ago, I remember this day well. It was my very first trip into London after switching from my Nikon D90 to the Fujifilm X-T10 and I was excited to be in the city to put the camera through its paces. As I crossed Westminster Bridge, the heavens opened and without any kind of weather sealing on this camera and lens combo, I had no protection from the rain so I ducked under the bridge to get some shelter. While I waited for the rain to die down, I spotted this fantastic view of the Elizabeth Tower framed by the arched entrance to the tunnel. Although it was still raining, there were still plenty of people passing through, so I moved to the back, set up my tripod, and when a suitable gap in the foot traffic appeared, I grabbed the shot.
When I first processed this photo in 2016, I didn’t take into account the conditions while editing the photo and in my opinion, tried too hard to introduce colour and warmth to the photo to make it pop but looking back, it was a dull, grey and wet evening and I wanted this mood to show through in the final photo so I brought those colours back down, cooled off the white balance and pulled the shadows down just a little to darken areas around the frame.
It’s a little strange because, at the time, I was happy with the first effort but after 4 years, that photo no longer represented my current taste and style and I’m a lot happier with this new and proved version which makes me wonder, how many other good photos do I have which I once dismissed? I guess there has never been a better time to go and have a look.
Please stay safe and talk to you next week.
Trevor
This post is featured in my Weekly Photo series where I post a new photo every Monday. To have this delivered directly to your inbox, you can subscribe to the mailing list here.
First Light at More London | Weekly Photo #44
This week I’m back in More London, along the Thames capturing a pre-sunrise blue hour cityscape, photo of Tower Bridge.
As I write this post, we in the UK are coming to the end of week two of our national lockdown and I can’t help but wonder, like many cities around the world, how much of a ghost town London must be right now. It’s strange when I think about it as I’m always trying to capture my cityscapes free of people as I like a more simple composition and too many can make my photos look a bit too busy. It’s one of the reasons why I make the effort to get up and out so early and London looking like this photo below 24 hours a day is strange to me. I truly hope humanity can get on top of the situation as fast as they can so the suffering can stop and we can all get back to something that resembles normality.
Fujifilm X-T30 | XF16mm F2.8 | 16mm | 8 Seconds | f/11 | ISO160
I’m pretty sure that this part of London is my favourite place to take photos at the moment as I’m constantly looking for opportunities to head here. It’s got everything a cityscape photographer wants from epic views at both sunrise and sunset, old and new architecture and plenty of opportunities to build layers and compositional interest into the image to boot.
On any given day, I’m happy if I get a single good image during a shoot but on a rare occasion, I get a bit lucky where I manage to capture a few photos that I would consider keepers. In fact, during this particular morning, I managed to grab 4 of them and this being the second I have shared to date. The first being in week 34 where I posted the photo I call City Blues.
On this shoot, I had with me my Fuji X-T30 and the 16mm 2.8 prime lens and as I was walking between More London and London Bridge I spend a bit of time around this area looking for compositions to capture. Using my small table-top tripod I keep in the bag, I rested the camera awkwardly on the ledge overlooking City Hall and Tower Bridge and went about taking this 8-second exposure seen here. The blue hour was still in full swing but what I like about the photo is the small amount of colourful pre-sunrise light peeking over the horizon and lighting up some of the clouds.
With the mid-level clouds and gap over by the horizon, it had the makings for an epic sunrise that day and it most certainly delivered. By the time I got over to London Bridge, the sky looked like it was on fire and probably the most dramatic sunrise I had ever seen in London. I haven’t quite finished editing that photo yet but once done, I will share it a future post.
Please try to stay safe and well and I will talk to you again next week.
Trevor
This post is featured in my Weekly Photo series where I post a new photo every Monday. To have this delivered directly to your inbox, you can subscribe to the mailing list here.
Spinning Wheel | Weekly Photo #43
In May 2019, I took this long exposure photo of the London Eye around sunset and this week I talk about how I took the photo and what some of the challenges are when taking a long exposure photo from this vantage point.
Before I dive into this week’s post, I wanted to let you know about an article I published last week all about printing the photos we take. In the article, I talk about what I’ve printed recently and why I think it’s so important for all photographers to commit ink to paper and the benefits it can bring to your craft. I decided to share the article now as with many of us on lockdown due to the global pandemic and unable to head out to take photos, I honestly feel this is a good opportunity to go through some of your most important work and have a go at printing some photos. For people that love their photos, there is nothing like holding them in your hand as physical, tactile pieces of art. You can find the article on my blog here: Why every photographer should print their photos.
Fujifilm XT2 | XF18-55mm | 21mm | 95 Seconds | f/7.1 | ISO200
I haven’t shared a long exposure for a few weeks now and as I was rummaging through my photos searching for this week’s post, I came across this photo of the London Eye which was taken from my favourite vantage point looking down the River Thames from the Golden Jubilee Bridge. One of the reasons I take long exposure photos is that it allows me to remove some of the clutter from the image such as the ripples in the water or in this case, smooth the motion of the London Eye and this composition suits this approach perfectly as I can exclude the taller buildings which are just out of frame on the left allowing this modern icon to stand tall and dominant in the frame and simplifying the composition even more.
In my main cityscape kit, I use the Formatt-Hitech 85mm system and for this photo, I used their 10-stop ND filter to give me the shutter speed I wanted to smooth out any movement in the scene. The London Eye moves quite slowly and takes around 30 minutes to go all the way around which means if the exposure is too short, all you really get is a bunch of slightly blurry passenger capsules. To get this effect that makes the London Eye appear to be spinning more rapidly, the exposure really needs to be at least 30 seconds or in this case, with the ambient light fading fast, I ended up with a 95-second exposure.
Shooting from this spot is not without its challenges when taking longer exposures like this. First off, the bridge is a bit wobbly. The Golden Jubilee Bridge is attached to the older Hungerford Bridge and when a train crosses, everything shakes a little which can cause some camera shake. Also, as the camera is pointed down the Thames, the river traffic takes longer to pass through the frame and when taking long exposures, finding the right gap to take a photo can be difficult, to say the least. Looking through Lightroom at the photos from that evening, of the 10-15 shots I took, this is the only photo I managed that was both sharp and free of ghostly looking riverboats in the water.
I visit this location regularly enough and more often than not, leave without a shot in the bag and for those times I do leave empty-handed, I have to remind myself that the hunt is as important as the catch which can be a bitter pill to swallow.
Stay safe and well while we all get through these uncertain times and I’ll talk to you next week.
Trevor
This post is featured in my Weekly Photo series where I post a new photo every Monday. To have this delivered directly to your inbox, you can subscribe to the mailing list here.
Why Every Photographer Should Print Their Photos
As I embark on my own printing journey, I wanted to share with you what I’ve been printing lately and to help convince other people to get their photos off of their computer and on to paper, I have listed 6 reasons why I feel every photographer should print their photos.
It’s 2020 and the shift to digital photography happened a long time ago. We now take more photos than ever before and nearly all these photos are stored and consumed on our phones and computers. With so many photos to consume, the time we all spend looking at these photos gets shorter and shorter to the point where these days, from the point they are taken, most photos likely never get seen by human eyes at all.
In this post, I’m going to dive into the world of printing and talk about how I currently print my photos and provide my reasons why I believe everyone should be printing their own best work in some form or another. What I won’t cover in detail is how to prepare photos for print and instructions for printing photos at home as that’s an entire topic on its own. I have already written a blog post called How I printed this photo of the Shard, London but that post only really skims the surface of printing at home as I wanted to keep the post light and free from too much jargon so everyone could follow along but there is so much more information that could have been included.
“The negative is the equivalent of the composer’s score and the print the performance.”
How I Print My Photos
I’ve been printing my photos for many years, long before I first took up photography as a creative hobby. When I was young a photo was only a photo when it was physically printed as apart from using a slide film and projector, there wasn’t really any other option. Most of us would head off to the local print lab or drugstore and hand in our film to be processed ad collected 24 hours later. Although times have changed and photos can now be displayed in both digital and analogue form, for me at least, nothing has changed with regards to my desire to commit ink to paper and have my photos printed.
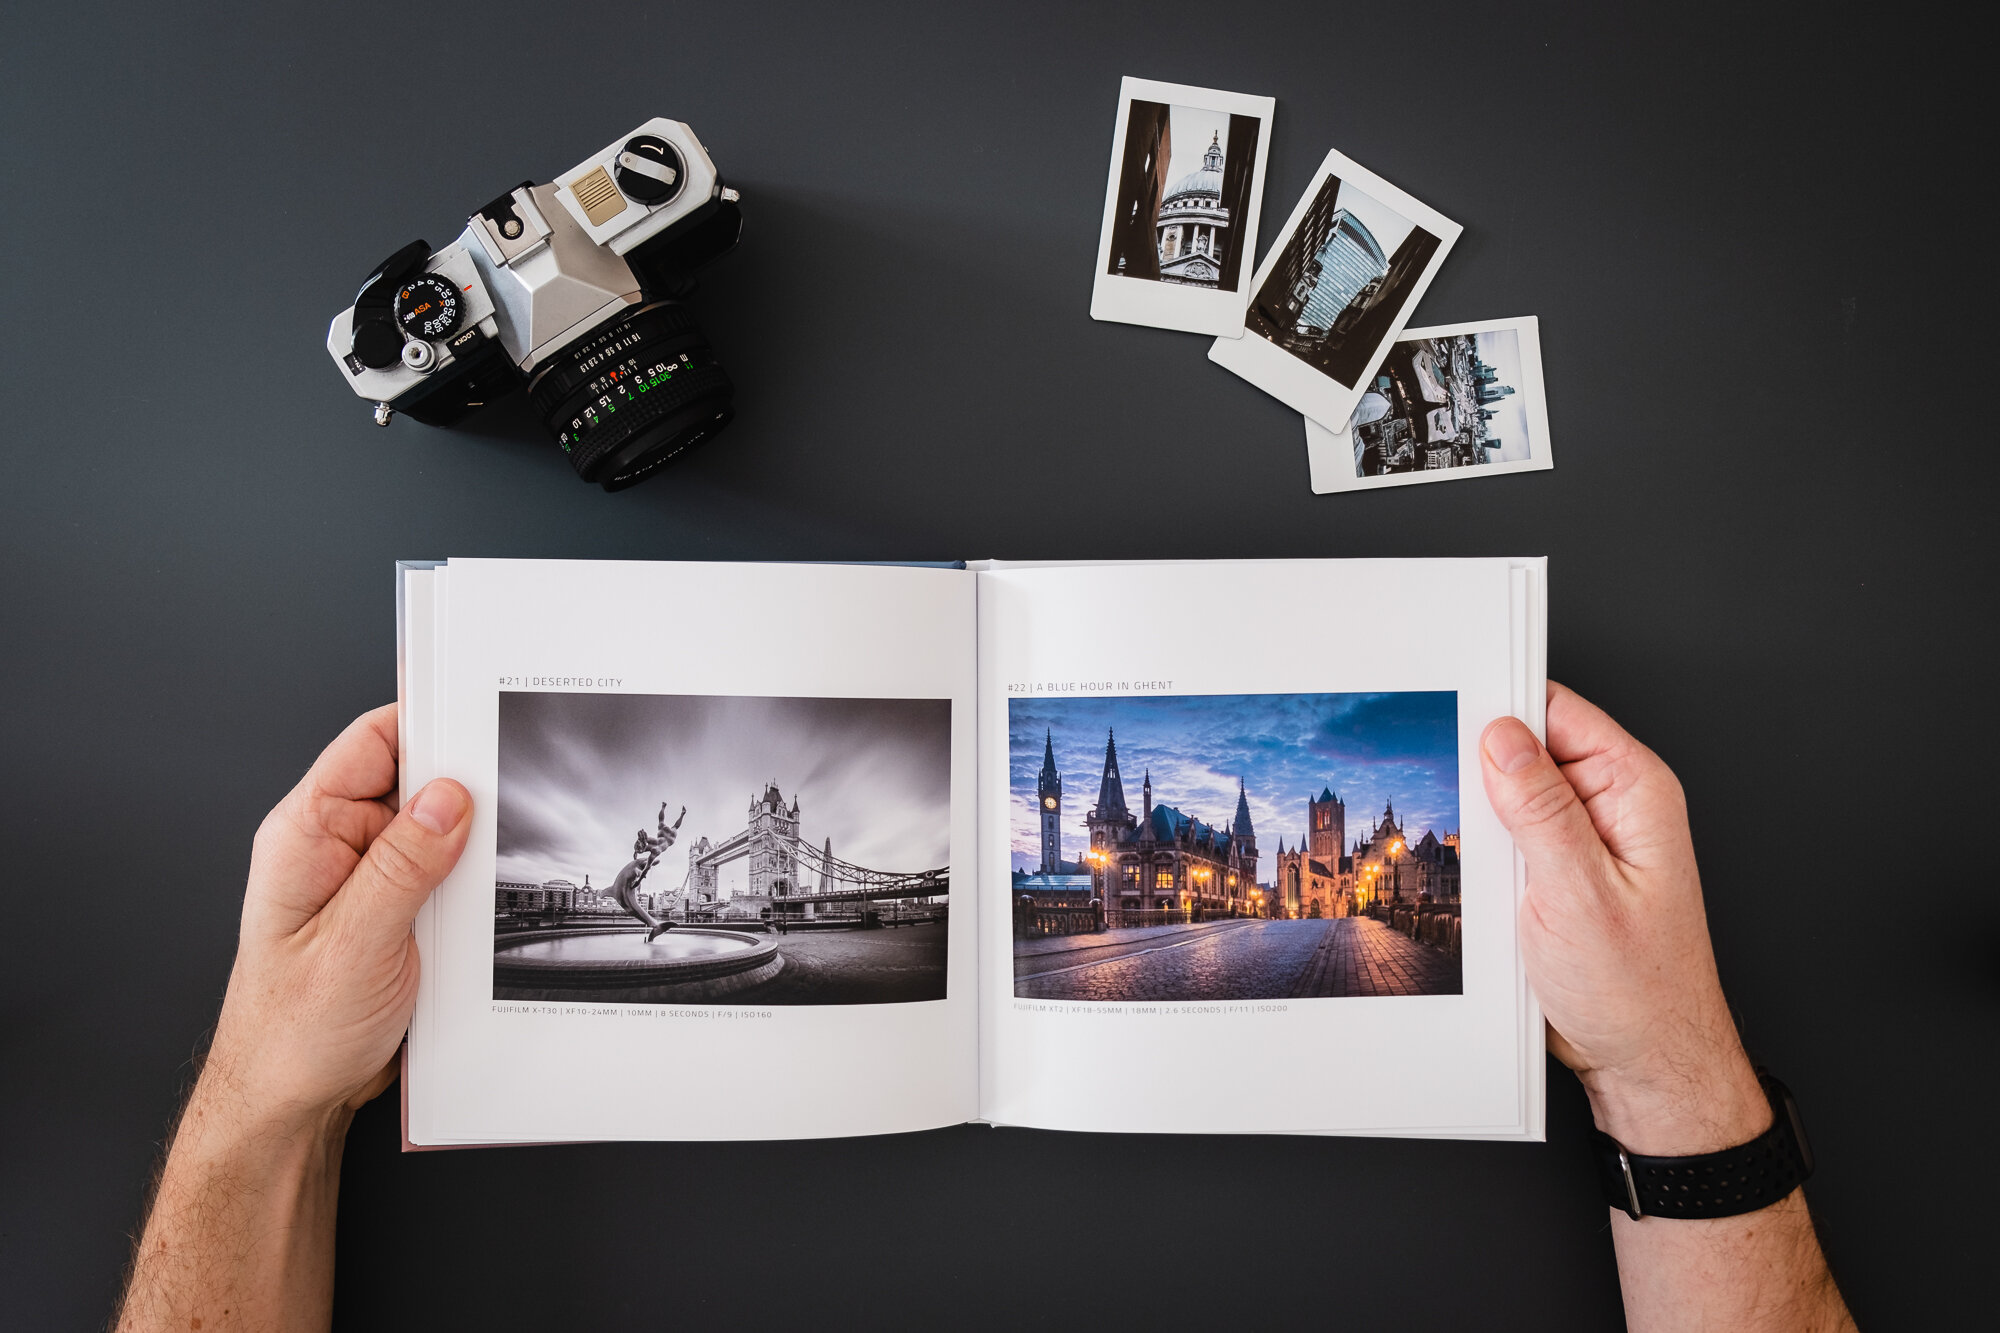
I consider myself lucky to live in an age where there are so many more options when it comes to printing photos, from your standard print to fine art paper, large wall-art such as canvas and acrylic and my personal favourite, the photo book. 20 years ago, when I would pick my prints up from the lab, I didn’t look forward to spending the next few hours sticking them all in an album. It was tedious work, to say the least. These days, photo books are the new photo album and whether it’s using a phone, tablet or laptop, anyone can design and create their own books featuring a collection of photos with relative ease.
After visiting Venice in 2017, I wanted to round off my amazing trip by printing some of the photos I took. I decided to do two things. First, narrow down my favourite images and present them in a small coffee table style book and second, choose just a small selection to be framed and hung on my wall. I chose around 35-40 photos that were taken across the weekend and designed a book in my usual minimalistic style. I chose to print the book with a quality soft-touch matte cover which oozes quality with the photos printed on the thicker 250g silk matte paper. I could have chosen cheaper paper but this book was for me, a one-off and I wanted it to look and feel great to read.
Scroll through a few pages of the book below to get an idea of the layout and style.
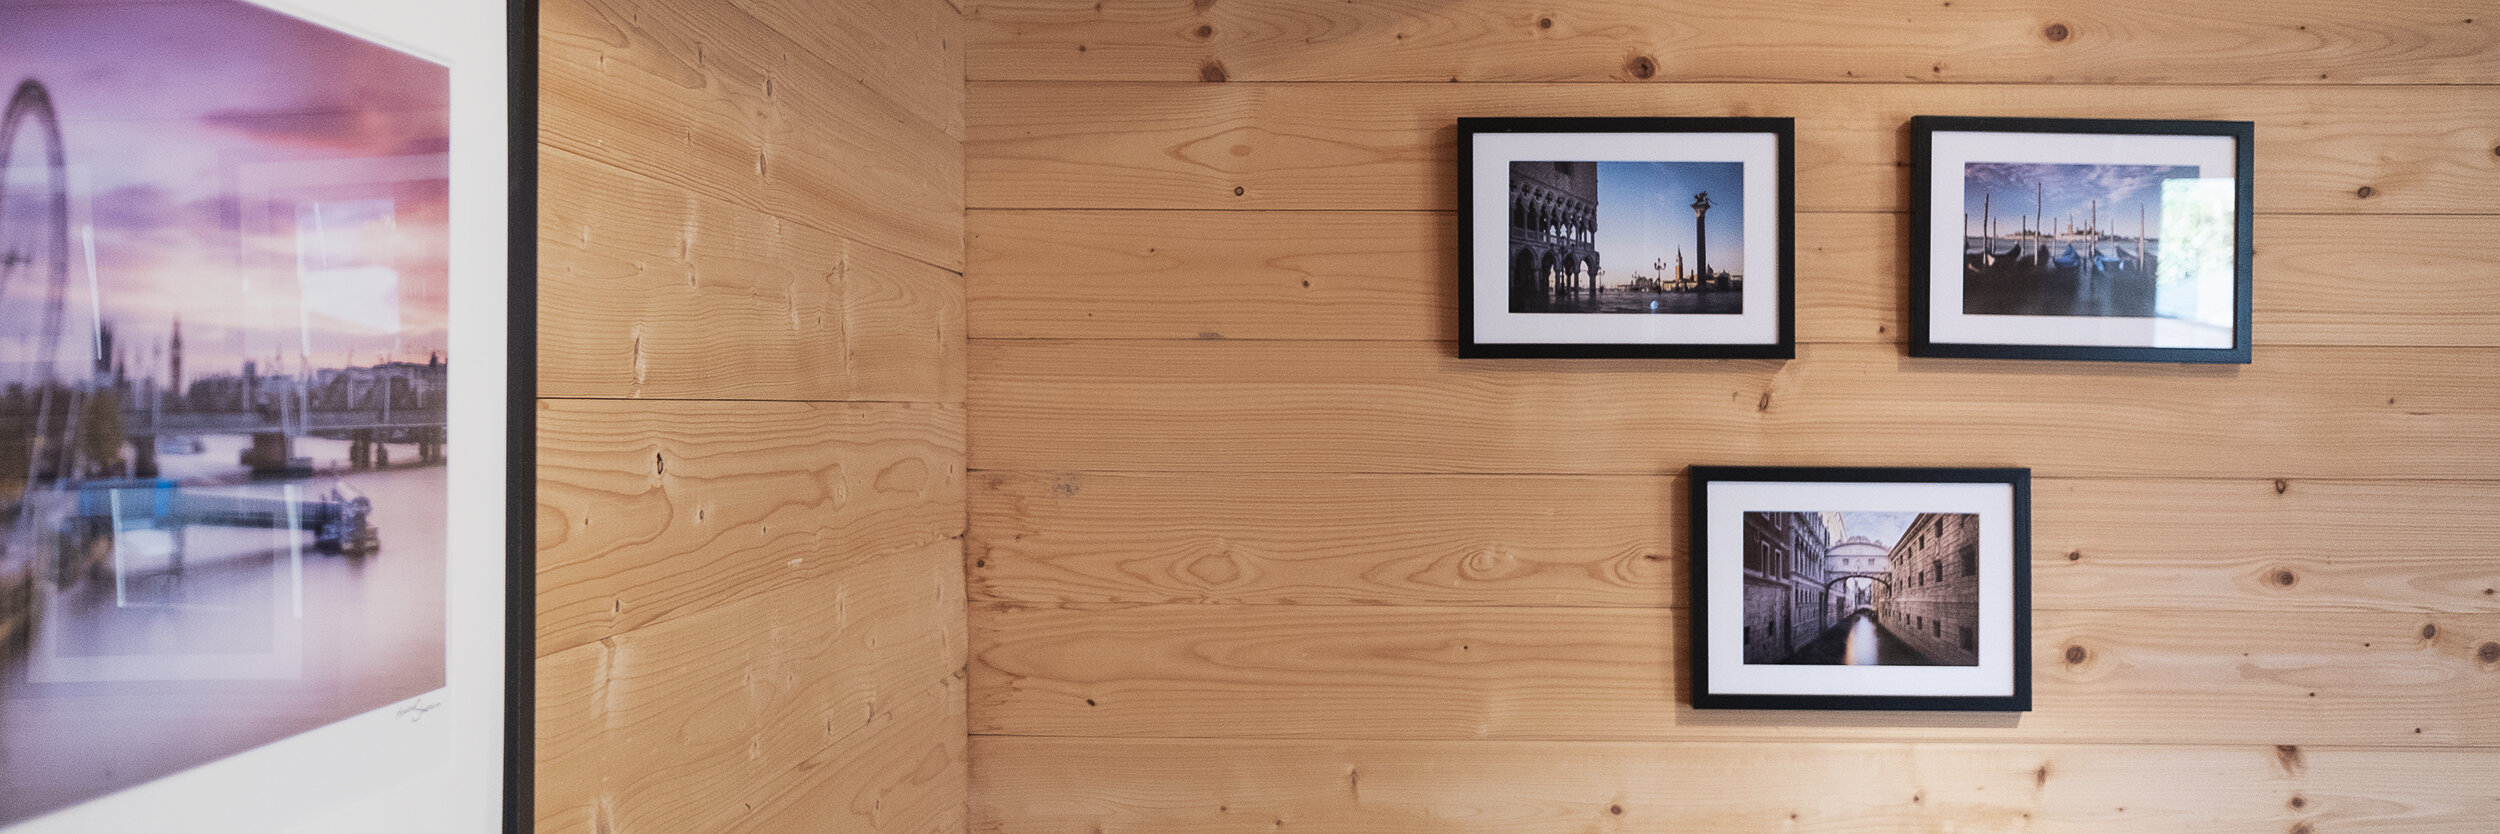
After the book, I wanted to print a few pictures a bit bigger and hang them on the wall in my studio. I chose 3 images that fit together and printed these on my Canon Pro-10s printer. I chose these three images in particular as not only are they photos of what I think shows off the beautiful city, but they also fit well together visually. All three were taken around the same time, early in the morning and each has strong blues from the sky and warm oranges from the rising sun.
While preparing the images for printing, I increased the vibrancy, added a little sharpening and brightened the images by around a stop of light. Once printed, I used frames with mounts in the same style as my other prints on the studio wall and hung them as shown in the photo below.
If you want to see more photos I took in Venice, check out my Weekend in Venice project which includes lots more photos and information about the final prints. The project page can be found here: A Weekend Photographing Venice.
Printing my Weekly Photo Series
One advantage of publishing a single photo each week is that the numbers are low enough to make printing the entire collection manageable. When I kick off a project or in this case a photo series, I immediately think about the project end game and that will include what plan I will have for the work I produce.
As with the Weekend in Venice project, I wanted to create something I could grab in a pinch and review all of the photos I produced for the series so, in keeping with the same size and style as before, I put together the Weekly Photo 2019 photo book below.
Although I share a photo on this site and social media each week, this book was for me as above all else, this is still a personal project and for all of the work that goes into producing all of the posts and choosing the photos, I wanted something I could keep and potentially recreate each year as I build up a convenient collection of my work.
I heard a quote on a podcast I was listening to recently from a photographer/teacher called Katrin Eismann and she said: “The truth is revealed when the ink hits the paper” which nicely sums up one of the reasons I also print my photos onto A3 paper.
As with the book, every photo I publish each week also gets printed. Although I love my photo books, seeing and holding your work printed in A3 or larger allows you to appreciate the photos in all of their high-resolution glory but importantly, it highlights issues with the print you may not have noticed on the computer such as compositional distractions or errors introduced when the photo was being processed. I’m no exception as I’ve previously been forced to take an image back into Lightroom or Photoshop to fix a problem found only after I had printed the photo. It’s frustrating at the time but I want these prints to represent my best work.
I print my photos on a Lustre paper which I find suits my style of photography well as the paper is not too glossy but the resulting image still has good contrast and a nice sheen to it and works well when mounted and framed behind glass.
The only problem when printing all of these photos in A3 is how I store and keep them safe. I’m keen to hear what others do to store their prints but currently, I use an A3 black presentation box which has enough room to hold around 60-70 prints all separated by a sheet of acid-free tissue paper. I don’t really know the long-term effects of the photos that sit at the bottom of the pile with all of the weight pressing down but time will tell I guess and for now, it’s the best option I can come up with.
Why every photographer should print their photos
So, I have talked a bit about my personal photo printing but if you still need help convincing to get your images off of the computer and onto paper, then here are some reasons why I think you should give it some serious thought.
#1 There are so many print options to choose from
As I mentioned earlier in this post, when I grew up, print options and finishes were incredibly limited and most photos would end up in a shoebox in a cupboard. We are so lucky to live in an age where there is literally a different print option for every photographer. If you want to create a book like I have, great, what size do you want? How many pages? What cover style? If I wanted to print a single image large and hang it on my wall, do you choose a traditional framed print or do you create a modern, vibrant acrylic or aluminium print? Don’t even get me started on how fun the Fujifilm Instax system is. With so many options, choosing the best format for your work has never been easier.
#2 Prints make a great backup
Now, I don’t strictly buy into the fact that one day all of the electricity can go off and along with it your photos will be lost if not printed as truth be told, if we all suddenly lost power, I would be much more worried about surviving than my photos of London. But that being said, if for some reason I was to lose my digital copies in some freak data loss situation, having my best work printed means they couldn’t be affected and I would still have a copy of my photos should the worst happen.
#3 Making a good print of your work means you get to learn a new skill
Ok, so technically yes, you can just grab one of your photos and upload it to the cheapest online print lab and order without giving it much of a thought and if that works for you, then happy days but, if you really want to make sure your printed work looks its absolute best then learning the steps needed to prepare your files for print is essential. This might include understanding why prints might come out darker than your screen or digging further down into colour science or print profiles. This may all seem a bit complicated to some but for those who want to spend the time to understand all of this will stand the best chance of getting a print that properly reflects the work they see on their screen.
#4 Printing your photos does not have to be expensive
Truth be told, after a very limited amount of research, I can’t find much in the way of what a print costed 20 years ago compared to today but one thing I do know is that you no longer have to print an entire roll of film just to have a few good photos. You can now walk into a high street lab with just a selection of your favourite photos on your phone and hand them over or upload just the photos you want to be printed to an online print lab, confident in the knowledge that the prints you get back will be keepers. This selective approach means you no longer have to waste money on printing photos that end up in a shoebox in the cupboard, never to see the light of day.
On the flip side, printing can be an expensive undertaking. If you choose to print on fine art paper or choose to buy a professional printer and print at home then you are going to make a more considerable investment but, the key-word here is “choose”. You can choose to spend more money but with so many options at either end of the price spectrum, you just don’t have too.
#5 Print for prosperity
Apart from the photo books I mentioned above that showcase my personal work, I have also printed many family albums in the form of photo books covering a great holiday, an event or a period of time. For example, I started creating yearbooks for my kids when they were born, converted my wedding album to a photo book and I now have close to 30 photo books and counting on my shelf which I hope one day will be on the shelves belonging to my children and maybe even their children’s shelves and so on. A photo book won’t suddenly go obsolete because the picture format is no longer supported or the social media platform they are hosted on suddenly shuts down, so, over long periods of time, the only way to ensure your photos remain accessible and if you’re lucky, passed down the generations is to get them printed.
#6 Printing your work can make you a better photographer
I mentioned earlier in this post how printing my photos bigger will emphasise compositional issues, distractions or processing errors and I think that’s a good thing. As you hold your printed work in your hands and study it, what you are doing is logging both the good and the bad within the image so if there is something you spot that works well, you know to continue doing it and on the flip side, learn from any mistakes you made while taking the photo.
When I post photos to social media sites such as Instagram, I know that most people will be viewing the images on a mobile device and this smaller form-factor is far more forgiving to issues within the photo but when I am out taking photos knowing that the photo I take could end up as a large format print, I know I have to take extra care while taking the shot, making sure the photo is as good as it can be as any flaws will be on full show once the ink hits the paper.
Should you print at home or use a professional print lab?
Before I wrap this post up, there is one last point I want to touch on and that’s the decision to print using a professional print lab or to invest in the equipment needed to make prints at home. This is a long, complicated subject but I will try to summarise why you might choose one over the over with as fewer words as possible, so, here it goes.
Printing your photos using a professional print lab
So, let's start with why you might use a professional print lab. When printing using a lab, you are effectively outsourcing the task to print your work which depending on what you are trying to achieve could be a good or bad thing. Although you are giving up the control to someone else to produce the final print, if you prepare the work properly and choose a good lab using recommendations you trust and conducting your own tests, you can end up with some quality prints easily enough. On top of this, compared to printing at home, the initial outlay is low. You don’t have to pre-purchase any equipment which is an advantage but if you have issues with the print, the turnaround time and delivery charges can add up.
Printing your photos at home
Printing at home is initially more time consuming, more technically complicated and certainly carries far higher up-front costs as you need to buy the printer, paper and inks before you can even start. Like photography itself, I regard printing my own work a craft in itself and one that needs time to explore and learn to get the very best out of it which can involve learning topics such as printer profiles, screen calibration, etc. The advantages of printing at home are that you retain full control of your final print and you can get your work printed faster, in particular, if you need to tweak and re-do.
Print your photos and bring them to life
What we do with our digital photos will continue to evolve and who knows what the next best thing will be but one thing I know for certain is that we will all continue to view most of our photos on a screen, in many cases taking only seconds to process the image before we skip to the next.
It doesn’t have to be this way for all of our photos. For those that evoke a special kind of emotion, be it fond memories, loved ones or simply a picture you are proud to have taken, bring those select few to life by making a physical print and displaying it in your home or a book on your shelf rather than being stored and forgotten on your phone or computer lost among the many thousands of other photos you probably have there.
I hope this post has gone some way to both inspire and convince more people to print their work and if you have any more tips or experiences you want to share with the community, feel free to write a comment below.
The Sun Will Rise | Weekly Photo #42
I love to get up early and venture out when visiting new places so when I spent a weekend in Ghent back in 2019, I was up and out to capture the city during what turned out to be a beautiful sunrise.
As I sit here in the UK during some incredibly uncertain times, I know that for most people right now, photography is far from the top of the agenda. I get it and I feel the same. But, while there are many people being impacted by this unprecedented global event and there are far more important and practical jobs which are being done by many heroes all over the world, I do feel that positive distractions are incredibly important for everyone now more than ever, and I for one am grateful for all of the content creators out there continuing to provide these welcome creative distractions including my favourite photographers and YouTubers.
Fujifilm XT2 | XF10-24mm | 10mm | 1/6th Second | f/7.1 | ISO200
I first shared this photo in a recent article I posted titled On Location Photographing a Sunrise In Ghent. This is the view looking down the River Leie from St Michael’s Bridge in the historic city of Ghent in Belgium. Although there is no clear focal point in this scene, when I first crossed the bridge during the day I knew this view with its fantastic reflections was one I had to revisit and try to photograph during my planned sunrise shoot the following morning.
After taking a photograph of Saint Nicholas’ Church during the blue hour, the sunrise exploded into the sky, casting these beautiful colours across the scene. With the tripod set up, I decided to go as wide as possible for this shot to get as much of the reflections into the foreground as possible so on to the Fuji XT2 I attached the 10-24mm lens set to 10mm.
Although there are some strong compositional elements such as the long, sweeping lines created by the river bank and the detail in the reflections creating a strong foreground, there isn’t really a main focal point which lets the image down somewhat. A taller building that stands out like an ornate clock tower would have been perfect on the right hand third but we can only capture the view we see. What I feel does work and helps here is the way the light is well balanced across the scene as the sky on the right lighting up the buildings on the left help make sure the light isn’t too strong on just one side.
I will be using some of this time during social distancing to process a few photos I have yet to get to and write a few blog articles that have been on the back burner. I will continue to post my weekly photo posts during this outbreak which I hope will be a small but welcome distraction and although it seems a long way off yet, as the title says, the sun will rise again.
Stay safe.
Trevor
This post is featured in my Weekly Photo series where I post a new photo every Monday. To have this delivered directly to your inbox, you can subscribe to the mailing list here.
Canary Wharf Reflections | Weekly Photo #41
In 2017 I bought a new wide-angle lens and this view of Canary Wharf in London was a perfect location to put it through its paces.
This is another one of those fantastic views of London that is rapidly changing. I recently returned to this spot over on the Isle of Dogs and found a handful of new buildings have appeared in a relatively short period of time, changing the composition you can see here. I don’t claim to be a documentary photographer in the traditional sense, far from it in fact, but I do think my photos are in their own creative way documenting the city skyline and over the years will show just how much London has changed.
Fujifilm X-T10 | XF10-24mm | 10mm | 7 Seconds | f/9 | ISO200
This week’s photo is one from the 2017 archives. I remember this day well as it was my first outing with my then, recently purchased Fujifilm XF10-24mm lens and was looking for a location to put this wide-angle through its paces. I decided to head to Blackwall Basin as it provides a great view of the buildings over at Canary Wharf and if you are lucky, some beautiful reflections too. This spot can be a little difficult to find but for those local to London looking to try and take the same photo, you need to head over to the east side of the Isle of Dogs and head toward Blackwall Basin. Here is a link to the location in Google Maps.
On my first visit to this spot, I didn’t have a wide enough lens that could capture the view in one frame so I ended up taking a series of photos and stitching them together. With this new lens, I was now able to capture the entire vista in a single image so off I went to have another go. My aim for this photo was to use the lens to capture the epic buildings and their reflections in the water to provide some foreground interest but on the day, it was a bit windy and the water had a few ripples across the surface so I ended up using a 10-stop ND filter to slow the shutter enough to smooth the water and remove the ripples. The end result was a nice smooth surface but the reflections lacked the clarity I was after. You win some, you lose some I guess.
I’ve never visited this location at sunrise before and with the sun rising from the east and behind this vantage point, the scene will be illuminated from the front which could make a cracking image so it’s definitely on the list for a future shoot when the current round of building work is complete.
Have a great week and given the current situation, I wish you all good health.
Trevor
This post is featured in my Weekly Photo series where I post a new photo every Monday. To have this delivered directly to your inbox, you can subscribe to the mailing list here.
On Location Photographing A Sunrise in Ghent
In the Summer of 2019, my family and I visited Ghent, Belgium and during our stay, I snuck away for a few hours to capture a beautiful sunrise in the city’s historic district.
I have been sitting on this post since last year, never quite getting around to publishing it but at last, it is finally out in the wild.
In the Summer of 2019, I travelled to the city of Ghent in Belgium with my family to explore what I consider one of Europe’s best-kept secrets. Since falling in love with the chocolate-box city of Bruges during a trip the year before, we were left wanting to see more of what Belgium has to offer.
I won’t be covering the entire trip in this post as I have already done so in a previous blog which you can find here: On Location | Photographing Ghent. Instead, this post will talk about my early morning shoot during which I was lucky enough to capture a beautiful sunrise across this fine city.
Although this trip to Ghent was a family city-break, I still made a point of getting a sunrise shoot in by heading out early on my own to try to photograph the city while looking its best, during the best light and with fewer people around. Getting out earlier gives me a few hours to explore the deserted city, photograph away and have the best compositions to myself.
Contrary to my daytime setup where I had with me the smaller Fujifilm X-T30 camera, for this shoot, I took with me the larger XT2 workhorse which I use for my main landscape/cityscape work. Normally, I wouldn’t have so much gear with me when on a city-break but as we travelled to Ghent by car, I had the luxury of taking as much camera gear as I wanted.
Photographing a Sunrise in Ghent
Before visiting Ghent, I researched the city for photo ideas and had spotted a composition similar to this looking across the bridge towards Saint Nicholas' Church, so, when I arrived in the city, I headed to this spot first. I wanted to incorporate the ornate streetlights that lined the bridge so I looked around for the best composition as I waited for the sky to get a little lighter but wary not to wait too long just in case the lights were turned off before I had the shot in the bag.
Fujifilm XT2 | XF18-55mm | 18mm | 2.6 Seconds | f/11 | ISO200
From the other side of the Bridge and with my wide-angle 10-24mm attached, I managed to capture a few more shots, including this view down the River Leie just as the sky came alive with these fantastic sunrise colours. This stretch of river and between St Michael’s Bridge and Grasbrug is one of the most picturesque areas of the city and where I spent most of the morning with my camera soaking in all of the history during these peaceful early hours.
Fujifilm XT2 | XF10-24mm | 10mm | 1/6th Second | f/7.1 | ISO200
Fujifilm XT2 | XF18-55mm | 25mm | 1/3rd Second | f/11 | ISO200
Fujifilm XT2 | XF18-55mm | 18mm | 0.5 Seconds | f/11 | ISO200
Once done on the bridge, I wandered down to the water’s edge. Having noticed how the disorderly buildings looked as they lined the river and with the 10-24mm lens still attached, I had a go at photographing them front-on and capture some of those great reflections at the same time. Although the light in the sky was amazing, it was all coming from behind the buildings so I had some dynamic range issues to deal with in post-production but the excellent XT2 dealt with it well and I was able to recover a lot of detail from the underexposed buildings. I also struggled to align the composition properly because the building to the left of the clock tower is leaning to the right making the entire scene appear wonky so the final image isn’t quite as good as I was hoping for but I know there is potential there if I visit again, maybe at the other end of the day so the light hits the front of the buildings.
Fujifilm XT2 | XF10-24mm | 11.5mm | 1/12th Second | f/11 | ISO200
Fujifilm XT2 | XF18-55mm | 18mm | 1/8th Second | f/7.1 | ISO200
Fujifilm XT2 | XF18-55mm | 55mm | 1/17th Second | f/7.1 | ISO200
Fujifilm XT2 | XF18-55mm | 36mm | 1/400th Second | f/3.6 | ISO200
Fujifilm XT2 | XF18-55mm | 31mm | 1/1700th Second | f/5.6 | ISO200
Fujifilm XT2 | XF10-24mm | 17mm | 1/400th Second | f/8 | ISO200
Fujifilm XT2 | XF18-55mm | 30mm | 1/340th Second | f/8 | ISO200
When the last of the sunrise colours were gone, I spent some time wandering back along the river and around St Michael’s Bridge taking more photos during the morning golden hour. I had a great time capturing the city while continuing to play with the lead-in lines and reflections along the water’s edge.
If I had one regret after the shoot, it’s that I didn’t take any long exposure photos during this sunrise. In reality, if I had attempted to spend the time to set up the kit, get the filters ready etc, I might have come away with nothing so it was probably the right decision and given that the city is such a short drive from Calais, I can always come back to this charming city and try another time.
It wasn't too much longer before the best of the light was gone which was my cue to leave and meet my family for breakfast at the hotel feeling pretty happy I had a few good shots on my memory card.
I hope you enjoyed this On Location photo travel blog and please get in touch if you have any questions.
Cheers
Trevor
City Glow | Weekly Photo #40
While crossing Westminster Bridge during an early morning walk during a rather windy blue hour in London, I photographed this view of West London all lit up like a sci-fi city of the future.
For those that don’t know the city well, this view of London might be less recognisable but I suspect that won’t be the case for too much longer. When crossing Westminster Bridge, most people will be on the other side, checking out the view of the London Eye but this is the view looking in the opposite direction and judging by how fast this part of the city is being developed, it wouldn’t surprise me if this area of the city starts to get a bit more attention soon enough.
Fujifilm X-T30 | XF55-200mm | 67mm | 9 Seconds | f/7.1 | ISO160
During an early morning stroll in London, I crossed Westminster Bridge at the start of the blue hour on the hunt for new views of the city and as I looked towards the west, down the River Thames, I was drawn to how the buildings in the distance were lit. It had a kind of futuristic, sci-fi city feel, specifically how the lights are designed on the St George Tower (that’s the tall, round building that looks a bit like a battery).
The inevitable consequence of having these areas of development are all of the cranes creating these red dots all over the frame. When I first started to photograph London a few years ago, I would be quick to Photoshop as many of these out as possible as these temporary structures offered nothing and distracted from the main subject but more recently, I tend to leave them in. Yes, it means the photo has these distractions around the photo but they tell their own story about these areas of London and a time of significant change from the traditional, industrial architecture to these modern, striking developments. Some oppose this change, some embrace it but whatever you think, this is the inevitable change needed to keep London firmly on the global stage so there is no stopping it.
While out on this early morning photo walk, I had with me my Fujifilm X-T30 and the impressive XF55-200mm. I love this lens as it is small (compared to similar focal length models) and super sharp. When I spotted the composition, I knew I had the right kit with me as I would have to zoom right in, close to 70mm to isolate the best composition and to ensure the buildings are prominent in the frame.
It was very windy in London and I had to hide next to one of the street lamps to shield myself from the gusts but still, the longer lens was wobbling and with the lens OIS (optical image stabilisation) switched on, it still took me around 8 or 9 attempts to get a sharp 9-second exposure. I could have shortened the exposure by raising the ISO or opening up the aperture further but I was deliberately trying to get a longer exposure as it helps smooth out the river a little, making the already busy composition a little less so. Thankfully, my perseverance paid off and the wind died down for long enough for me to eventually capture the shot.
Until next week.
Trevor
This post is featured in my Weekly Photo series where I post a new photo every Monday. To have this delivered directly to your inbox, you can subscribe to the mailing list here.
Shards of Chrome | Weekly Photo #39
Pointing to the sky like a shard of metal, I love how dominant the Shard looks, appearing to stand alone in this London cityscape. Along with how I took this photo, in this week’s post I talk about how I tend to use presets to edit my photos.
Who else uses presets when editing their photos? I’ve built up quite a collection over the years and included in these is a collection I call “City Chrome” which I use for many of my photos of London and can end up being a huge time saver. Granted, individual approaches will differ but I use presets as a kind of starting point, a base edit if you will. Then, once I get close to the look I’m after I will finish editing the image by making manual adjustments from there. If I create a new look that I like and want to recreate later, I will save those settings as a new preset in the collection.
Fujifilm X-T30 | XF35mm F2 | 35mm | 1/450th Second | f/2.8 | ISO160
This photo was taken during one of my recent shoots from the top of St Paul’s Cathedral. After climbing 528 stairs to get to the Golden Gallery, you are awarded some epic views of the city. I have shared two other photos taken from this location in previous Weekly Photo posts which you can read by following the links here:
As I circled the pinnacle of the dome, absorbing the epic views of London, the striking shape of The Shard caught my eye and away from the other high-rise buildings, it appears to stand alone, dwarfing the buildings that surrounded it. With these nice tones and textures in the clouds creating a great backdrop and The Shard positioned dead-centre in the frame, I went ahead and took the shot.
What I particularly like about these high-up, cityscape photos is the detail you can capture and the subtle areas of interest you can pick out as you look closer at the photo. Once I have studied the photo, taken in the entire scene and start to look closer, I get drawn to the details such as the tiny red buses crossing the river over on London Bridge or the smoke billowing out of the tall chimney over in the distance.
So back home, I used one of my City Chrome presets to kick off the editing process but in reality, the photo didn’t need much in the way of changing. With the preset applied, the photo was still a little underexposed so I lifted the exposure a touch and added some contrast. Next, I reduced the saturation a little, particularly the blue tones and finished off with a subtle vignette to pull more attention into the middle of the photo.
Until next week.
Trevor
This post is featured in my Weekly Photo series where I post a new photo every Monday. To have this delivered directly to your inbox, you can subscribe to the mailing list here.
A Brief Moment in Brighton | Weekly Photo #38
Along with this week’s photo taken while on a walk along Brighton beach, I talk about the importance of capturing the mood and what it adds to the final image.
Outside of London, Brighton is one of my favourite places to take photos. Not only is it the closest beach to where I live, but as many of you might know by now, I tend to include the “hand of man” in my photos and for a seaside location, Brighton certainly has that in abundance. I typically get drawn to man-made structures such as the West Pier’s skeletal remains as the imposing but frail-looking structure makes for a strong subject to photograph but the photo here is less about the subject or particular focal point but more about capturing the moment, the mood or feeling I experienced during the shoot.
Fujifilm X-T30 | XF35mm F2 | 35mm | 1/1,700 Second | f/2 | ISO160
I have already shared this photo as a part of a collection in a post I wrote titled Mental Health and Why Photography Matters and decided to share it again in my Weekly Photo series as not only is it my favourite of the set but it’s the one that connects with me the most. I can find it difficult at times to portray the feeling or mood I experienced during a particular shoot. It’s something I try to work on but find others accomplish this far easier and better than I do. Or at least that’s the perception I get. So, when I do take a photo that represents the mood accurately in a shot like this photo here, it creates an instant connection with me and rekindles the memories and emotions I felt on that particular morning.
As I walked along the beach with my X-T30 Camera and 35mm F2 prime lens, I spotted someone standing close to the water, seemingly deep in thought and appearing happy just to be out at a time many other people rarely get to experience. This is exactly the kind of feeling I was experiencing and one I wanted to capture. The sun was just starting to rise off to the right and with the clouds just lining the horizon, the light was slightly defused resulting in this beautiful warm glow across the scene. Aware the moment could be over in an instant, being careful to make sure the figure in the distance stood out and was not lost amongst the structure of the pier, I quickly crouched down low to include the pebbles in the foreground and captured the photo.
Technically, the photo itself isn’t amazing. The composition isn’t particularly balanced being heavier on the left-hand side and the person standing on the beach isn’t in the best position compositionally but not all photos have to be prize winners to mean something to you. After all, who do you take photos for? It’s sometimes good to throw the rule book out the window and just enjoy the photo because of the connection you have with it, not because it’s technically and compositionally perfect.
Cheers,
Trevor
This post is featured in my Weekly Photo series where I post a new photo every Monday. To have this delivered directly to your inbox, you can subscribe to the mailing list here.


